McMaster-Carr SOLIDWORKS Add-In: Installation & Use
McMaster-Carr is one of the most popular hardware suppliers known for its extensive catalog and readily available CAD models, which have made both sourcing and design very convenient for engineers. This convenience is further enhanced by the McMaster-Carr add-in for SOLIDWORKS, a free tool that helps users seamlessly add components to their designs. In this blog, we will cover how to use this add-in to save time in design and data management.
You might be tempted to see the McMaster-Carr add-in as a replacement for the SOLIDWORKS Toolbox, but in reality, these tools serve distinct roles. The SOLIDWORKS Toolbox helps users manage standard components and hardware - either individually or standardized across an entire organization.
The McMaster-Carr add-in enables users to easily incorporate McMaster-Carr CAD models into their designs. This is useful for those who occasionally need to use standard off-the-shelf hardware, especially for those who regularly source components from McMaster-Carr.
How to Install the McMaster-Carr Add-in for SOLIDWORKS
Start by downloading the McMaster-Carr SOLIDWORKS add-in. This add-in has very few requirements, and any system currently running SOLIDWORKS should not expect any issues.
Note: The McMaster-Carr add-in is not a Dassault Systèmes product and is, therefore, not supported by GoEngineer.
According to the McMaster-Carr website, the requirements are as follows:
- Windows 10
- SOLIDWORKS 2017 or newer (latest service pack installed)
- Internet connection
- Approval for web browser process in antivirus or security software (as needed)
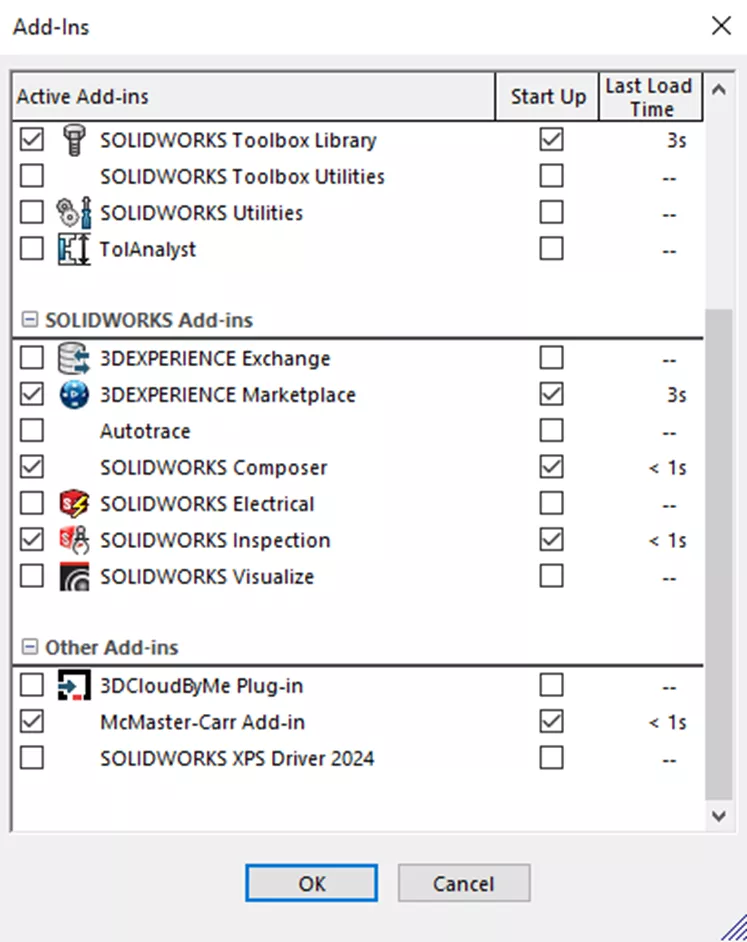
After installation, the McMaster-Carr add-in is enabled and set to start on launch by default. If you are new to add-ins, you can find the add-in menu by clicking the arrow next to the gear or options icon at the top of your screen and selecting add-ins from the drop-down menu.
This will display a list of add-ins, allowing you to choose which ones to add to your current session and which to add on start-up for every SOLIDWORKS session.
How to Use the McMaster-Carr Add-in
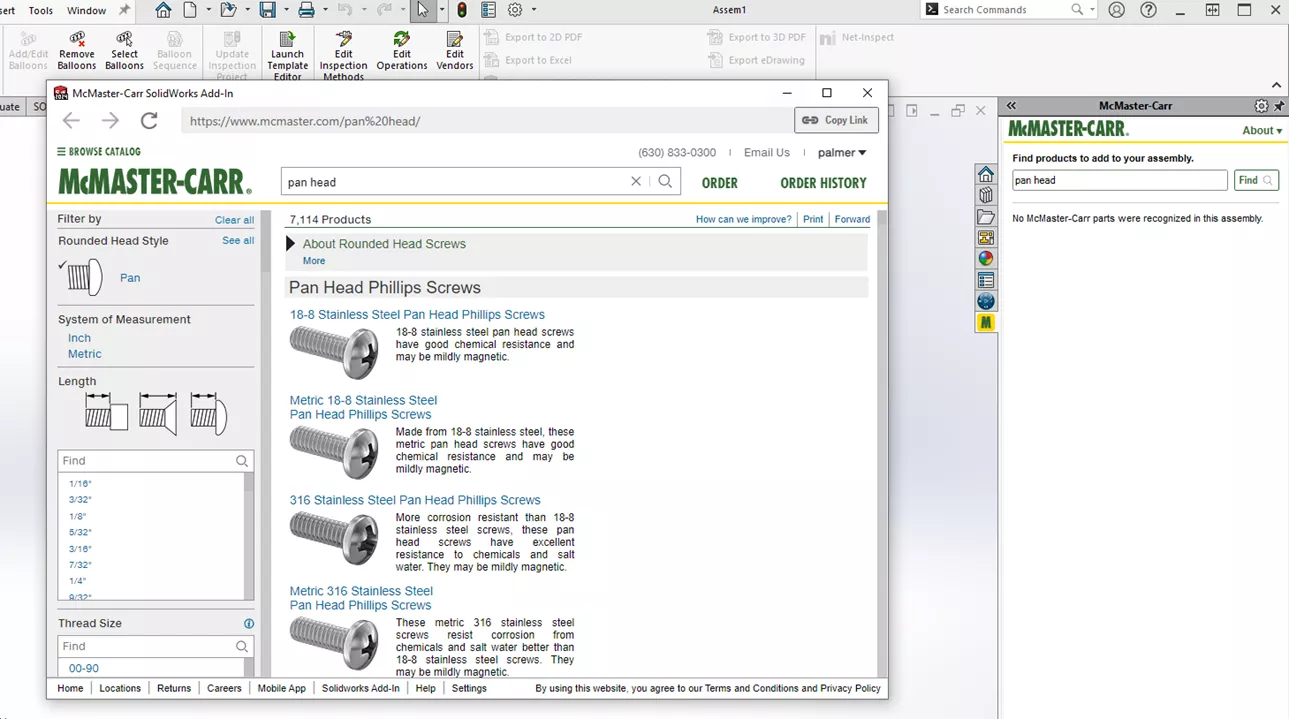
Once you have the add-in installed, you can find it in the task pane on the righthand side of the screen (denoted by a small “M” icon).

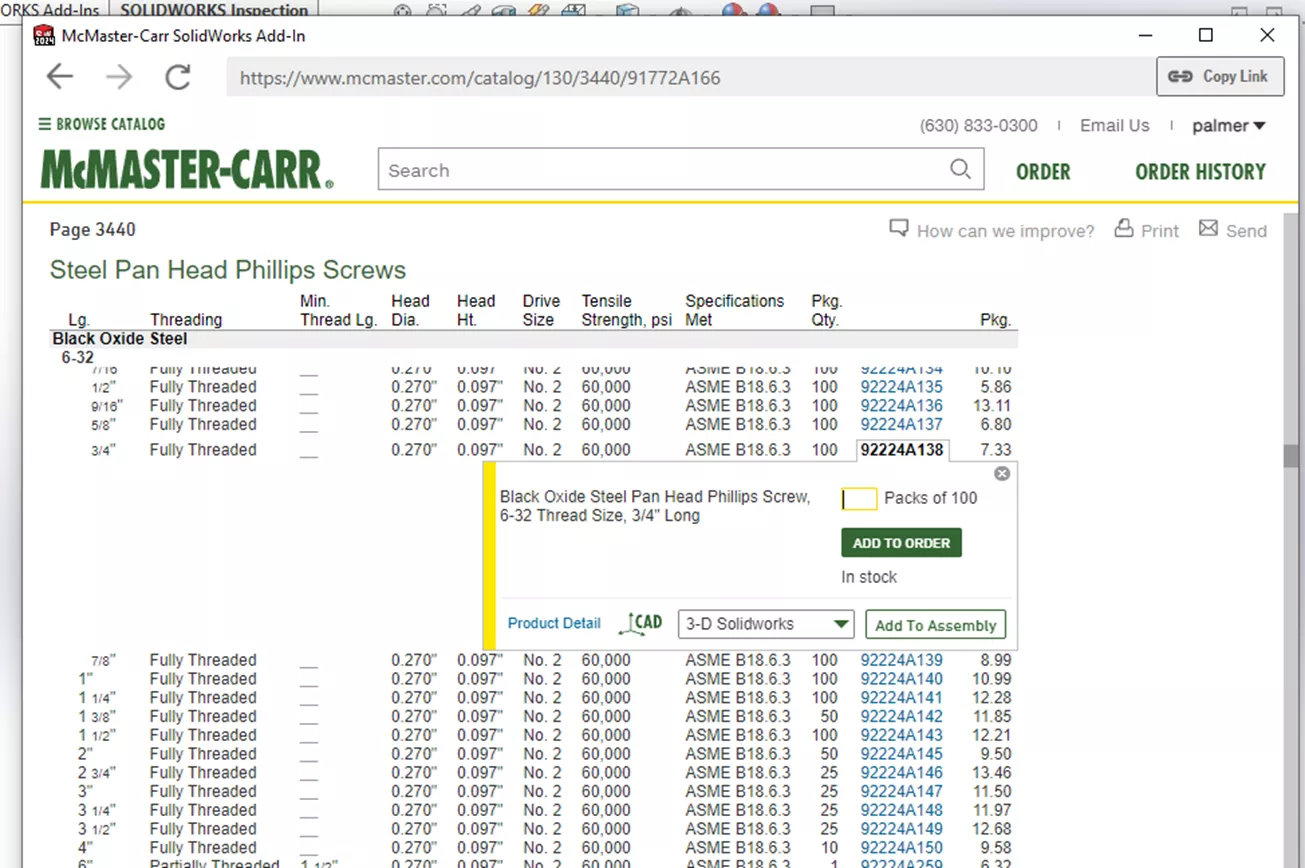
The Find button, which is represented by a magnifying glass, allows you to search the catalog for parts. Once you have found a part, click the Add to Assembly button, and select a download location for the assembly file. This will allow you to save and insert the file into an assembly.
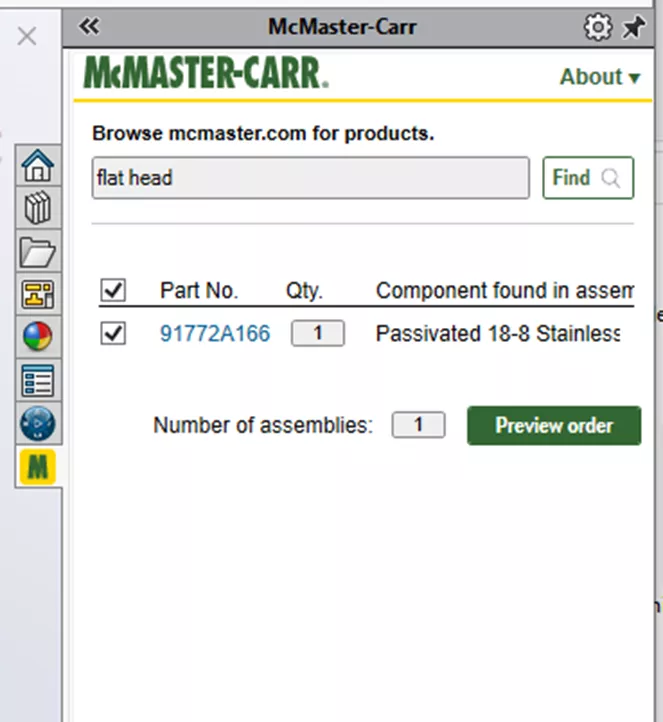
After the component has been inserted into the assembly, the add-in will automatically add it to a McMaster-Carr order. You can preview and edit the order before placing it or add any extra hardware needed for your product. Once the order is correct, place it directly in the add-in just like on the website.

I hope that this has helped you streamline the use of hardware in your assemblies and ordering your parts.

SOLIDWORKS CAD Cheat Sheet
SHORTCUTS ⋅ MOUSE GESTURES ⋅ HOT KEYS
Our SOLIDWORKS CAD Cheat Sheet, featuring over 90 tips and tricks, will help speed up your process.
Related Articles
How to Add a Watermark Note in SOLIDWORKS
Getting Started with the SOLIDWORKS Design Library
Create a SOLIDWORKS Assembly from a Multibody Part
Using the SOLIDWORKS Temporary Fix/Group Command
Introduction to SOLIDWORKS Mates: Standard, Advanced, & Mechanical
About Palmer Bubb
Palmer Bubb is a SOLIDWORKS Technical Support Engineer at GoEngineer.
Get our wide array of technical resources delivered right to your inbox.
Unsubscribe at any time.