SOLIDWORKS PDM Adding a Revision Number to a Workflow
In SOLIDWORKS PDM, the first step in revision management is creating a revision number. Once a revision number is created, it can then be added to a workflow to automatically set the revision.
Add Revision number to the Target State
In this example, the target state is "Approved".
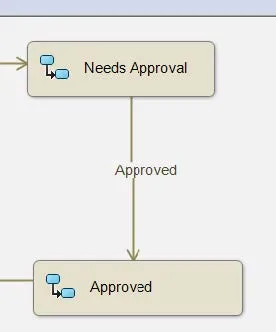
We have to add the revision to this state. Double-click click on the target state and to go the revisions tab. Change Do not use a revision number to the revision number that you have previously created. Do not change any other values.
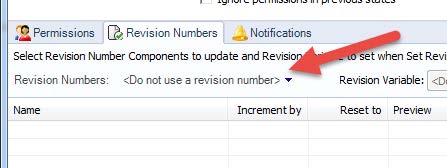
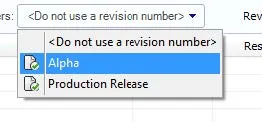
Add Revision number to the Transition
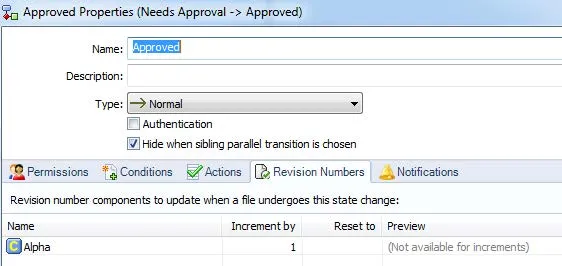
Go to the transition before the target state, in this example, it is the “Approved” transition.
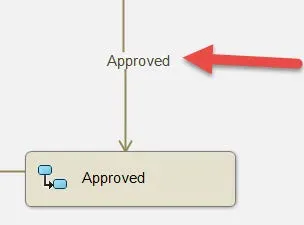
Go to the Revision Numbers tab, add the revision number.
In the increment by field, enter the number 1. This will increment the revision number, one time, every time a file goes through this transition.
Set Actions
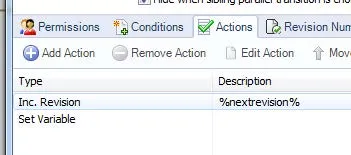
In the Actions tab, two actions must be set in order for the revision to translate the data card variable Inc. Revision and Set Revision. Inc revision must be listed before Set Revision, otherwise, the variable will not have the correct revision.
Test
The final step is to test a file by sending it through the workflow multiple times. You will want to ensure that not only is the file revision incrementing, but that the data card variable is also linked correctly.
If you have any further questions about SOLIDWORKS PDM, please feel free to contact us.
More SOLIDWORKS PDM Tutorials
SOLIDWORKS PDM - Not Selecting All References During Transitions
Ultimate Guide to PDM Permissions
Setting the Preview Tab Viewer in SOLIDWORKS PDM

About GoEngineer
GoEngineer delivers software, technology, and expertise that enable companies to unlock design innovation and deliver better products faster. With more than 40 years of experience and tens of thousands of customers in high tech, medical, machine design, energy and other industries, GoEngineer provides best-in-class design solutions from SOLIDWORKS CAD, Stratasys 3D printing, Creaform & Artec 3D scanning, CAMWorks, PLM, and more
Get our wide array of technical resources delivered right to your inbox.
Unsubscribe at any time.