SOLIDWORKS Dimensions Dialog Box Options
The Dimensions Dialog Box is an incredibly useful tool within SOLIDWORKS. Inside this little box are numerous options and tools that are often overlooked. In this guide, we will go over the different tools/options found within the Dimensions Dialog Box.
What is the Dimensions Dialog Box?
If we draw a line and add a dimension to this line, the Dimension Dialog Box automatically appears, allowing the dimension to be edited. If we already have a line and a dimension in place, we can access the Dimension Dialogue Box by double-clicking on the dimension.
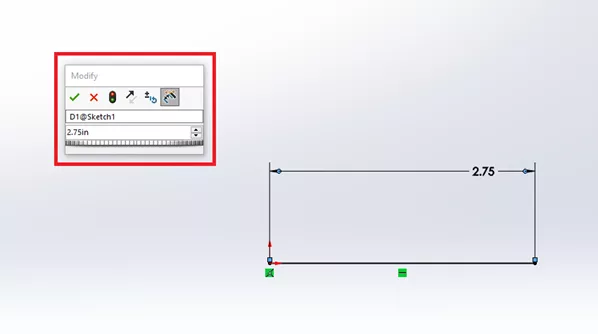
The Dimensions Dialog Box houses many different features that help to edit the dimension or provide options for how the dimension can be used.
Features of the Dimensions Dialog Box
Dimension Value
The primary function of the dialog is the dimension being displayed; we can edit this value to be whatever we want. Once the Dimension Dialog Box is exited, the dimension will update to the newly inputted value.
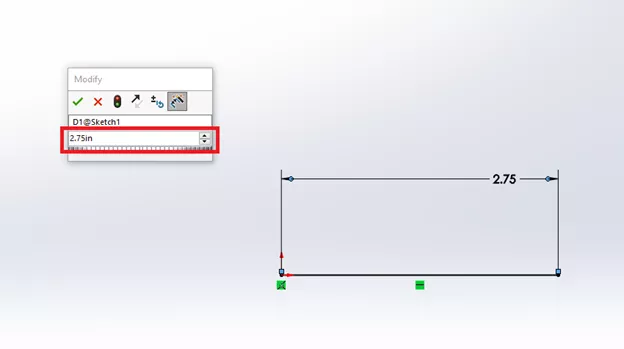
Spin Box
The Spin Box is the two arrows pointing up and down to the right of the Dimension Value. By clicking the arrows, the Dimension Value changes based on the increment set in the Options.
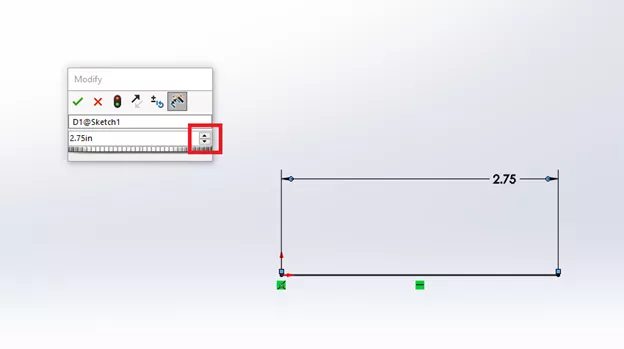
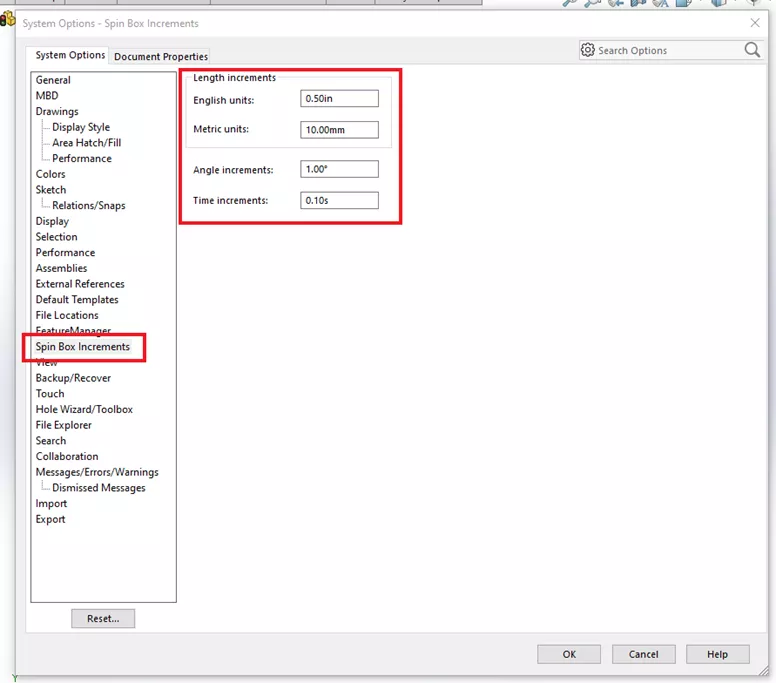
Set the Spin Box increments (as either English or Metric units) in the System Options by going to Spin Box Increments. Whenever the increment is changed, it simply adds the new increment value to the list of available increments.
Reset Spin Increment Value
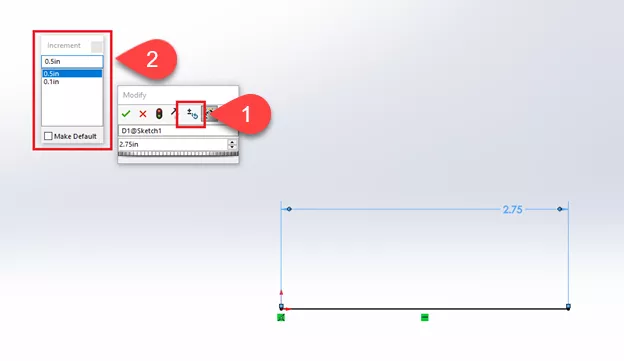
To switch the Spin Box increment value, simply click the button (step 1 below). This will open the list of Spin Box Increment Values (step 2) that we have input in the settings. We can now quickly toggle between the different values in the list.
Rebuild Button
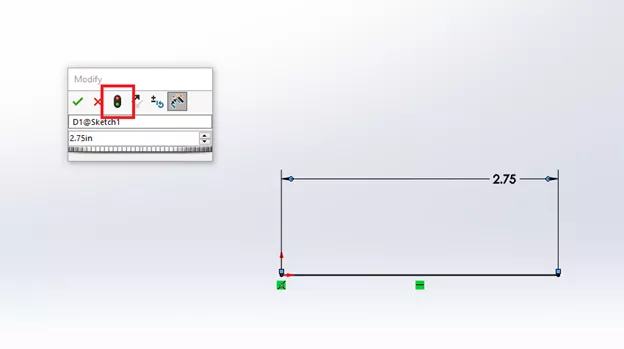
The Rebuild Button allows us to update the dimension to the current Dimension Value without dismissing the Dimension Dialog Box.
To change the Dimension Value and continue working in the Dimension Dialog Box, click ENTER. The dimension will update, but the box will be dismissed automatically. The Rebuild Button updates the dimensions, but does not dismiss the box, allowing us to continue our work.
Reverse Sense of the Dimension
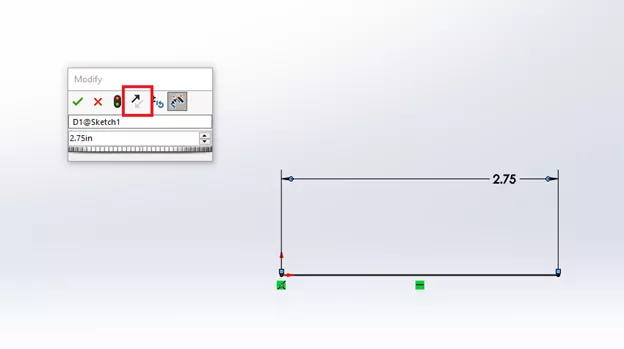
This button reverses the sense of the Dimension from positive or negative.
Dimension Name
This box indicates the Dimension Name. We can edit the name of the dimension to something more recognizable and use the Dimension Name when creating Custom Properties or Equations.
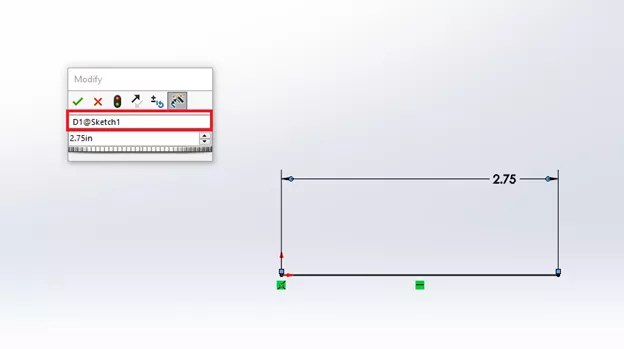
Notice how when we edit the Dimension Name, only the first half changes. The @Sketch1 remains. The @Sketch1 indicates which sketch the dimension is located in. If we edit the name of Sketch1 in the FeatureManager design tree, the name in the dimension will update as well.
Mark Dimension to be Imported into Drawing
By default, this option is turned on. While on, the dimensions can be directly imported into a drawing.
Thumbwheel
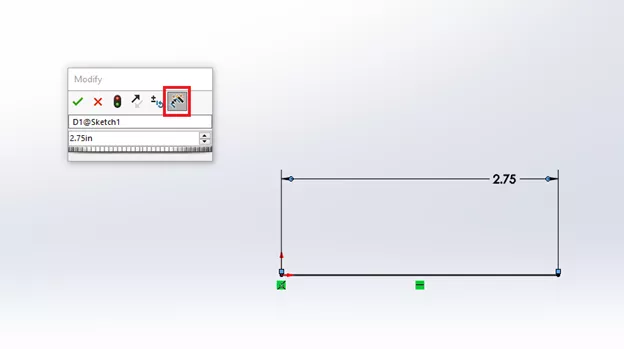
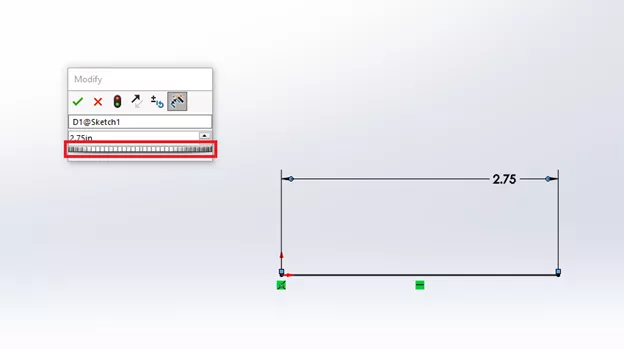
Below the Dimension Value is a Thumbwheel. We can click and drag the wheel to the right or the left to increase or decrease the Dimension Value by the Spin Box Increments.
The Dimension Dialog Box provides many useful features and options. For more information on this topic, check out this YouTube video.
Check out more SOLIDWORKS tips and tricks below.
 Join the GoEngineer Community!
More SOLIDWORKS Tutorials
SOLIDWORKS Magnetic Mates Explained
SOLIDWORKS Tutorial: Edit, Create, & Convert Style Splines
Breadcrumbs in SOLIDWORKS Explained
SOLIDWORKS Weldments: Corners, Gussets, & Bounding Box

About GoEngineer
GoEngineer delivers software, technology, and expertise that enable companies to unlock design innovation and deliver better products faster. With more than 40 years of experience and tens of thousands of customers in high tech, medical, machine design, energy and other industries, GoEngineer provides best-in-class design solutions from SOLIDWORKS CAD, Stratasys 3D printing, Creaform & Artec 3D scanning, CAMWorks, PLM, and more
Get our wide array of technical resources delivered right to your inbox.
Unsubscribe at any time.