How to Create Custom Cables in SOLIDWORKS Electrical
In this tutorial, we go over how to add custom cables in the SOLIDWORKS Electrical that do not already exist in the library. With SOLIDWORKS Electrical open, go up to the library tab, and open up the Cable Reference Library Manager.

Figure 1: Library Tab > Cable References Manager
SOLIDWORKS Electrical comes with numerous cables broken up into different classifications.
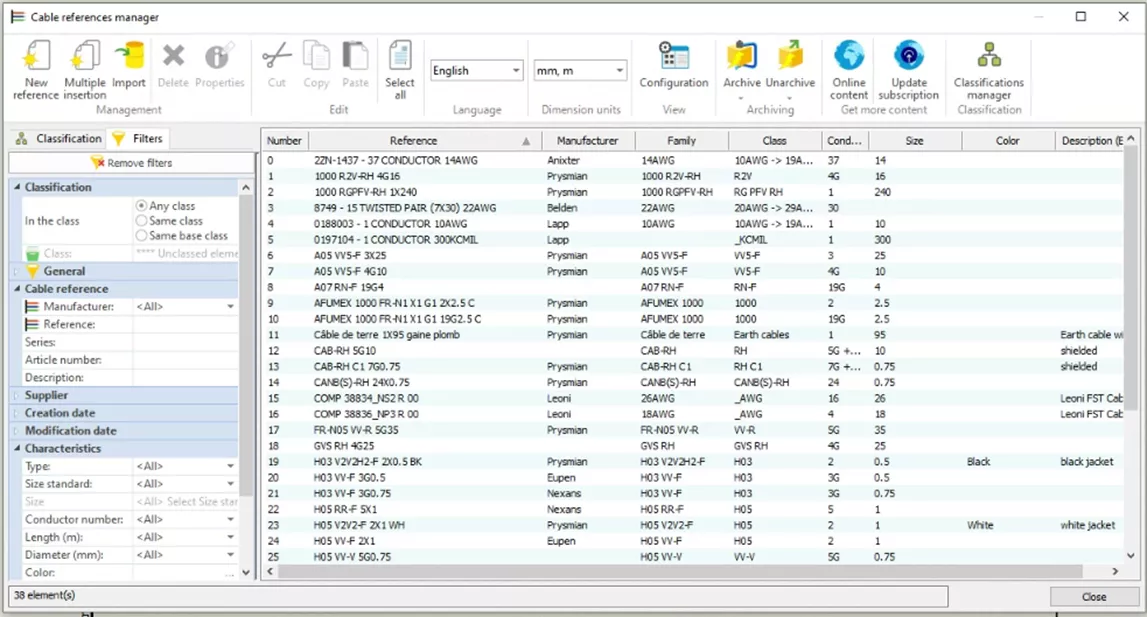
Figure 2: Default Cable References
To create a custom cable, select New Reference. When creating a custom cable we will have to decide what conductor size standard to abide by. For this example, we will select AWG standard.
Now we can enter our cable properties; starting with Reference and entering 001011- 3PAIR – 22AWG.
For our Manufacturer, you can use the drop-down to find existing Manufactures or enter them in manually as we did here.
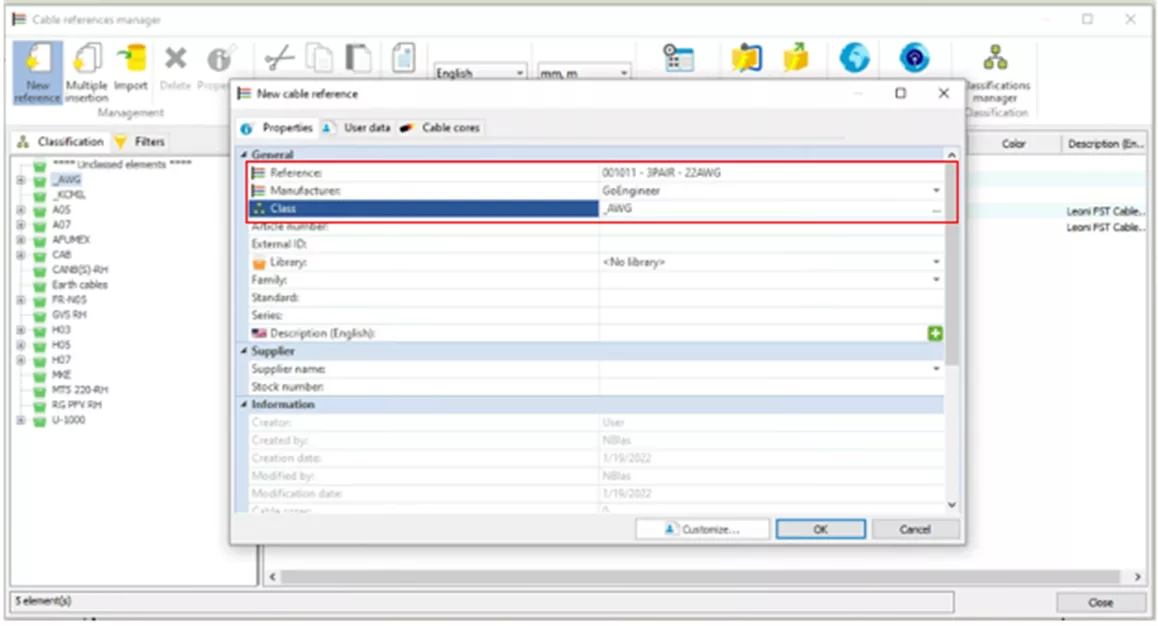
Figure 3: Reference, Manufacturer
Next, we can enter our class. We will leave it as AWG, but we are going to select a subcategory. We will select 20AWG->29AWG since 22AWG falls within this range.
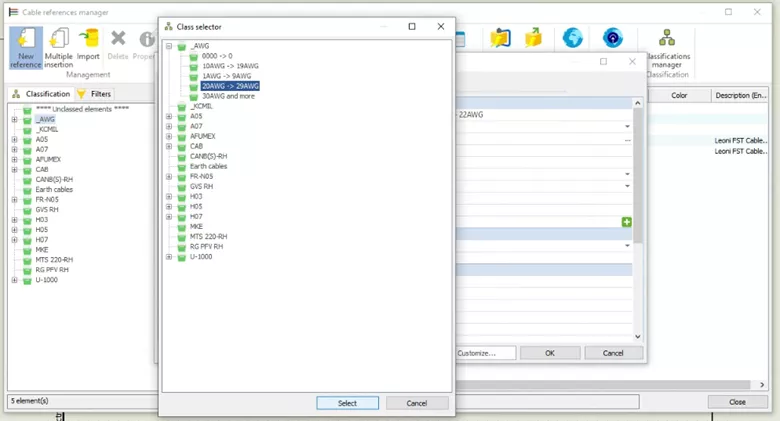
Figure 4: Class Sub Category
Next, we will put this into a certain Library, which is going to be the AWG cable – Cables with AWG Guage.
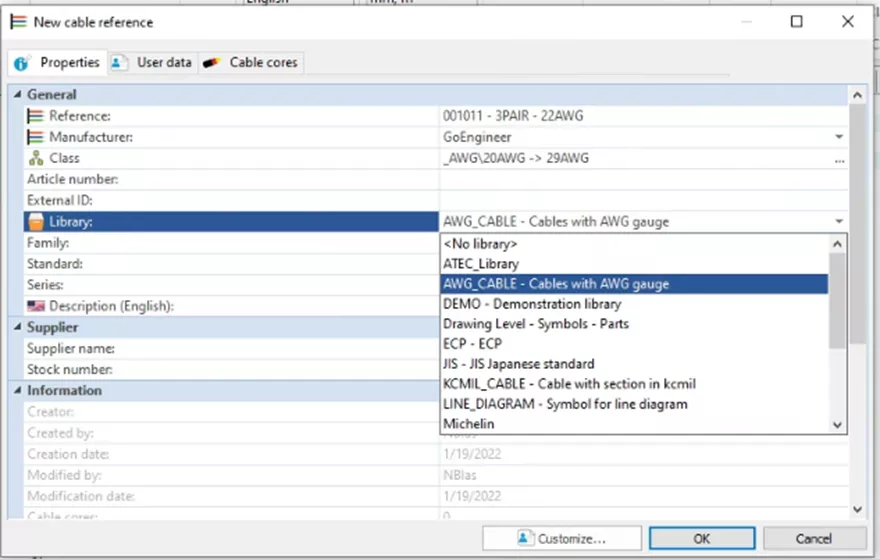
Figure 5: Library Selection
We are also going to select our Family. Again, we can use the drop-down to select a default Family or we can enter manually what we want, which is what we did here with 22AWG.
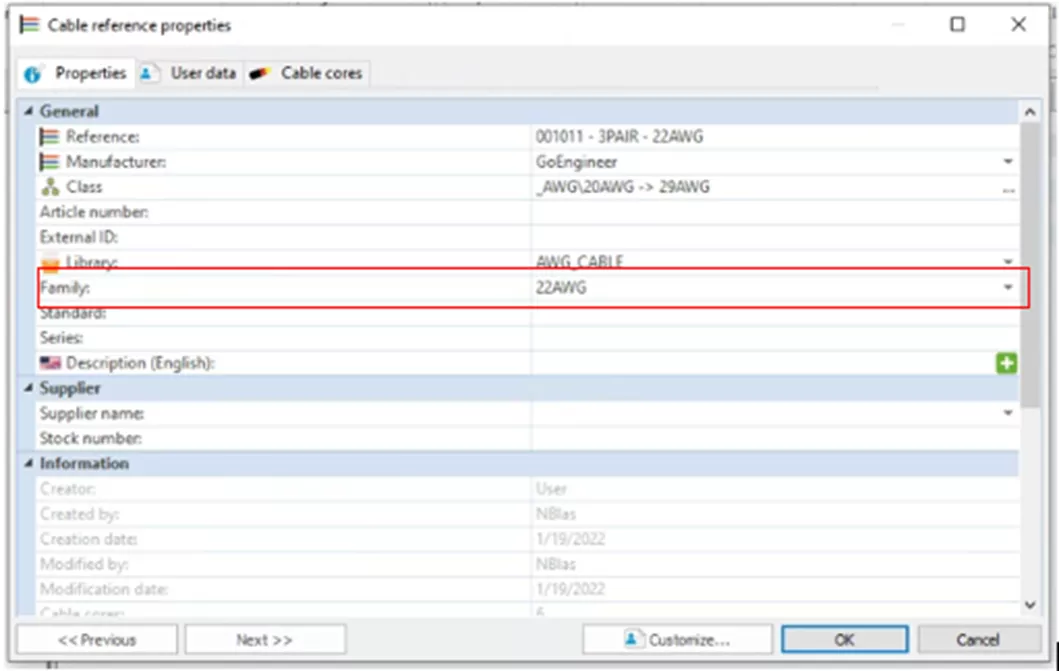
Figure 6: Family, 22AWG
This is all searchable and filterable criteria. Later, when we go to find our Exact Cable, we can narrow down our search to find a few cables instead of looking at thousands of cables. Some of this criteria auto-populates such as the Creator, the Creation date, the Modifier, and the Modification Date.
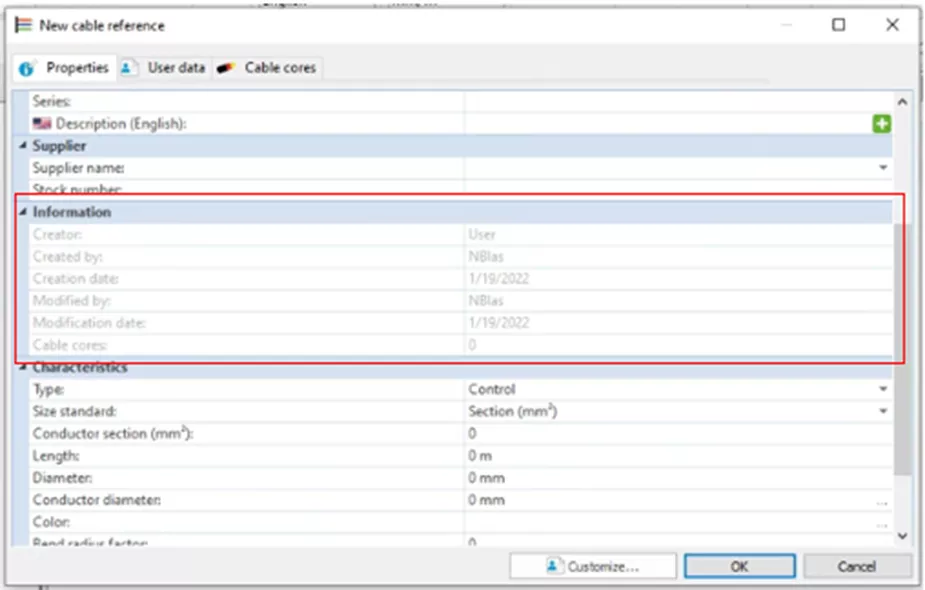
Figure 7: Information Section
We can now enter the characteristics of our cable. For Type, we will select Miscellaneous cable. The Diameter will be 10mm. We could enter a color, but for now, we'll leave it blank. For size Standard, we will select Guage(AWG Standard) and then enter 22 for the Conductor Guage.
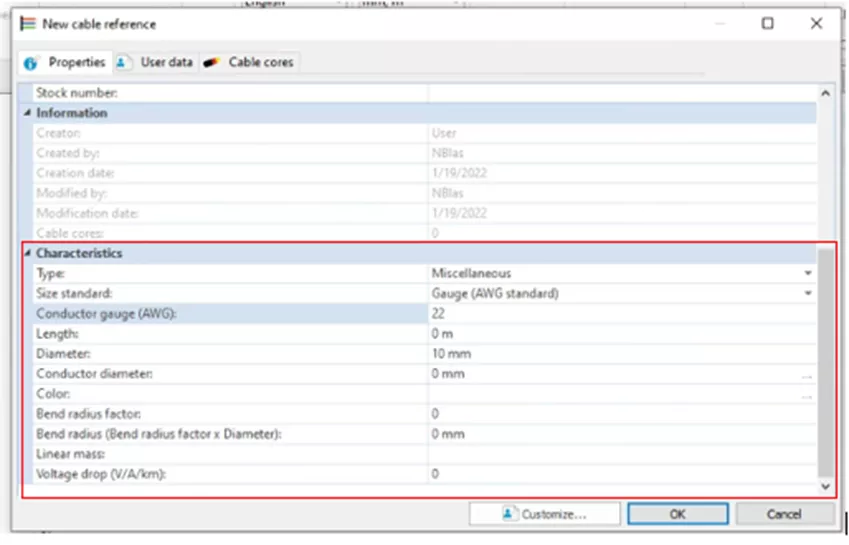
Figure 8: Characteristics
On the User tab, we can enter Descriptions depending on what our company desires.
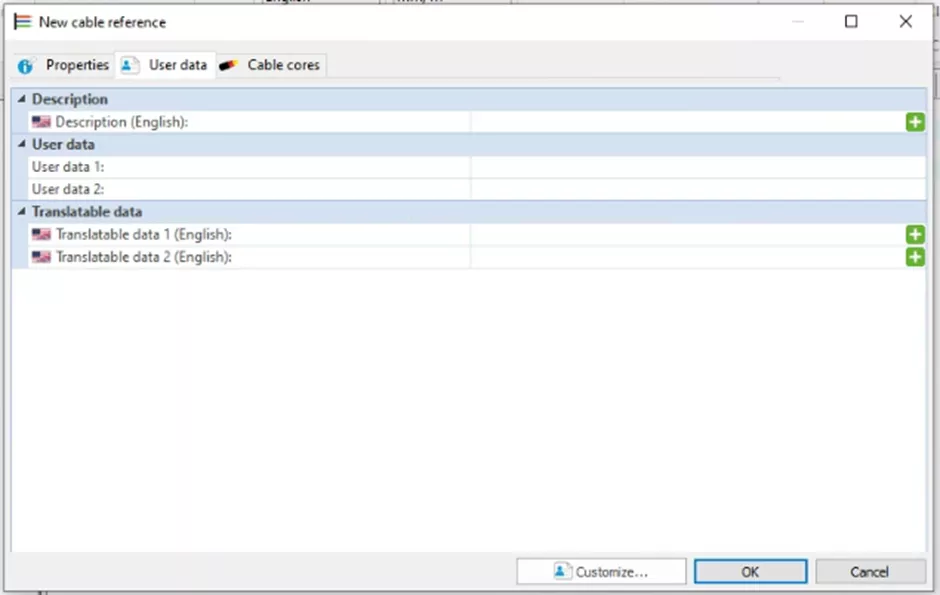
Figure 9: Description, User Tab
We can now enter our cores on the Cable Cores tab. To do so, hit the Add button six times. We can reorder and group these as desired. Select all of the cores and enter the Guage for these as 22, if they're not already populated.
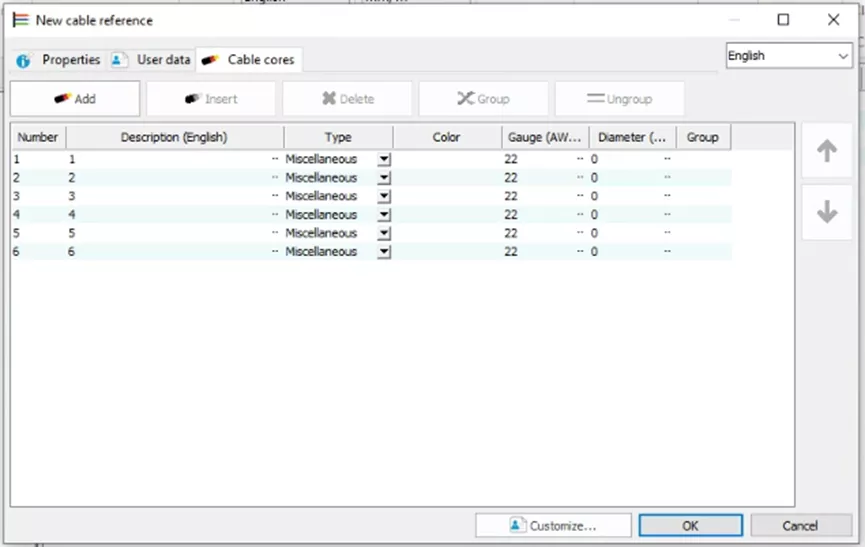
Figure 10. Six Cores, 22 Gauge
We can also do the same for the color. We will change this to black, except we will go back and change the last two; to blue and to green/yellow.
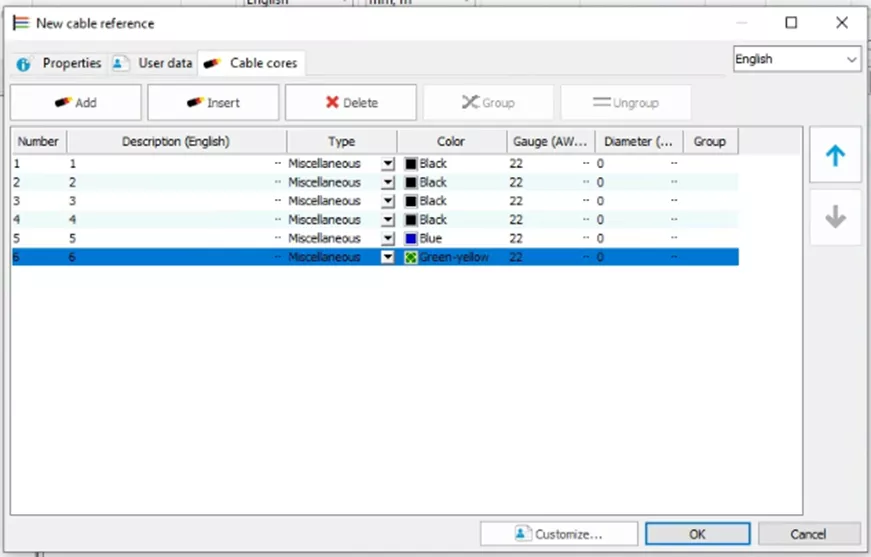
Figure 11: Color, Change to Black, Blue, and Green/Yellow
Optionally, we can also change the type of core, but in this example, we are going to leave all of these as Miscellaneous. The description for each core can be changed as well, or it can be left blank. Here I have shown the first two changed for demonstration purposes. Click OK.
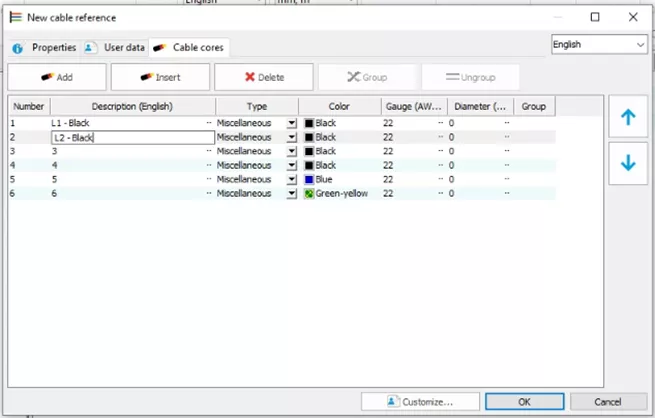
Figure 12: Description Change
Now that we have our cable created, we can find it in the long list of cables by using the filter tab. We can select the AWG Class. As you can see there are only a few listed and we can see our cable, but if more cables matched the criteria of our cable adding more information will filter down the list until we can find the one we created.
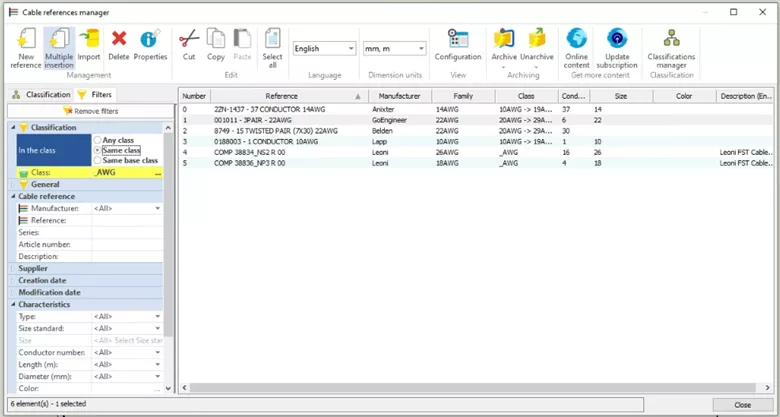
Figure 13: Filter Cable References
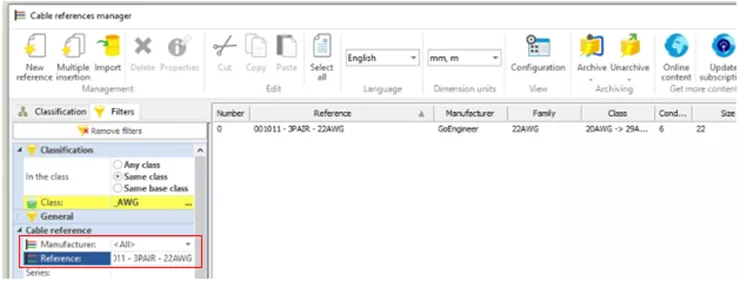
Figure 14: Filter by Reference
Similarly, since we know the Reference number, we can enter that into the Reference field and the menu will go straight to our cable.
Want to Become An Expert?
Take the official SOLIDWORKS Electrical Schematics training course online or in-person.
I hope you found this tutorial for creating custom cables in SOLIDWORKS Electrical helpful. Check out more tips and tricks below.
![]() Want to learn more? Check out this YouTube video demonstrating these tips, tricks, and best practices.
Want to learn more? Check out this YouTube video demonstrating these tips, tricks, and best practices.
More SOLIDWORKS Electrical Tutorials
Organize SOLIDWORKS Electrical Projects Using Locations
SOLIDWORKS Electrical vs Routing: Which Product Should I Choose?
SOLIDWORKS Electrical: Wire Mark, Equipotential, and Wire Numbering
Create a SOLIDWORKS Electrical Project Template
About Nathen Blas
Nathen Blas is a SOLIDWORKS Technical Support Engineer based out of our Headquarters in Salt Lake City, Utah. He earned his Bachelor’s degree in Mechanical Engineering at the University of Utah in 2018 and joined the GoEngineer family that same year.
Get our wide array of technical resources delivered right to your inbox.
Unsubscribe at any time.
