SOLIDWORKS Convert to Bodies Command Explained
The Convert to Bodies command is a slick feature in SOLIDWORKS that allows you to remove feature history while maintaining references to other parts or drawings.
The Convert to Bodies command can be run on a part, but not while editing in context of an assembly - you must open the part in its own window. Leaving the assembly open in the background allows you to automatically swap out the full-featured part for the simplified version to be created.
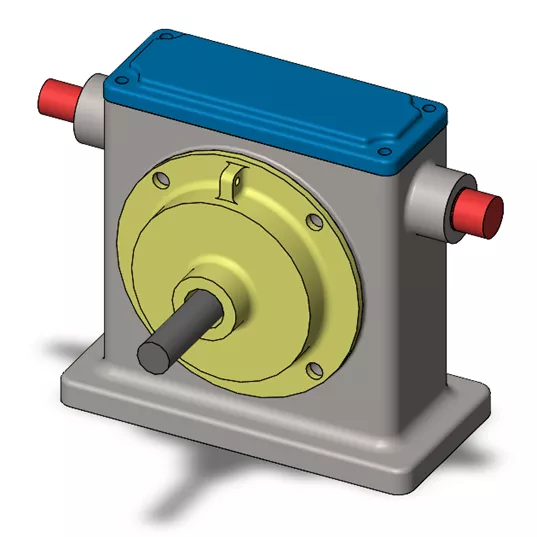
In this example, I will apply the Convert to Bodies tool to the gray housing part. This part has external references to all of the other parts in the assembly in the form of concentric and coincident mates.
Other methods of removing the feature history, such as saving the file in a CAD-neutral format like STEP or IGES, require you to replace the component in the assembly and reassign mates to ensure that the components are in the correct position. The Convert to Bodies tool takes care of preserving these references and replacing the component for you.
Here, I have opened the housing in its own window. Note the length of the FeatureManager Design Tree and all of the different features used to model the housing.
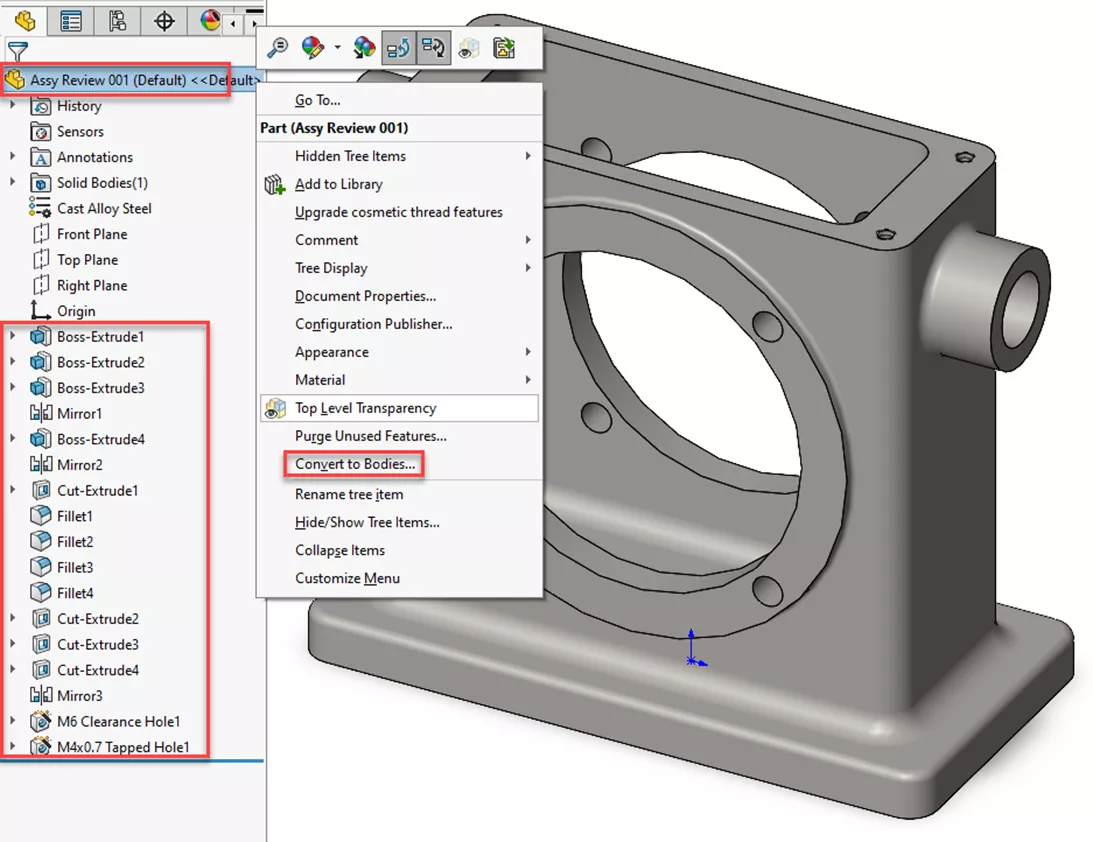
To run the Convert to Bodies command, right-click on the name of the part at the top of the tree and select Convert to Bodies…
This opens a new window with three important aspects:
- File Name (with Browse button)
- Save As Options
- Reference Geometry Checkbox
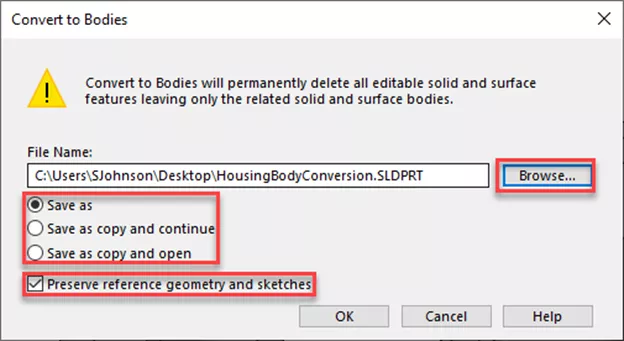
In the File Name field, I have renamed the part to indicate that it has been converted to bodies. I have also chosen to save this part in a different directory than the original. This way, I can keep the fully editable design file separate from the converted file to avoid confusion when browsing my computer.
The Save As options are equally important and work in the same way as when performing a save as operation on parts you have opened from an assembly. The first option will update any assembly to use the converted part instead of the original part. The next two options will still convert the file, but will not replace the original design in your assembly with the converted part.
The third option is the check box labeled Preserve reference geometry and sketches. Aside from the actual conversion to bodies, this is the most important option to remember.
When performing a normal Save As operation on a part to create a CAD-neutral file such as STEP or IGES, replacing the original component with this new file requires you to reassign mates, a process that can be very time-consuming.
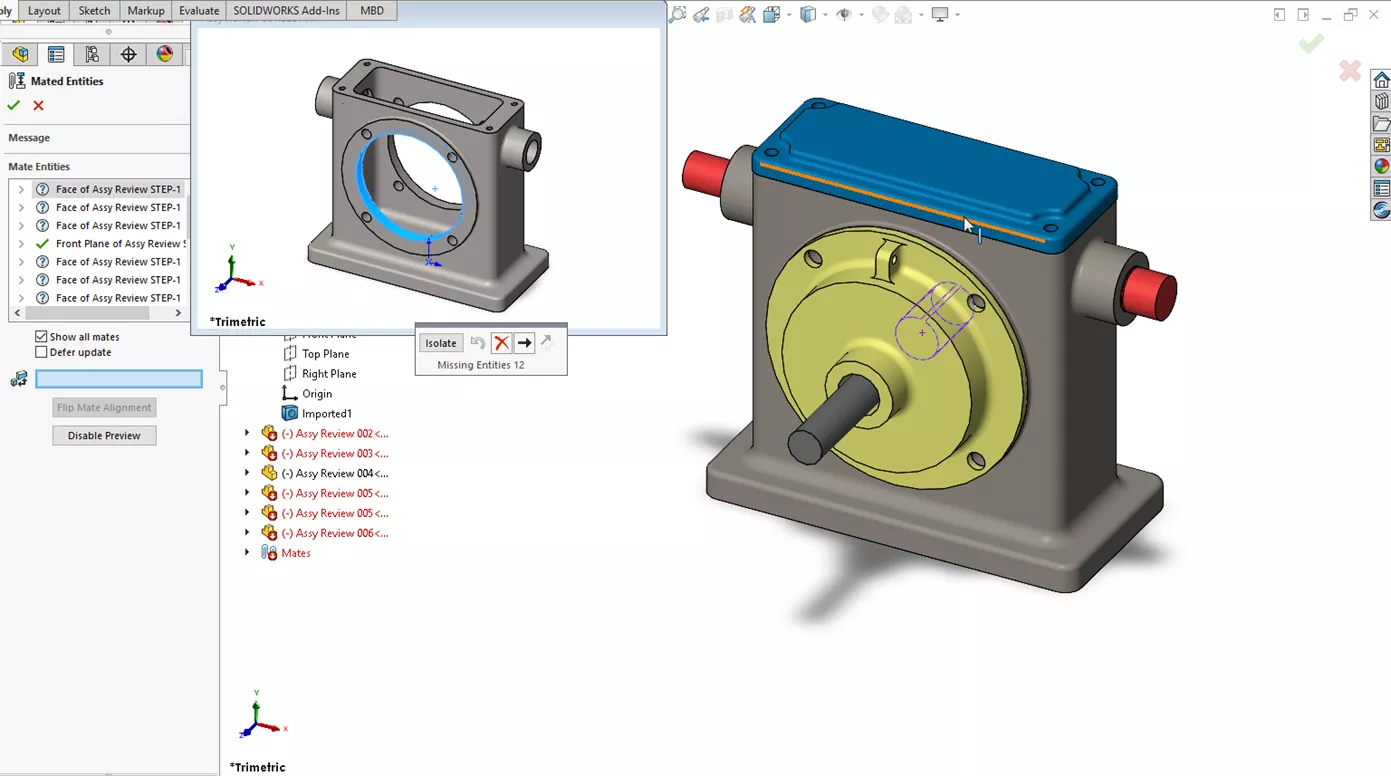
However, with the Convert to Bodies command, checking the Preserve reference geometry and sketches box, in combination with the Save As radio button selected, results in a ‘de-featured’ feature tree for the part and automatically updated mates and references.
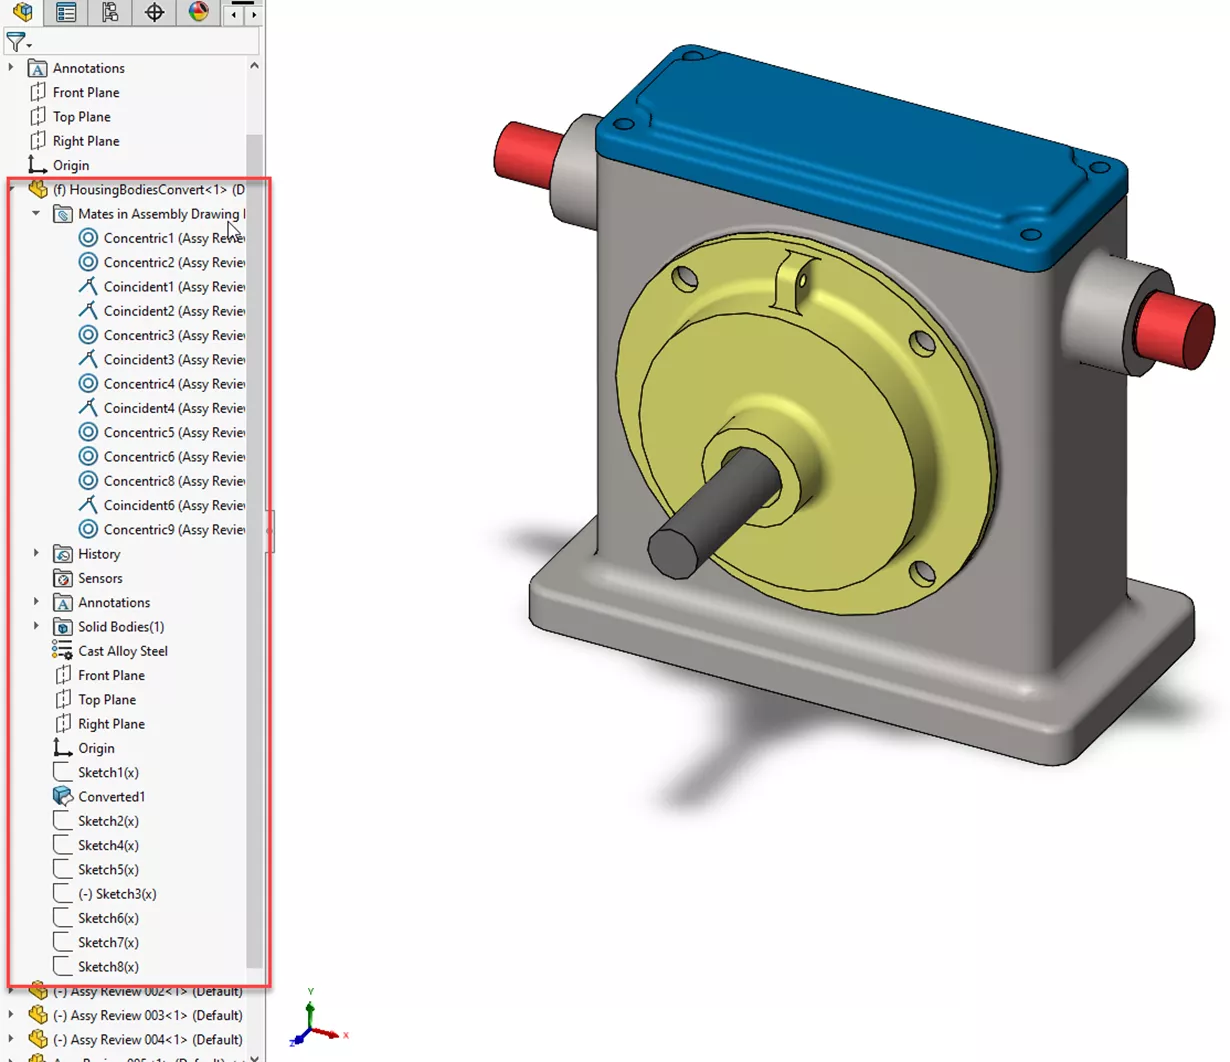
I hope this article has helped de-mystify or perhaps even introduce the Convert to Bodies command and that you are able to use it in your workflow.
Want to learn more? Check out our latest tips and tricks below. Additionally, join the GoEngineer Community to participate in the conversation, create forum posts, and answer questions from other SOLIDWORKS users.
SOLIDWORKS CAD Cheat Sheet
SHORTCUTS ⋅ MOUSE GESTURES ⋅ HOT KEYS
Our SOLIDWORKS CAD Cheat Sheet, featuring over 90 tips and tricks, will help speed up your process.
More SOLIDWORKS Tutorials
SOLIDWORKS Limit Angle Mate Tutorial
Misaligned Concentric Mates in SOLIDWORKS Explained
How to Transfer SOLIDWORKS Parts and Assemblies to a New Template
Make Multibody Parts from SOLIDWORKS Assemblies

About Shaun Johnson
Shaun has been using and supporting SOLIDWORKS since 2000. After spending five years in a support role, he went on to develop products and solutions in industries ranging from consumer electronics to military aviation ground support equipment. Once again in a support role, Shaun enjoys leveraging this experience to help others realize their designs and transform pixels into parts. Whenever he can, Shaun fires up his coal forge and takes a more ‘hands on’ approach to creating parts from raw steel.
Get our wide array of technical resources delivered right to your inbox.
Unsubscribe at any time.