How to Transfer SOLIDWORKS Parts and Assemblies to a New Template
In SOLIDWORKS, templates allow users to have all their preferred settings, standards, and properties ready to go. However, you may find yourself receiving a file that is not on the desired template. Or perhaps, when troubleshooting a problem, you want to test how a file behaves on a different template. Here are some tricks you can use to transfer existing parts and assemblies over to new templates.
Transfer Part to a New Template
Start by creating a new part file using the Target Template (the template you want to transfer the existing part over to).
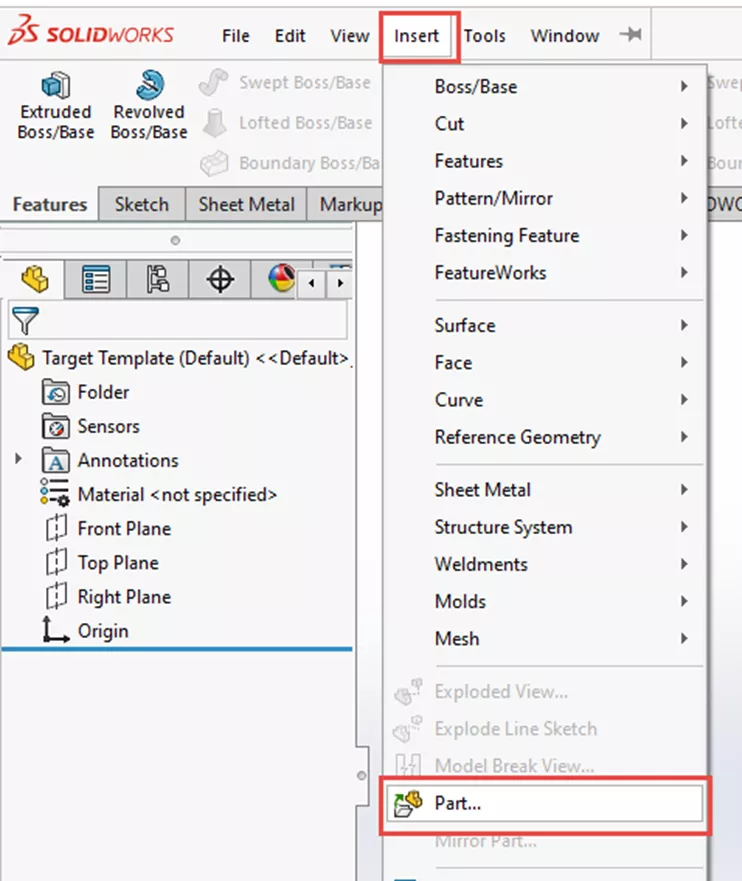
Go to Insert > Part and choose the part you want to transfer to the target template.
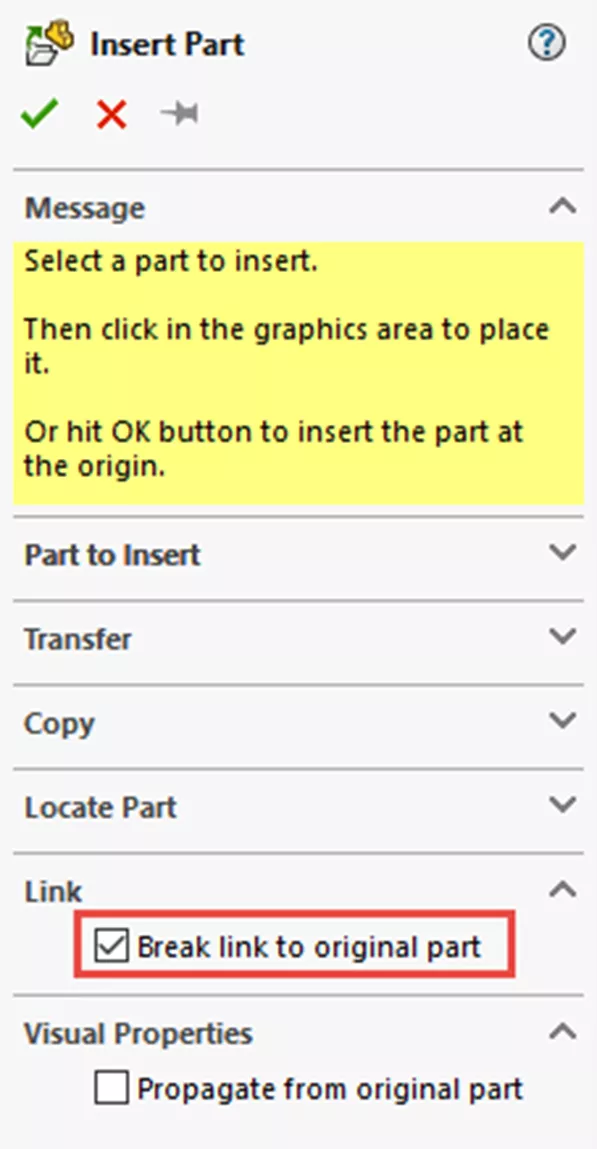
Before accepting the Insert Part command, Break link to original part must be checked. This allows the inserted part to inherit the features of the original part. Without this checkbox, the only feature in the target template will be a link to the original part file rather than its features.
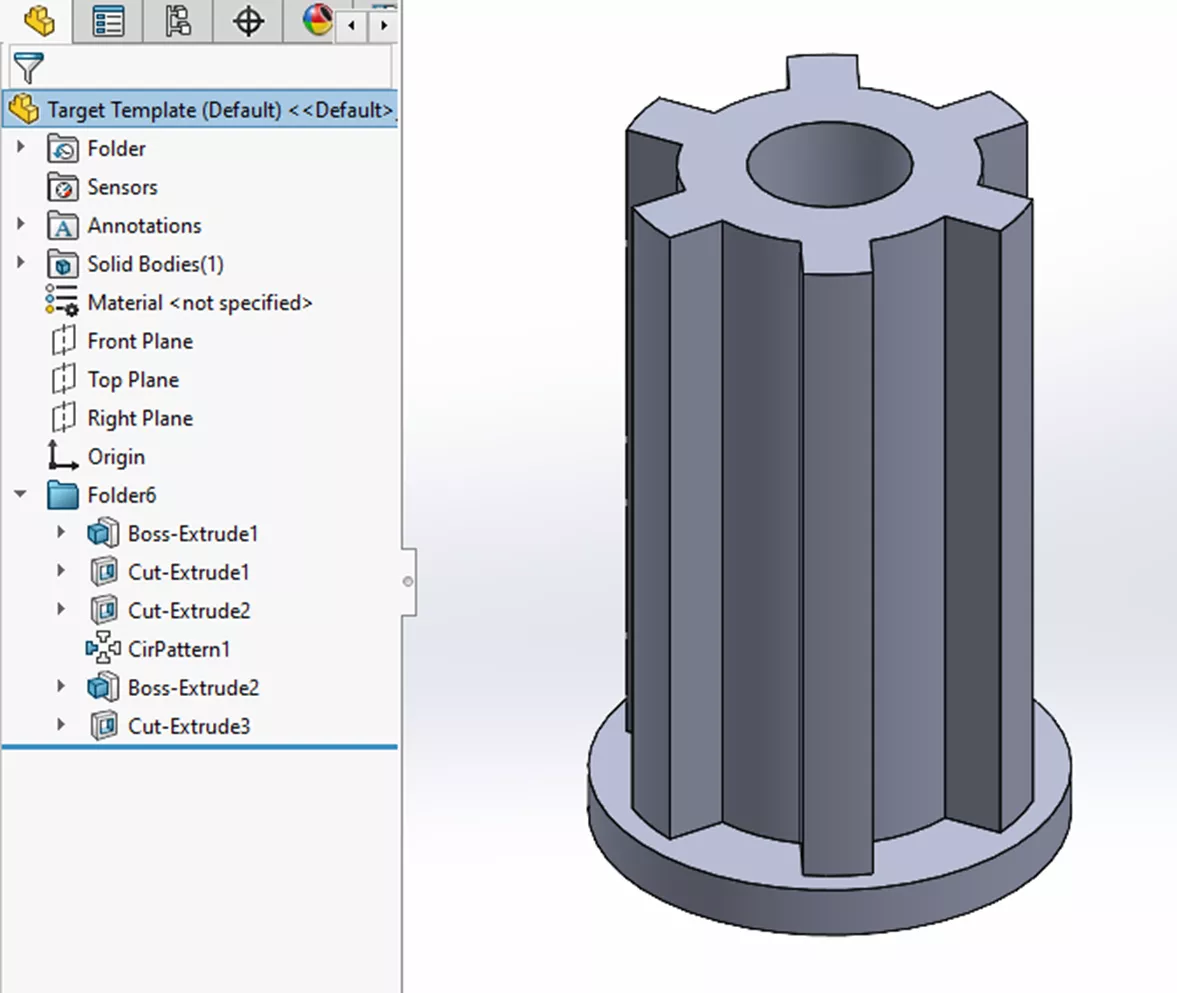
The result will be the original part in the target template with all features inside a folder (the folder can be deleted).
One caveat about this method is that it does not transfer configurations with the above steps alone, it only transfers the active configuration. If you need to transfer a part with multiple configurations, some extra steps are required. These extra steps will be covered in the final section of this blog since it applies to both parts and assemblies.
Transfer Part Summary:
- Start new Part with Target Template.
- Insert > Part. Select Part to transfer to Target Template.
- Before accepting the Insert Part command, check Break Link to Original Part.
- Green check to accept Insert Part command, optional: Delete folder containing features.
Check out this video for more in-depth instructions.
Transfer Assembly to a New Template
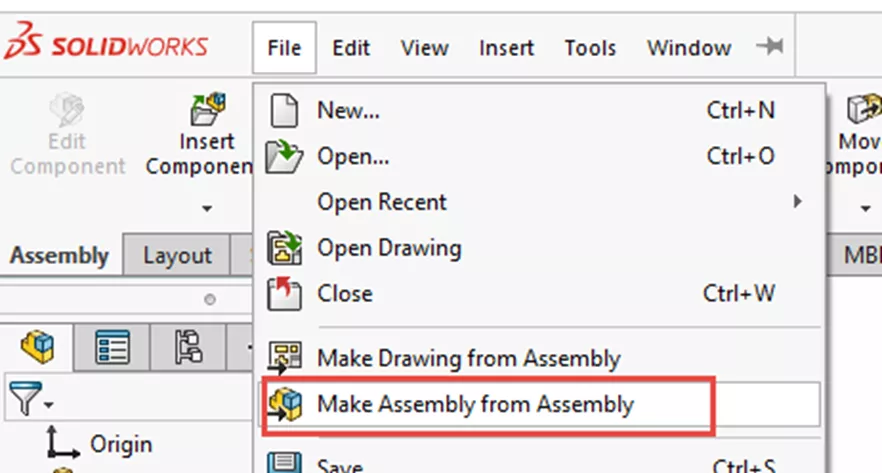
To transfer an assembly to a new template, starting inside the assembly being transferred, go to File > Make Assembly from Assembly.
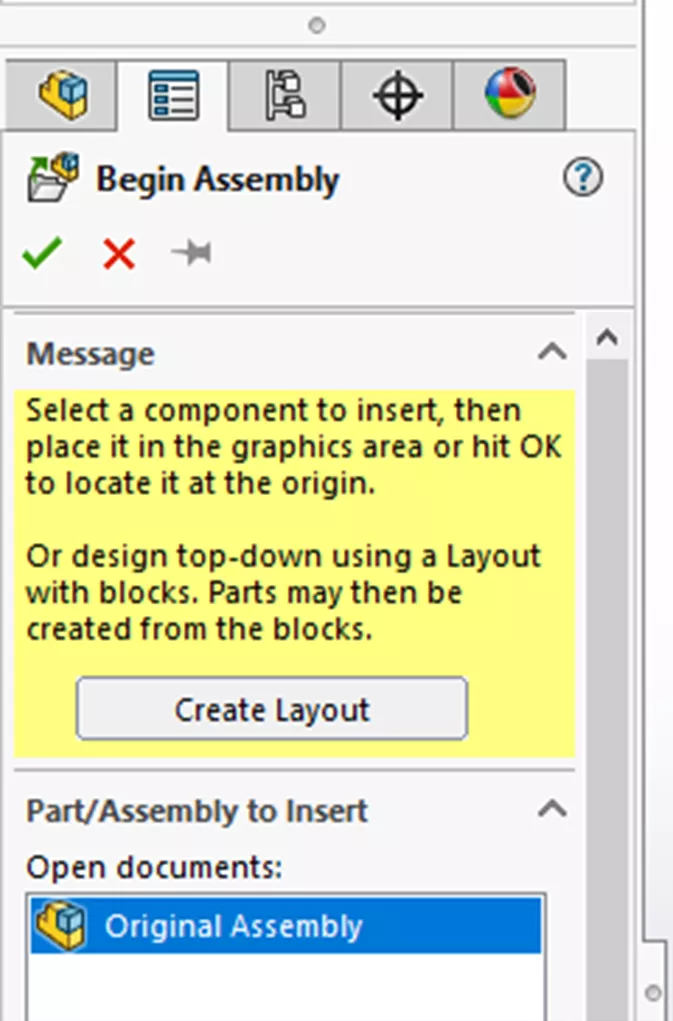
When asked for the assembly template, choose the target template you want to transfer the assembly to. Once the new assembly is open, click the green check for Begin Assembly which will result in the original assembly being inserted on the origin as a subassembly in the target template.
From here, right-click on the original assembly in the FeatureManager Design Tree and choose Dissolve Subassembly.
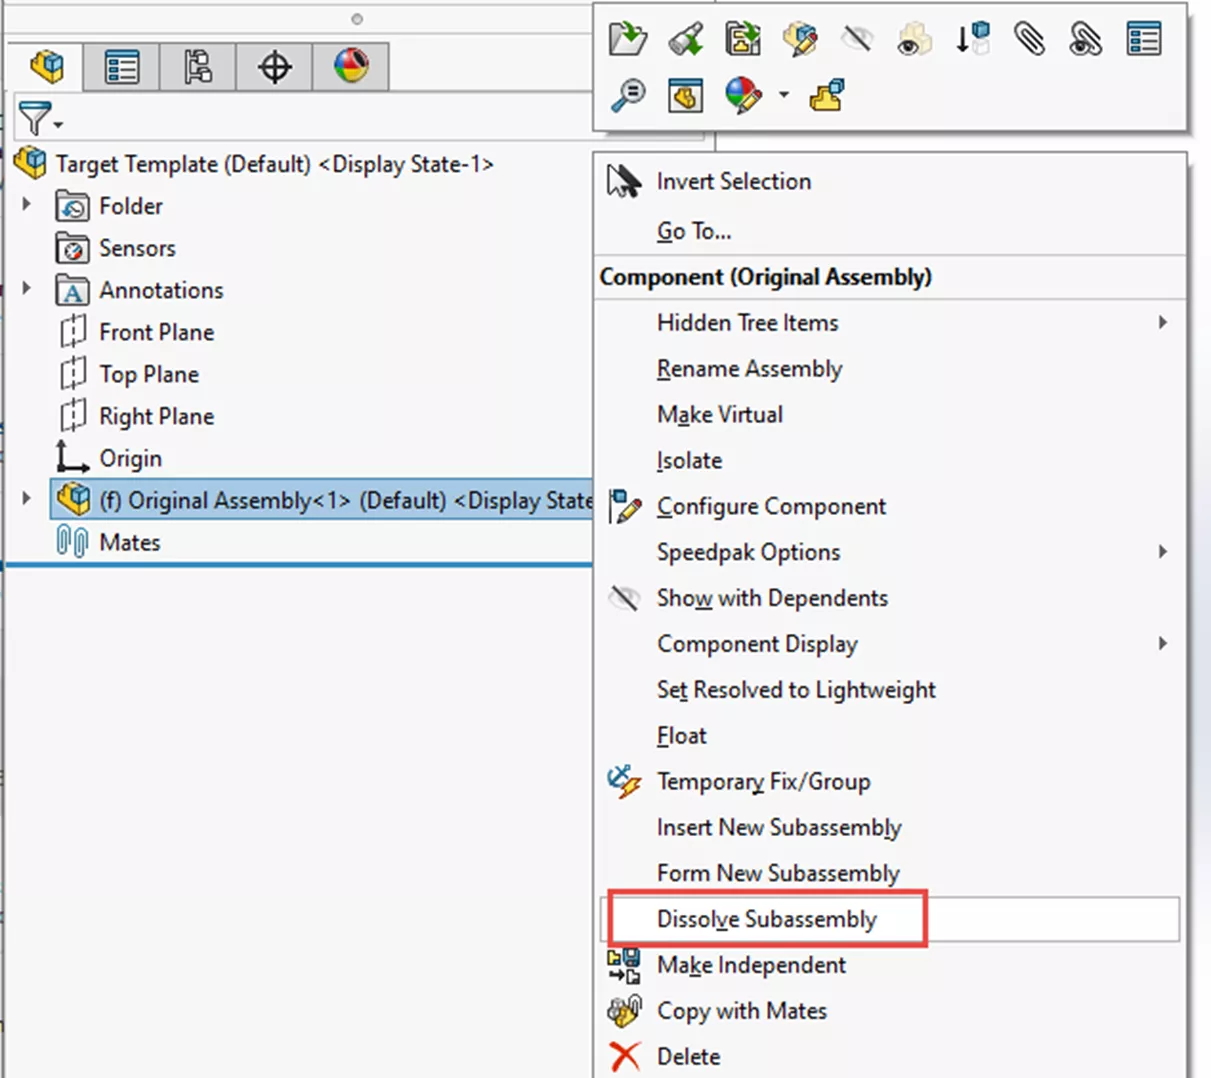
This will put all components and subassemblies inside of your Original Assembly and move them to the top level of your Target Template.
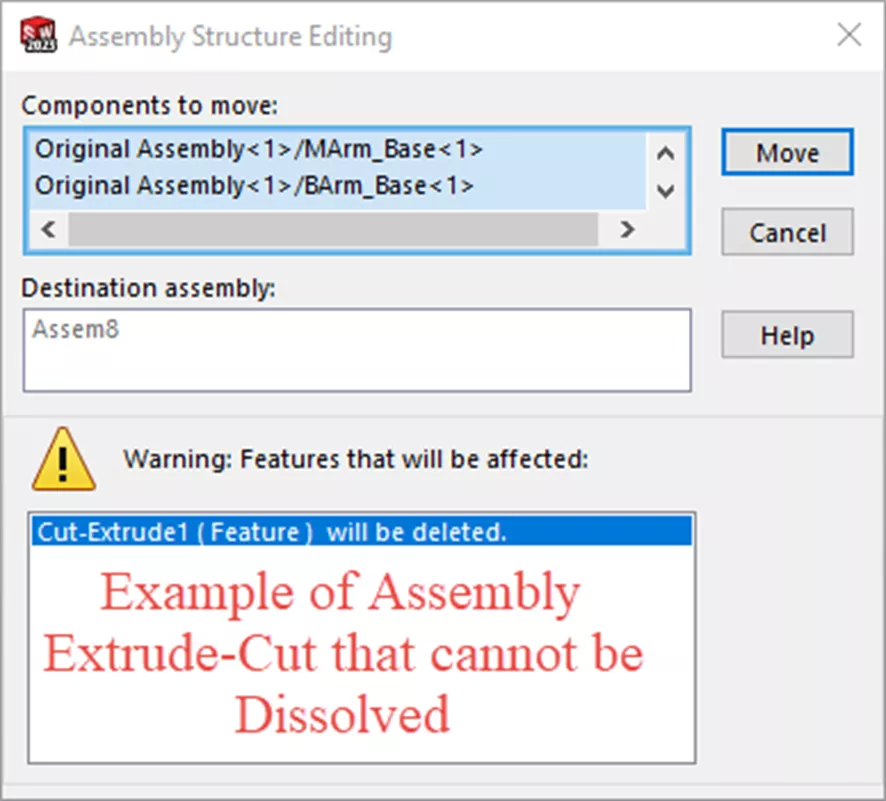
In some cases, certain features cannot be moved to the new top-level, most commonly assembly-level Extrude-Cuts. In these cases, before committing to the dissolve, there will be a popup that lists which features cannot be transferred.
Transfer Assembly Summary:
- Start by opening the assembly being transferred.
- File > Make Assembly from Assembly and select the target assembly template.
- Green check for Begin Assembly to place original assembly at origin.
- Right-click the Original Assembly in the FeatureManager Design Tree and choose Dissolve Subassembly.
For assemblies that have multiple configurations, please refer to the next section for steps on how to preserve the configuration information so that it can be transferred to the new template.
Transfer Configurations to a New Template
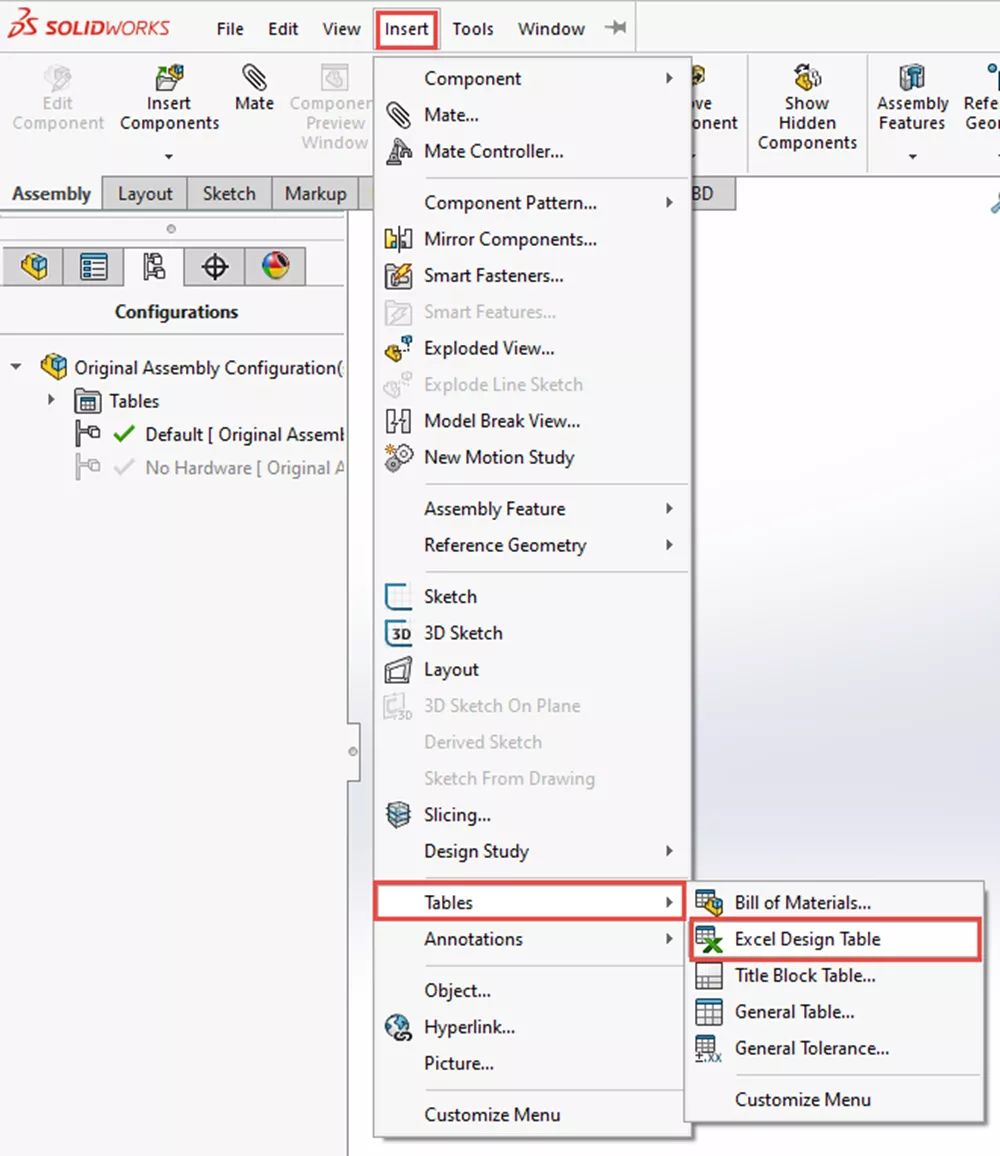
In order to prepare a part with configurations to be transferred to a new document, we need a design table of the configurations. If a design table is not already created, you can create one by going to Insert > Tables > Excel Design Table.
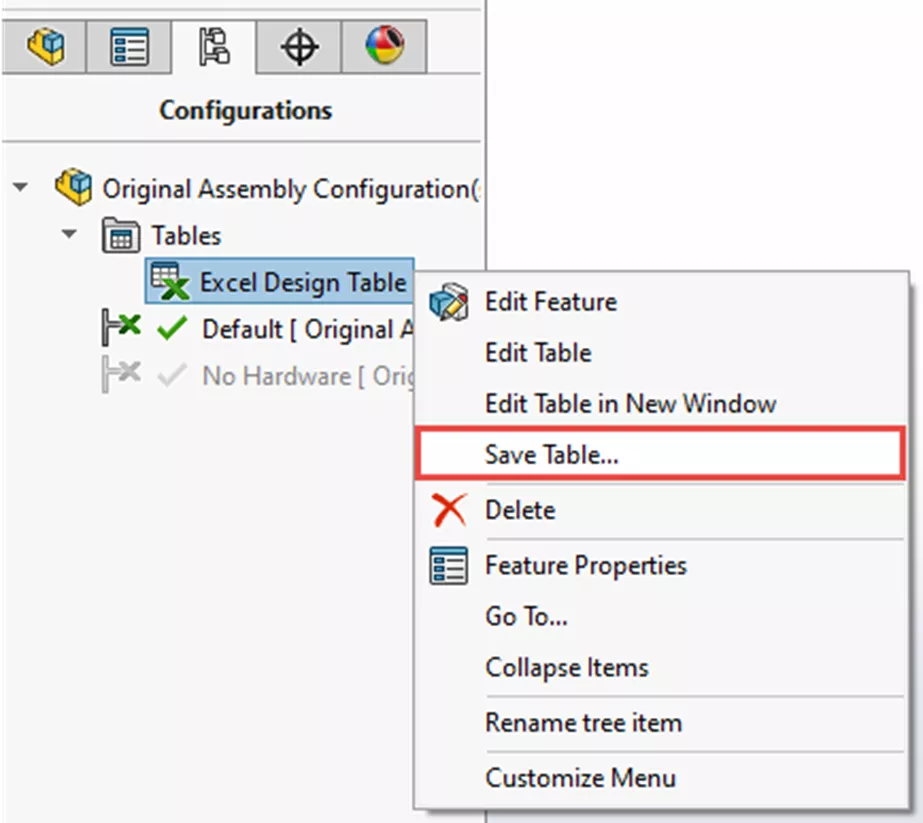
The Design Table can be left on the option for Auto-Create which will then proceed to automatically create a Design Table. With a Design Table created, export it by right-clicking the Design Table in your configuration tab and choosing Save Table….
Proceed to save the table as an Excel file in a location of your choosing.
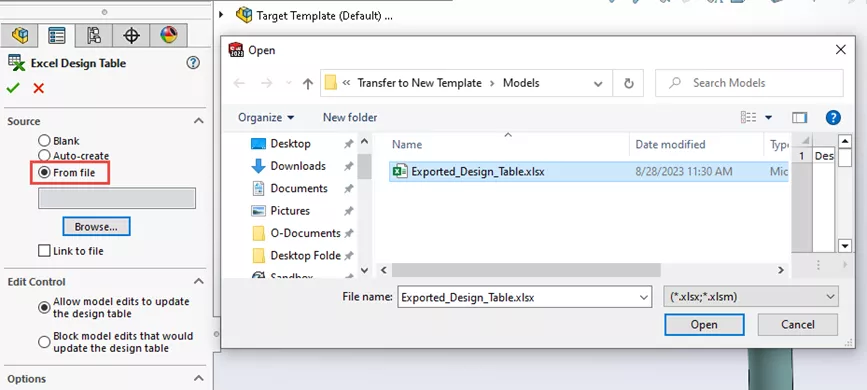
Once the Design Table is saved, the prep work is done. All that is left is to reload the Design Table after transferring your part or assembly to the new template. To re-add your configurations to the new template, start by going back to Insert > Tables > Excel Design Table, and instead of leaving it on Auto-create, this time choose From file and browse to the exported Design Table from the previous step.
This will then create a design table and the respective configurations within that design table. Once the configurations are created on the new template, you can optionally delete the design table.
Transfer Configuration Summary:
- From an existing part or assembly, create a design table with Insert > Tables > Excel Design Table
- For the Design Table, leave on the option to Auto-Create
- Once the Design Table is created, right-click on the Design Table and choose Save Table to export an Excel file.
- Begin the process of transferring part/assembly to the new template (see above sections for instructions).
- In the new template after the transfer has taken place, go to Insert > Tables > Excel Design Table.
- Change the Source to From File and browse to select the previously exported Excel file which will then create the missing configurations.
- Optionally, delete the Design Table after configurations are created.
You should now be able to transfer almost any SOLIDWORKS part or assembly into a new template. If you use this method to replace parts that are used in drawings or assemblies, you may want to refer to one of our other articles on how to repair broken references.
If you have existing parts or assemblies that you want to make into templates so you can use the methods described above, here is an article that goes over How to Recover SOLIDWORKS Part and Assembly Templates.
I hope you found this article explaining how to transfer SOLIDWORKS parts and assemblies to a new template helpful. Check out more tips and tricks listed below. Additionally, join the GoEngineer Community to participate in the conversation, create forum posts, and answer questions from other SOLIDWORKS users.

SOLIDWORKS CAD Cheat Sheet
SHORTCUTS ⋅ MOUSE GESTURES ⋅ HOT KEYS
Our SOLIDWORKS CAD Cheat Sheet, featuring over 90 tips and tricks, will help speed up your process.
More SOLIDWORKS Tutorials
How to Add a Watermark Note in SOLIDWORKS
Getting Started with the SOLIDWORKS Design Library
SOLIDWORKS Fixed vs Floating Components
SOLIDWORKS Trim Entities Command Capabilities
About Braden Leasure
Braden Leasure is a Sr. SOLIDWORKS Technical Support Engineer at GoEngineer.
Get our wide array of technical resources delivered right to your inbox.
Unsubscribe at any time.