Make Multibody Parts from SOLIDWORKS Assemblies
New to SOLIDWORKS 2024 is the ability to make multibody parts from assemblies. While saving an assembly as a part has always existed, a new tool provides additional options. In this guide, we’ll compare the differences between these two methods.
Old Method – Save Assembly as Part
As previously mentioned, an assembly can be saved as a part file using File > Save as, then changing the Save as type to SOLIDWORKS Part.
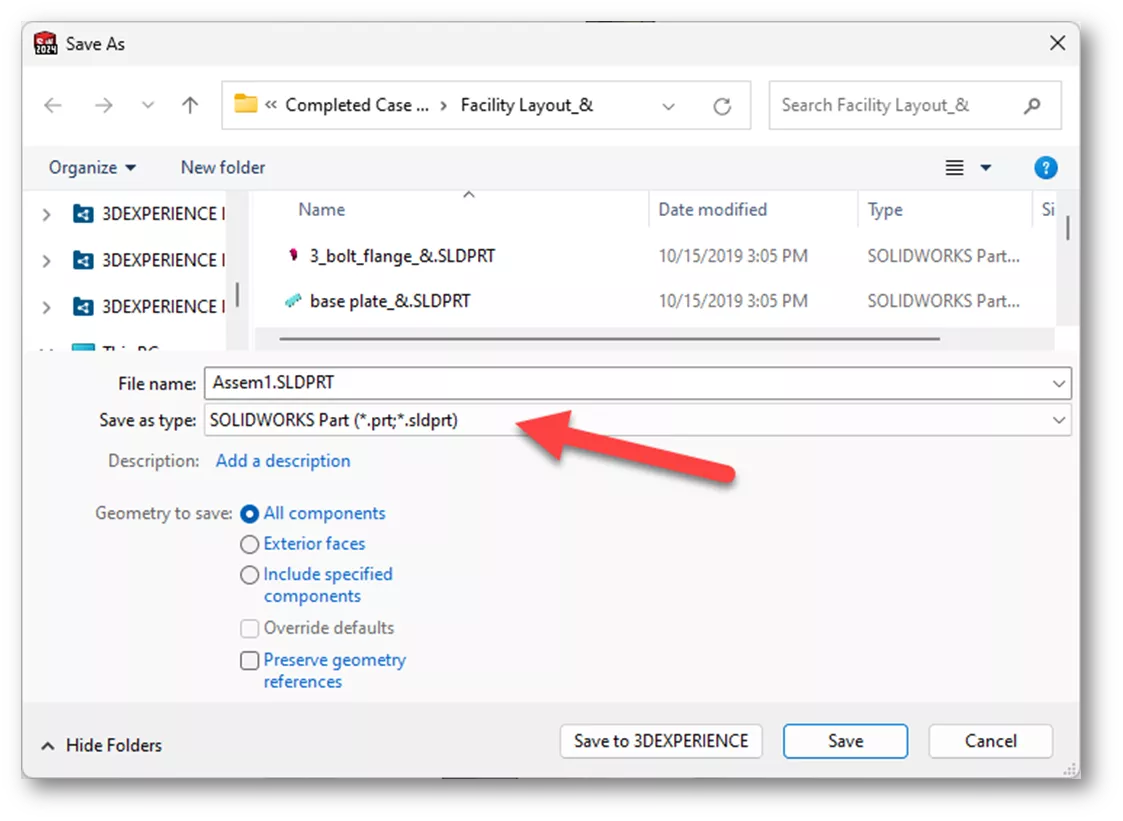
For an in-depth look at this process, check out our article: Save SOLIDWORKS Assembly as Part and Preserve Geometry References.
Pros
The advantage of using save as part is the option to Preserve geometry references. Every face in the assembly has a unique identifier (or name). These unique identifiers are used as references for mates, sketch relations, reference geometry, etc. If the name of a face changes, it can cause errors downstream. The Preserve geometry references option preserves the names of each face when the assembly is saved as a part. If a subassembly is saved as a part and replaced in an upper-level assembly, any references to those faces should remain intact.
Cons
While this method is effective, there is little control over what gets saved. There are only options for saving All components, Exterior faces, or to Include specified components. Furthermore, there is no link between the assembly and the part file. If the assembly is updated, the part will not reflect the changes, so the assembly must be saved as a part again.
New Method – Make Multibody Part
In SOLIDWORKS 2024 and higher, there is a new command called Make Multibody Part. With an assembly open, go to Tools > Make Multibody Part. ![]()
Make Multibody Part PropertyManager
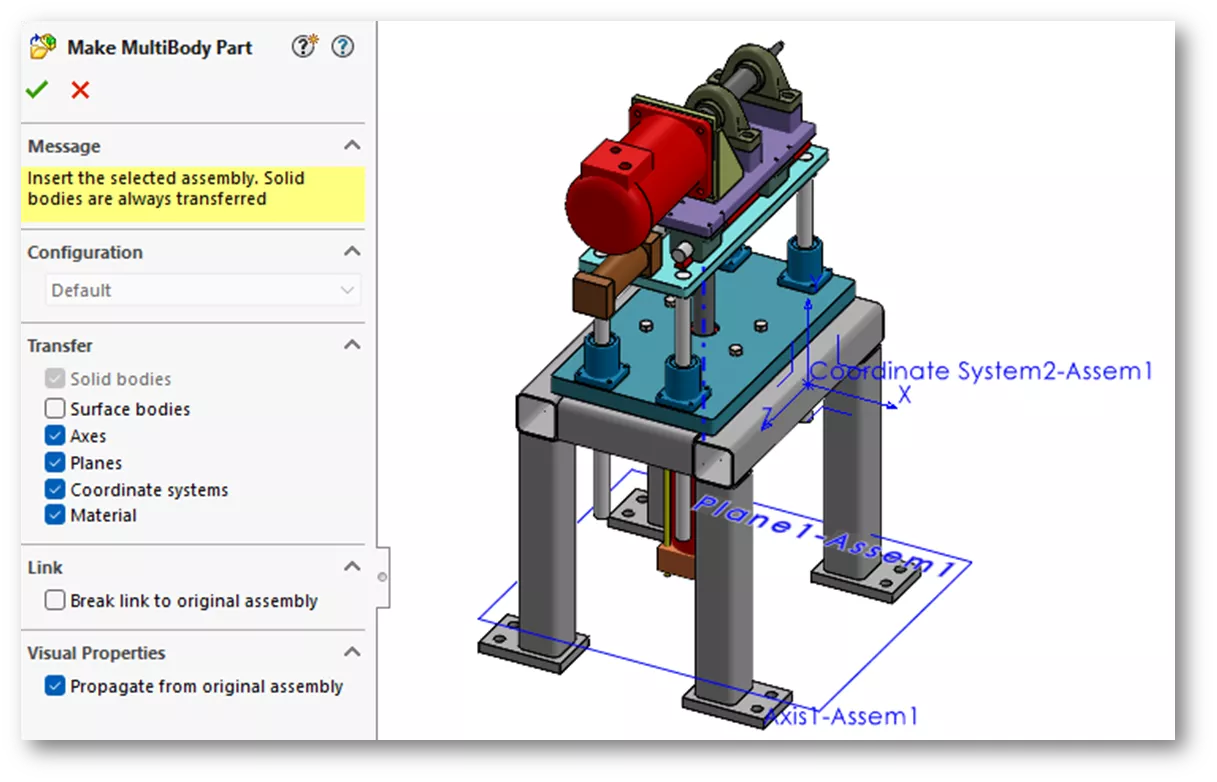
After clicking Make Multibody Part, the PropertyManager is displayed and provides more options for what gets transferred to the part. You can now include items such as Surface bodies, Axes, Planes, Coordinate systems, and Materials. We can also choose to Break link to the original assembly and under Visual Properties, Propagate from original assembly.
Once all transfer options have been set, click the green check mark to finish the operation. After clicking OK, the part is opened while the original assembly remains open in another window.
Note: The part file is not automatically saved like save as part. You’ll still have to click File > Save to give it a name and choose the destination.
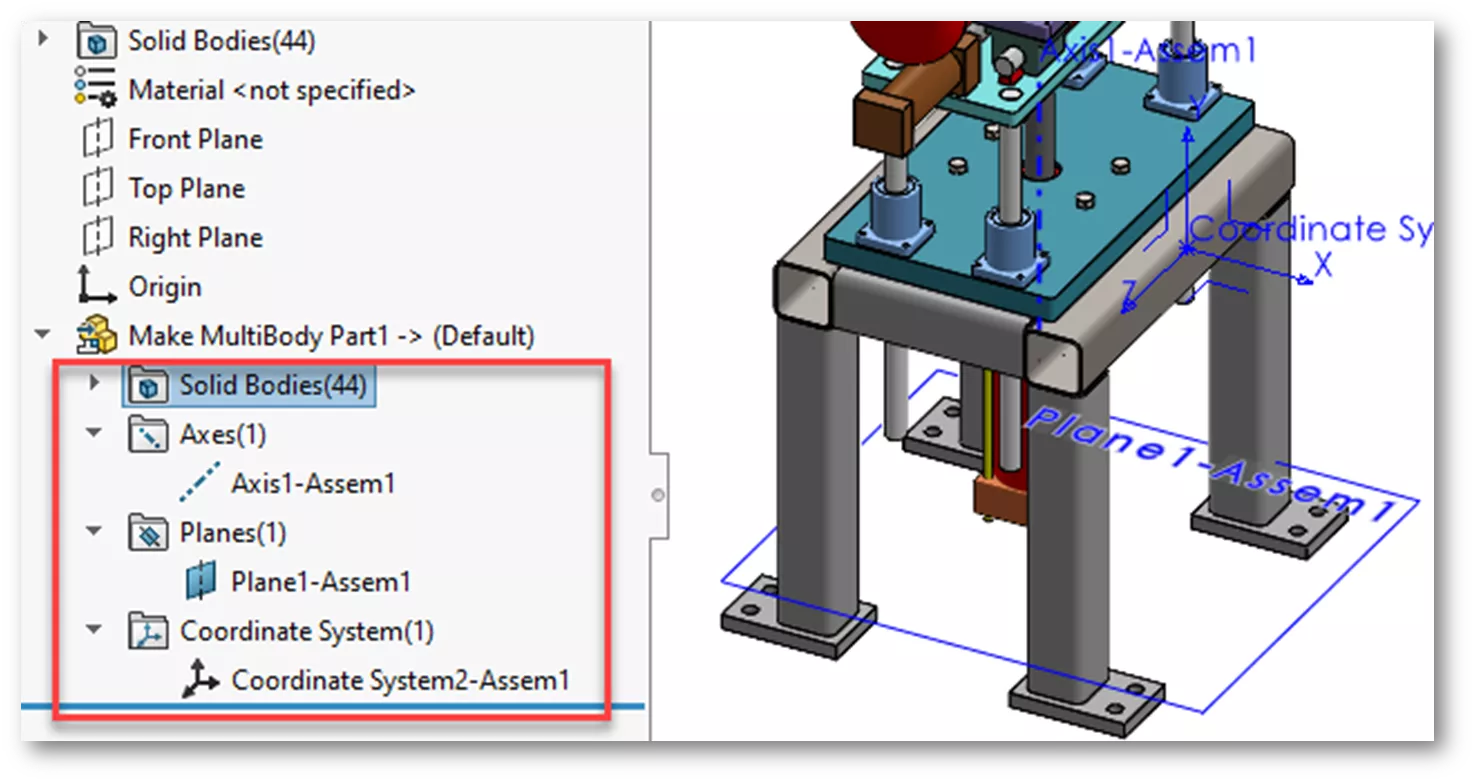
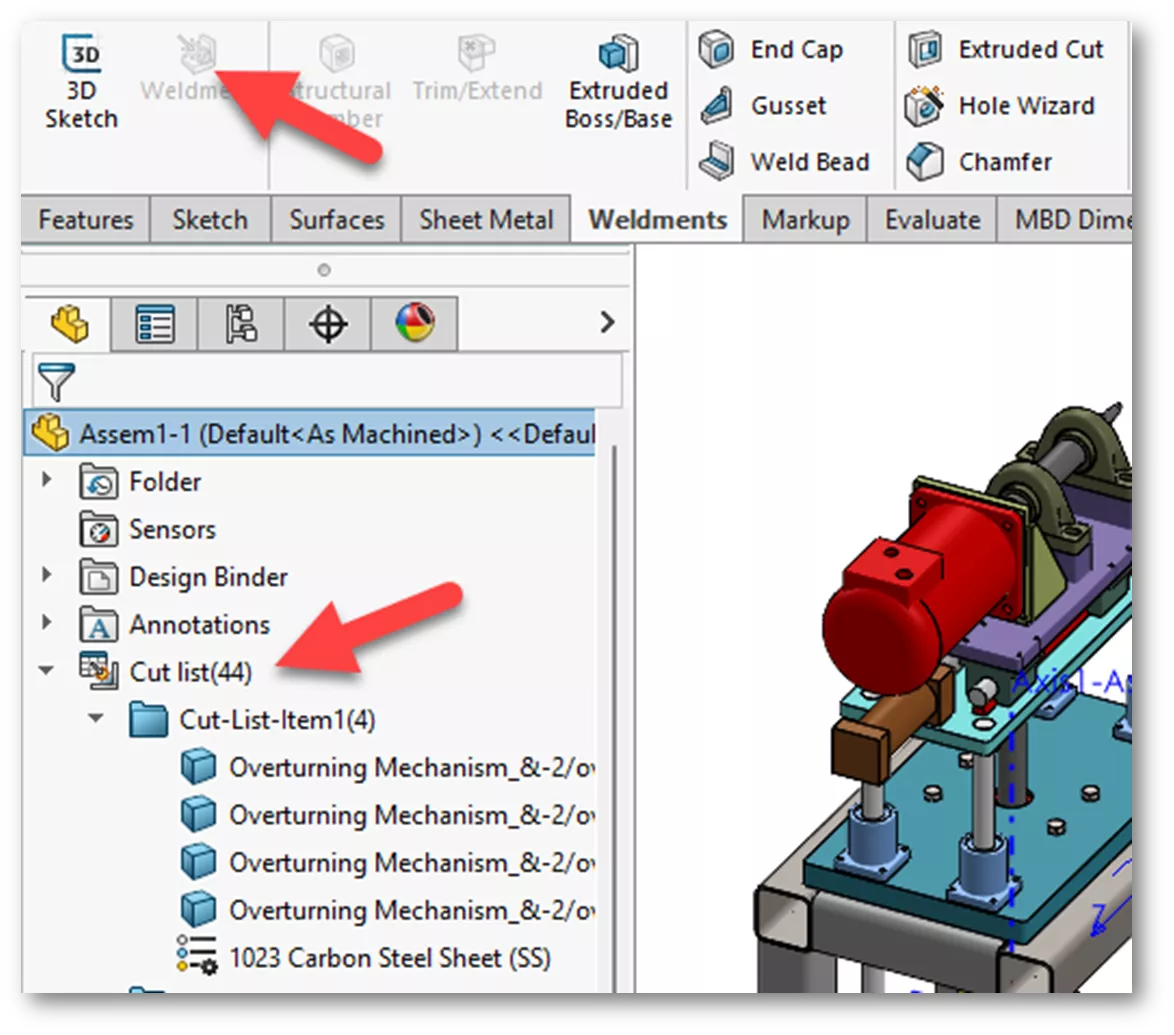
In the multibody part file, a feature is created in the FeatureManager Design Tree labeled Make Multibody Part1, which can be expanded to see a list of folders. A separate folder is created for each transferred entity. Expand each folder to see its contents.
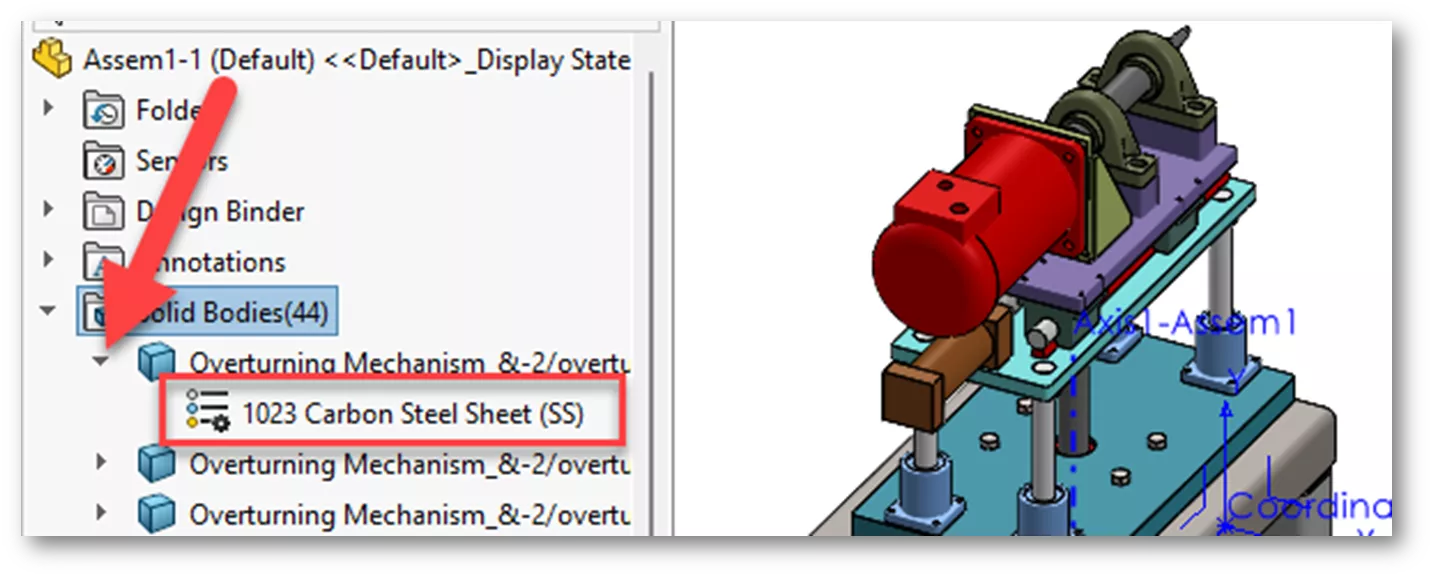
The Solid Bodies folder contains individual bodies representing each component in the assembly. Each body is given the same name as the component it was created from. If a material was applied to the component and materials were selected to transfer, the body can be expanded to see the applied material.
Just like any other multibody part file, a cut list can be created by clicking the Weldment icon on the Weldment Toolbar.
Pros
The advantages of using Make Multibody Part are:
- There are more controls on what can be transferred to the part file.
- A link can be maintained between the part file and the original assembly. Changes to the assembly will propagate to the multibody part.
Cons
The disadvantages of this method are:
- There is no option to preserve geometry references like save as part.
- Currently, there is no way to export multiple configurations of the assembly to the multibody part file. Only the active configuration gets saved as a part.
- Performing this on other configurations of the assembly creates a new part file.
I hope you found this article explaining the new Make Multibody Part tool in SOLIDWORKS 2024 helpful. Check out more tips and tricks listed below. Additionally, join the GoEngineer Community to participate in the conversation, create forum posts, and answer questions from other SOLIDWORKS users.
SOLIDWORKS CAD Cheat Sheet
SHORTCUTS ⋅ MOUSE GESTURES ⋅ HOT KEYS
Our SOLIDWORKS CAD Cheat Sheet, featuring over 90 tips and tricks, will help speed up your process.
More SOLIDWORKS Tutorials
How to Add a Watermark Note in SOLIDWORKS
Getting Started with the SOLIDWORKS Design Library
SOLIDWORKS Fixed vs Floating Components
SOLIDWORKS Trim Entities Command Capabilities

About Zach Brown
Zach Brown is a certified SOLIDWORKS Expert and a Technical Support Engineer. Prior to working at GoEngineer, he spent 15 years as a mechanical designer, CAD support tech, and instructor using SOLIDWORKS. His hobbies include playing guitar, riding motorcycles, and skiing.
Get our wide array of technical resources delivered right to your inbox.
Unsubscribe at any time.
