How to Create a New Revision in 3DEXPERIENCE
There are several ways to generate new revisions with the 3DEXPERIENCE Data Management tools, both manual and fully automated. This is great because it gives each company the ability to be as simple or as complex as they want with their formal change process.
Keep in mind that these capabilities may be restricted to specific users or groups of users or may be made available to everyone, depending on the settings established by your company's platform manager.
First, let’s take a look at two manual methods and their variations.
#1. Manual - Inside of SOLIDWORKS Create a New Revision Before Making Changes
The 3DEXPERIENCE PLM add-in, in the task pane in SOLIDWORKS, lets you create a new revision before making any changes to the model. With the part or assembly open that you would like to modify, right-click on it in the task pane and choose New Revision.
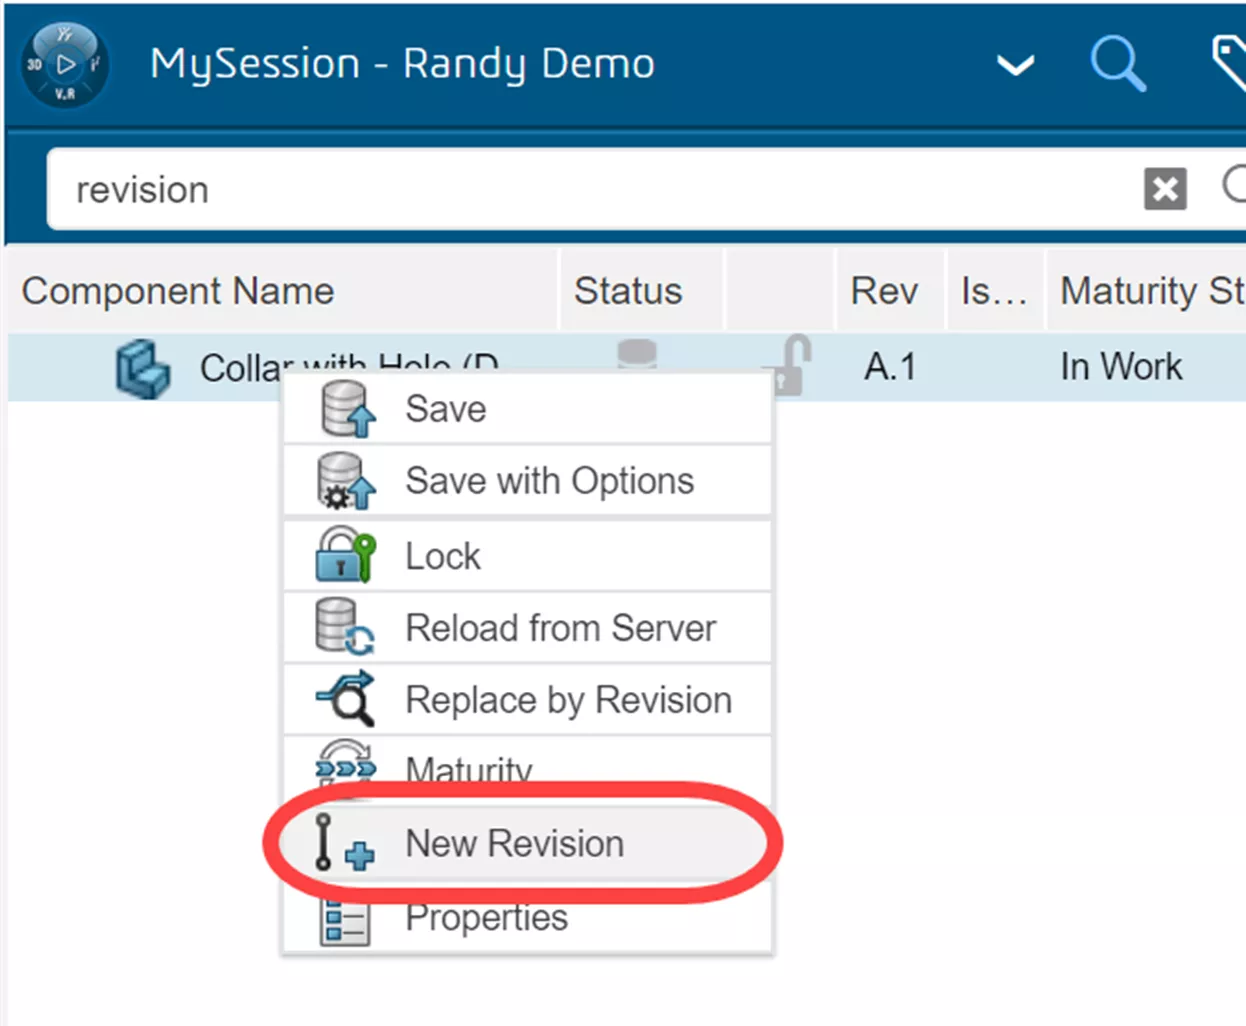
A dialog box will prompt you to add a revision comment. You will see that the next revision in your company’s revision scheme is being chosen (in this case A.2).

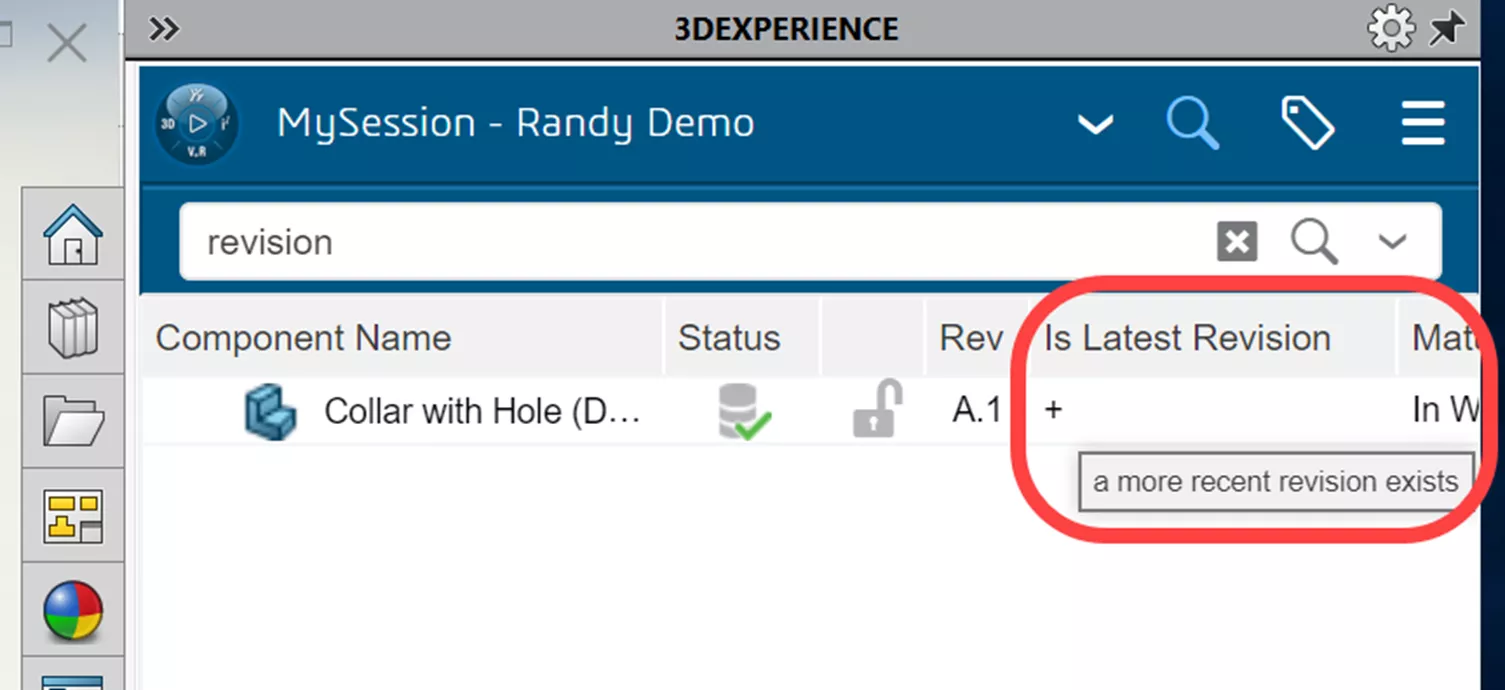
Be mindful that this method does not put you in the new revision - it keeps you in the original. For all it knows, you perhaps just wanted to create the new revision and then move on to another file. Most likely though, you now want to modify the file you were in that you just made the new revision for. If you know where to look, the 3DEXPERIENCE PLM task pane will imply that a newer version exists for this file and you are not in it. This is indicated by a “+” sign in the Is Latest Revision column.
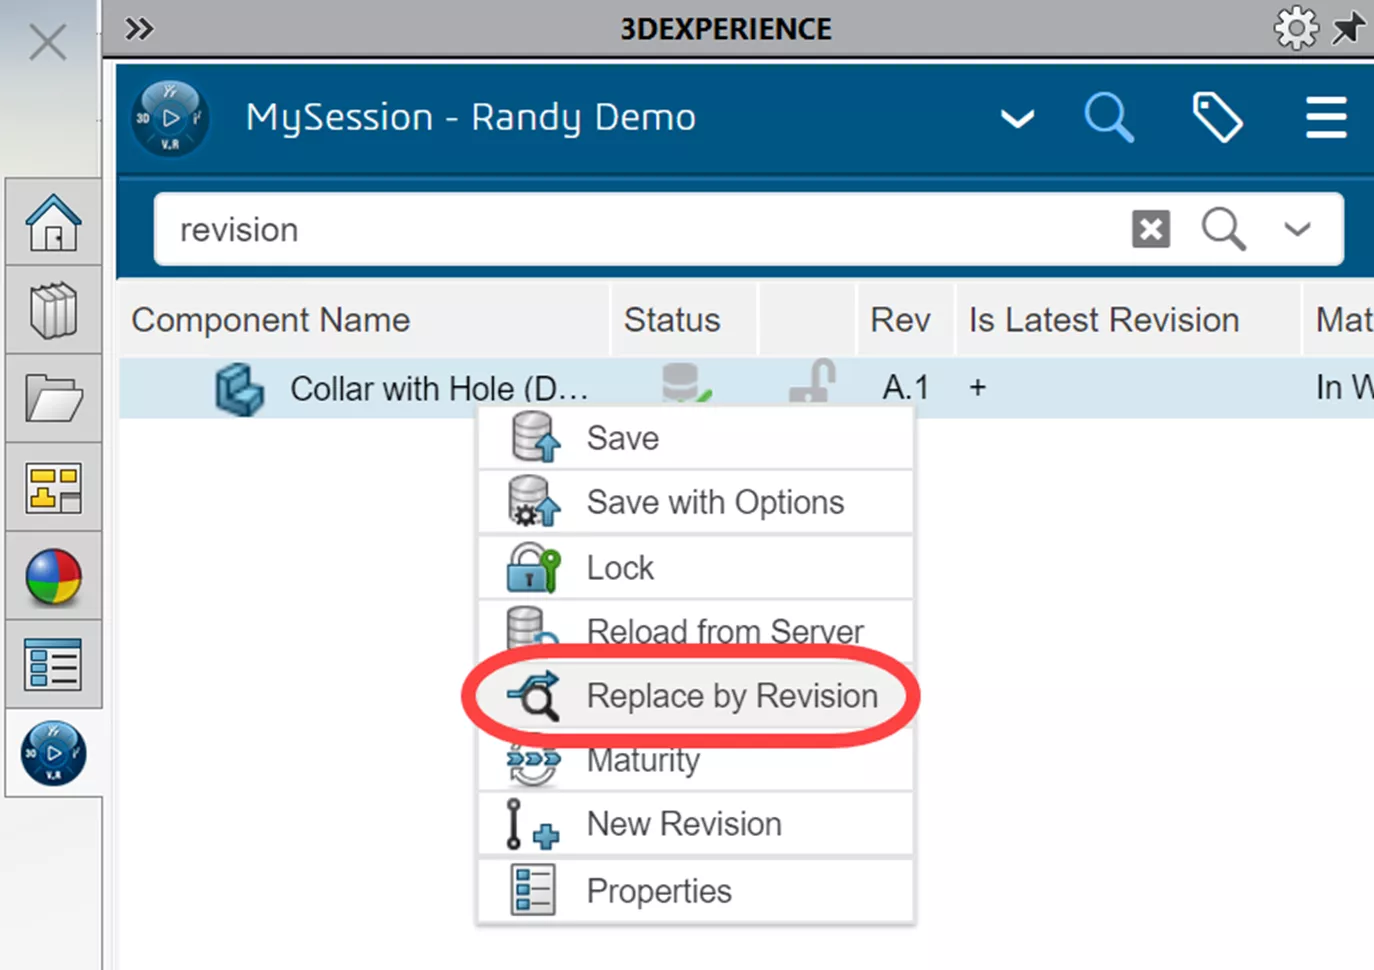
Using this method of creating the revision before the changes, you then have to manually switch to that new revision before making the changes. Otherwise, you are changing the A.1 revision in this case! Switch to the new revision by right-clicking on the file in the 3DEXPERIENCE PLM task pane and choose Replace by Revision.
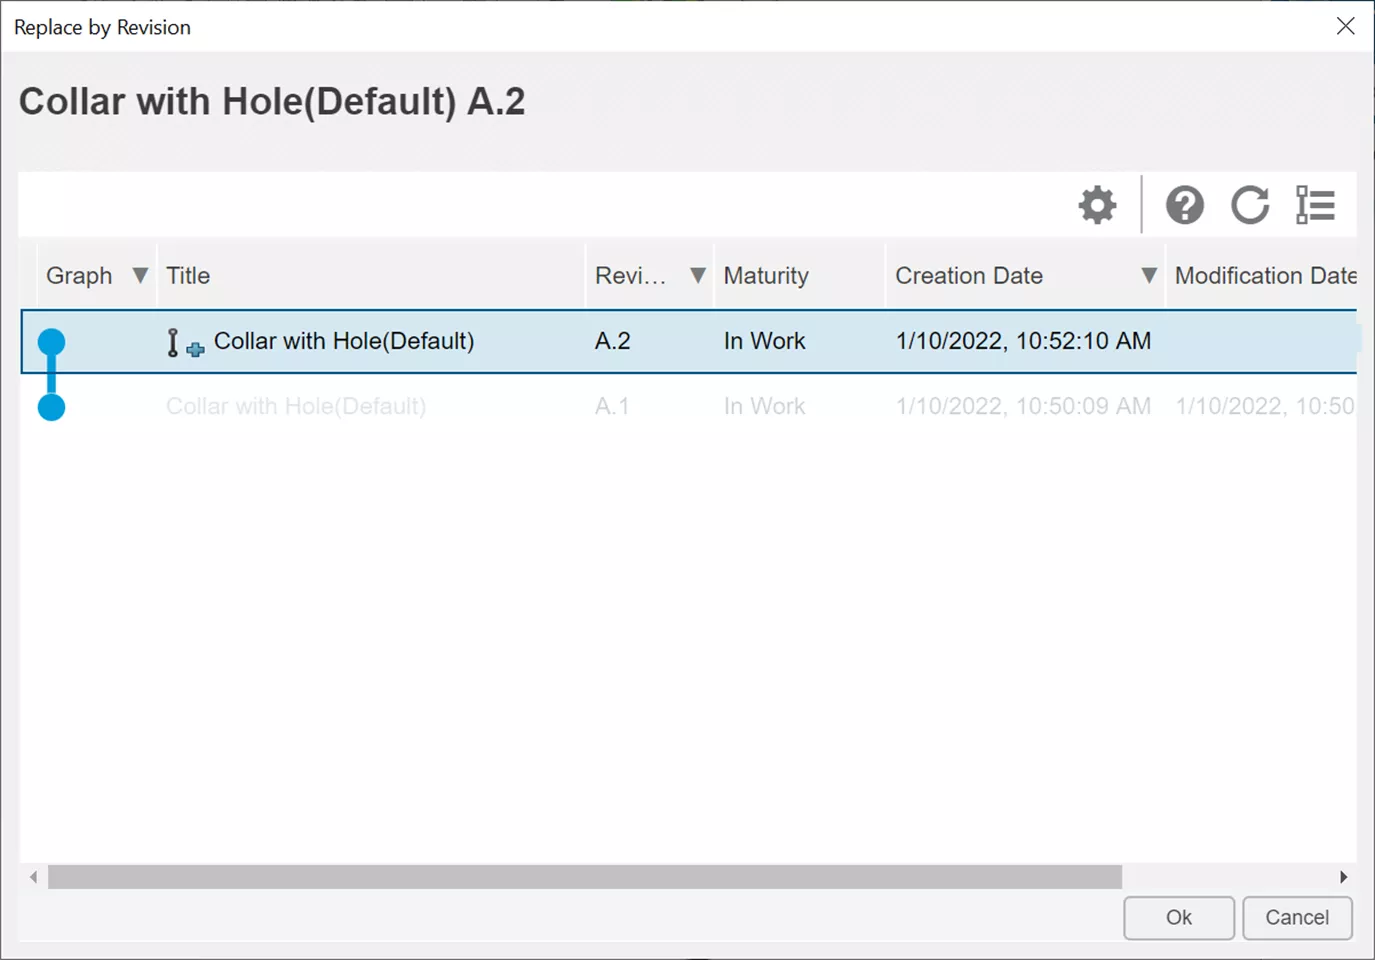
Another window will appear, allowing you to select what revision you would like to work on.
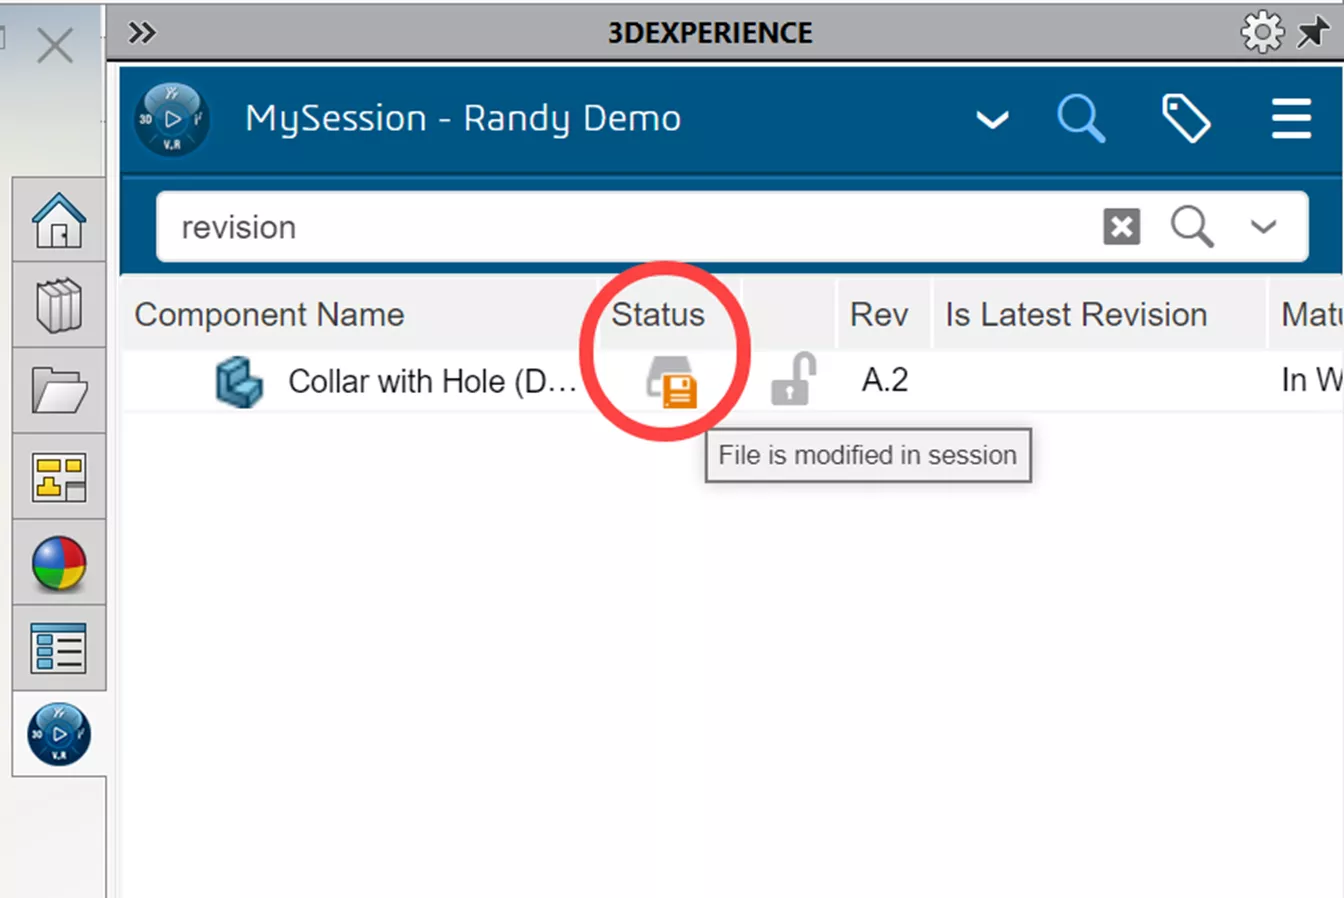
Make your changes to the par or assembly. The status icon in the task pane shows that you have made changes in your session and they do not match the version on the server.
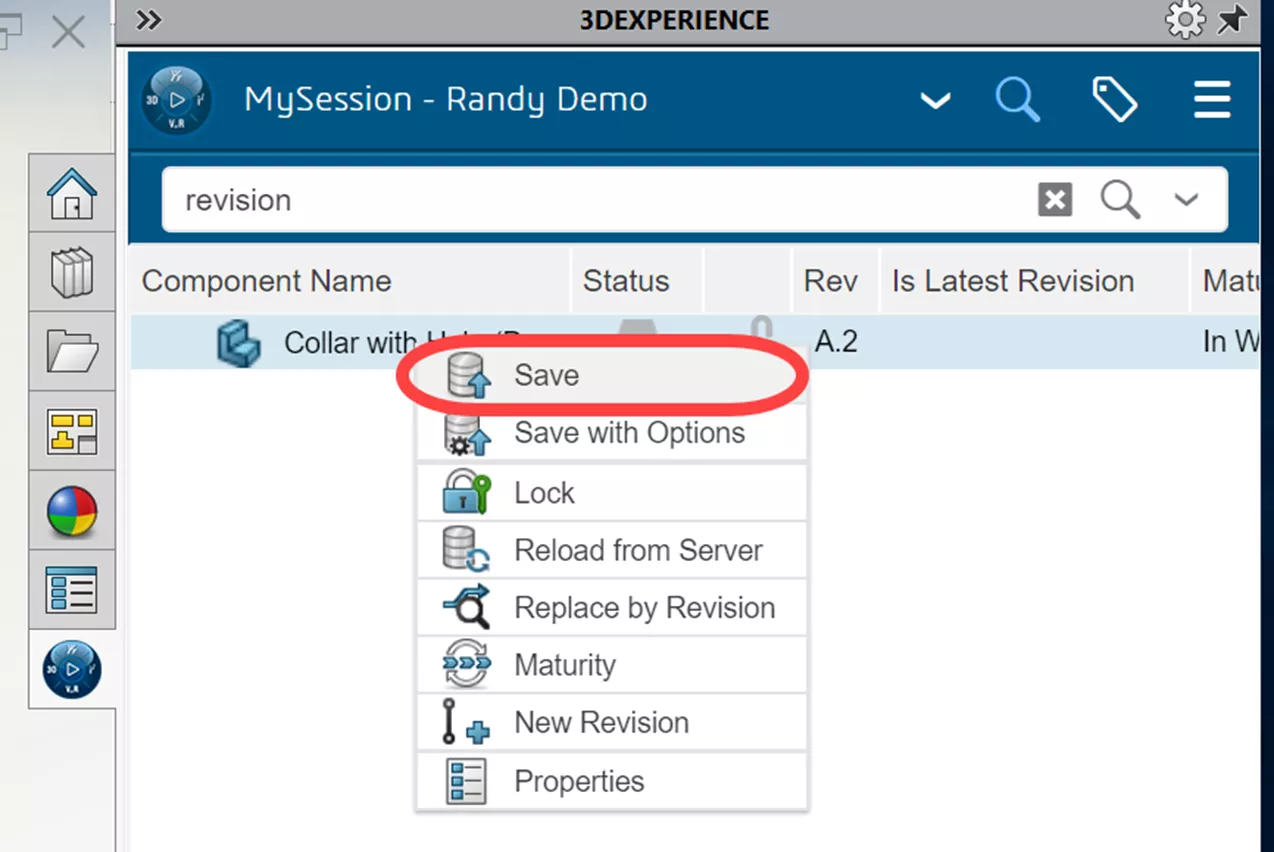
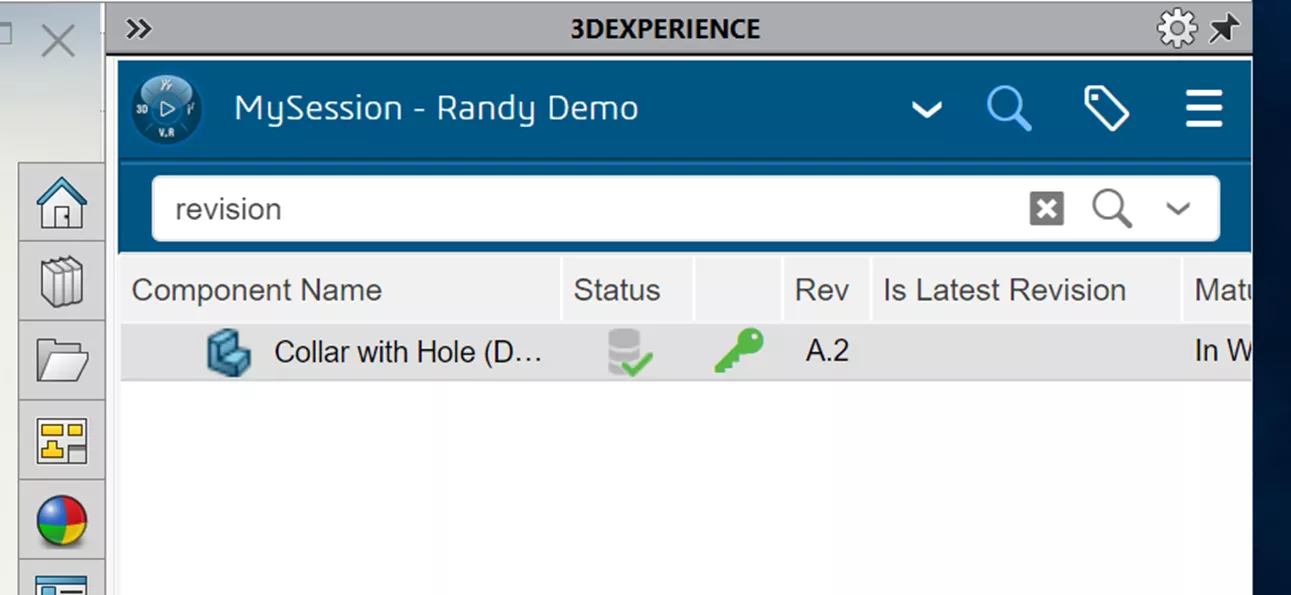
Save (right-click on the file in the task pane) the changes to the platform.
This method of creating a revision before making changes in SOLIDWORKS can also be done without using SOLIDWORKS at all.
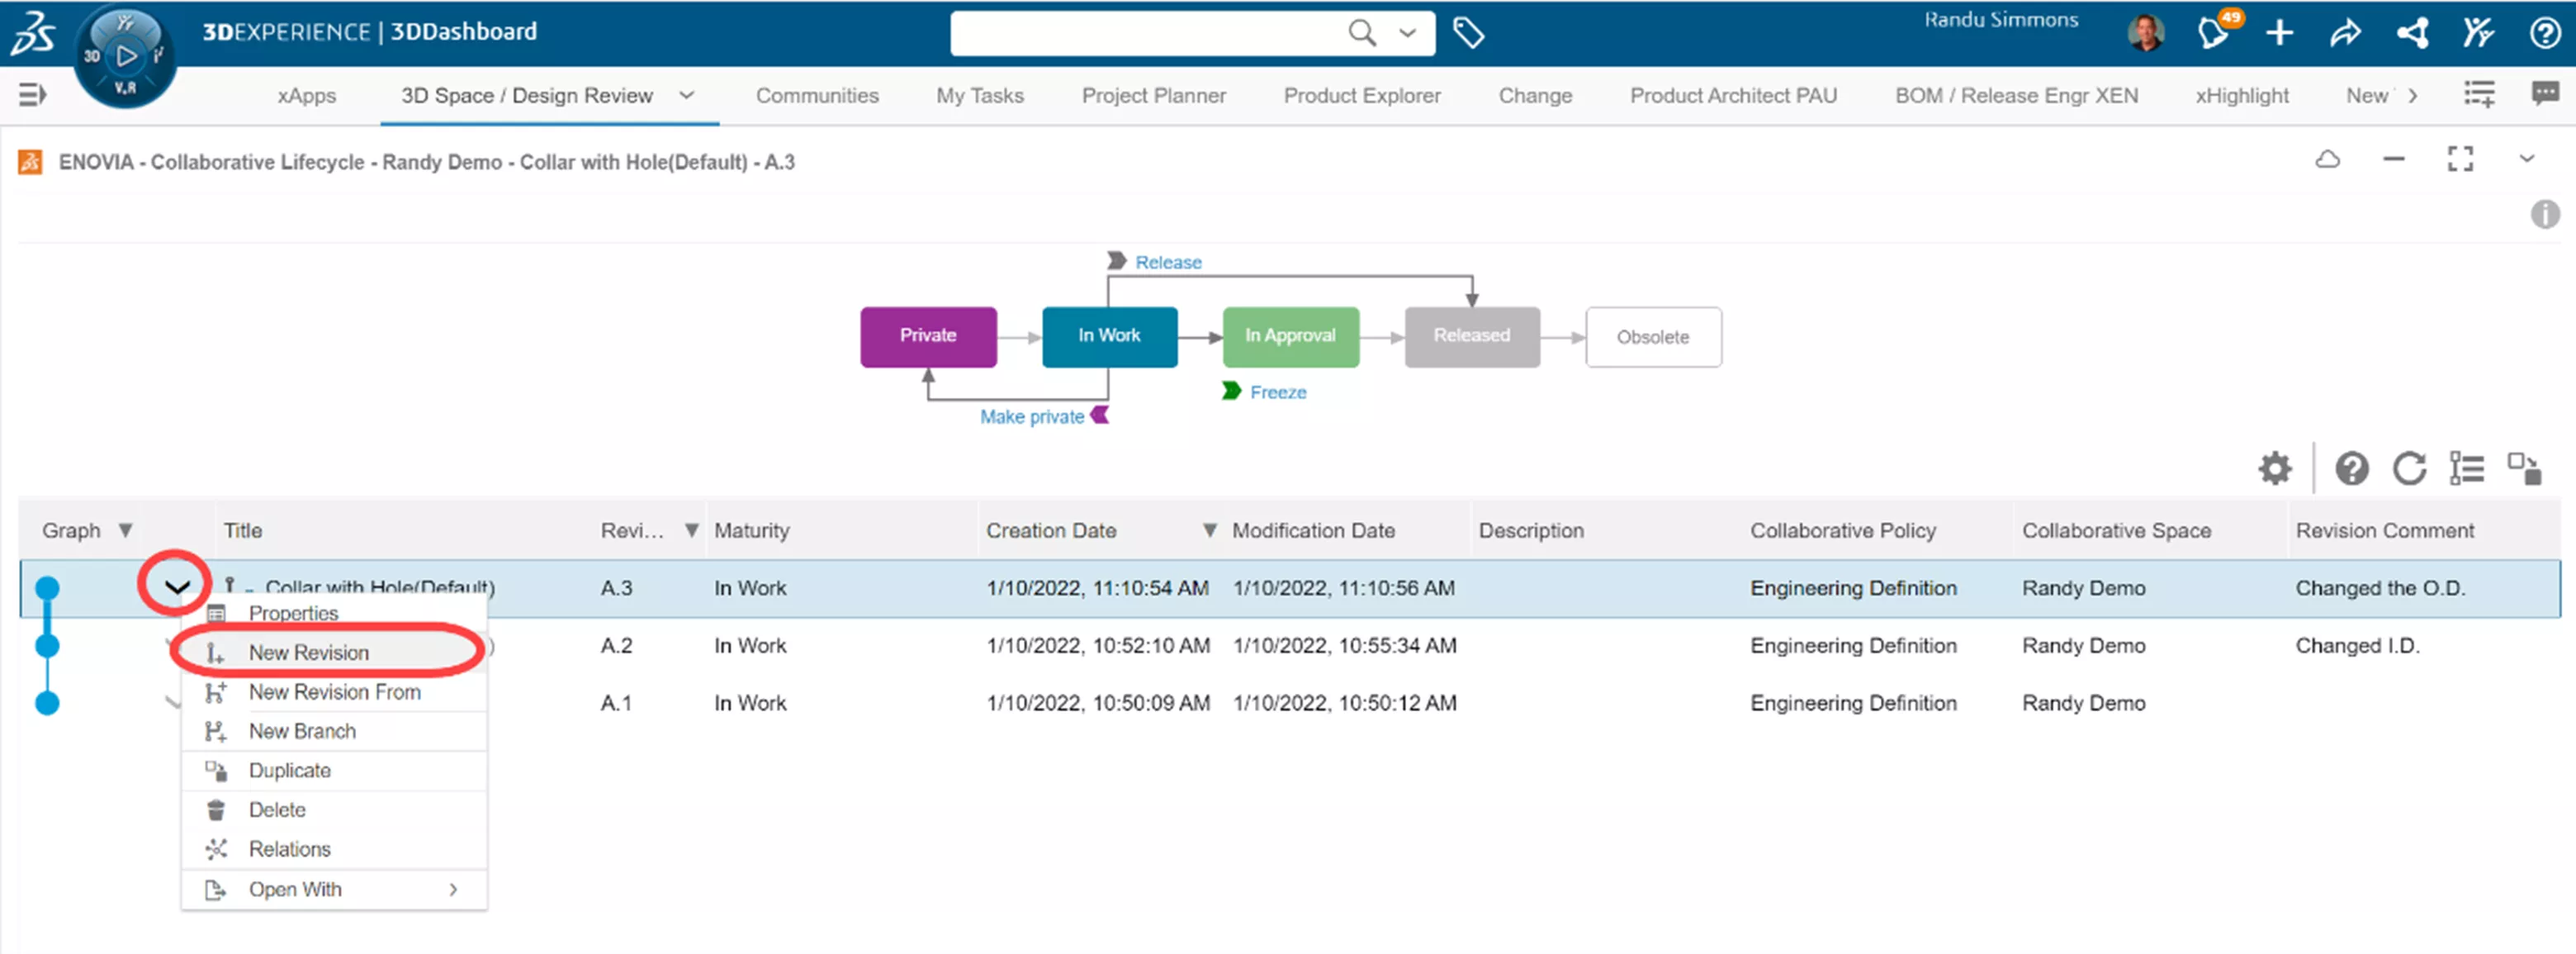
Those with the allowed permissions can use the web interface to create a new revision. This is done in the Collaborative Lifecycle app by clicking the down arrow next to an existing revision and choosing New Revision. The idea here then is that the SOLIDWORKS user would search for and open that new revision, work on it, and then save the changes to it.
To me, this is the more likely scenario that you would create a revision before making changes and then go open that revision of the file to work on. Especially if it is a non-CAD user (e.g., an engineering manager, etc.) creating the new revision and then relying on a CAD user to make the changes.
#2. Manual - Inside of SOLIDWORKS Create a New Revision After Making Changes
Because of the extra hoop you have to jump through (and possibly forget to do) of switching to the new revision in the previous method, this is my preferred of the two manual methods.
In this case, you would have the part/assembly open that you want to modify and simply make the changes. Then, upon saving back to the platform, you would use Save with Options (right-click on the file in the 3DEXPERIENCE PLM tree) and in that dialog choose to create a new revision and enter a comment.
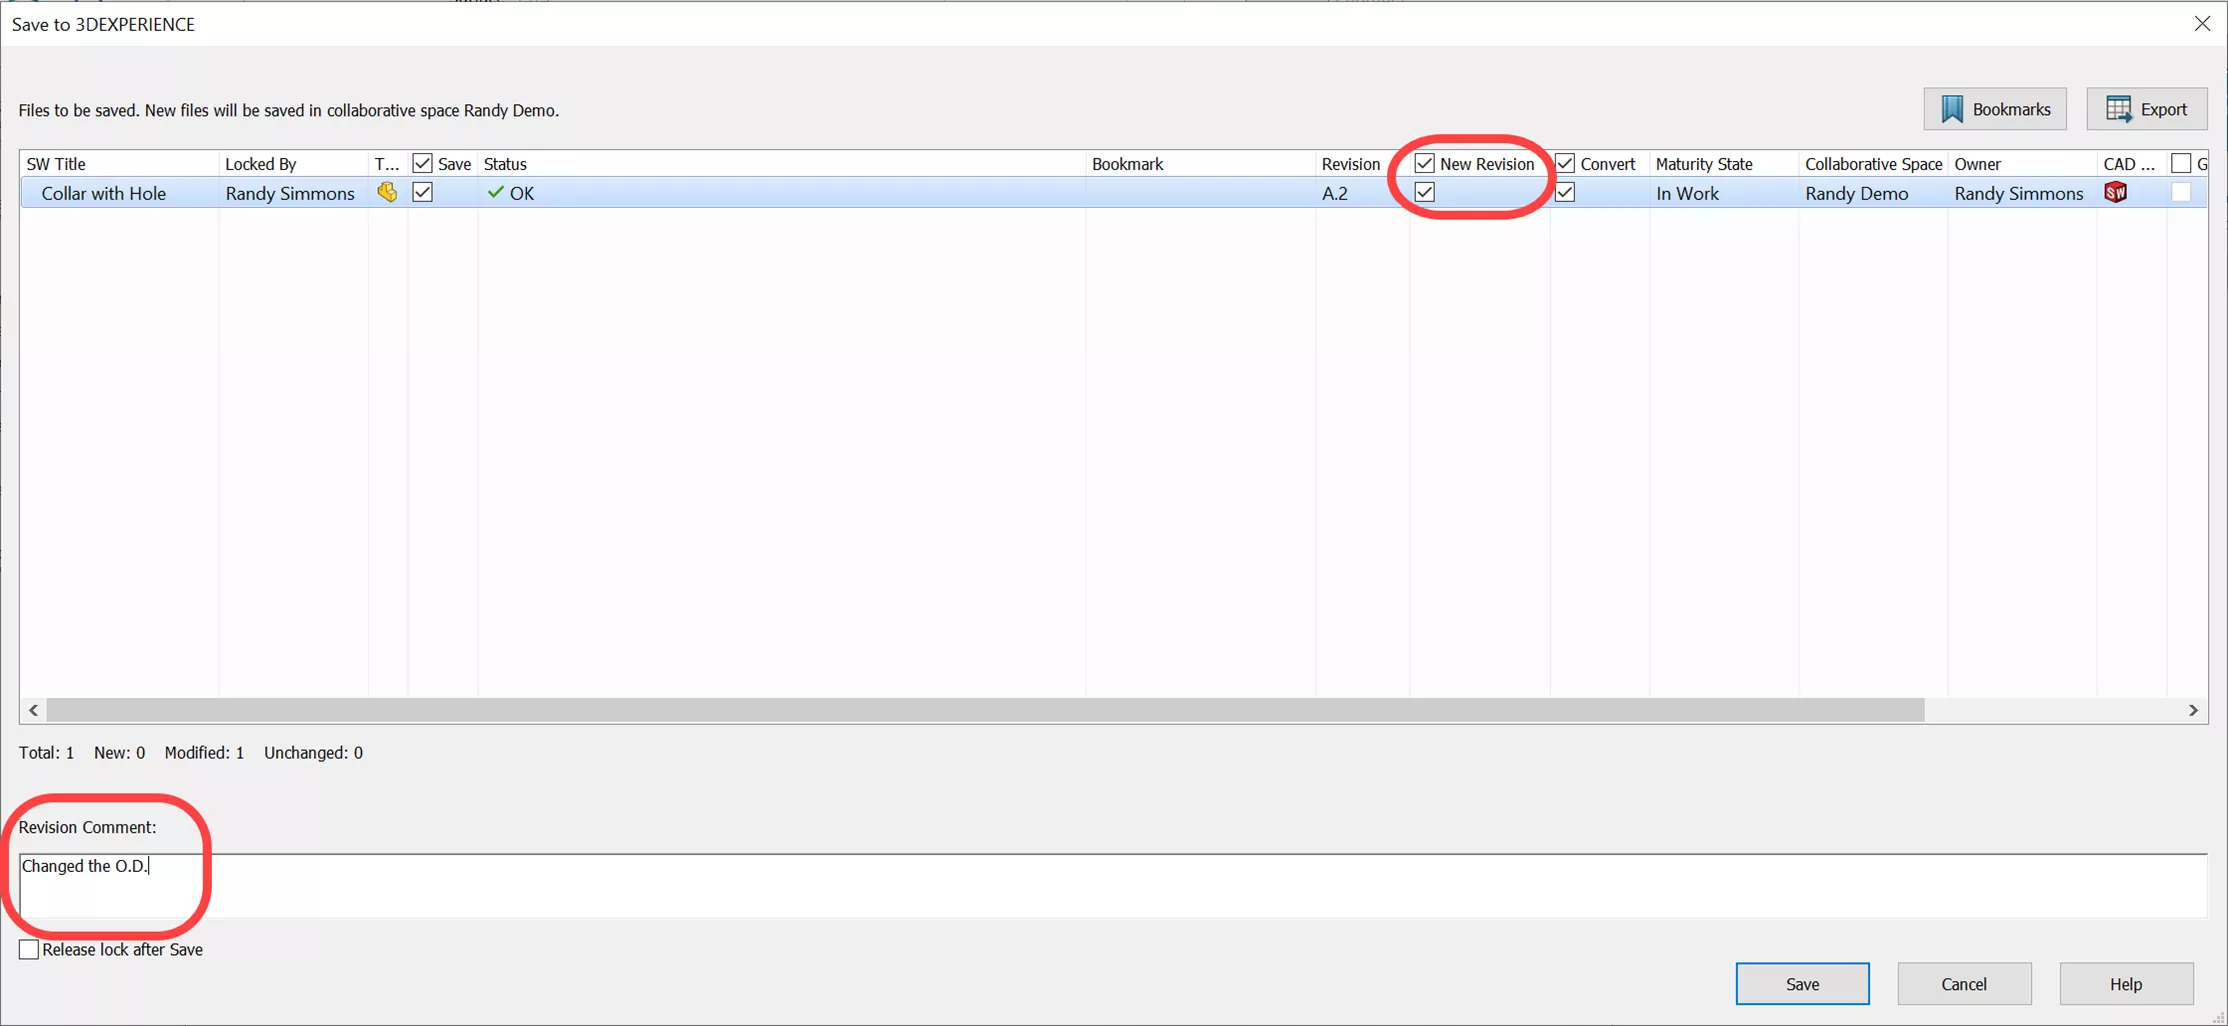
In my opinion, this is much easier and has less chance for mistakes than the first method.
#3. Automated – Change Action (And Optional Issues)
A formal change process can automatically create revisions for you. This change process can be fairly complex including Issues to identify problems, Change Requests to evaluate the problem, Change Orders to assign and monitor the progress, and Change Actions to actually implement the change.
Or it can be as simple as just doing the last step of creating a Change Action. Issues and Change Action is something that everyone with the base roles on the platform can participate in, and those two steps are the method that we feel most small to medium-sized companies are going to want to implement.
With Issues, a user on the platform can raise/report an issue right on the 3D model using the web interface. You just tag a part or assembly graphically on the screen and enter the details of what you think the issue or problem is. There is even a place to attach photos or screenshots to get your point across. Other users can then see this issue and comment on it.
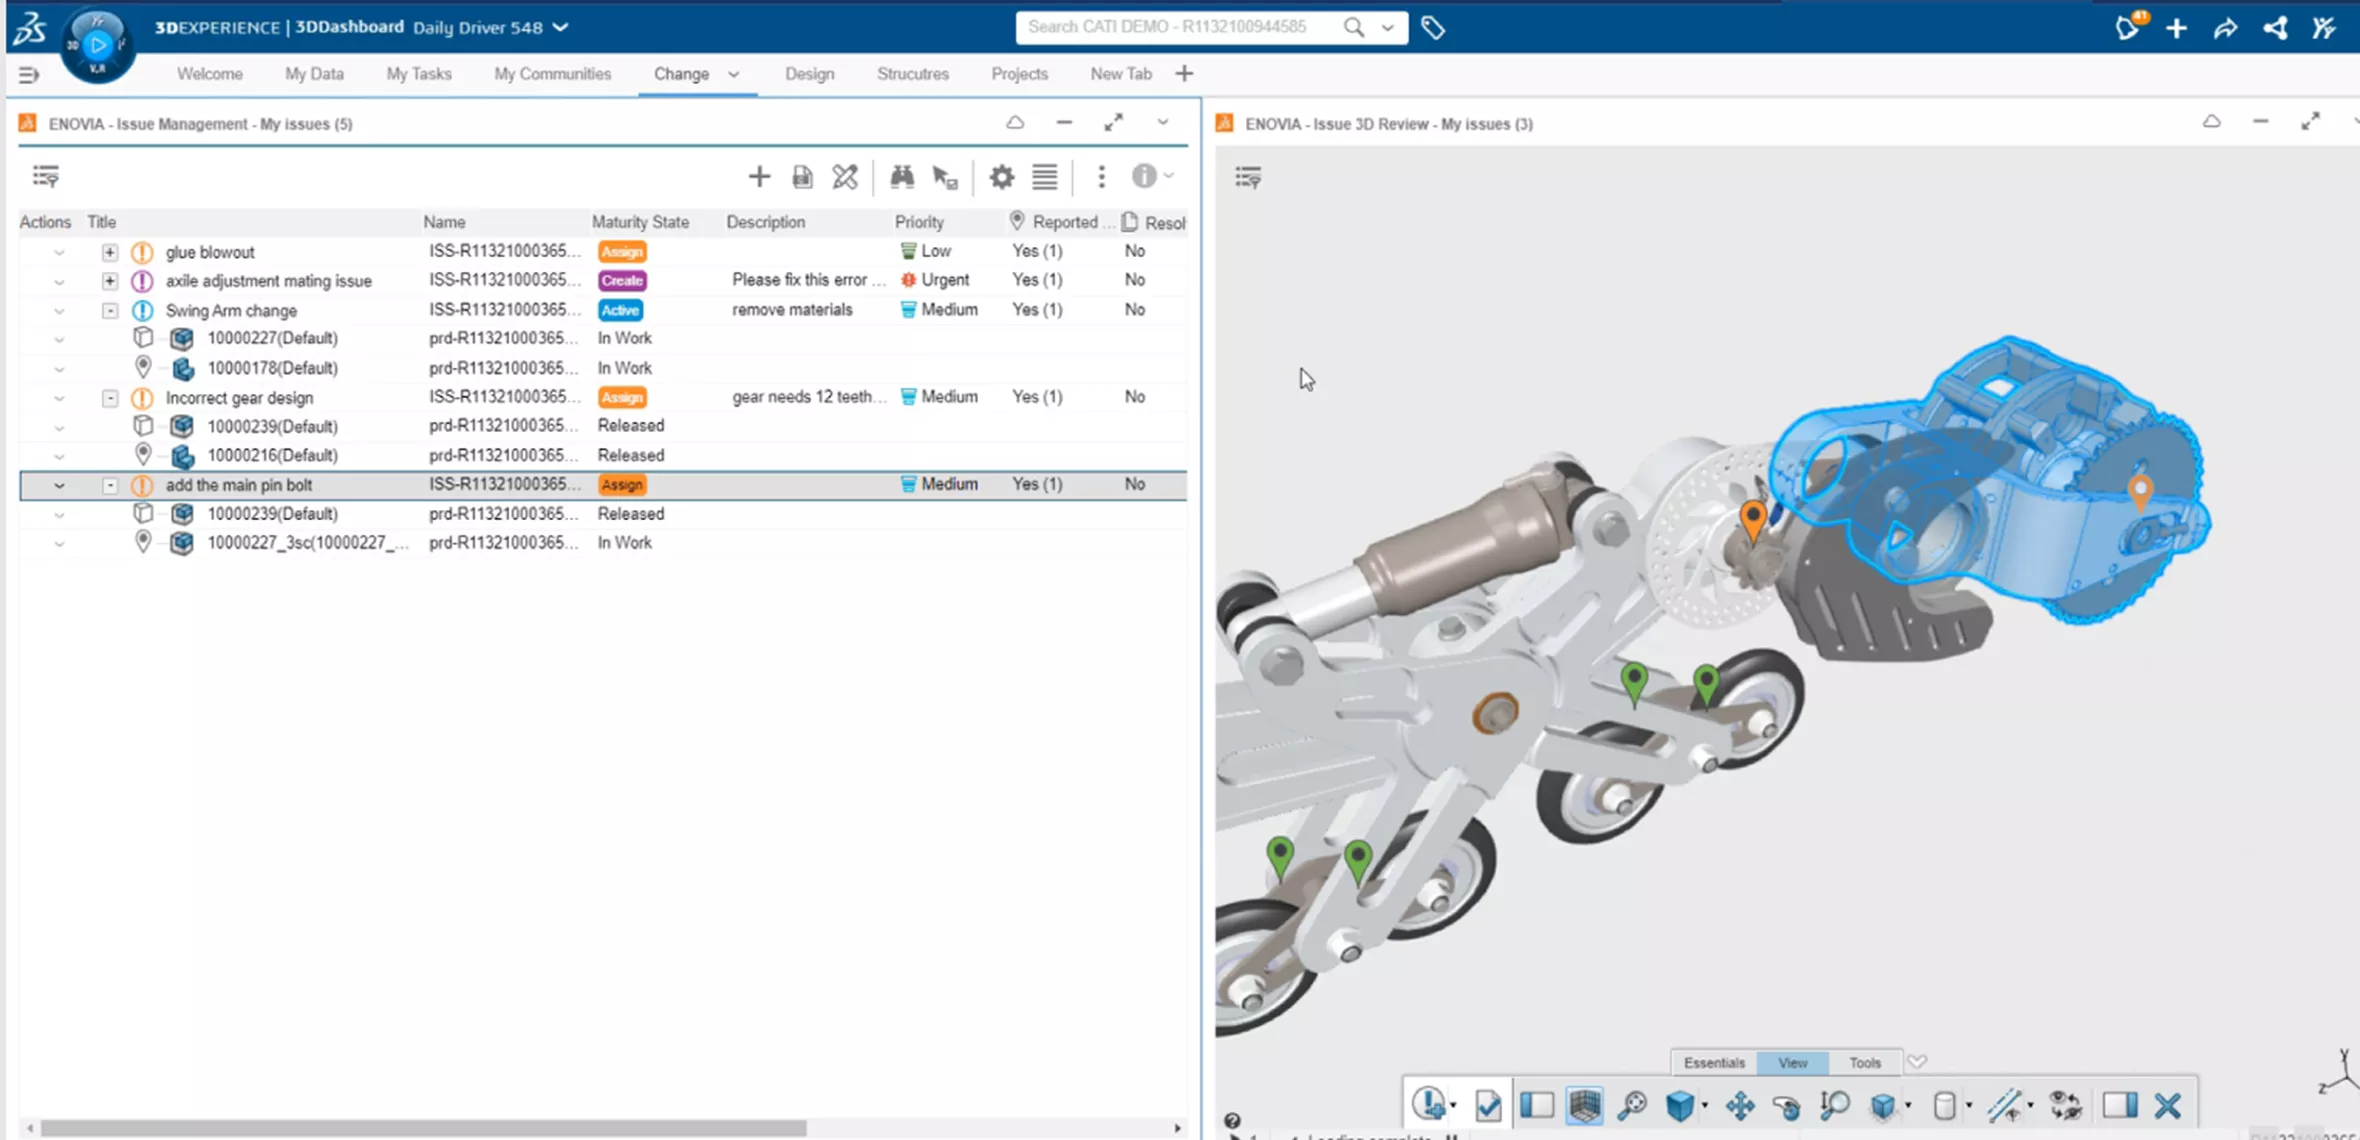
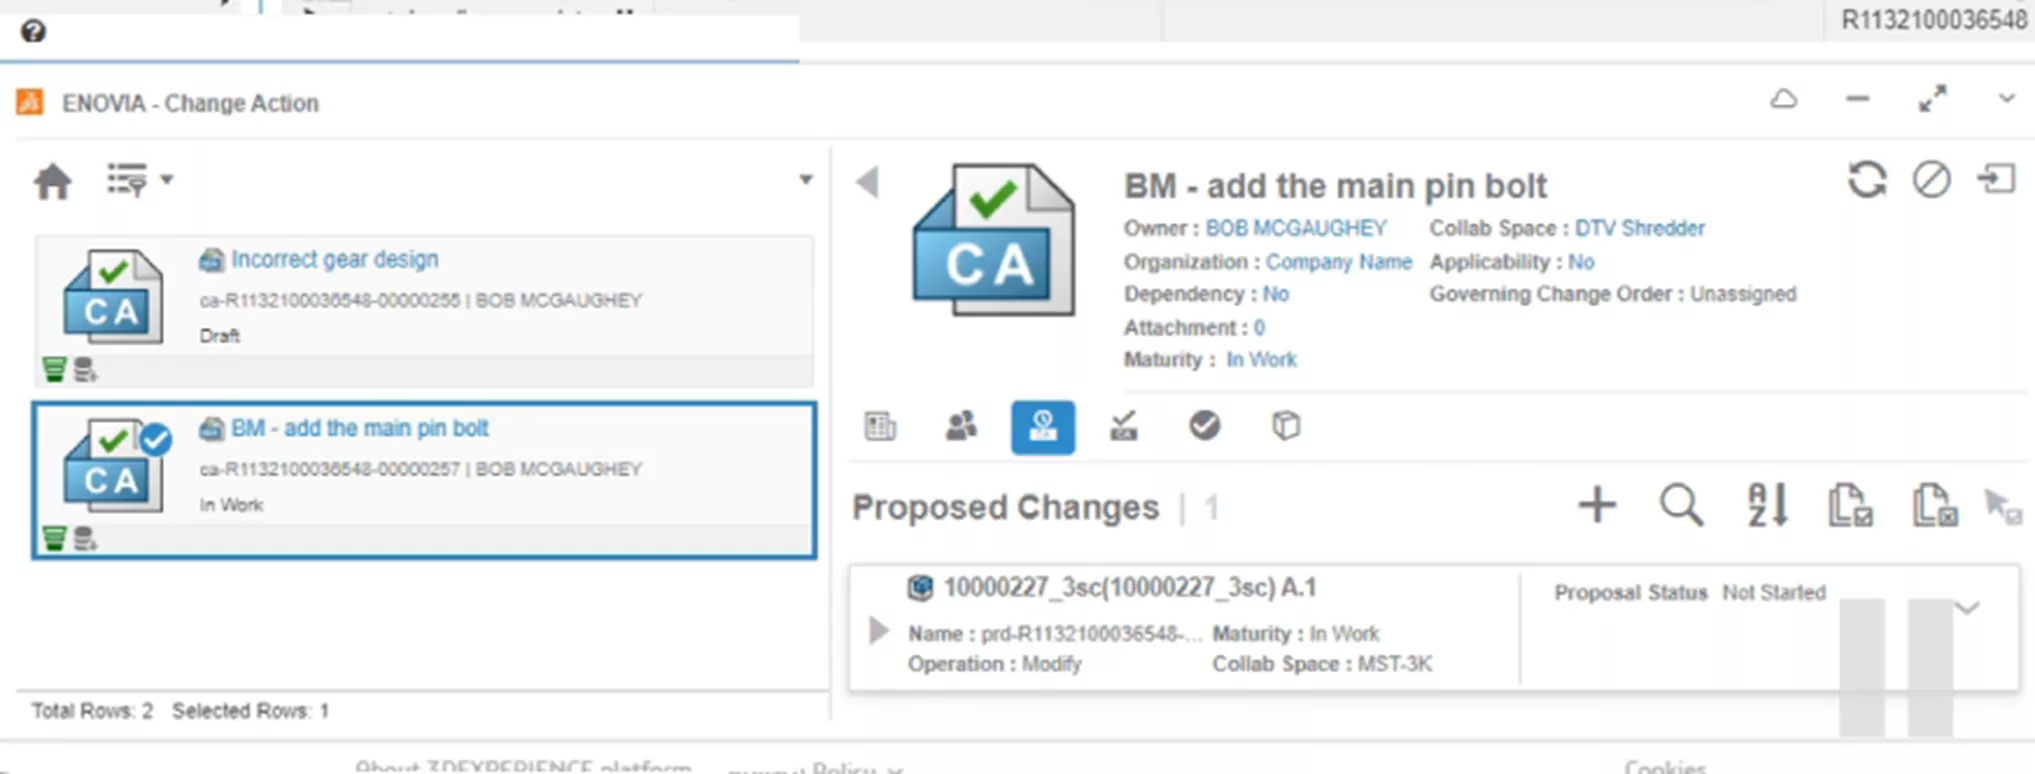
If it is then decided that a change is needed, someone (with the proper credentials) can generate a Change Action directly from an Issue. This Change Action then can create tasks for users (like dishing out who is going to be changing the CAD models), notify users of the pending change being made, and automatically create a New Revision for the file.
The act of creating new revisions and making changes can be as simple or as complex as you wish, which is great flexibility for many different companies!
GoEngineer is here to help you implement any of these processes to tailor the 3DEXPERIENCE Platform to your needs.
Related Articles
View 3DEXPERIENCE File History from SOLIDWORKS Task Pane
3DEXPERIENCE Red Line Markup: Simple & Advanced
How to Use Offline Mode in 3DEXPERIENCE SOLIDWORKS
3DEXPERIENCE 2-Factor Authentication Setup
About Randy Simmons
Randy Simmons in a Sr. 3DEXPERIENCE Specialist at GoEngineer.
Get our wide array of technical resources delivered right to your inbox.
Unsubscribe at any time.