3DEXPERIENCE Red Line Markup: Simple & Advanced
A Red Line Markup is an annotation on an image or view of your item that identifies a non-conformity that needs to be passed on to relevant individuals to be corrected. This could be an error, a design revision, or an area that needs to be reviewed. In the 3DEXPERIENCE Platform, there are two types of Red Line Markups: simple and advanced.
The Simple Red Line is commonly used when collaborating on a design through 3DSwym, as it is quick for generating markup images and has a direct connection to 3DSwym in its save options. This option provides limited annotation options for the item being marked up. This type of markup is created inside of 3DPlay.
The Advanced Red Line option provides additional annotation types to more accurately show what changes may need to be made. This markup option is available within the 3DMarkup application and is intended for formal reviews in the design process. The advantages of the advanced option include:
- Slides - to control annotation views and control the display of multiple annotation views.
- Formats - predefined formats of annotation views to keep information uniform.
- More detailed annotations, such as circles, arrows, and text with flyouts.
- The ability to measure coordinates, area, angles, distance, etc., and save the measurement in the annotation views.
- 3D and 2D compare - visual comparison of two 3D/2D objects.
- The ability to generate an issue form, or change action from the Markup app.
- All markup information is saved to a unique item connected to the original record with all document control and lifecycle operations available.
Creating a Simple Red Line Markup
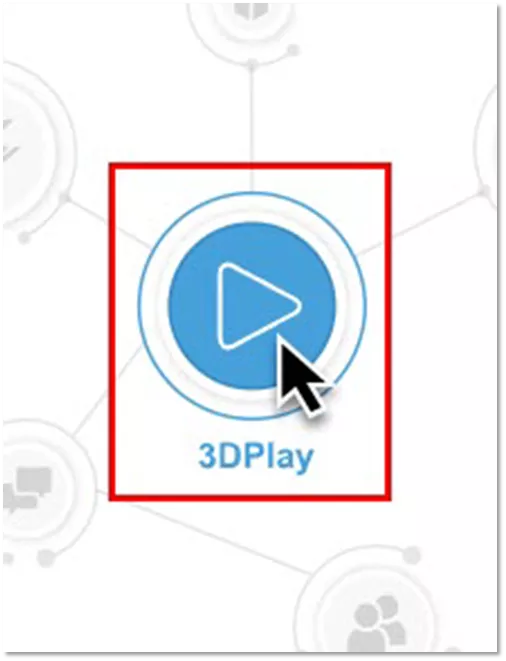
To start a Red Line, search for the item you want to apply the annotations to, right-click the item, and select Preview.

Once you have selected preview, 3DPlay will open in the task pane. Select the play button in the center to load your object.
Inside 3DPlay are a couple of options for creating annotations on a model, notably the Sketch and Text annotation commands located under the Tools tab.
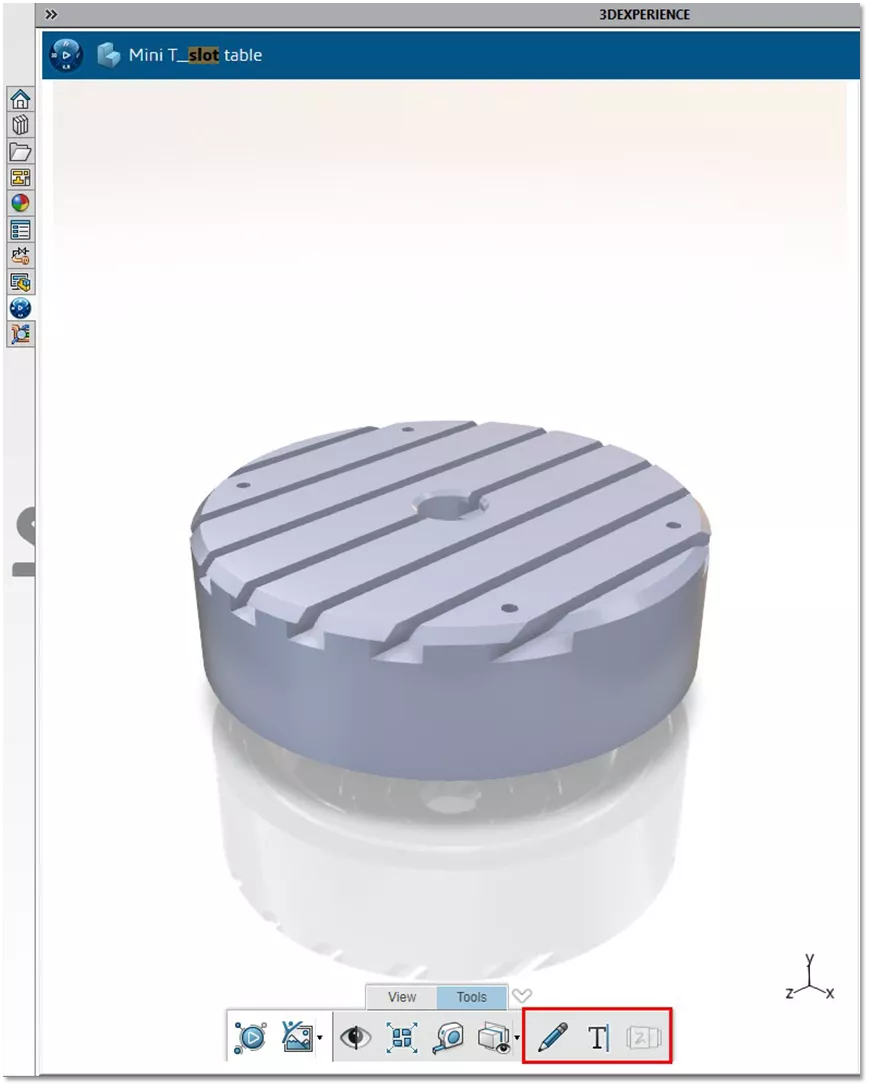
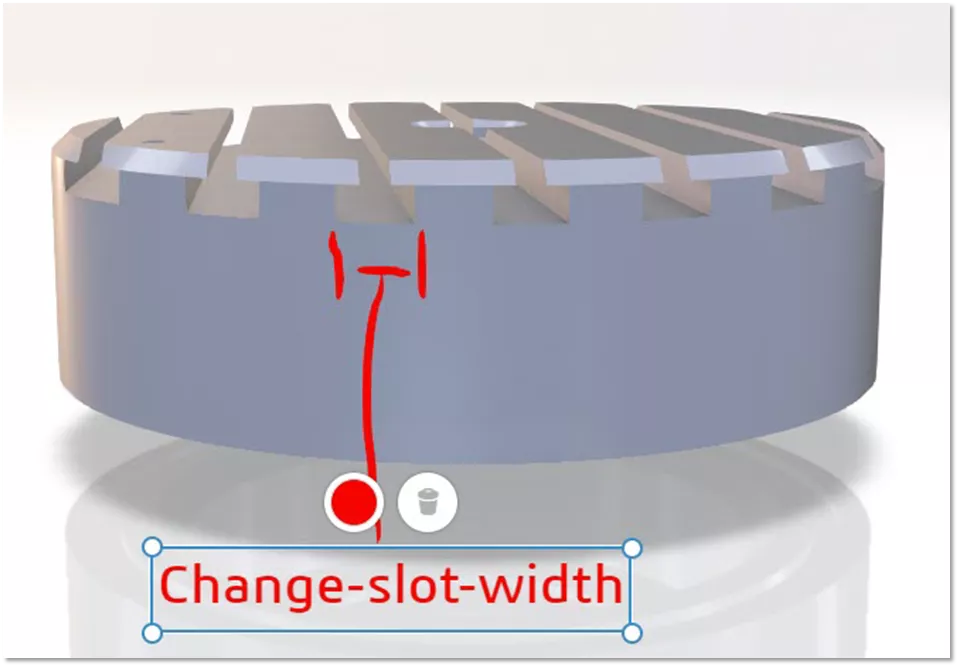
The Sketch annotation allows you to draw in 3D space relative to a view direction inside or around the object. The Text annotation does the same but with text box controls.
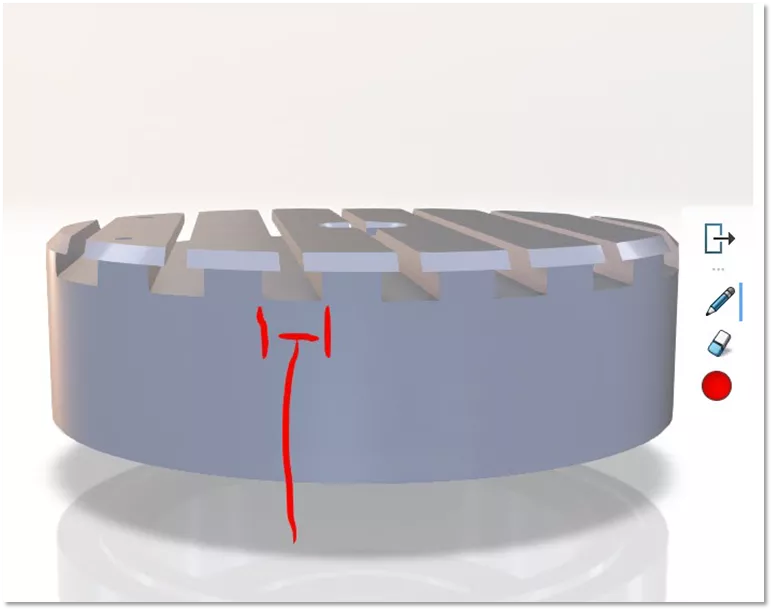
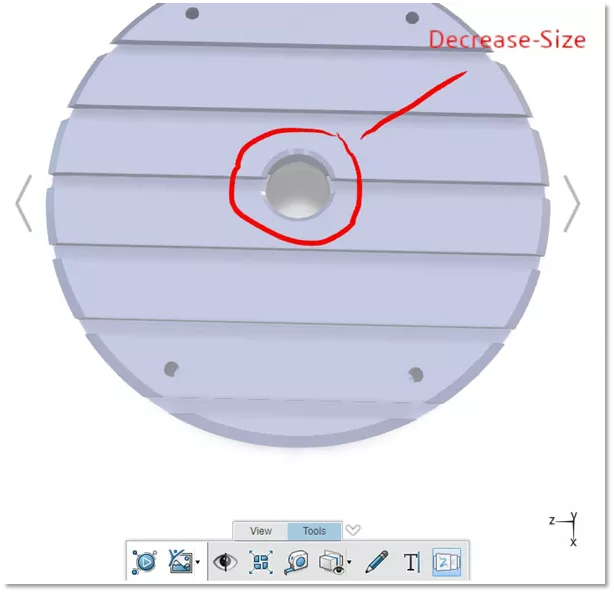
Once views have been created, select the Annotation Tour button on the toolbar and use the left and right arrows on either side of your 3D object to move between markup annotations.
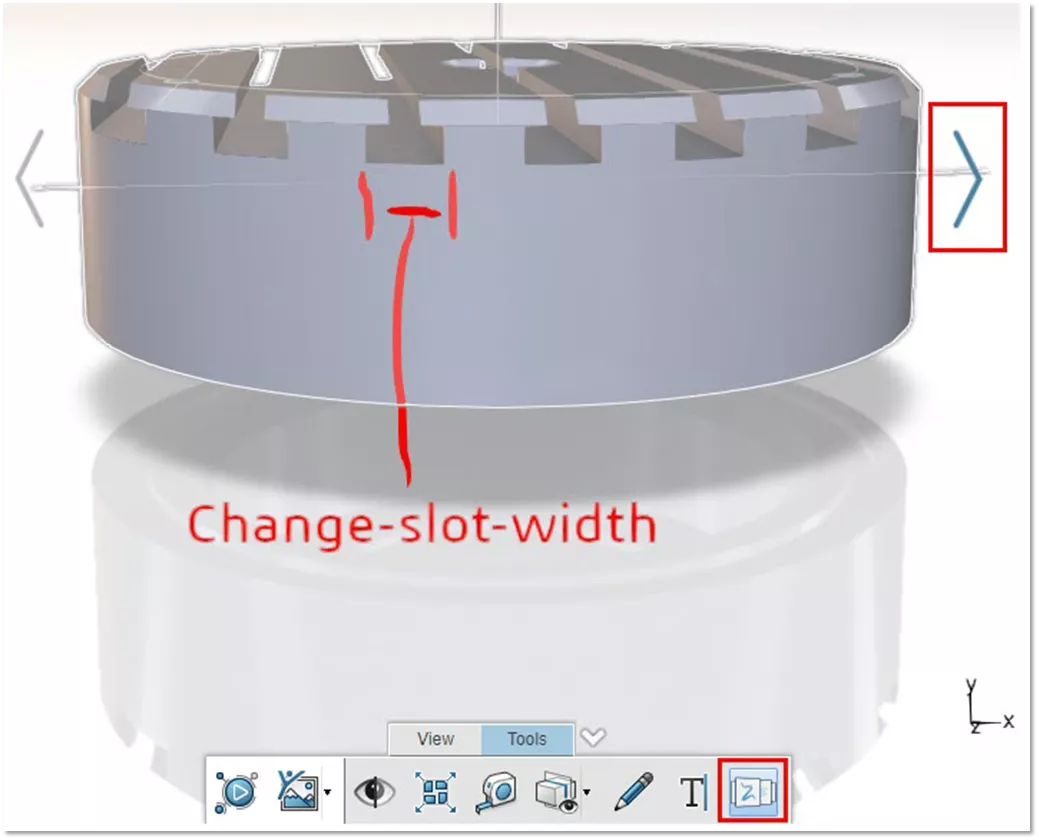
This option will automatically switch you to the view in which the other annotations were drawn. For example, after selecting the arrow, the screen shifts to the following view:
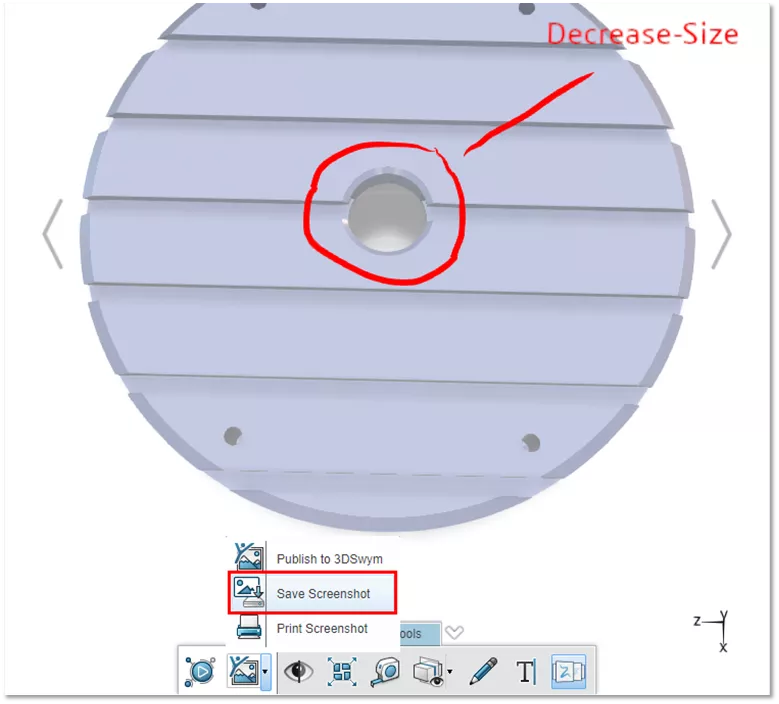
Note: The markup created in the simple method will not be saved into the item unless you select the option to post to 3DSwym, otherwise you will need to select Save Screenshot from the toolbar (shown below). This option will save your current view of the model.
Once the screenshot is saved, you can then attach it to a task to associate it with the item.
Advanced Red Line Markup
The Advanced method of creating a Red Line Markup has advantages over the simple method, and in most applications should be used over the simple method. One advantage of the Advanced method is that it saves the information in a markup item that is related to the original item, which can be searched, assigned to tasks, or viewed in the relations of the main item. The advanced method also includes more annotation tools than the simple method.
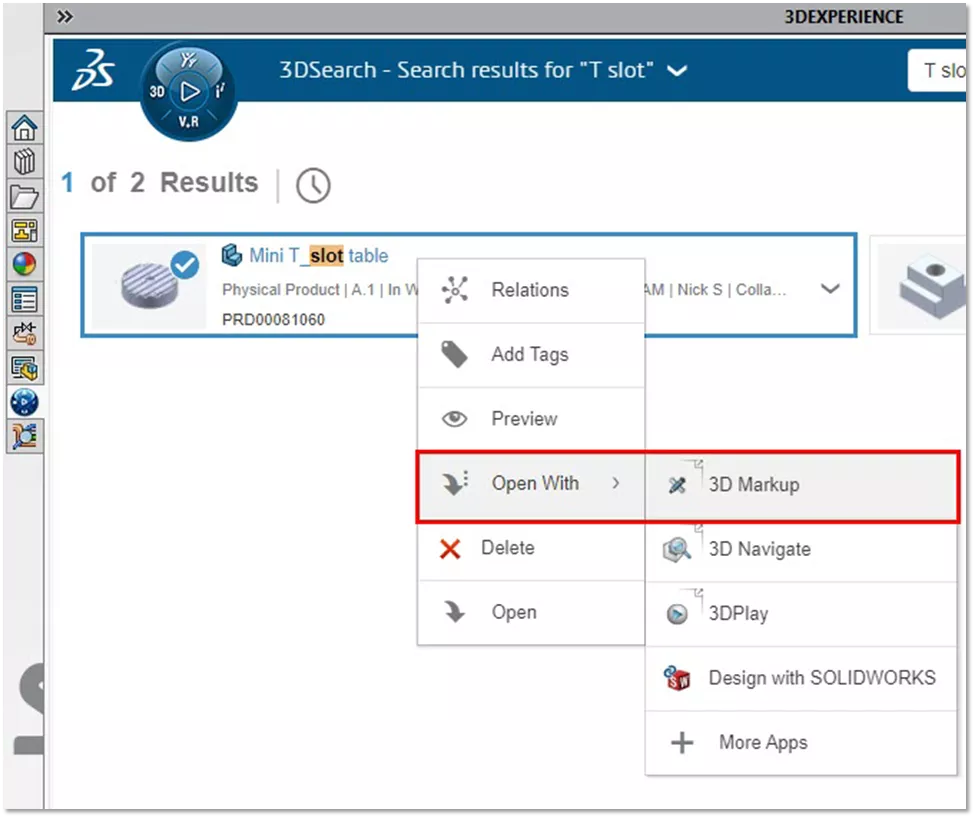
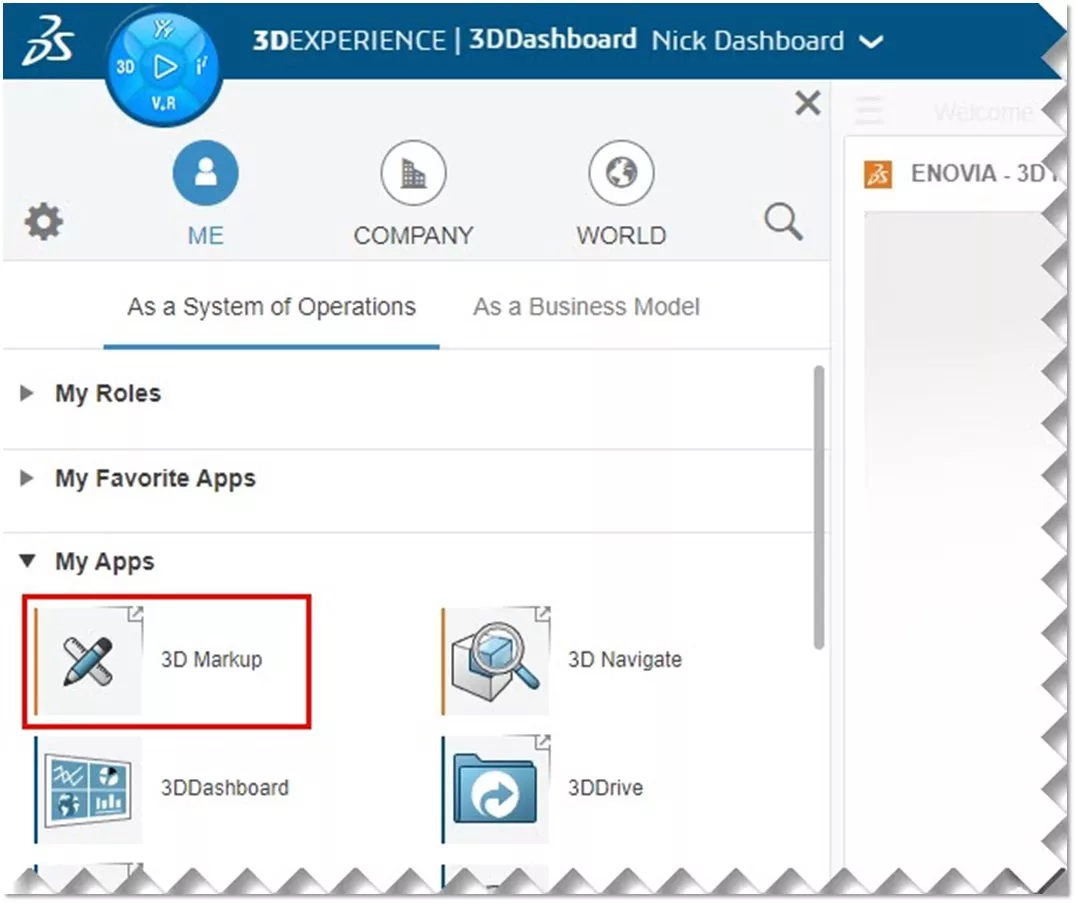
To create the advanced Red Line Markup, search for the item, right-click it, select Open With, and then 3D Markup. This will launch 3DEXPERIENCE in a browser window, as this method cannot be done in the right task pane of SOLIDWORKS. Alternatively, within 3DEXPERIENCE, in your browser, select the compass and choose the 3D Markup App.
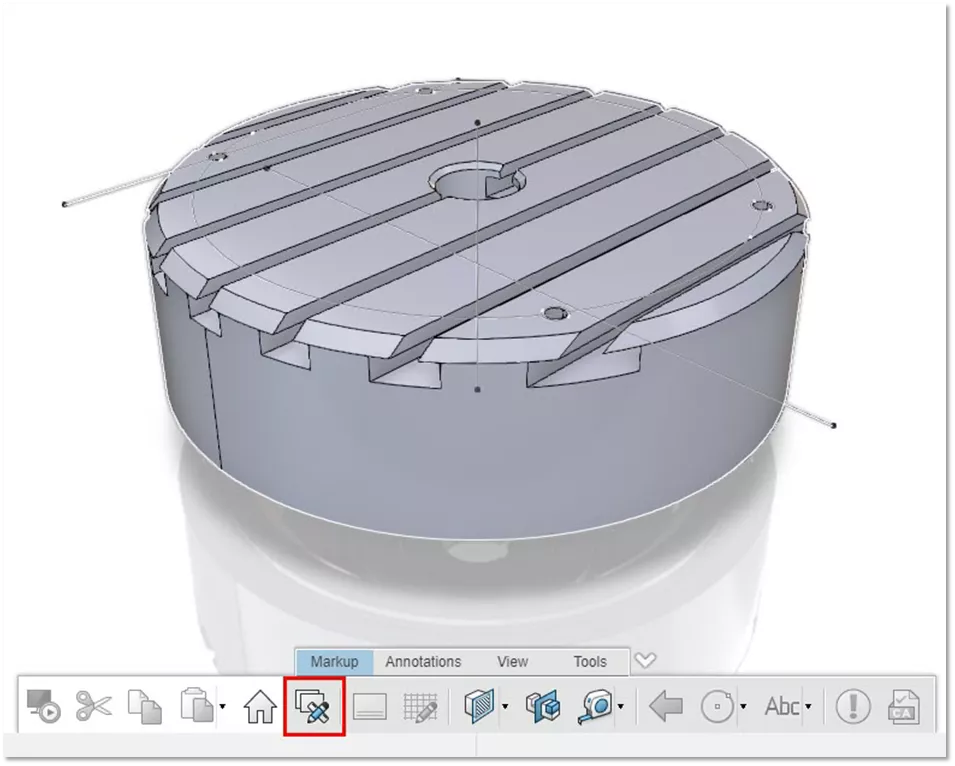
Inside the 3D Markup tool on the 3DEXPERIENCE Platform, you will see a view of your object and a toolbar displaying many more options than the Simple method. To start adding annotations, select the Markup button on the toolbar.
When this option is selected, you will be prompted to give a title to your markup and apply a description of what it is for.

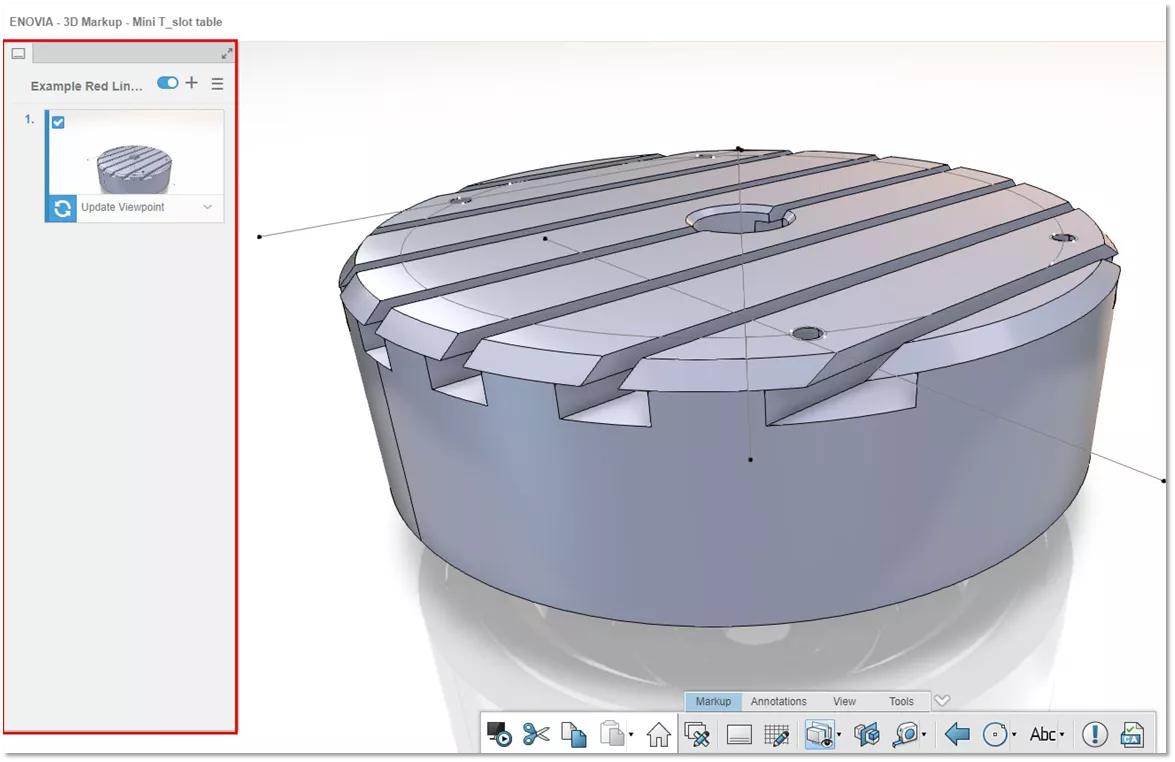
When selecting this option, a pane on the left will open showing your saved annotation views. From here you can enable, disable, create, delete, or update views.
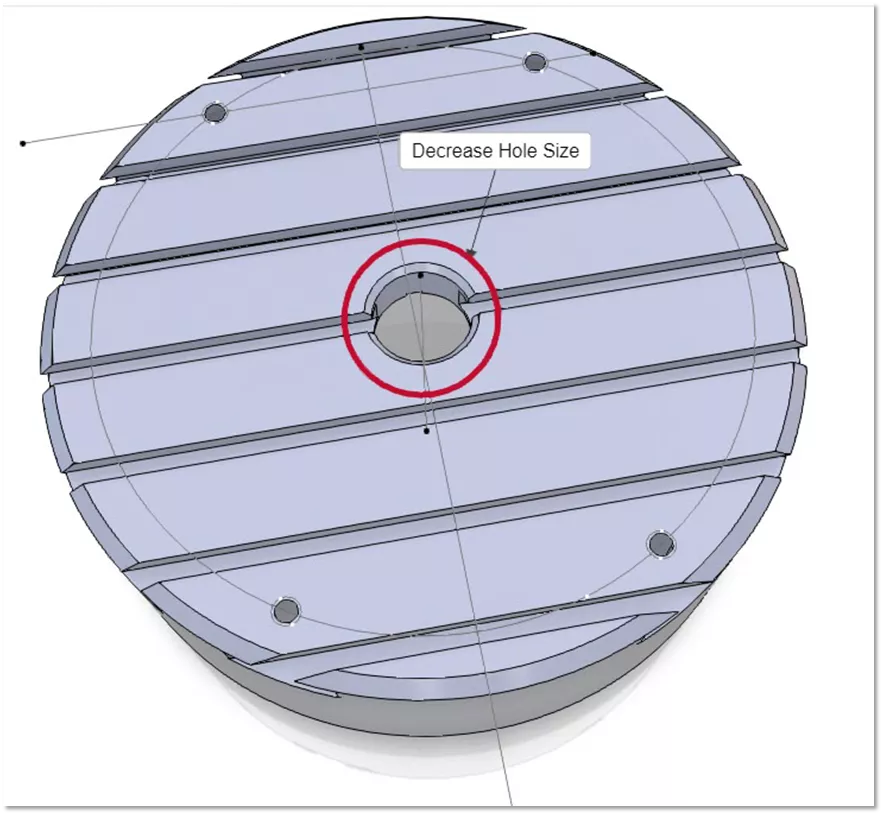
Like the simple method, there are several annotation tools available to apply 3D annotations to an object. For example, use the Circle and Sketch tool to reference an area that needs to be changed.
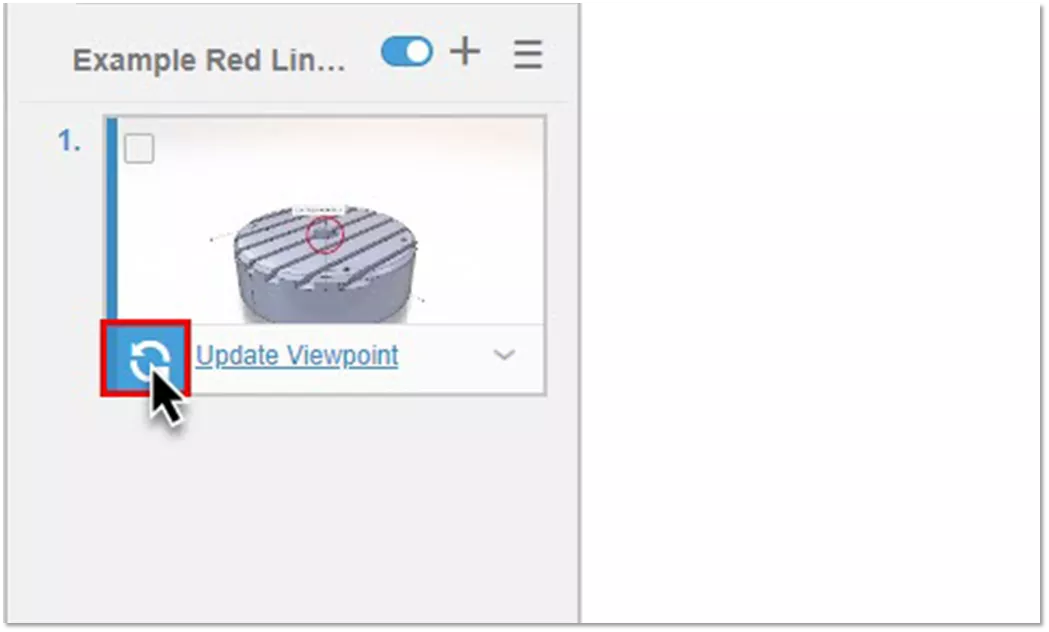
Once you have attached your annotations to update the existing view select the button that appears in the bottom left of that annotation view.
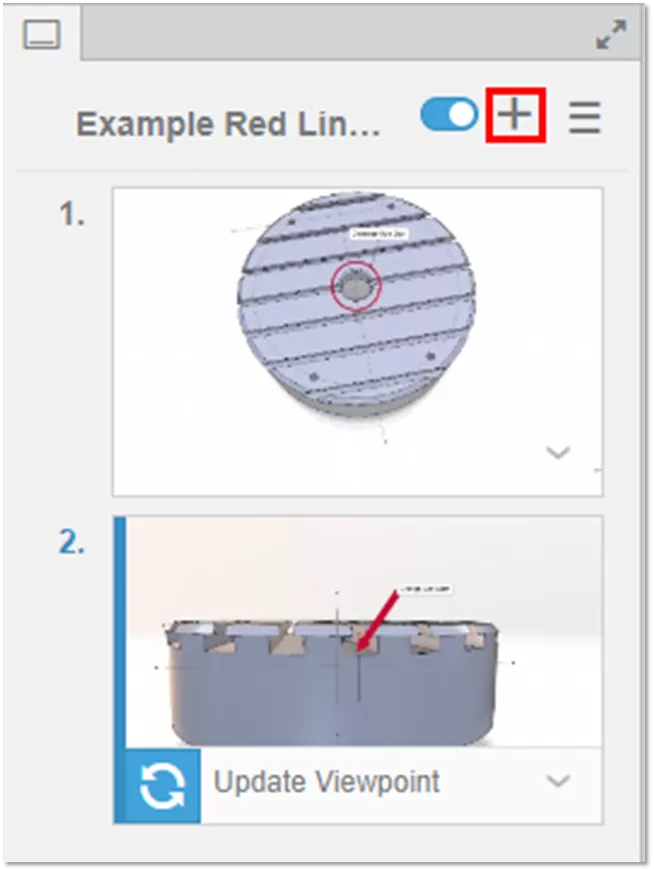
To create a new view to place annotations into, click the plus button and then select the newly created view. To delete the view, select the drop-down arrow in the bottom right of the view thumbnail.
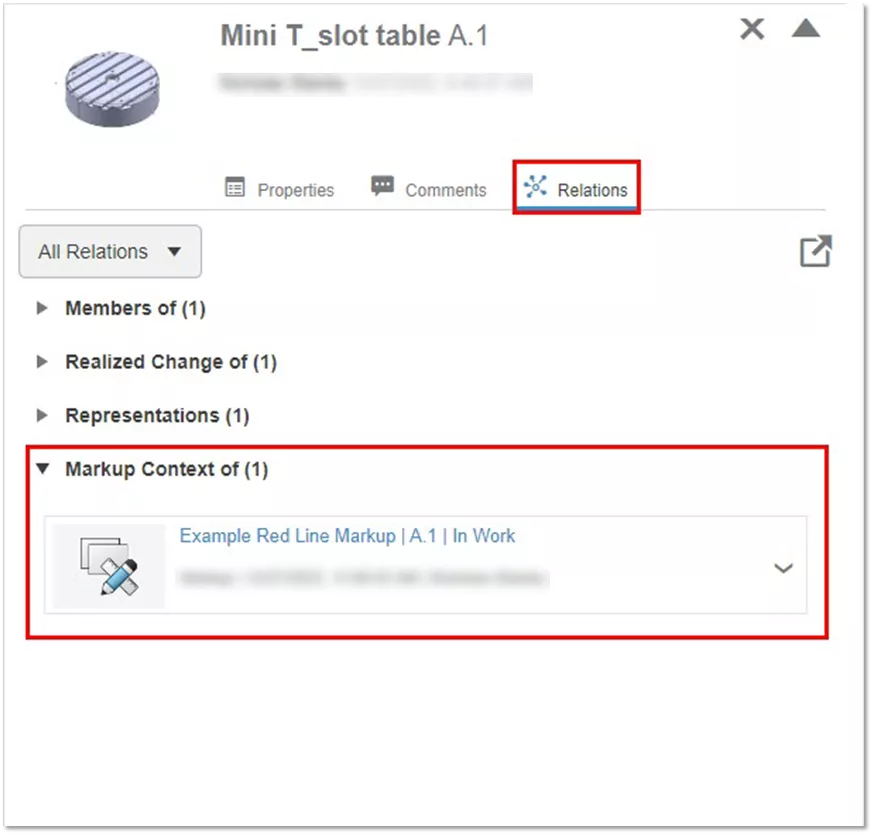
All changes made to the views while editing the markup are saved into the markup item. The markup item, after having been given a title and a description, will show as associated with the main item, in the main items relations.
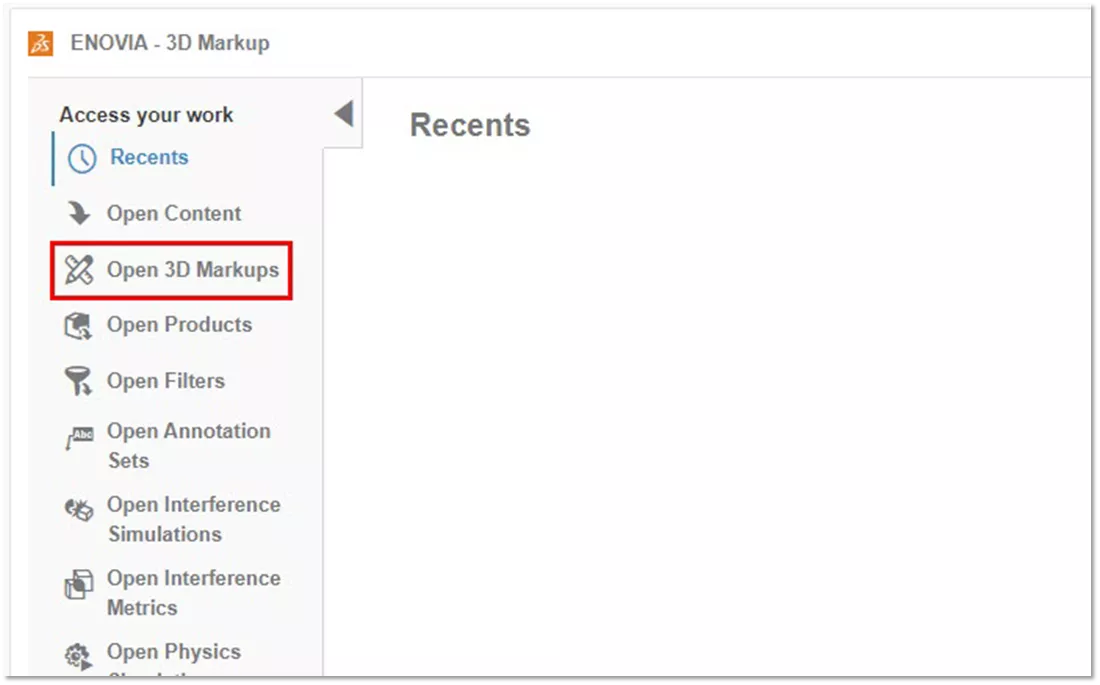
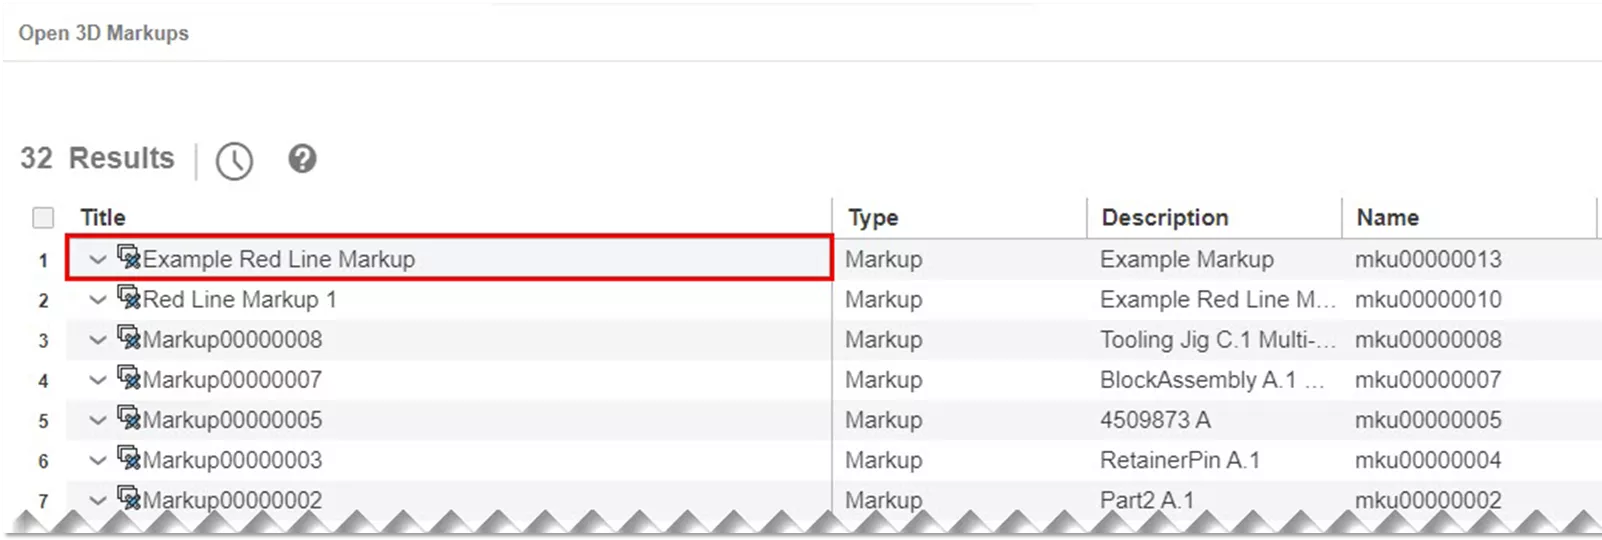
In addition to being found in the relations of the main item, you can also search for the markup item inside the platform, whether through the advanced search or the search within an app. For example, when opening the 3DMarkup app you have the option to search for all markup items.
This is a unique item inside of the platform meaning all document control and lifecycle operations are available. It can be used in conjunction with tasks, issues, and change approvals to name a few.
In this example, I showed marking up a part item, but there are many other item types that can be marked up, including Drawings, Assemblies, and PDF items.
I hope you found this overview of Red Line Markups in 3DEXPERIENCE helpful. Check out more tips and tricks below. Additionally, join the GoEngineer Community to participate in the conversation, create forum posts, and answer questions from other 3DEXPERIENCE users.
Want to take your skills to the next level? Enroll in one of our many 3DEXPERIENCE training courses. Both online and in-person classes are available.
Related Articles
How to Use Offline Mode in 3DEXPERIENCE SOLIDWORKS
3DEXPERIENCE 2-Factor Authentication Setup
3DEXPERIENCE Platform History Tab to View File History
Creating a 3DEXPERIENCE Dashboard: Step-by-Step Guide
![]()
About GoEngineer
GoEngineer delivers software, technology, and expertise that enable companies to unlock design innovation and deliver better products faster. With more than 40 years of experience and tens of thousands of customers in high tech, medical, machine design, energy and other industries, GoEngineer provides best-in-class design solutions from SOLIDWORKS CAD, Stratasys 3D printing, Creaform & Artec 3D scanning, CAMWorks, PLM, and more
Get our wide array of technical resources delivered right to your inbox.
Unsubscribe at any time.