How to Add Users and Assign Training in the GoEngineer Customer Portal
The GoEngineer Customer Portal is a great tool for managing users, training, assets, and other resources that GoEngineer has to offer. Two of the strongest assets, are the ability to manage users and then assign/access training from either your success plan or the classes you have purchased. This article is a guide for users with Professional Admin-level access (typically CAD admin or IT) to utilize these assets fully. Let's start with how to add users to the customer portal.
Adding Users to the Customer Portal
For users that have Professional Admin Access, the first step is to log into the Customer portal. Once logged in, you are presented with the home landing page (shown below).
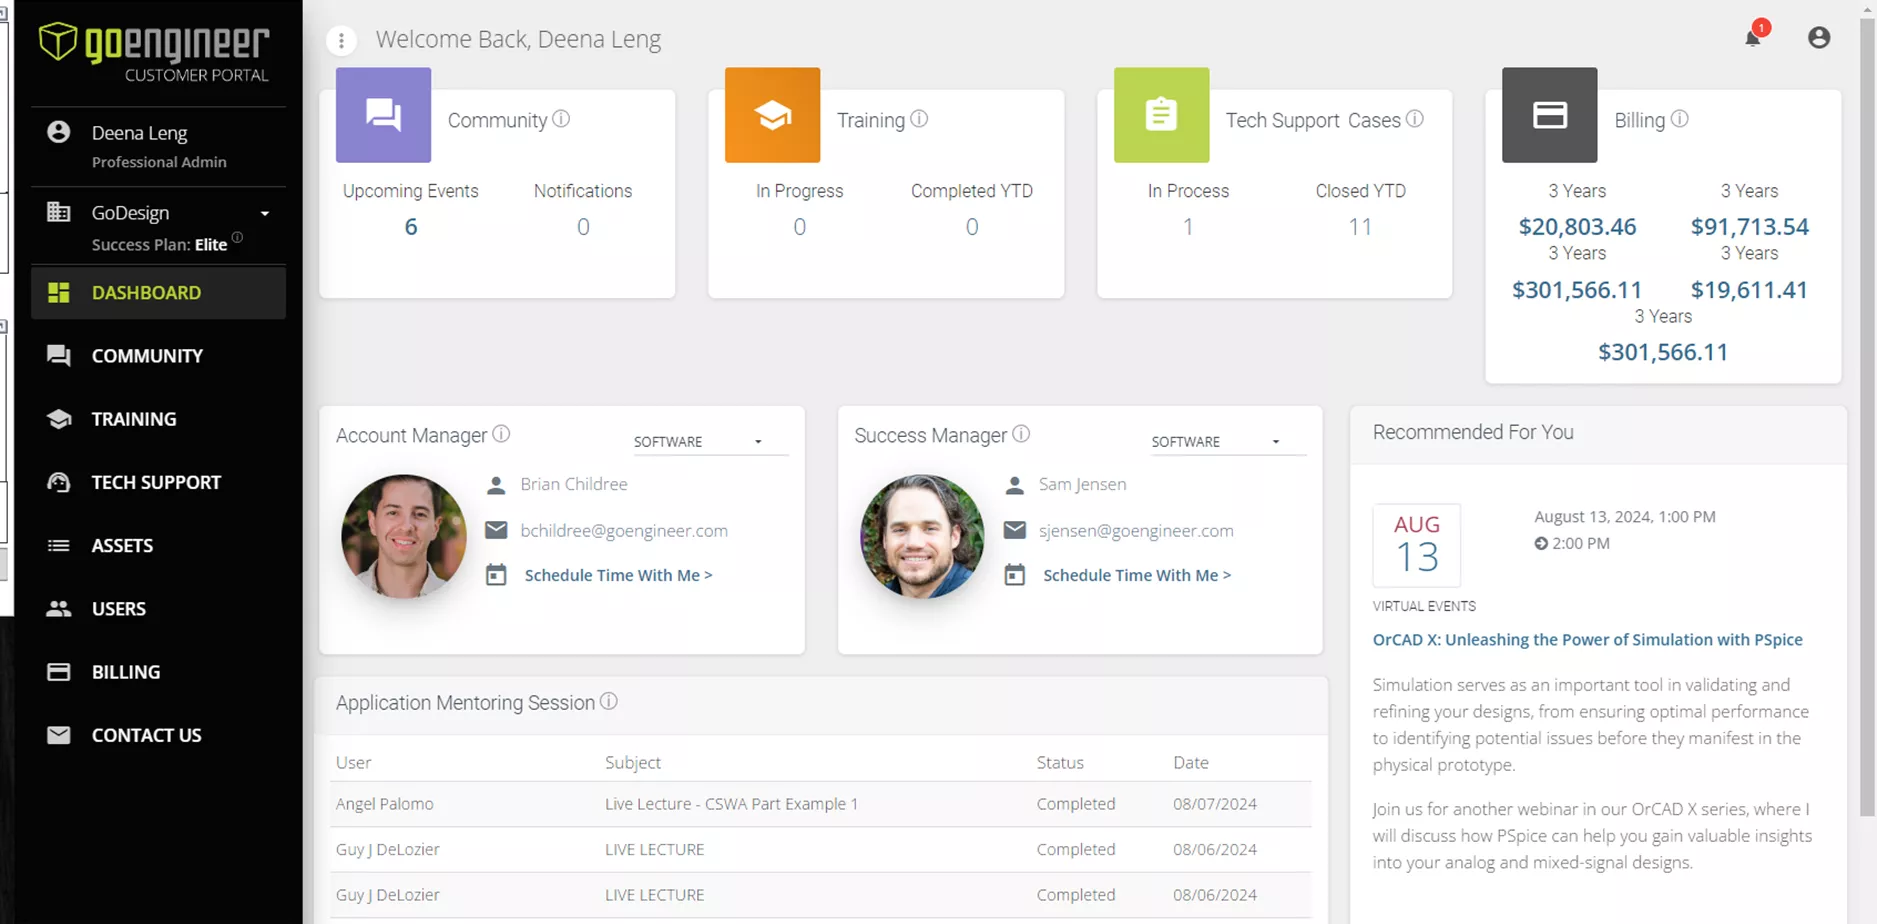
Figure 1: GoEngineer Customer Portal Landing Page
This landing page includes links to the different assets previously mentioned. Start by going to the Users tab located on the left-most menu.
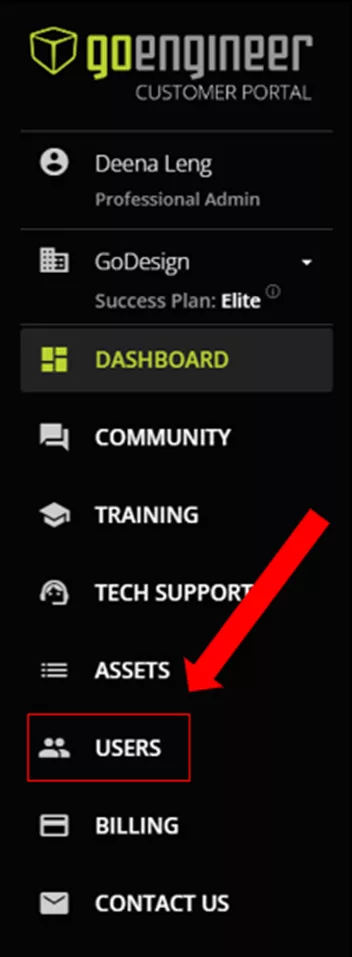
Figure 2: Users Tab
The Users tab will take you to the Users page. Here you will see all current users and other bits of information.
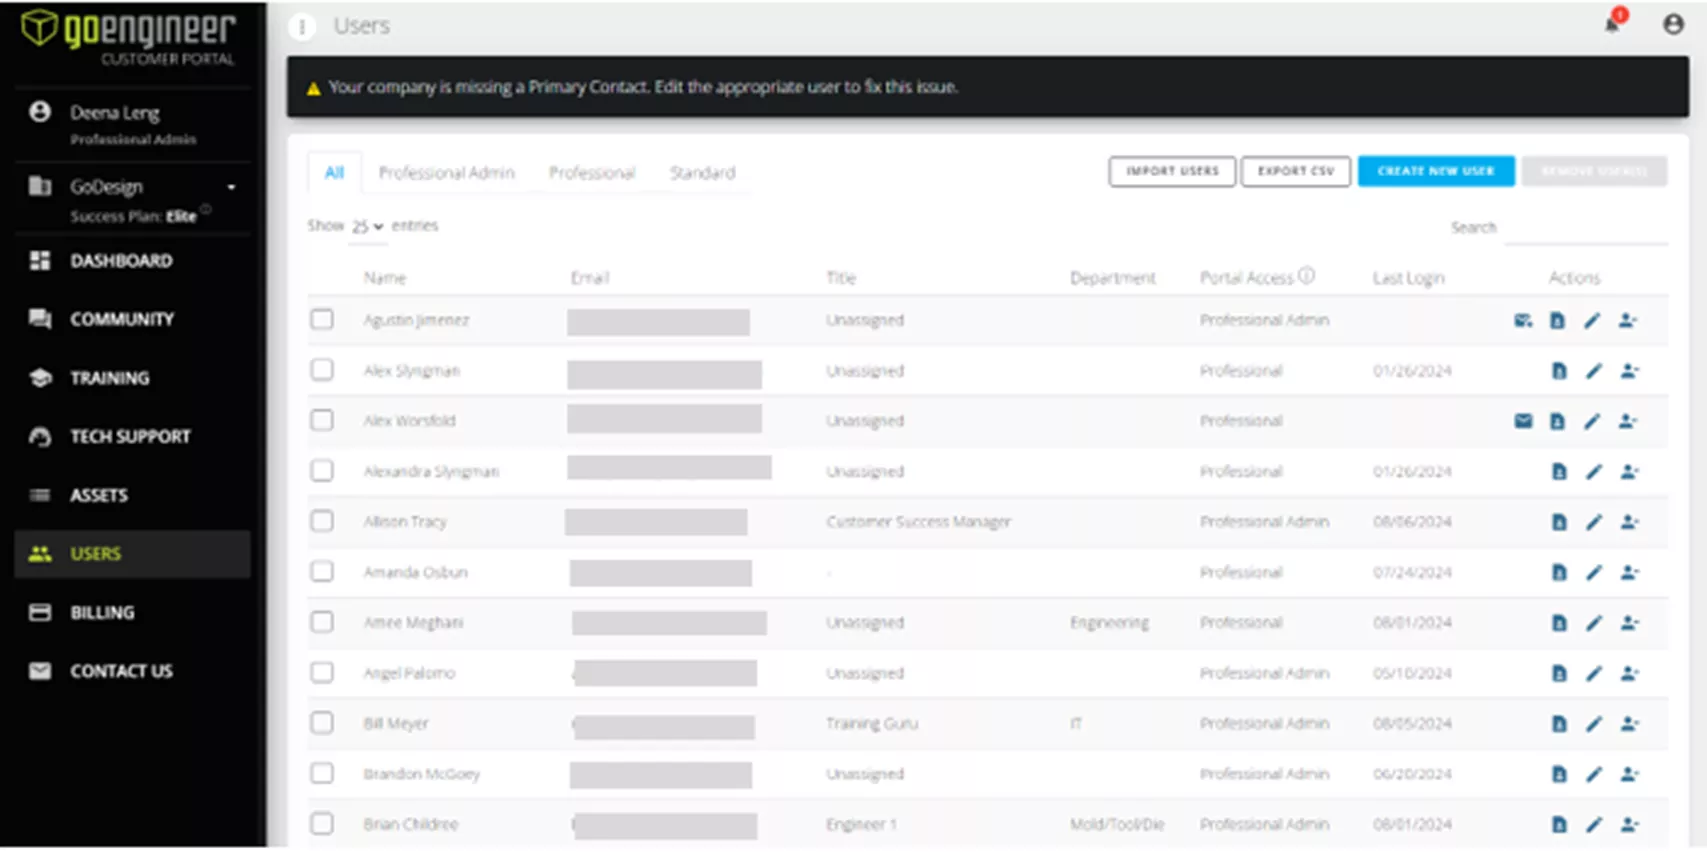
Figure 3: Users Page
In the top left-hand side of the Users page is a filtering tool. This filter allows you to filter between the different levels of user access: Standard, Professional, and Professional Admin.
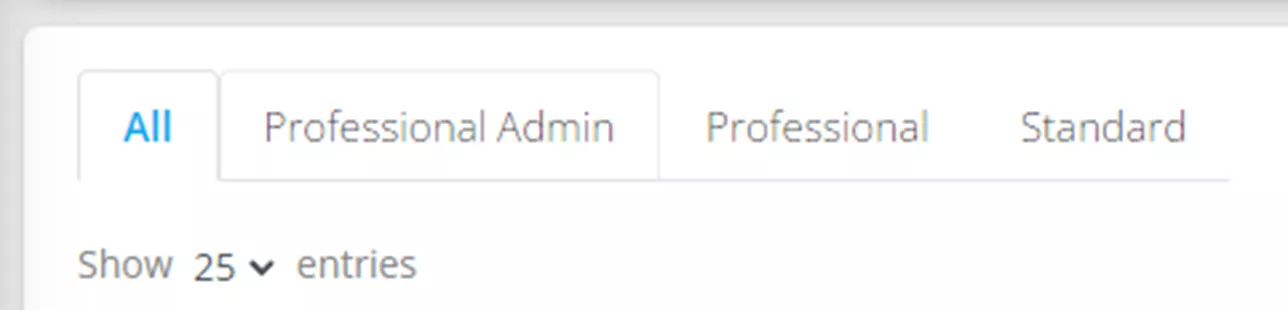
Figure 4: Filter Users Access
Standard-level users are non-SOLIDWORKS users. They can participate in the GoEngineer Community forum to ask questions or see other posts regarding various topics. These users cannot view or edit assets, training, or other company information.
Professional users are SOLIDWORKS users. They can access the Community like Standard users but can also purchase courses for themselves. Professional users can access and complete their training courses and view their training records and certificates of completion. Additionally, they can view the last 4 digits of serial numbers and view/participate in their support cases.
Finally, Professional Admin users are managers, CAD Admins, and Purchasing Departments. They have the same Community and training access as Standard and Professional users but can perform these admin-level actions:
- Purchase courses for any user
- View all training records and certificates of completion
- View complete serial numbers
- View/participate in all user support cases
- Purchase new licenses/assets
- Renew subscriptions
- Manage Users
For Professional Admin-level users, we recommend adding members from certain departments.
Accounts Payable - They can then access your current assets and make necessary purchases.
Engineering Manager/CAD Admin - They can then help manage current users and have ready access to serial numbers for reference/installation purposes.
IT - They can then install media and access serial numbers.
For Engineering Managers and IT personnel, having two members for each group is ideal. This allows for redundancy when the main contact is unavailable.
There are two ways to add users: Import Users or Create New User. Both of which are located on the top right-hand side of the Users page.

Figure 5: Adding Users
Create New Users is the simplest way to add a single user. When you select this option, a pop-up will appear.
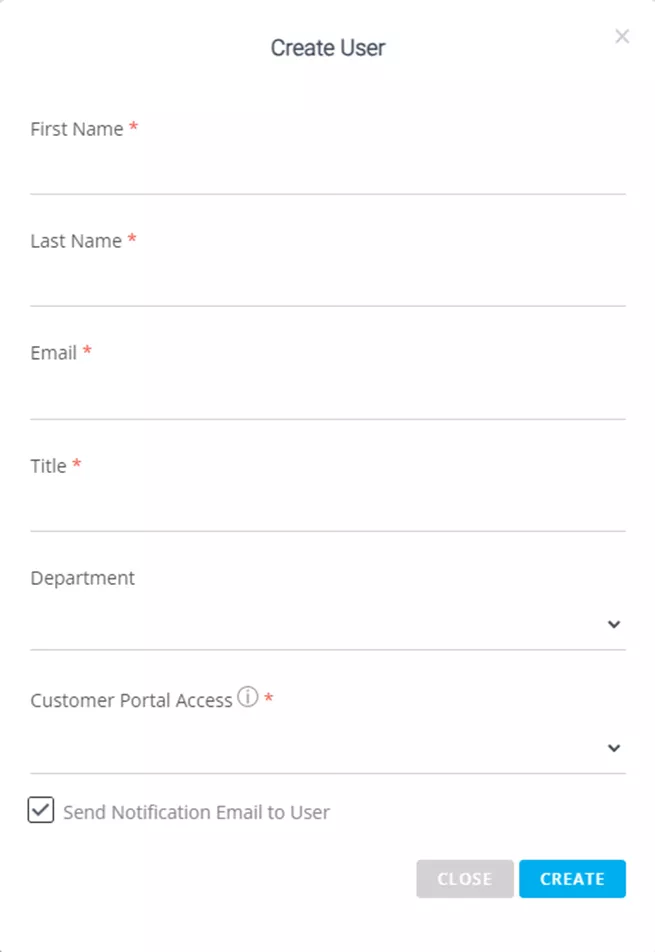
Figure 6: Create User
Add the user's first and last name, email, job title, department, and the level of access they should have. If you'd like to send a notification email to the user to alert them that they have been added to the system, check the checkbox at the bottom. When finished, hit Create.
Use the Import Users option to add several users. When selecting this option, a pop-up appears providing the following information:
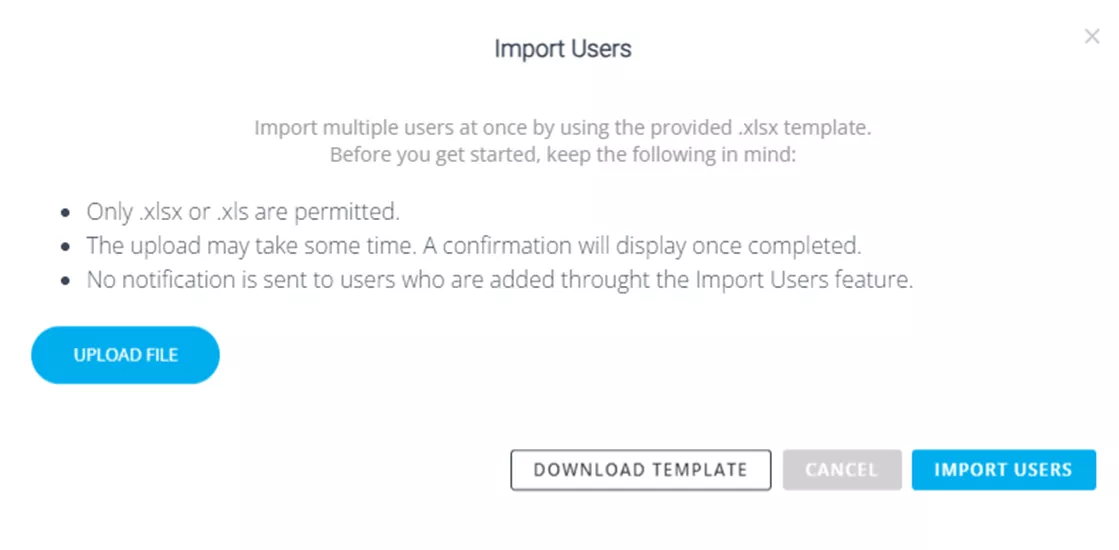
Figure 7: Import Users
Download the template, fill out the information, and upload it.
Once the process is finished and you receive the notification, every user listed will appear on the Users page.
Assigning and Accessing Training
Now that the users are added, you can assign them training courses and access classes. To do so, go to the Training tab on the left.
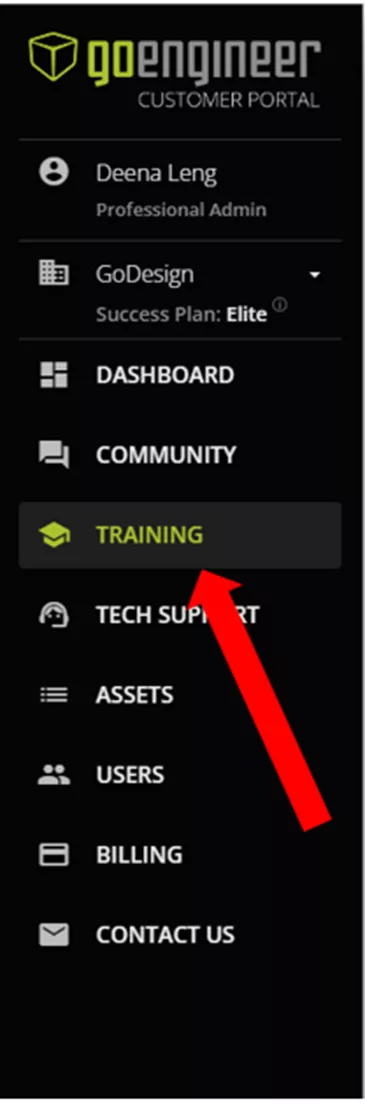
Figure 8: Training Tab
If you already have access to training plans, a pop-up will appear with instructions for how to access and assign users.
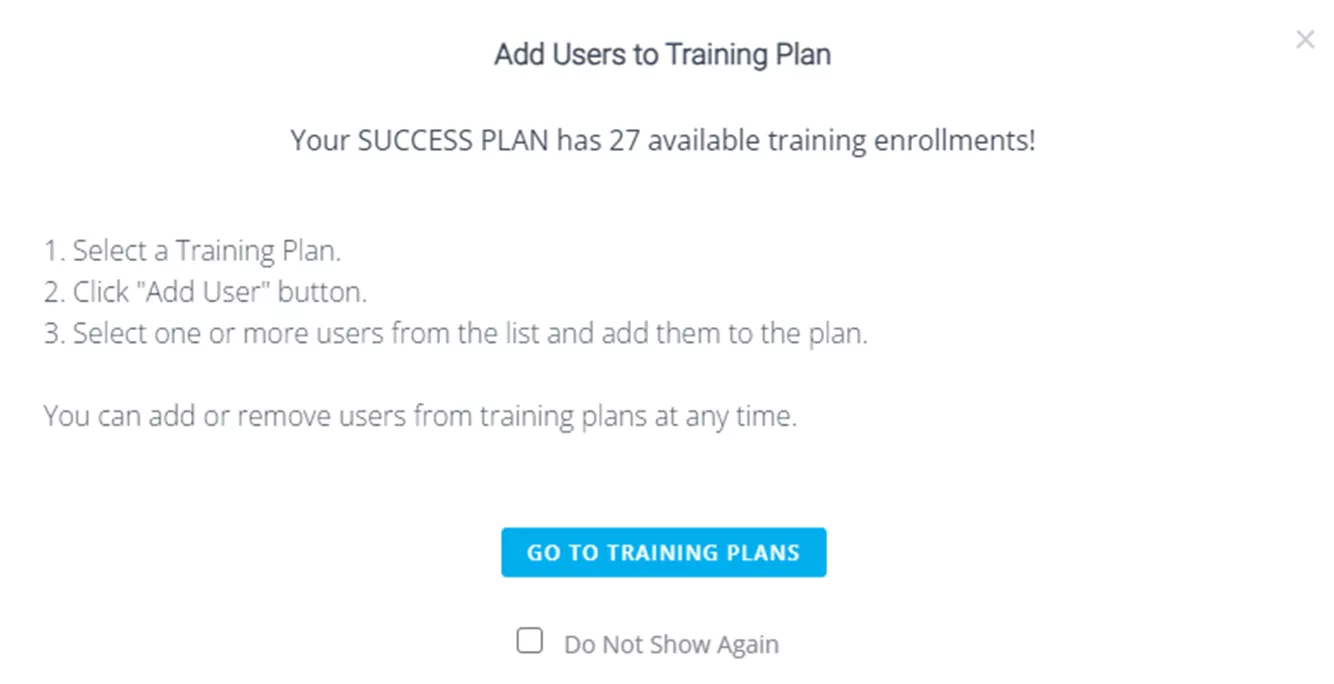
Figure 9: Add Users to Training Plan
Click the Go To Training Plans button to go directly to the Training Plans tab, but in this example, we will close this tab using the “x”. Doing this takes us to the My Training tab.
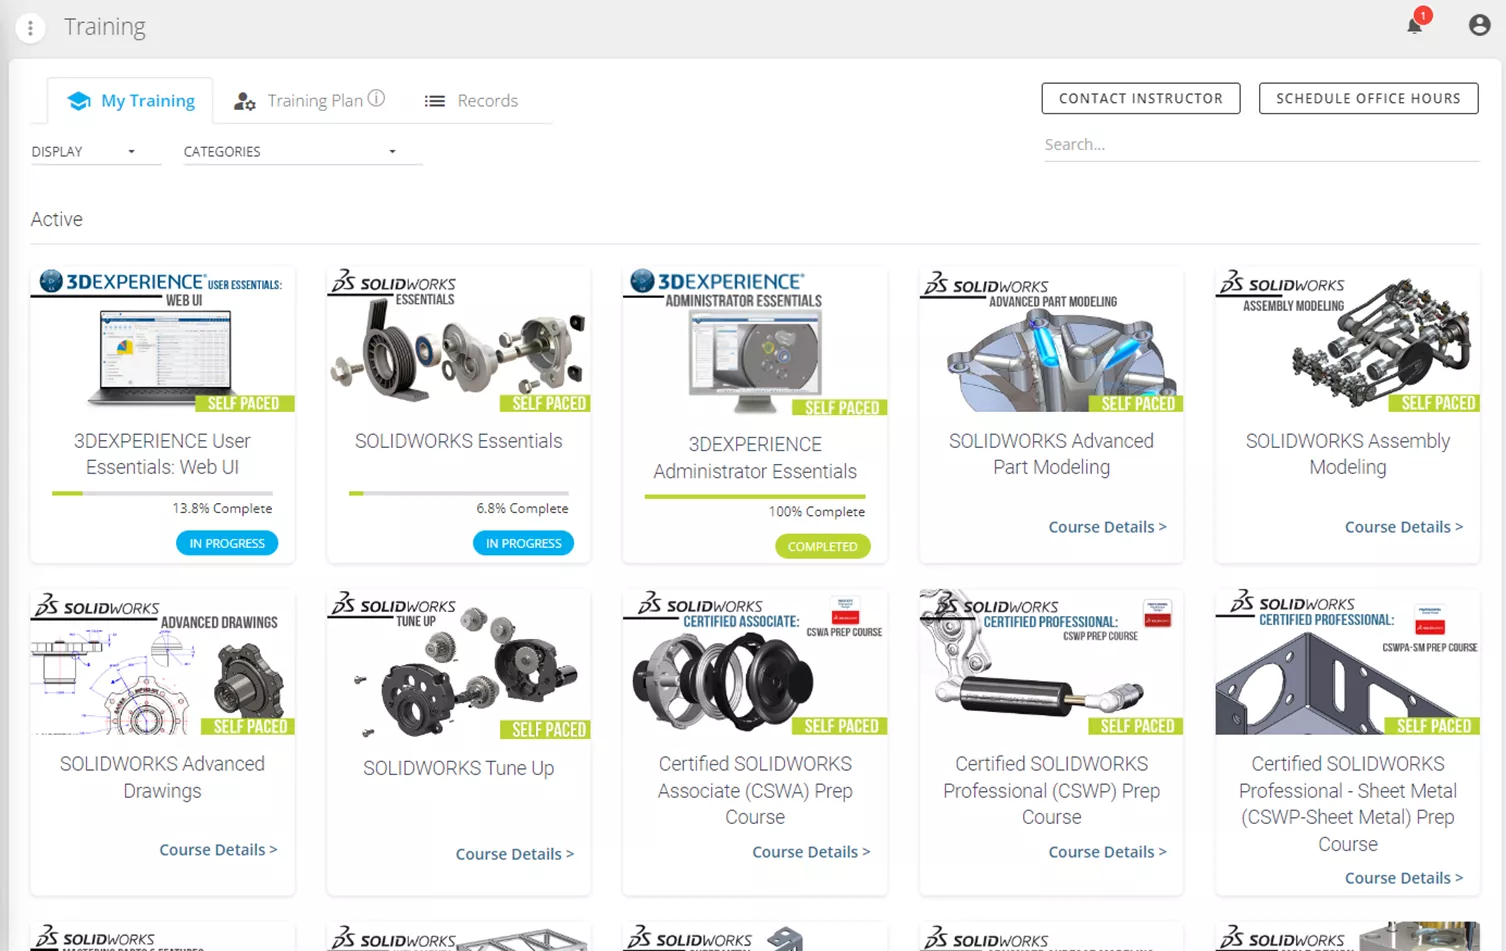
Figure 10: My Training
The My Training tab displays all of the training that has been assigned to this user and the percentage completed. This is also where you access all training courses.
When you select a training course, it will open a new window for Go University. If continuing a course, you will be presented with the next step of the course. If you are starting a course from the beginning, a welcome page will appear providing the course description, estimated time to complete, and curriculum.
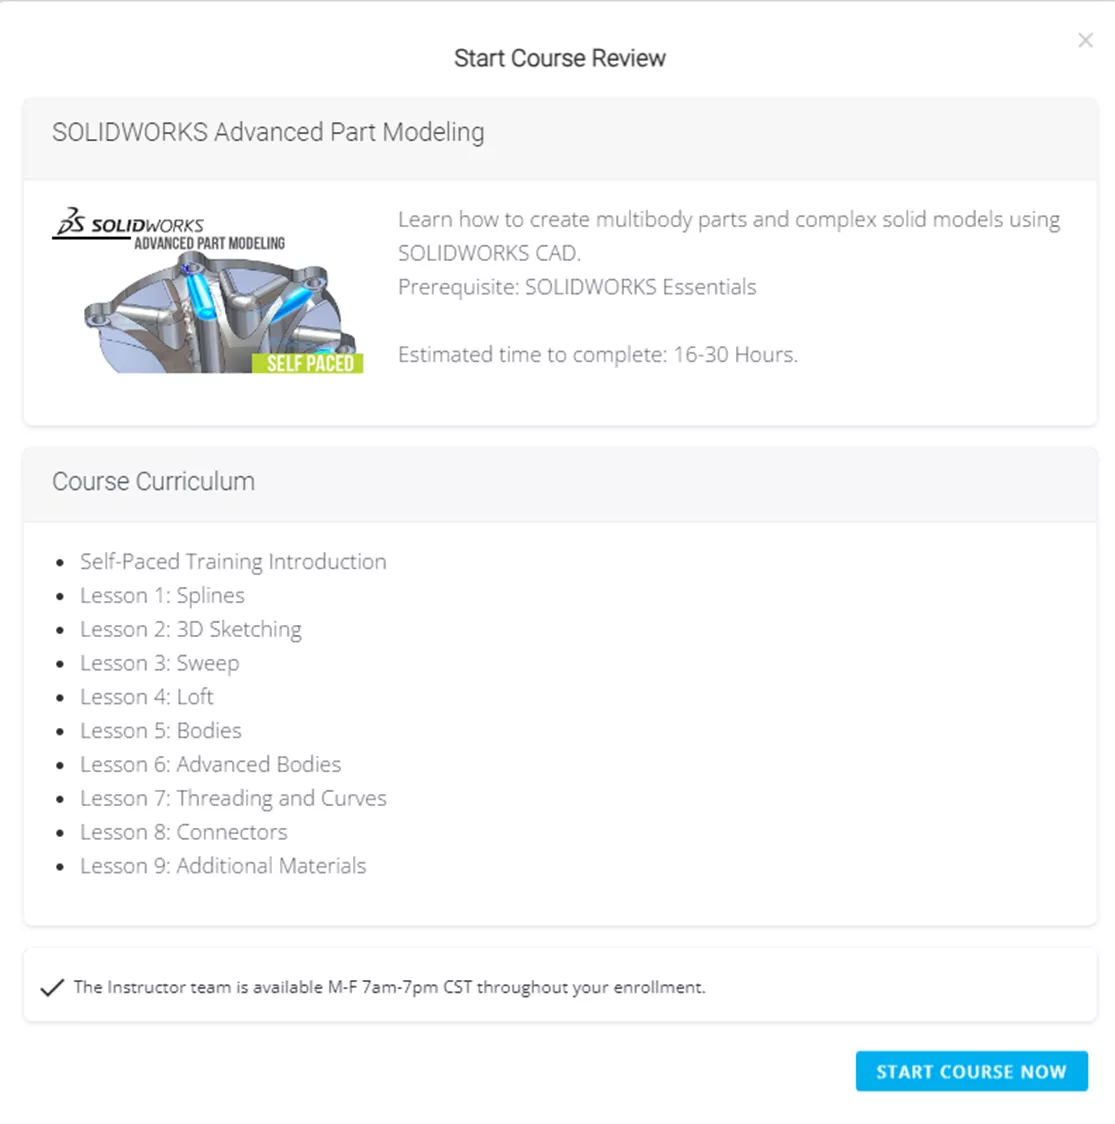
Figure 11: Start Course Review
The My Training page has some helpful items, like the User page. In the top left are two filtering options. Display lets you choose how many courses you want to see on the page at once (12, 24, or all).
The second filter is Categories where you can filter based on Course content. The options are:
In the top right corner of the training tab are three more helpful tools.
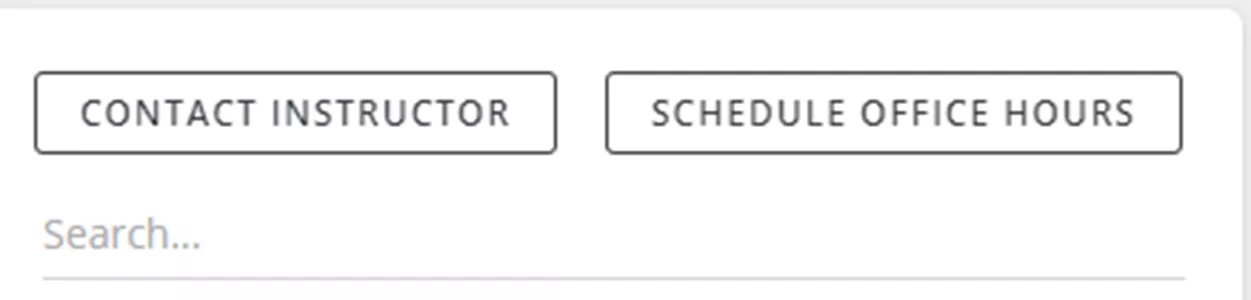
Figure 12: Search Bar and Contact Options
The search bar allows you to search for a specific course.
Contact Instructor gives you a pop-up with a number that takes you to someone knowledgeable about the subject who can help answer your questions. You will be prompted with different options based on the course you need assistance with.
Schedule Office Hours allows you to schedule a 1-hour session with an instructor for this course to go over any questions you have.
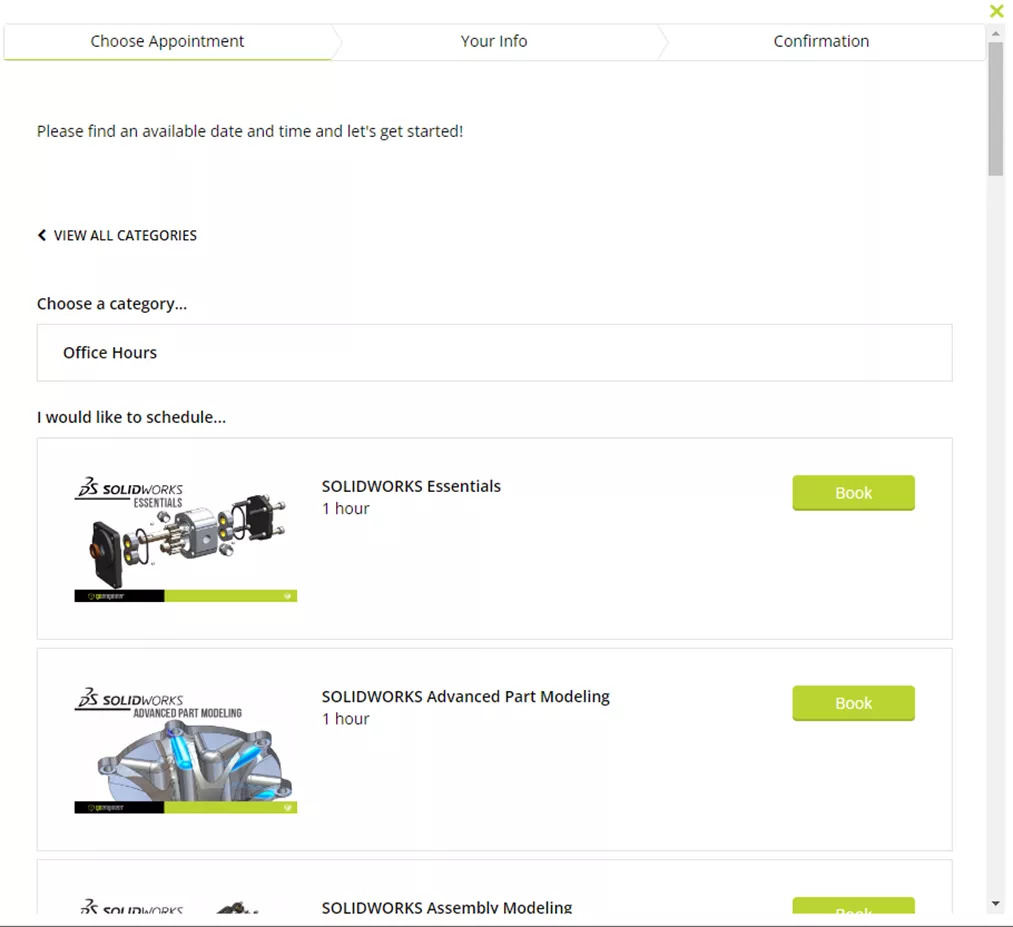
Figure 13: Schedule Office Hours
In the Training Plan tab, you can view your training plans and assign a user to this training plan.
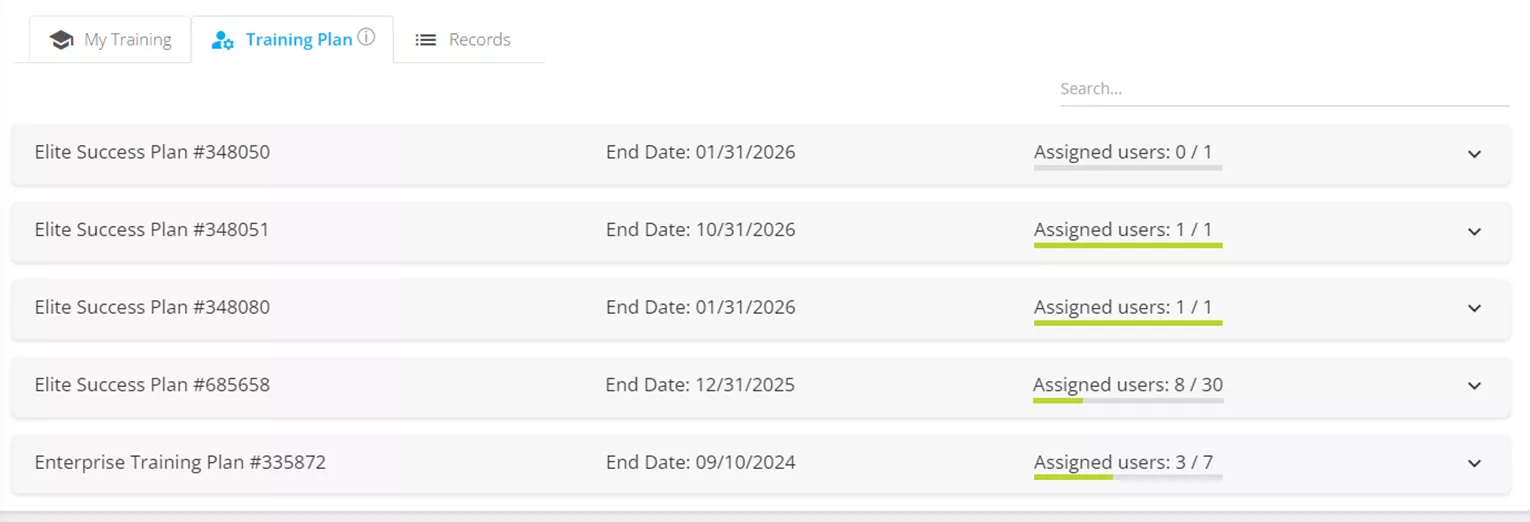
Figure 14: Training Plans
For each Training Plan listed, you will see the end date and the assigned users. From here you can expand the Training plan and assign users.

Figure 15: Assign User
To add users, select the blue Add User button. In the menu that appears, check the box next to the user(s) you want to add and then click the Add button on the bottom left.
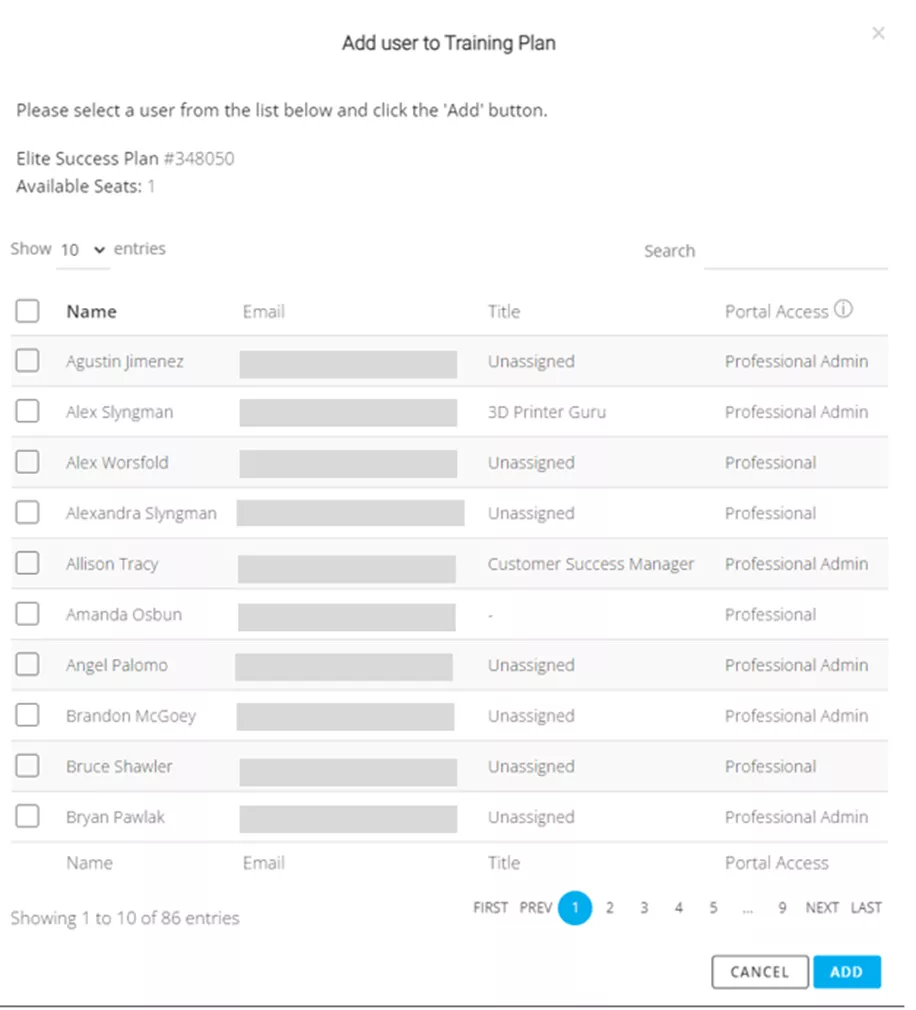
Figure 16: Add User to Training Plan
If you have a large number of users, there are filter tools that can help narrow down who you are looking for. In the top left-hand side of the menu, you can change how many user entries are shown. Just like the previous menus, a search bar is located in the top right-hand side, where you can search for specific users.
In the Records tab, you can view the records for all training that has taken place for all users.
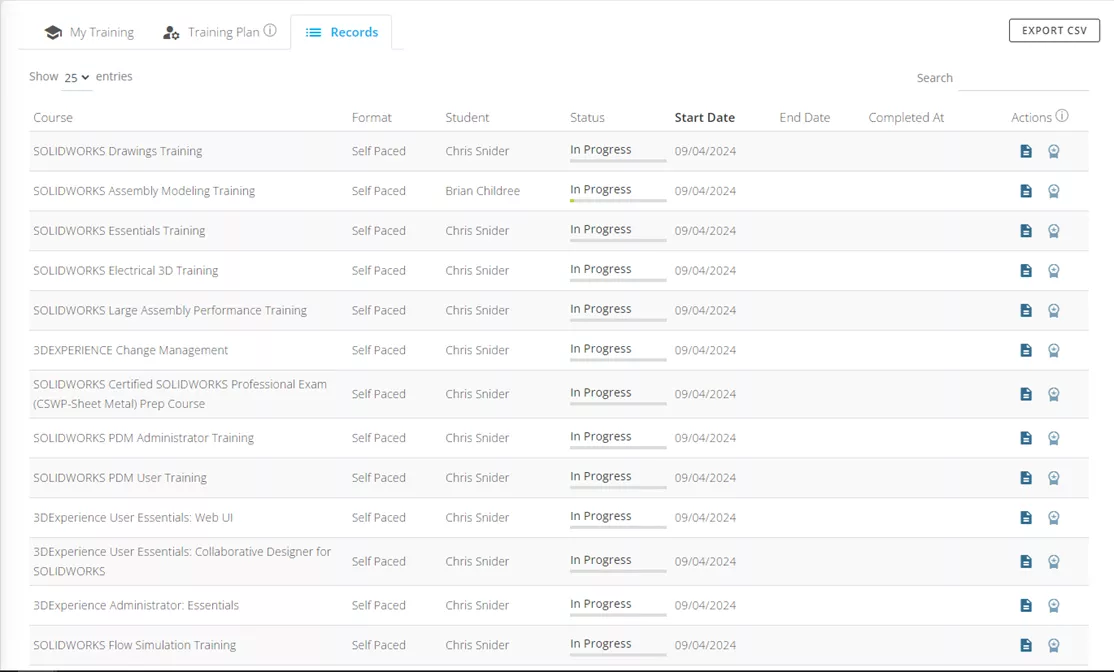
Figure 17: Records Tab
There are also some helpful columns.
- Course - Title of course taken
- Format - How the course was taken (e.g., self-paced or online instructor-led)
- Student - Name of the student who took the course
- Status - See a student's progress in the course via the green progress bar. Hover over the status bar for the percentage of completion.
- Start Date - When the course started.
- End Date - When the course ends.
- Completed At - When the course was completed.
- Action - Course information (title, progress, and completion date) & Certificate (only available if the course has been completed. Selecting this opens a new tab containing the Certificate of Achievement that can be downloaded or printed).
This concludes how to add users and assign and manage training for users. If you have questions, please reach out to your Customer Success rep whose name is located on the Landing Page of the GoEngineer Customer Portal.
Learn More
How to Customize the SOLIDWORKS Hatch Pattern File
DraftSight Make Flat Snapshot Workaround
New Artec Spider II Handheld 3D Scanner
Structural FEA for Beginners: 5 Stages of Simulation-Driven Design
SOLIDWORKS Loft vs Boundary: Key Differences
About Nathen Blas
Nathen Blas is a SOLIDWORKS Technical Support Engineer based out of our Headquarters in Salt Lake City, Utah. He earned his Bachelor’s degree in Mechanical Engineering at the University of Utah in 2018 and joined the GoEngineer family that same year.
Get our wide array of technical resources delivered right to your inbox.
Unsubscribe at any time.