7 Abaqus/CAE Tips for New Users
No matter how intuitive and robust a program is, it often takes time for new users to familiarize themselves with it and develop techniques to maximize their efficiency. So in this article, we'll share some Abaqus tips and tricks to shorten the learning curve, speed up your analyses, and get the most out of your new FEA software.
#1. Use Automatic “General Contact” Interactions
When creating a study in any simulation software, accurate contact interactions are a must. You never want to see solids passing through each other or sticking together when they shouldn’t. If you’ve ever clicked through what feels like a million face-edge pairs, you know how tedious this can be – and you still might miss one! Thankfully, Abaqus has introduced a reliable solution to vastly improve the efficiency and accuracy of this process.
For both Abaqus/Standard and Abaqus/Explicit, you can use the “automatic” option to incorporate all exterior element faces, edges, and analytical rigid surfaces, which automatically considers all possible node-face, edge-edge, and self-contact interactions.
Testing has shown that contact pairs are reliably identified and calculated using this method, so GoEngineer recommends it whenever available to speed up your process and achieve the best possible results. If needed, you can always add specific contact definitions between pairs of entities on top of what General Contact detects.
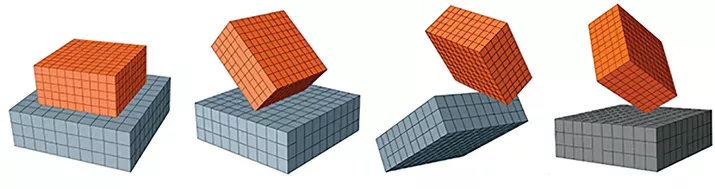
Illustrations of various contact interaction types automatically detected by “General Contact”
Select the General Contact option in the Interaction module.
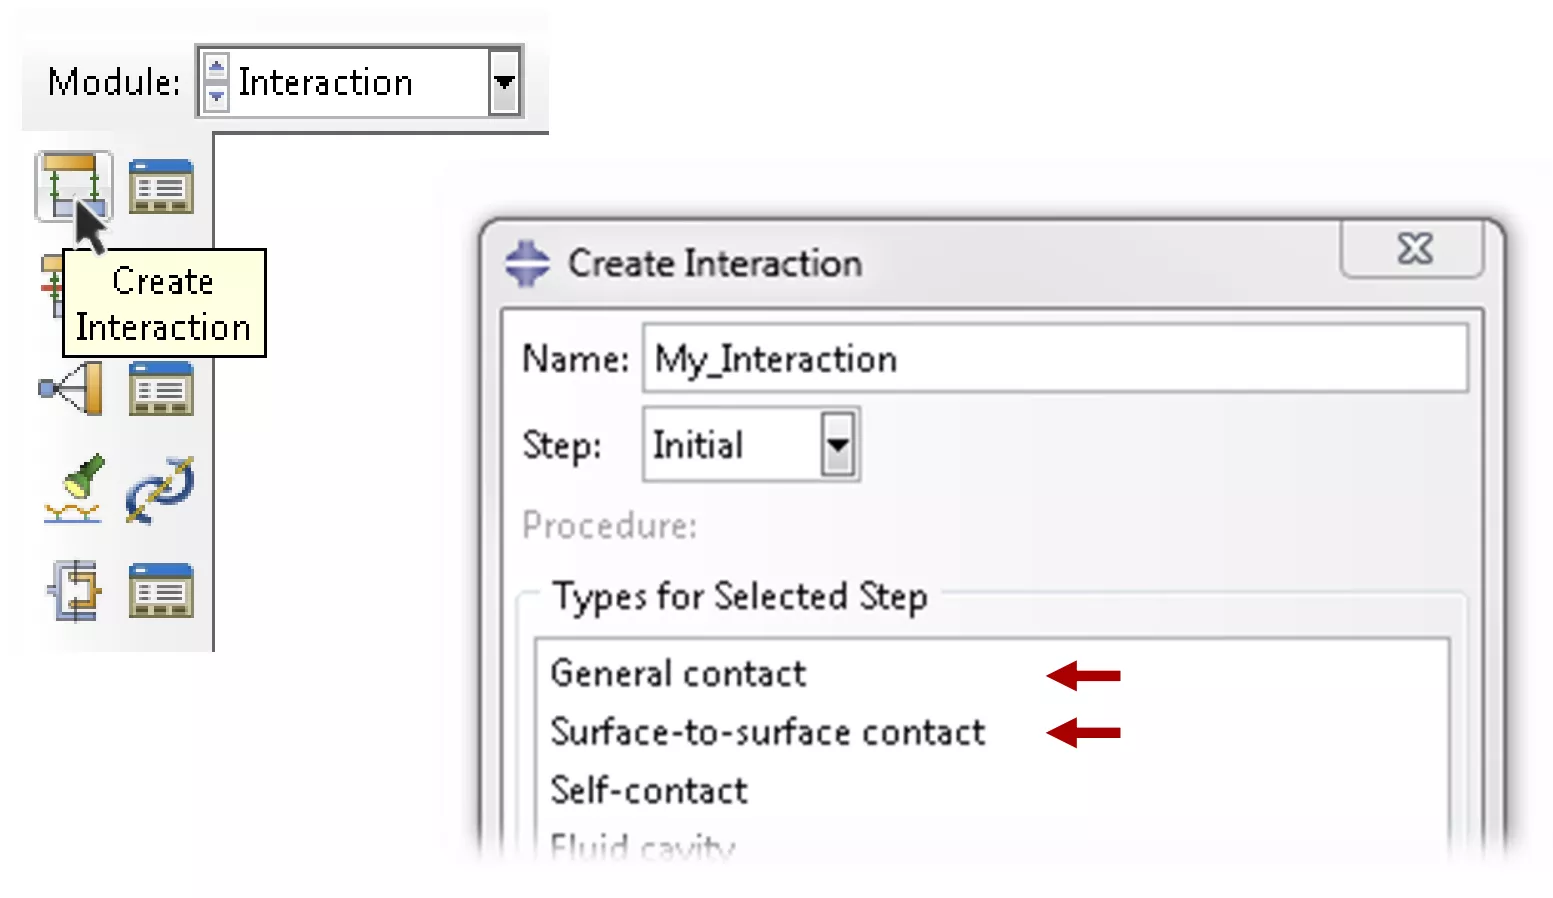
“Create Interaction” dialog in the Interaction module
#2. Color Code for Clarity
Color coding is a useful technique for verifying selections, exporting images for reports, and keeping your pre- and post-processing as clear as possible. In Abaqus, you can color code parts/instances by material, boundary conditions, constraints, and more using the Color Code Toolbar (View > Toolbars > Color Code).
How to color code based on part material
This technique provides a way to easily differentiate between components of a certain type when creating a study or analyzing results. Depending on the module currently in use (e.g., Part, Assembly, Visualization, etc.), there will be different options for color coding.
#3. Assign Sections
One point that is often overlooked is the correct way to assign sections to your model. Sections can be created as needed, but they must be assigned to have the desired effect in your analysis. Users will sometimes create a section to which they plan to assign a different material from the rest of the model, but forget to assign it to the desired region before running their analysis.
In the Property module, you can create and name a section to which you wish to apply a certain property or element type by going to Section > Create… from the Main Menu bar.
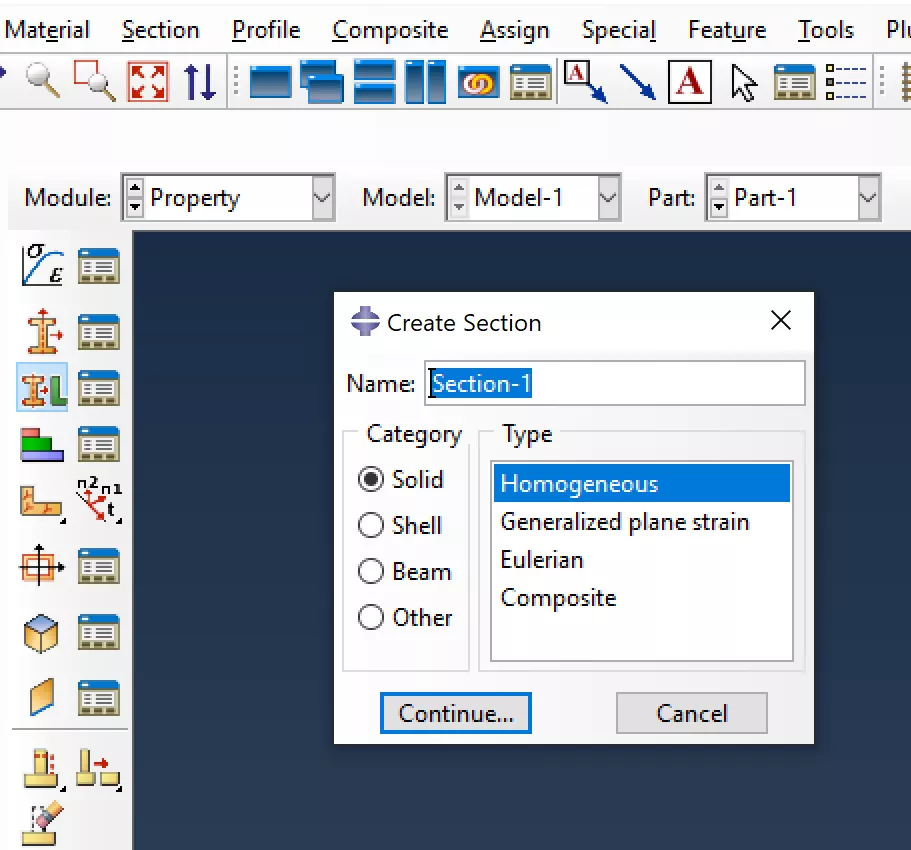
“Create Section” dialog
To assign the section and include the setting in your analysis, go to Assign > Section in the Main Menu bar to apply your section definition to specific regions of your model.
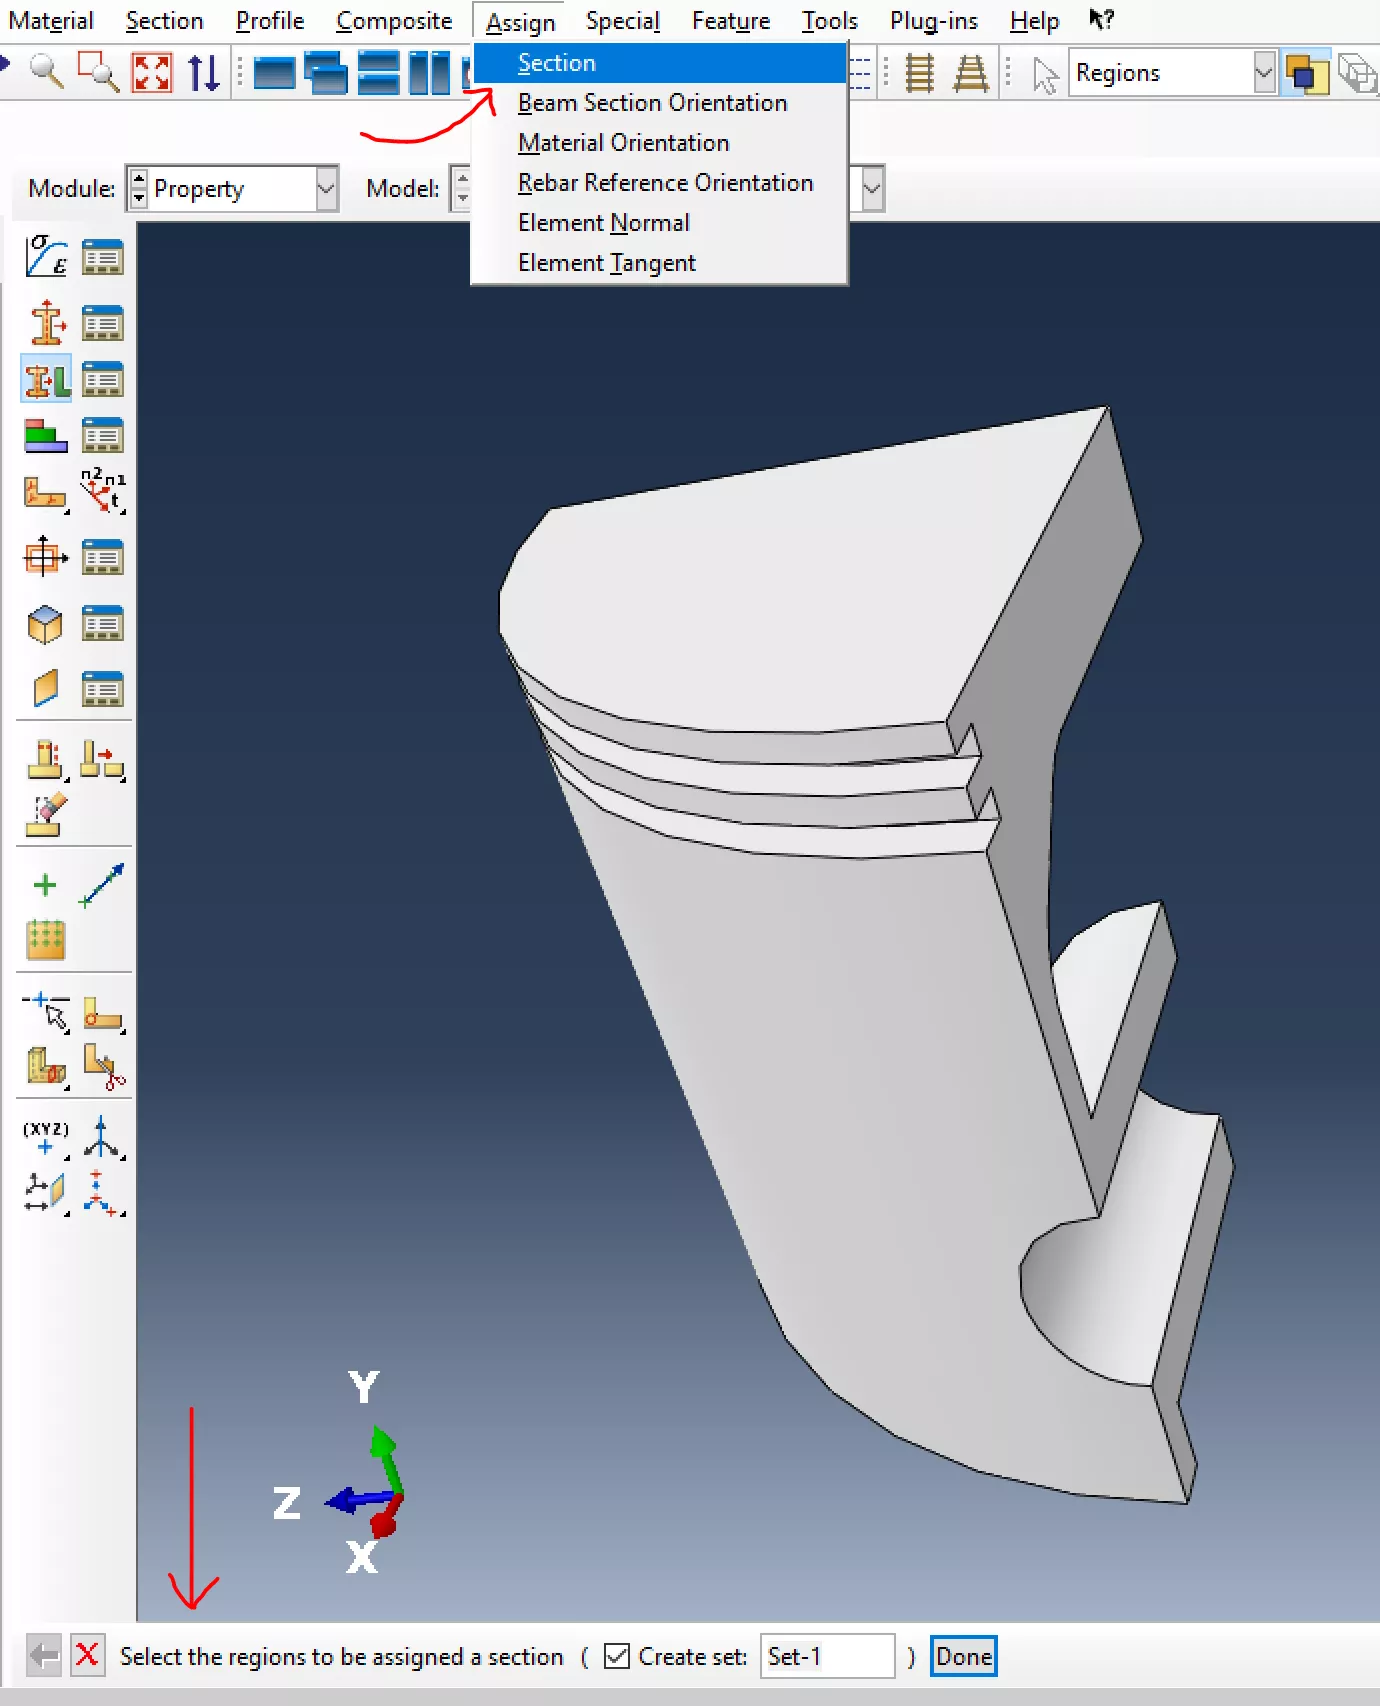
Assign a created section
Go to Section > Manager to view and edit your assigned sections.
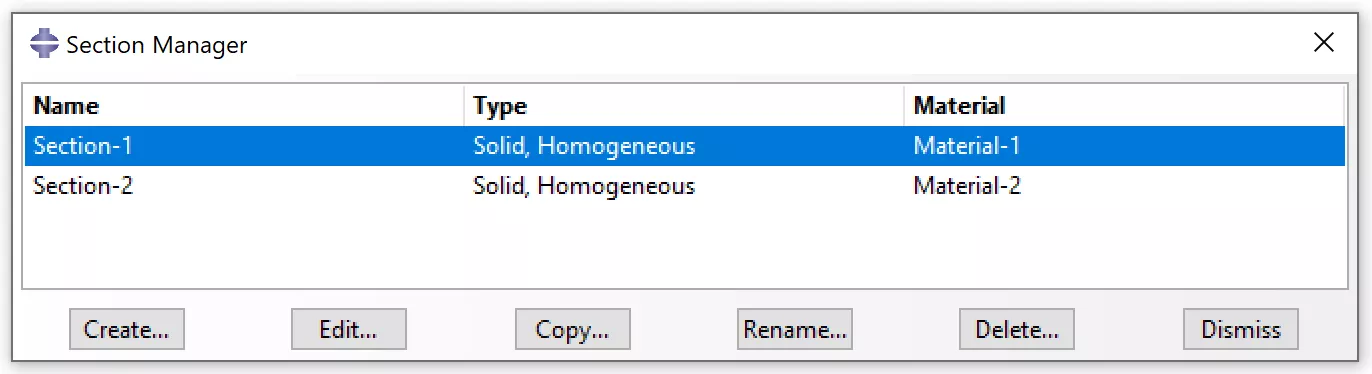
Section Manager dialog, used to view/manage section assignments
#4. Generate Reports
The Report Generator enables you to create an HTML report using the model and results data in an Abaqus output database (.odb) file. You can adjust the settings to select the content you want to include in the report and customize its appearance. You can also save commonly used report settings into a report options file, which can be loaded for use in another session.
Launch the Report Generator by selecting Plug-ins > Tools > Report Generator from the Main Menu bar in the Visualization module. After selecting the content you want to include, click Generate. Abaqus/CAE generates the report and opens it automatically in your default browser.
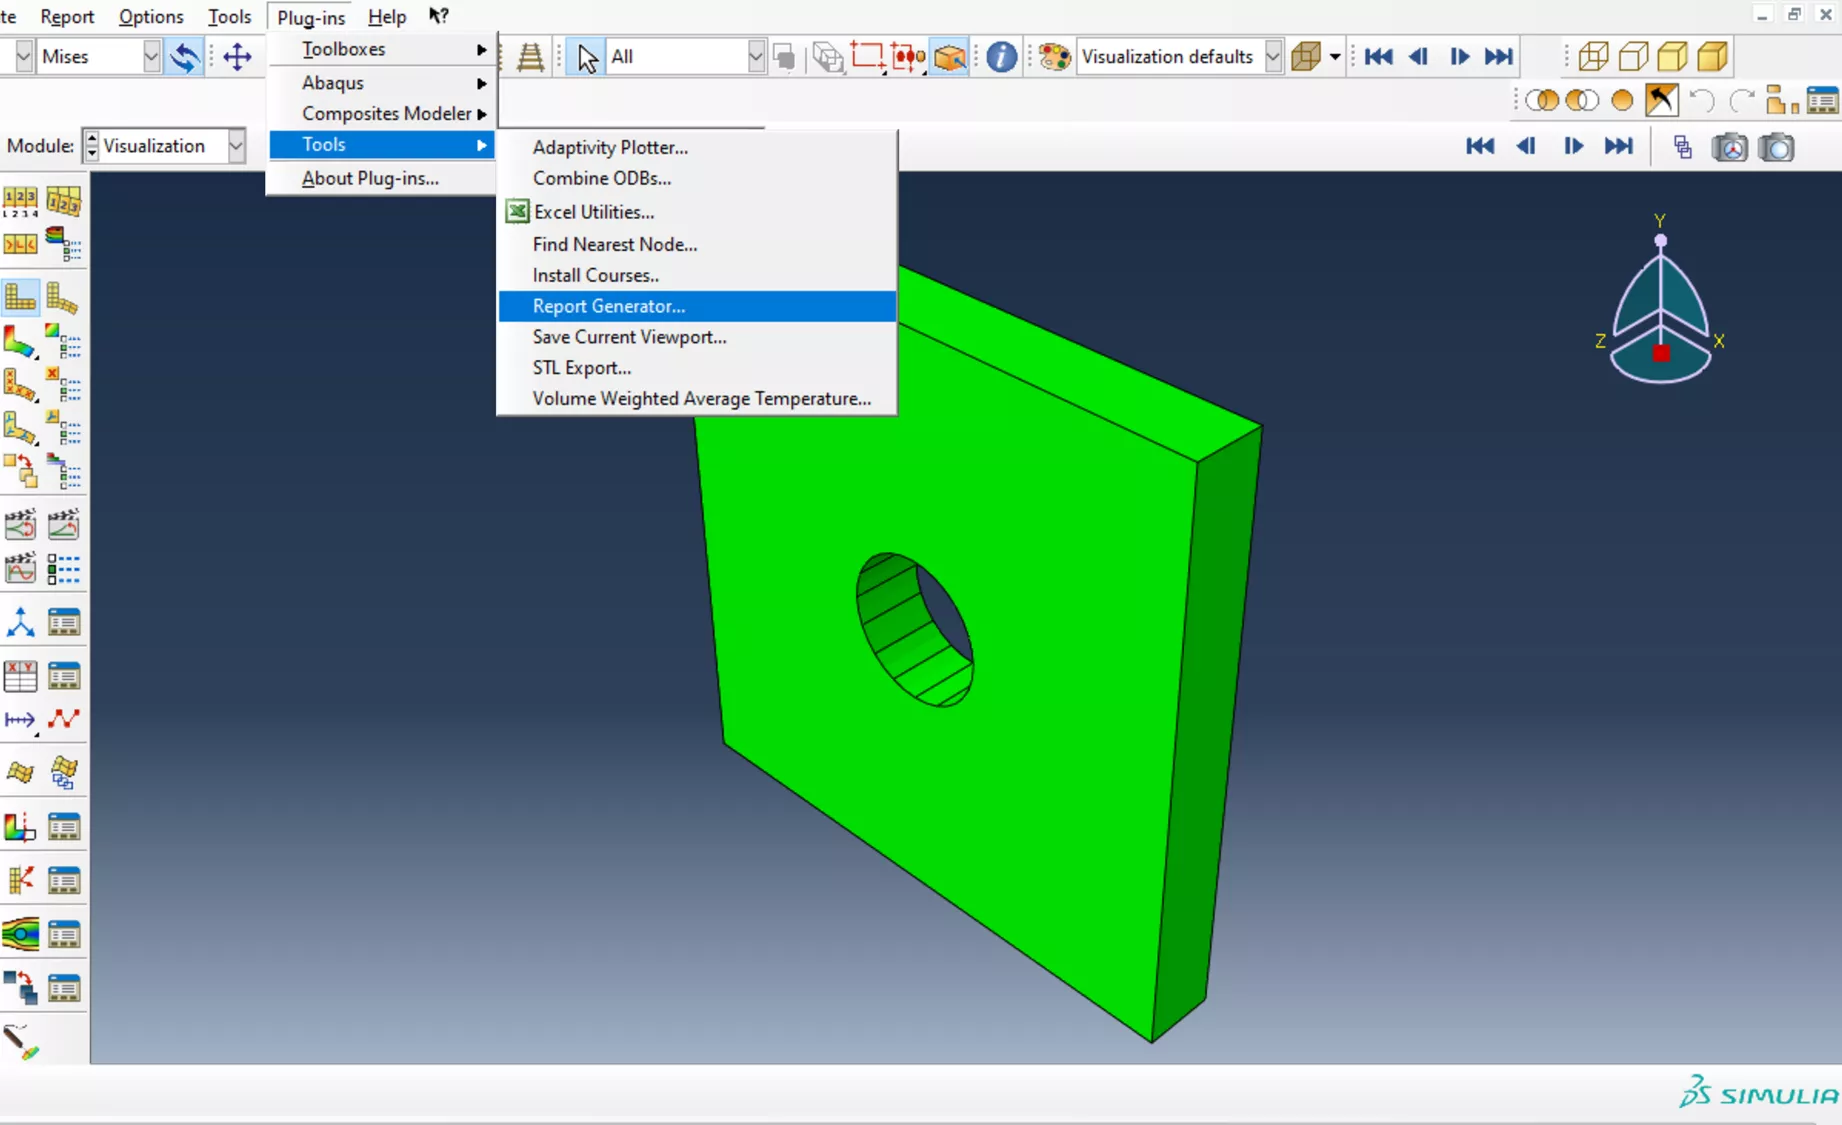
How to access the automatic Report Generator
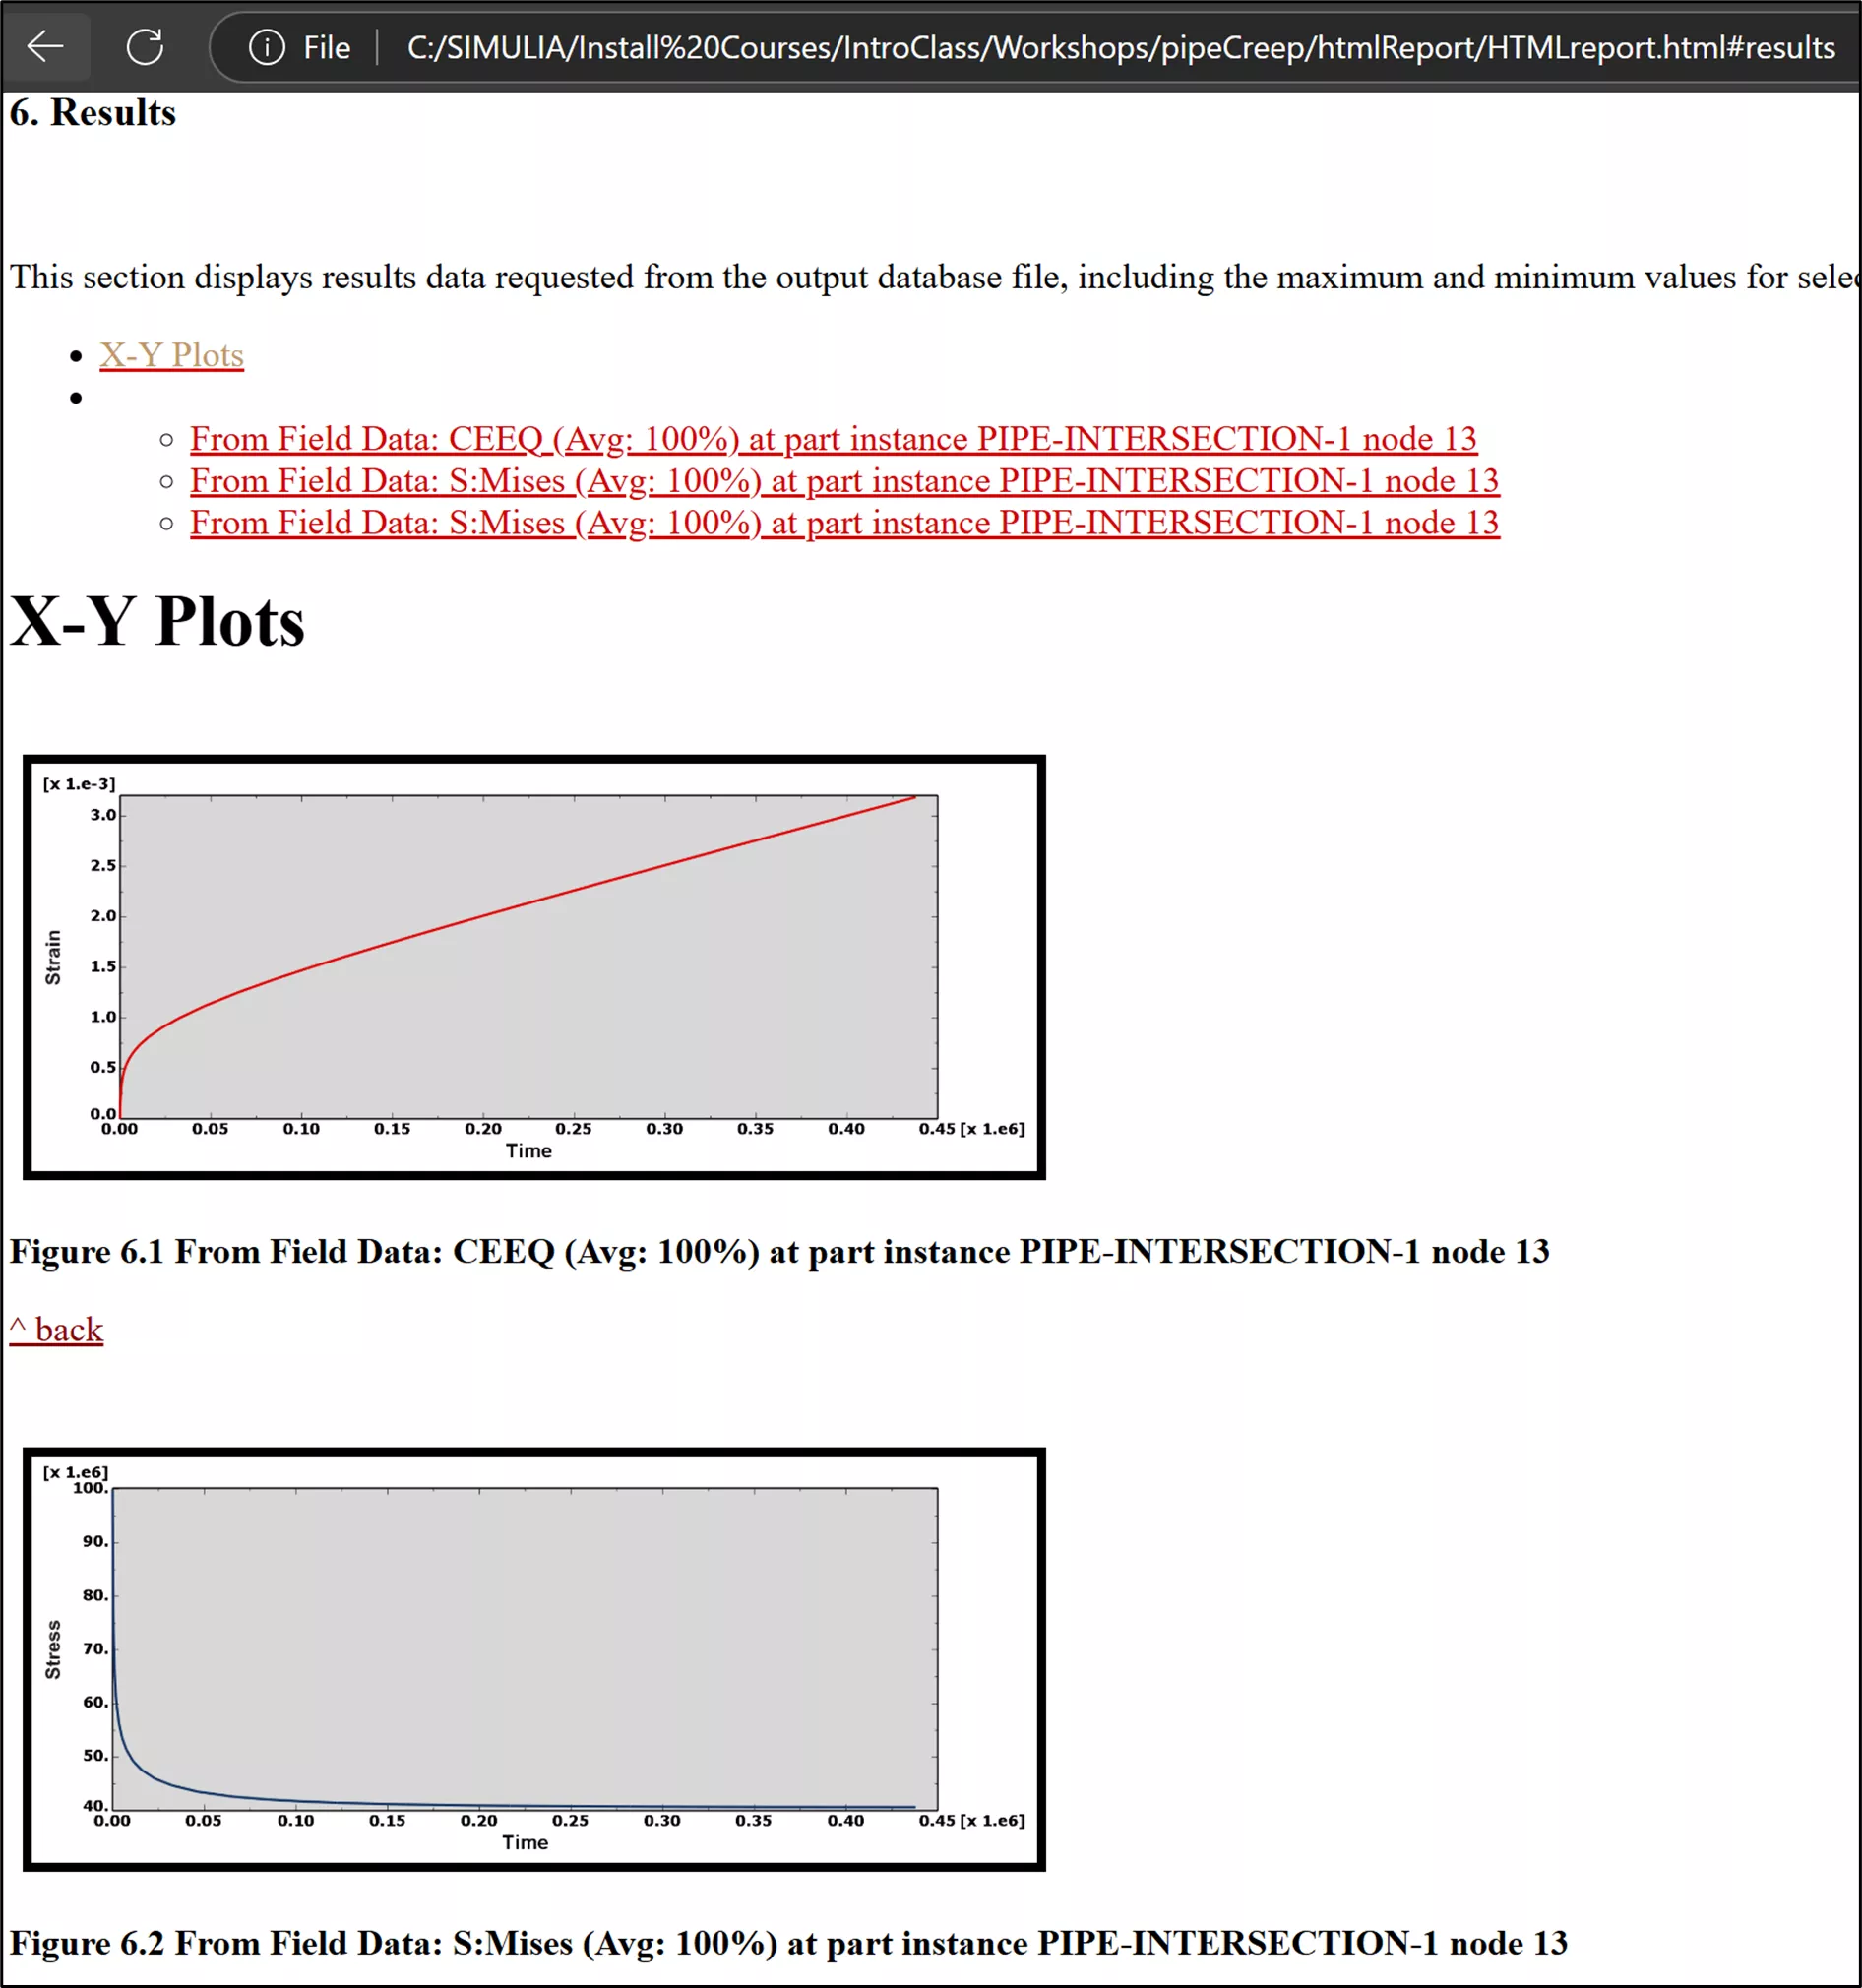
Example of plots in an automatically generated HTML report
#5. Customize 3D Controls
Many users start using Abaqus after developing a familiarity with another CAD system, like SOLIDWORKS. Abaqus has its own controls for rotating, panning, and zooming, but these functions can be customized to match your most comfortable setup. To do so, go to Tools > Options… > View Manipulation, then choose your most familiar application from the dropdown menu.
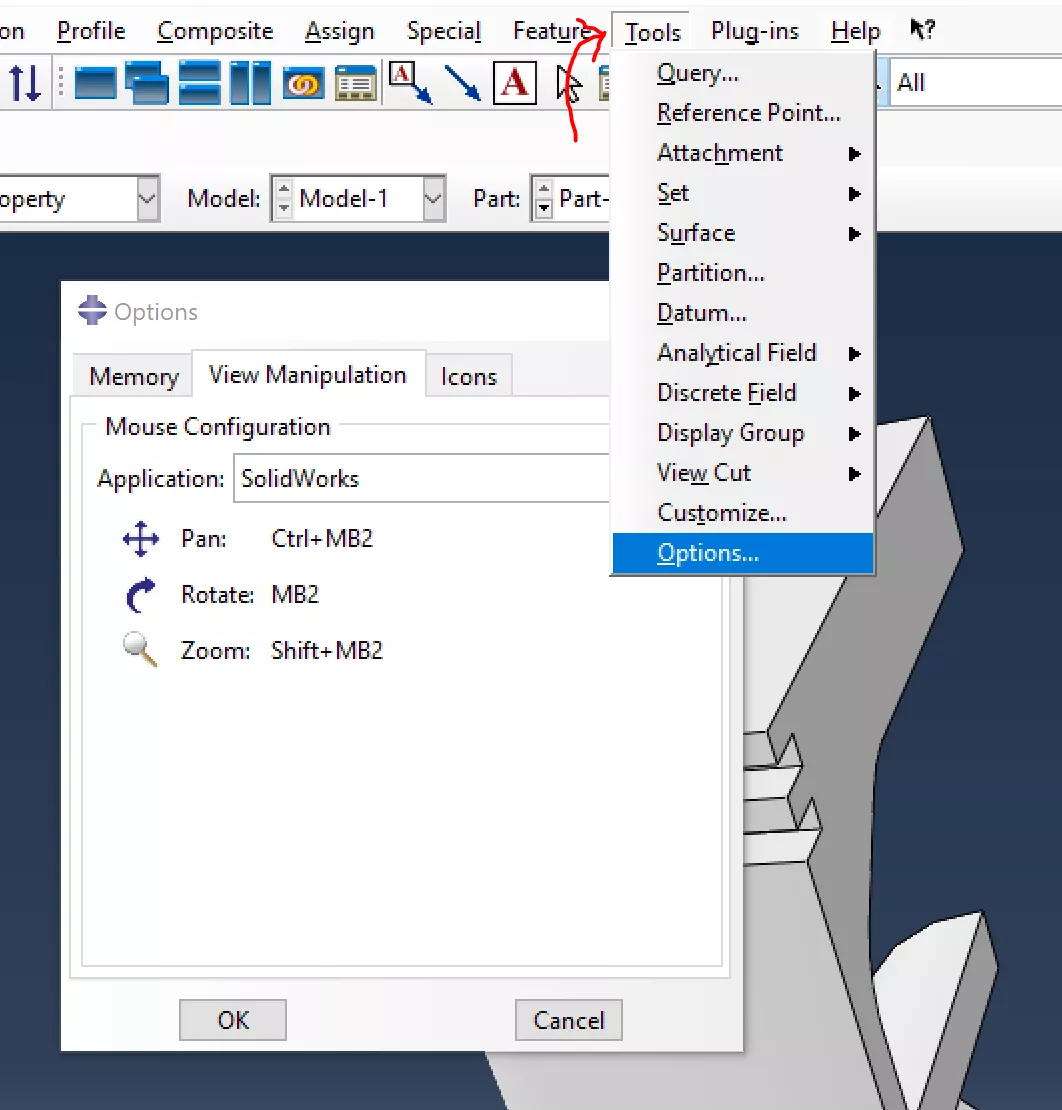
How to access the View Manipulation Options dialog
There are many other customizations you can apply within Abaqus, including memory allocation, icon display, toolbar visibility, and more. Explore the Tools > Customize, Tools > Options, and View menus to find additional ways to optimize your Abaqus experience.
#6. Quick View Orientation Options
When working with your model, it can be frustrating to try rotating and zooming to get the correct view orientation. Like other CAD programs, Abaqus has a toolbar that allows you to snap immediately between top, bottom, left, right, front, back, and isometric views, as well as any custom saved view you need. However, this toolbar is not always visible by default. To find it, check Views in View > Toolbars.
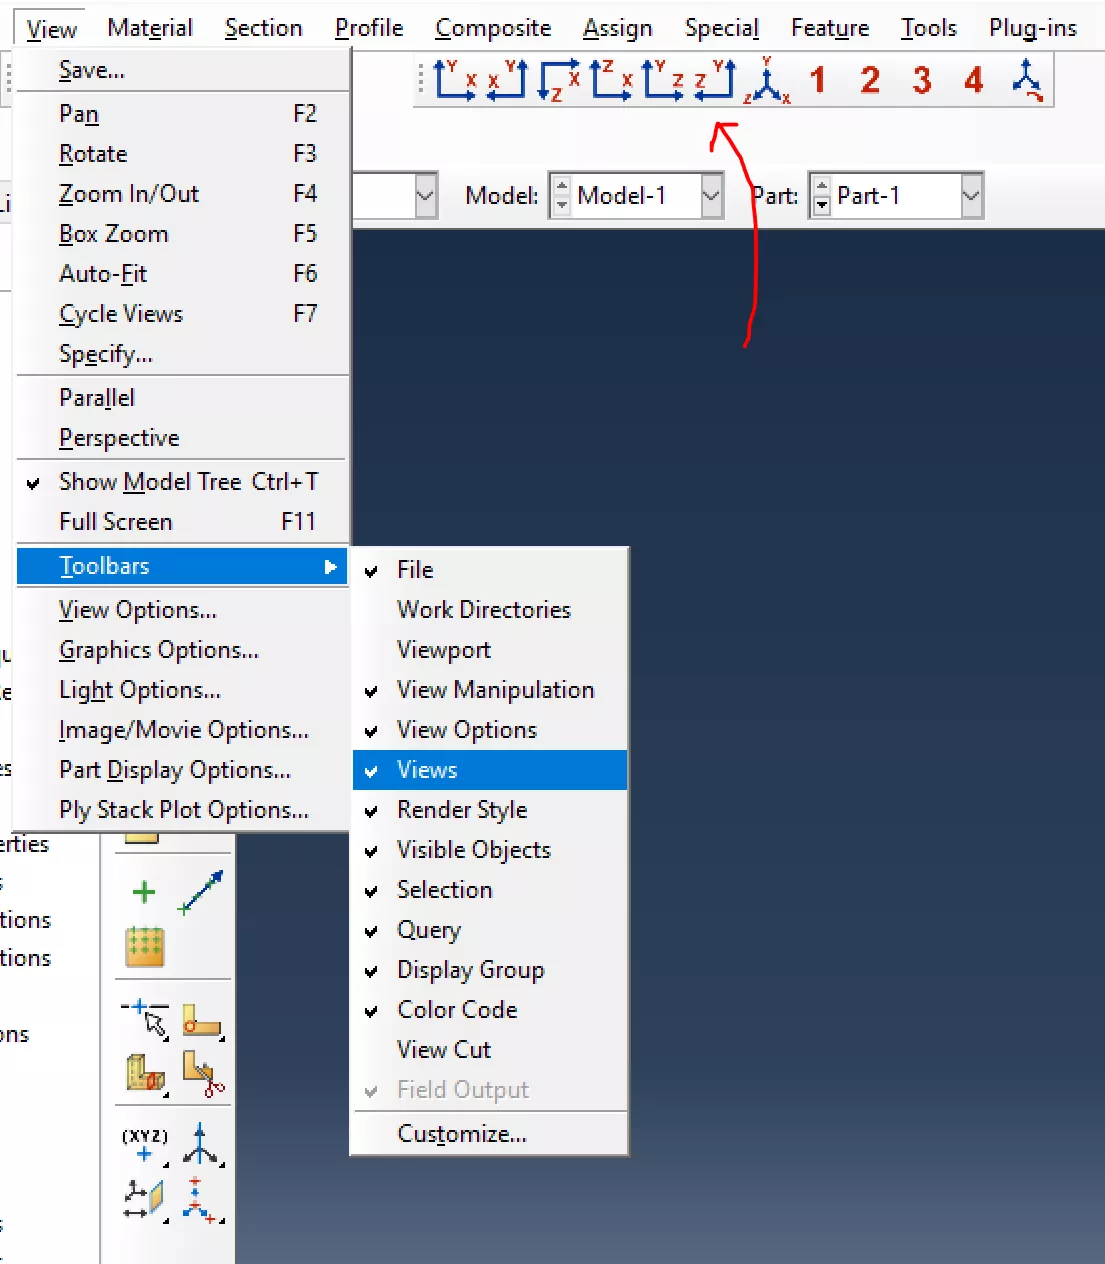
How to access the Views toolbar to snap to default orientations
The rightmost icon in this toolbar allows you to save the current model orientation as one of the user-defined views. You can either assign the current view to one of the custom 1-4 options or replace one of the existing default views.
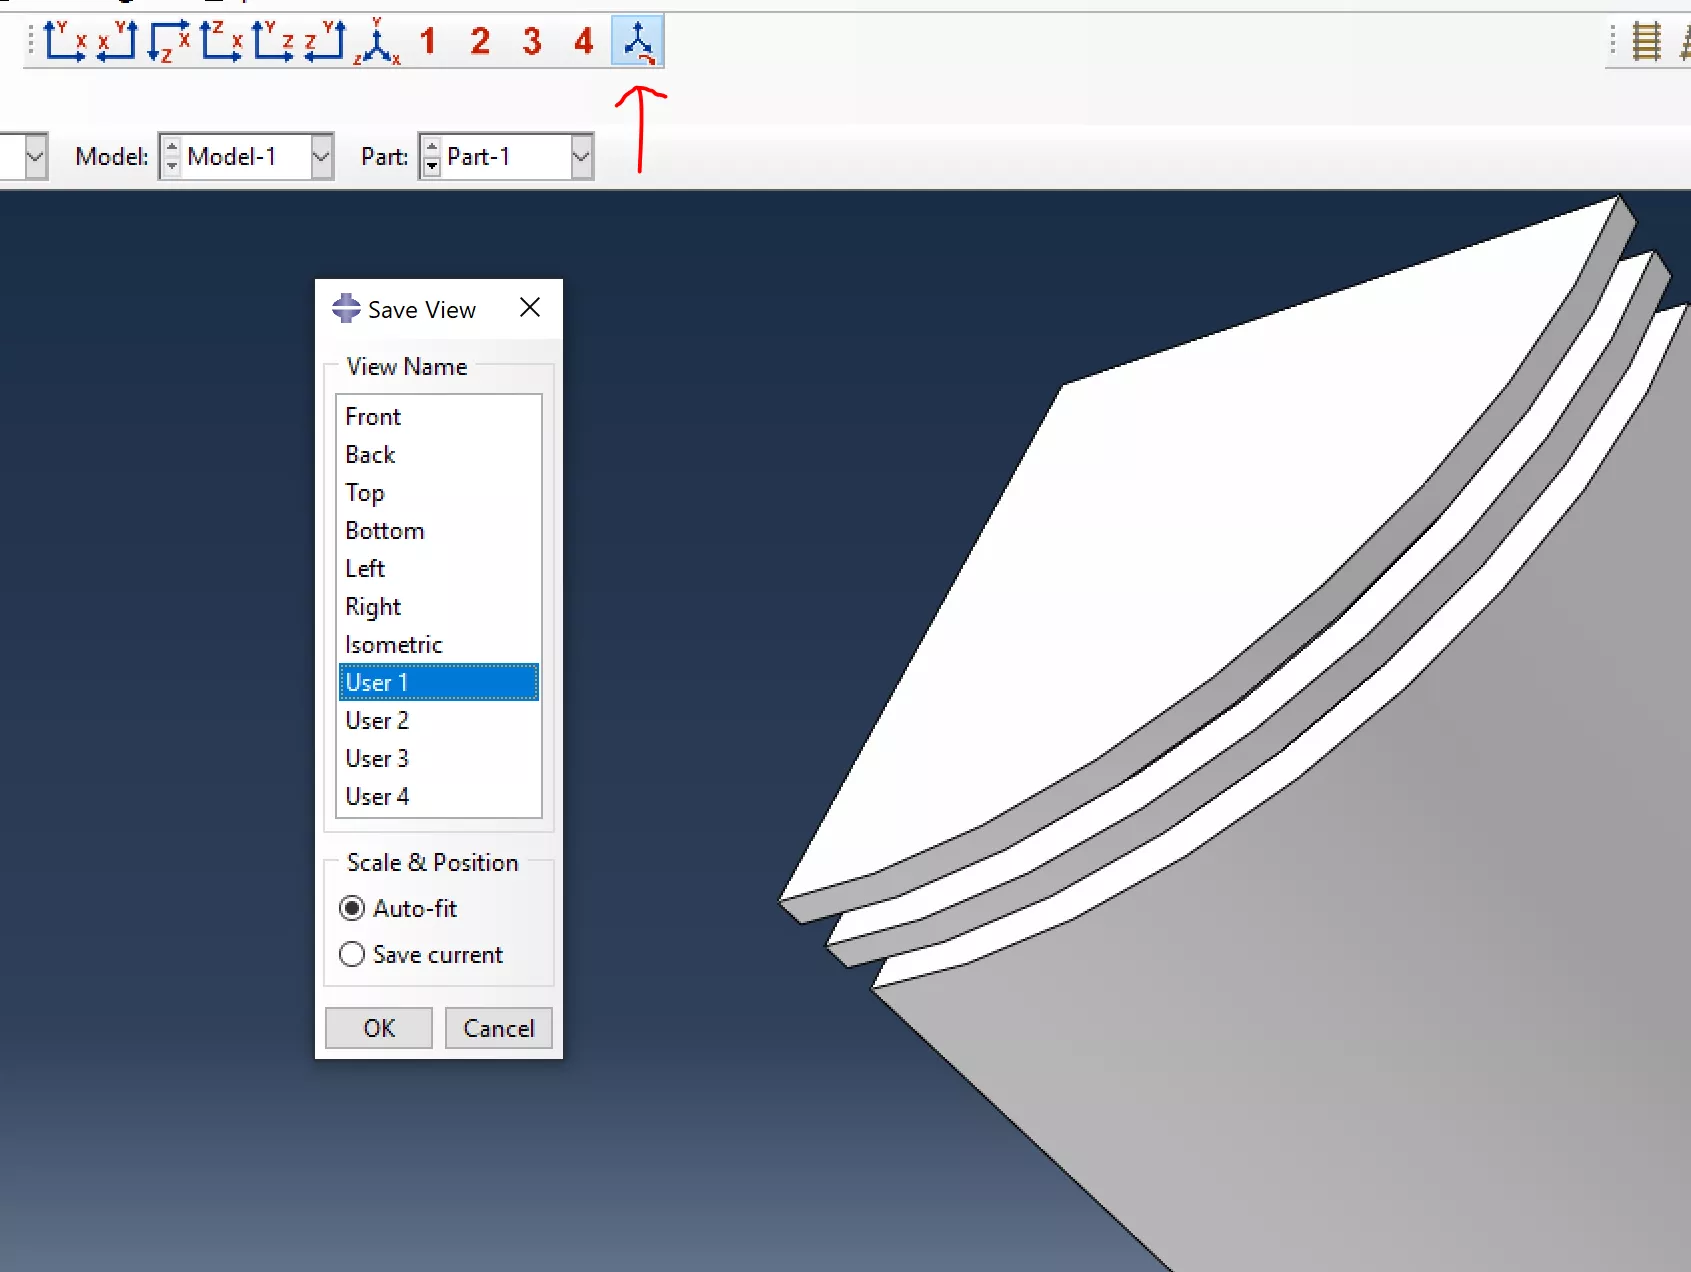
Dialog for creating custom view orientations that can be accessed from the Views toolbar
#7. Abaqus Associative Interface for SOLIDWORKS
While Abaqus has its own built-in CAD system and works well with most 3rd party CAD programs, there is an interface add-in designed specifically for use with SOLIDWORKS CAD. This add-in provides a way to transfer geometry directly from SOLIDWORKS to Abaqus/CAE. The file remains linked to SOLIDWORKS, so changes made to the model in SOLIDWORKS can be transferred to Abaqus without losing any analysis settings.
Abaqus Associative Interface pushing a model from SOLIDWORKS to Abaqus
- Suggested article >> How to Install the Abaqus Associative Interface for SOLIDWORKS
While these Abaqus tips alone won't make you an expert in Abaqus, they can enhance your efficiency and effectiveness with the software. These items represent insights I wish I had learned earlier, so I hope you can use them to get a head start on your Abaqus/CAE journey.
Abaqus Training
Want to take your Abaqus skills to the next level? Our course catalog contains 10+ online, instructor-led, or self-paced Abaqus training courses from introductory courses to advanced topics. View our course catalog for details.
Related Articles
FEA Materials Are Make-or-Break: Introducing the 3DEXPERIENCE Material Calibration App
Structural FEA for Beginners: 5 Stages of Simulation-Driven Design
Enhancing EV Connector Design Using Abaqus FEA
What Type of Abaqus License Do I Have and How Do I Use It?
Advancing Engineering Simplicity: SIMULIA’s New Unified Licensing Model
About Connor Bucka
Connor Bucka is a SOLIDWORKS Technical Support Engineer at GoEngineer.
Get our wide array of technical resources delivered right to your inbox.
Unsubscribe at any time.