SOLIDWORKS Custom Property Tab Builder: Step-by-Step Guide
SOLIDWORKS offers many options for making drawings and features uniform across a company. The Property Tab Builder is one such tool. With the Property Tab Builder, you can make sure that all parts/assemblies have their important custom properties. Custom properties are used to fill out information in areas like the title block and the bill of materials.
How to Launch the Custom Property Tab Builder
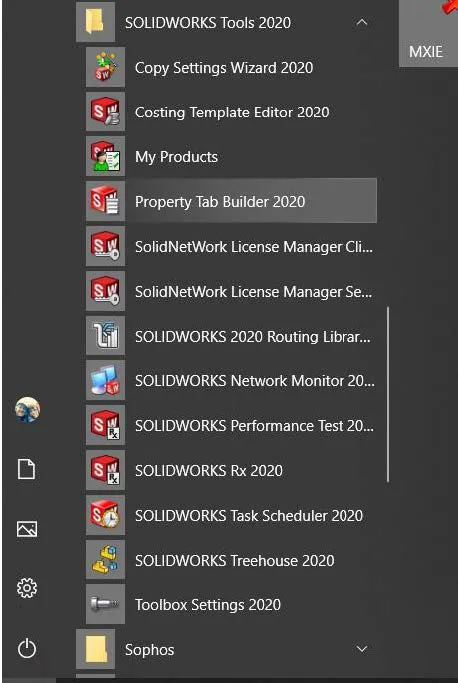
The Property Tab Builder application is launched by going to the Start Menu>All Programs>SOLIDWORKS Tools 2020.
Understanding the Elements
Groupbox: The Groupbox is essentially a container that allows you to group the other items. For example, you can place part information such as Part Numbers, Article Numbers, and Descriptions into a Groupbox and material information like Material, Finish, and Weight into another Groupbox. Each Groupbox can have a name.
Textbox: This item accepts free-form text and stores it as an associated property.
List: List boxes present users with a list of predefined values that once selected will be stored as a property.
Number: A number box accepts only number inputs to store as a property.
Checkbox: With a checkbox, you can have the user select between two predefined values to place as a property.
Radio: Radio buttons allow you to define a selection of up to three predefined values that can be used to show or hide elements in the dialog. As an example, you might want different text boxes to show based on the selected radio button.
File types
There are four file types you can save; PRTPRP for PARTS, ASMPRP for ASSEMBLIES, DRWPRP for DRAWINGS, and WLDPRP for WELDMENT PARTS. The type of dialog is selected by changing the TYPE in the Control Attributes.
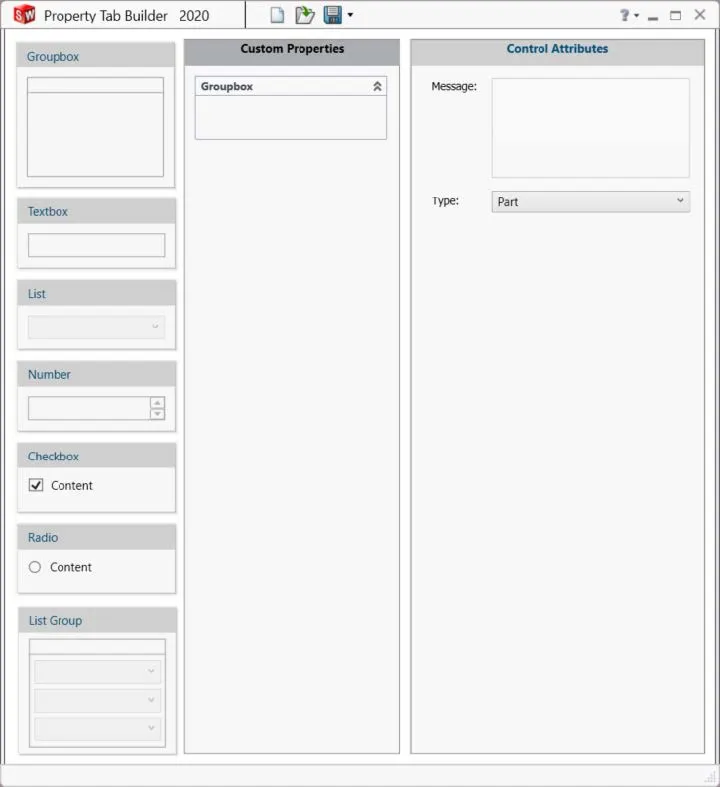
Once the application is started you will get a representation of Tab as it will show in SOLIDWORKS and has the first Groupbox. The Groupbox is a way to keep information organized and together. See Figure B.
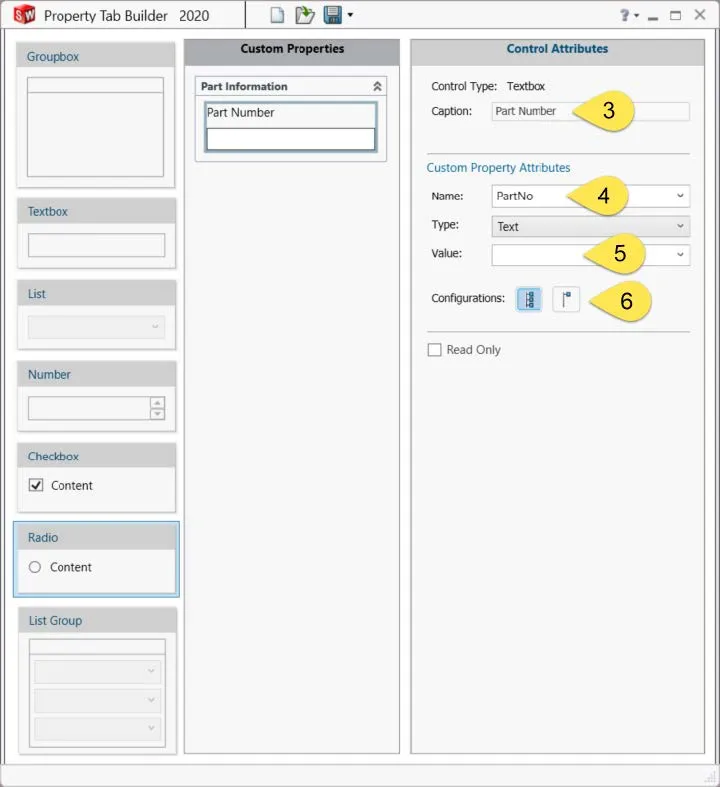
Groupbox can be renamed to best describe what will be listed in this property (Figure C:1). In the left-hand column, there are six different types of data entry boxes provided. To use one of these boxes, drag and drop them into the Groupbox. The text box is the easiest way to provide the needed information for the property. Drag and drop the text box from the left-hand column into the Groupbox (Figure C:2).
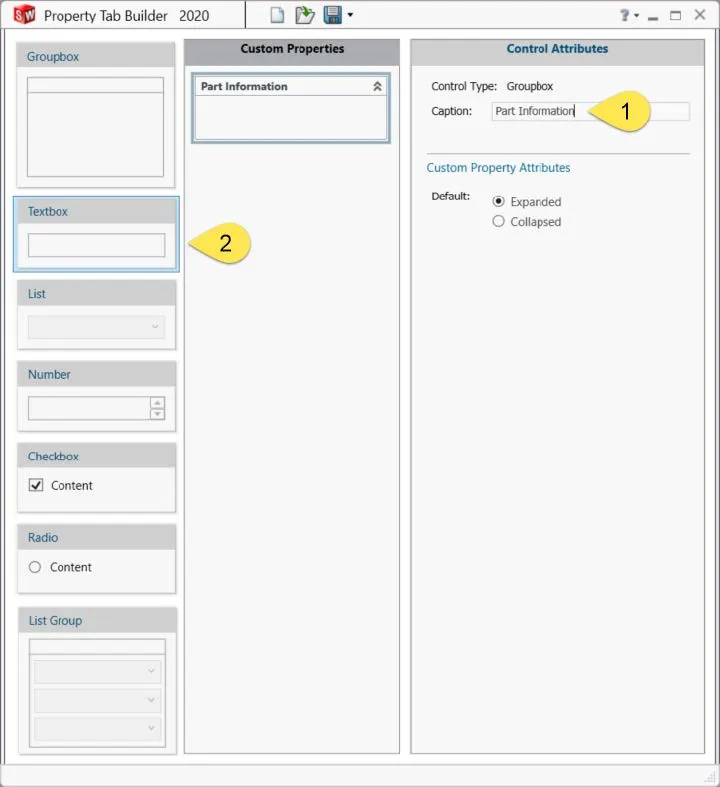
Then, in the right-hand column under Caption (Figure D:3), the text box can be renamed to best describe this attribute. This just names the text box. The custom property values are established in the Custom Property Attributes area. Choose what custom property this box will update (Figure D:4), the value (Figure D:5), and if it is for all configurations or a specific configuration (Figure D:6).
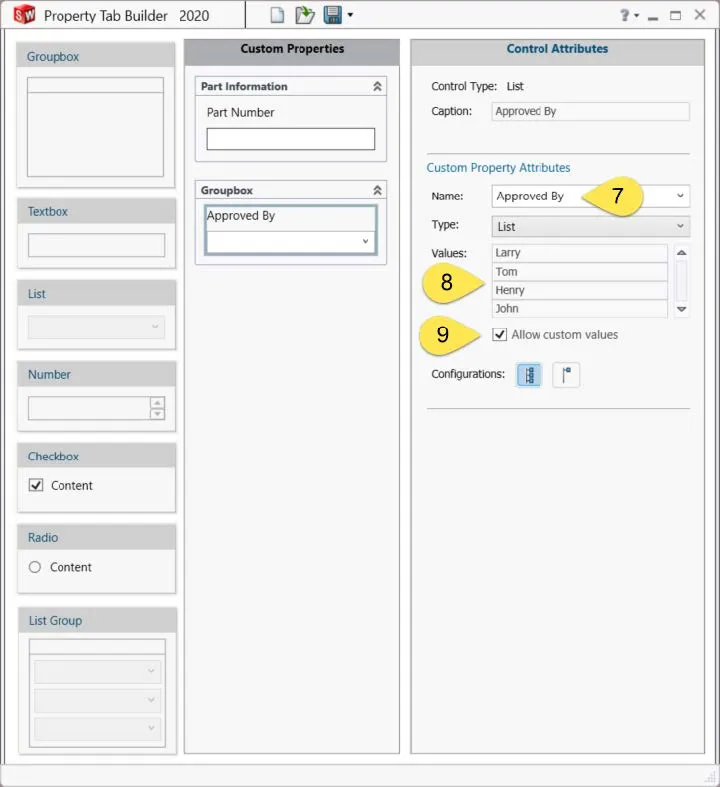
The List box will give the user a list to choose from, such as a list of the people approving a drawing (Figure E:7). The list can be filled out here (Figure D:8), plus if the “Allow custom values” box is checked the user can input the information (Figure D:9).
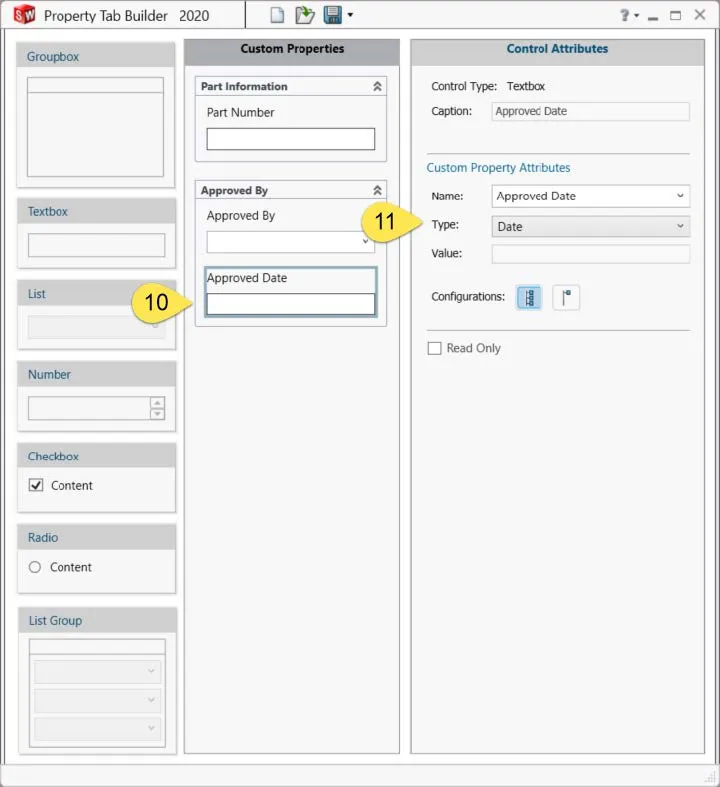
Adding another text box to the same groupbox (Figure F:10) and setting the type to Date (Figure F:11) will give the user a way to add a date.
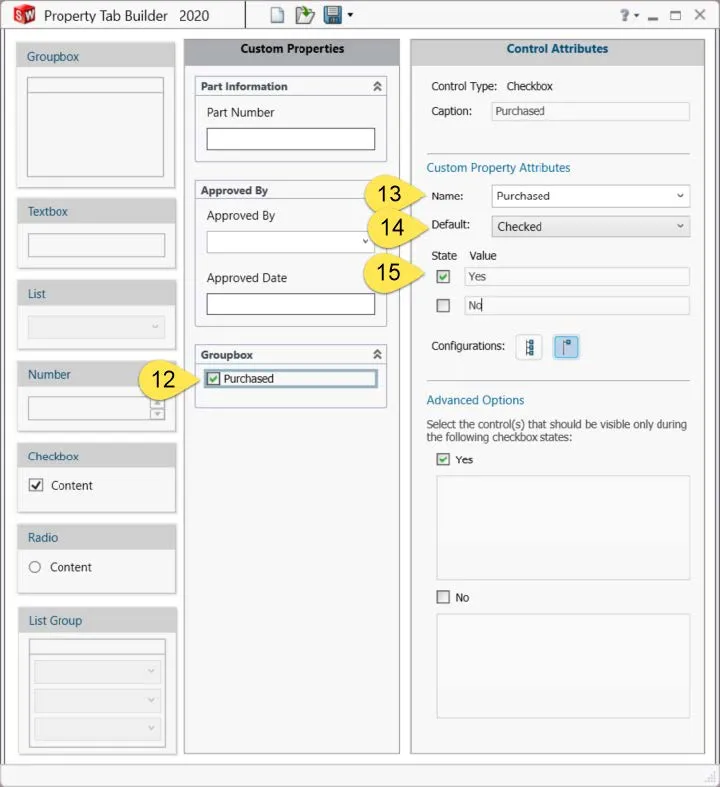
The next way to enter data would be the check box. This could be used to indicate if a part was purchased or built. Drag the check box into a new groupbox. Caption the box (Figure G:12), specify the custom property name (Figure G:13), and select whether the box will be checked or unchecked by default (Figure G:14). Then the value for a checked box or an unchecked box can be entered (Figure G:15).
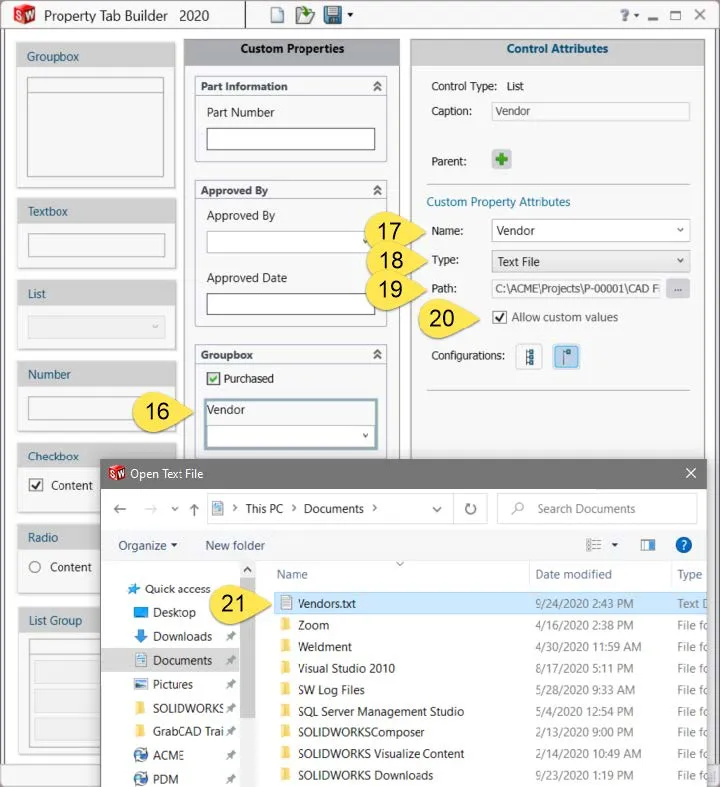
Another way to use the list box is to import the list from a text file saved on your computer. Add the list box (Figure H:16), caption the box, specify the custom property (Figure H:17), select text file (Figure H:18), and set the path (Figure H:19&21). If wanted, allow the user to enter a custom value (Figure H:20).
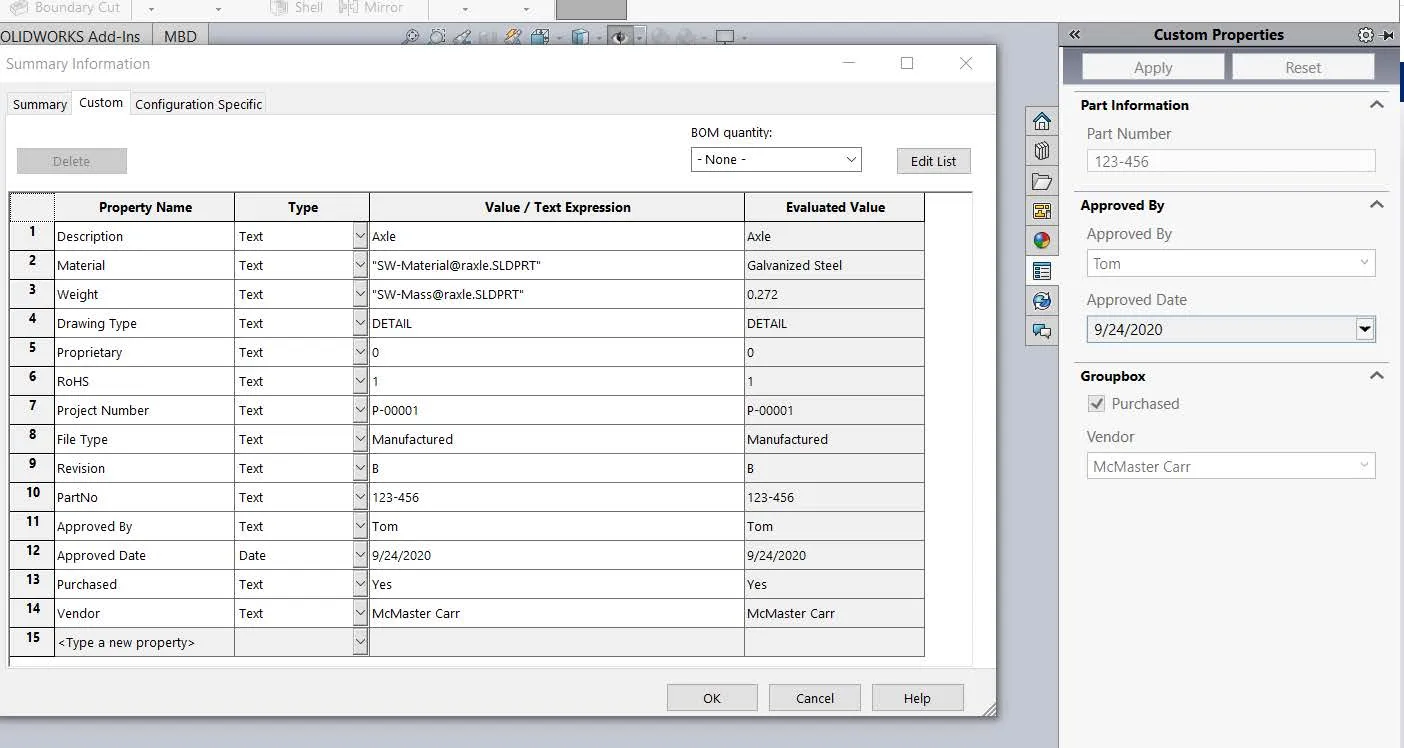
Once all the data boxes are completed, save the file. If this is going to be used for part files save it as *.prtprp. If it is for an assembly save it as *.asmprp. The files needed to be saved in the folder were SOLIDWORKS in looking for Customer Property files. To check for this location open SOLIDWORKS and navigate to Options>File Locations. Then find Custom Property Files in the pull-down menu. This will give the location where the files should be saved. Once the files are saved to this location, SOLIDWORKS needs to be restarted. Now when a part is opened, and the property tab builder tab is expanded (Figure I:21) the form will show, and the custom properties can be updated.
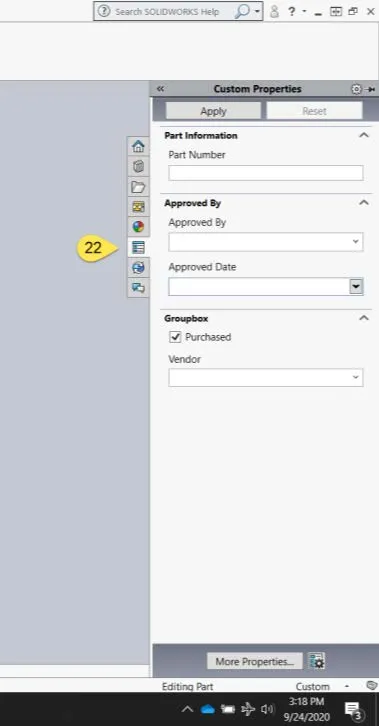
Then the user can update the information in the tab builder and when Apply is selected the custom properties will be updated.
This works for when the part is open in SOLIDWORKS. If the assembly is open, the properties of the part can be updated if the part is clicked on in the parts tree or the graphic area. The parts form will appear in the tab builder area.
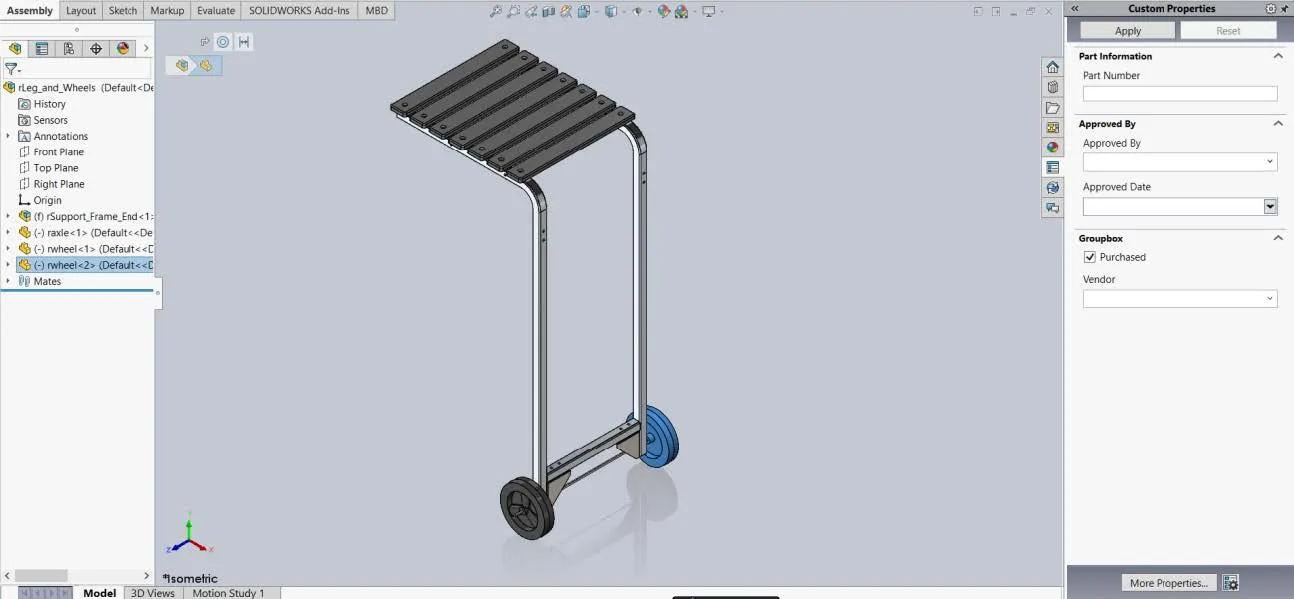
This way all the parts custom properties can be updated without having to open each part.
Using the tab builder is a great way to make sure that all the parts and assemblies have the custom properties needed and is a much quicker way to update these properties.
More SOLIDWORKS Tips & Tricks
Missing Cosmetic Threads and How to Fix them in SOLIDWORKS
![]()
About GoEngineer
GoEngineer delivers software, technology, and expertise that enable companies to unlock design innovation and deliver better products faster. With more than 40 years of experience and tens of thousands of customers in high tech, medical, machine design, energy and other industries, GoEngineer provides best-in-class design solutions from SOLIDWORKS CAD, Stratasys 3D printing, Creaform & Artec 3D scanning, CAMWorks, PLM, and more
Get our wide array of technical resources delivered right to your inbox.
Unsubscribe at any time.