Saving Your SOLIDWORKS Electrical Environment
This article explains how to create an environment archive and why you should in the first place. SOLIDWORKS Electrical stores your environment in two places: the Microsoft SQL Server (which holds the references and intelligence behind your projects) and the SOLIDWORKS Electrical data folder (typically found here: C:/ProgramData/Solidworks Electrical). The Data folder holds what you might consider the physical parts of your environment, such as the .dwgs of your drawings, the .dxf files of your symbols, etc.
Apart, neither of these parts is of any use. To be of use, they must be captured and stored in a specific way - the Environment Archive. Electrical Environments are important general backups. Depending on how often SOLIDWORKS Electrical is used will dictate how often you should create an Environment. If you only work in SOLIDWORKS Electrical once a week, creating one or two projects every couple of months, a backup once a month will save most of your data. This way, if your server were to go down, you would only lose a small amount of data (if any at all). If SOLIDWORKS Electrical is frequently used or you are working in the program every day and creating multiple projects a month, it is recommended to make an archive once or twice a week.
Another reason Electrical Environments are important is migrating your Electrical Server. Whether to do an upgrade, replace outdated hardware, or a facility relocation, you might need to Migrate the Electrical Server. The migration process is out of the scope of this article, but a crucial step of that process is capturing your Environment.
Creating an Environment Archive
All Environment Archives are taken from a client machine. With the program open, navigate to the Home tab and find the section labeled Archiving. This section has two buttons: the Archive Environment and the Unarchive Environment.
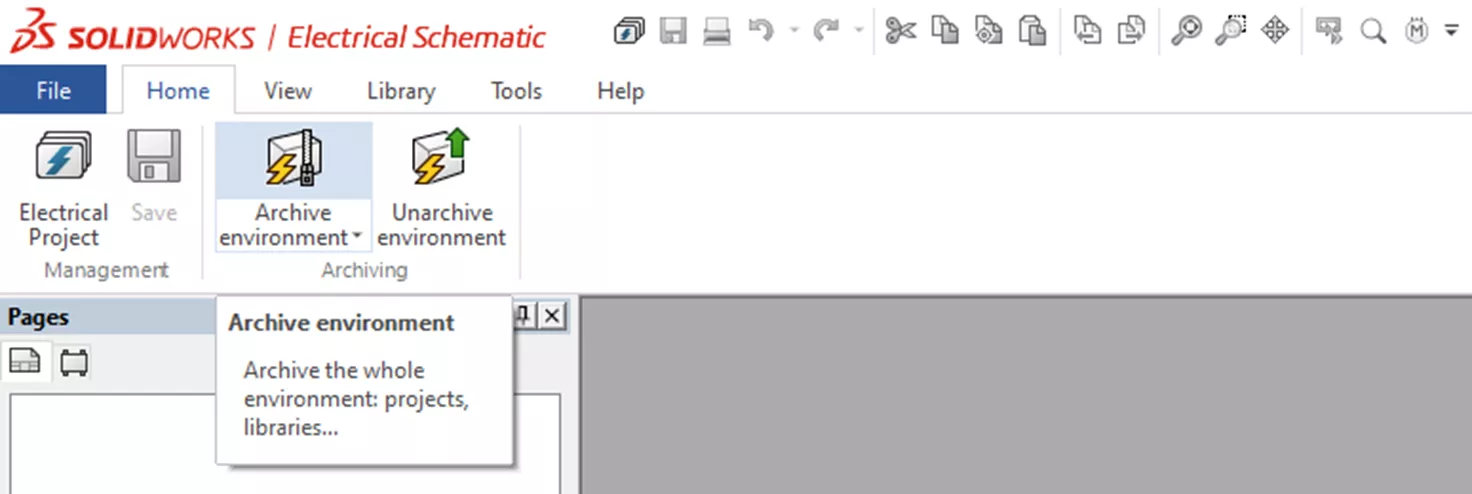
Figure 1: Archiving Section
You will also notice a drop-down menu for the Archive environment selection. This provides access to the Run external archiver. Learn more about the External Archive in this article: SOLIDWORKS Electrical Auto-Archiver Setup.
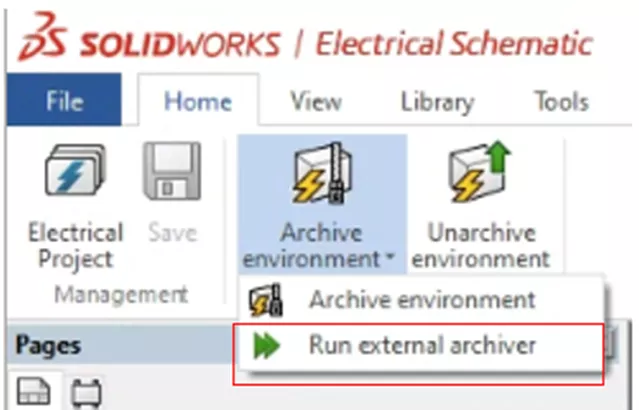
Figure 2: Auto Archiver
Select the Archive Environment to begin the process. On the welcome page of the archiving wizard hit Next.
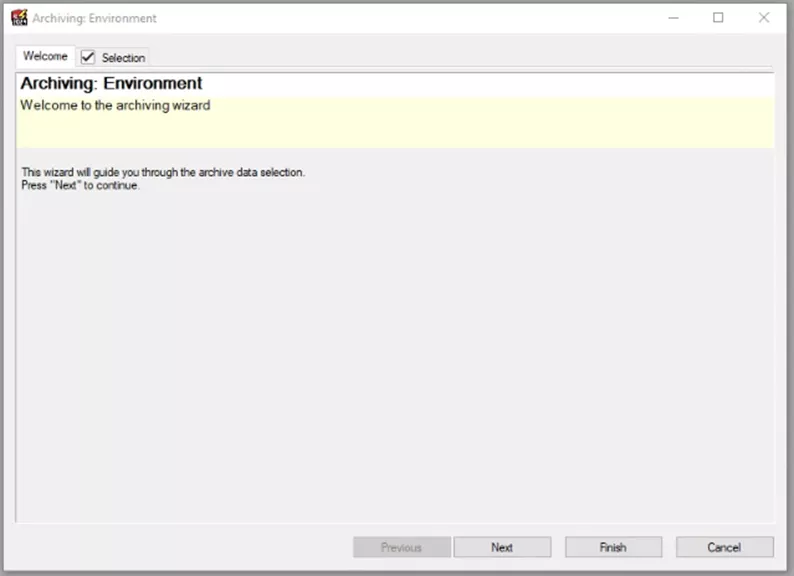
Figure 3: Welcome Page
On the Data Selection page, Custom is selected by default so you have full control over what you would like to archive.
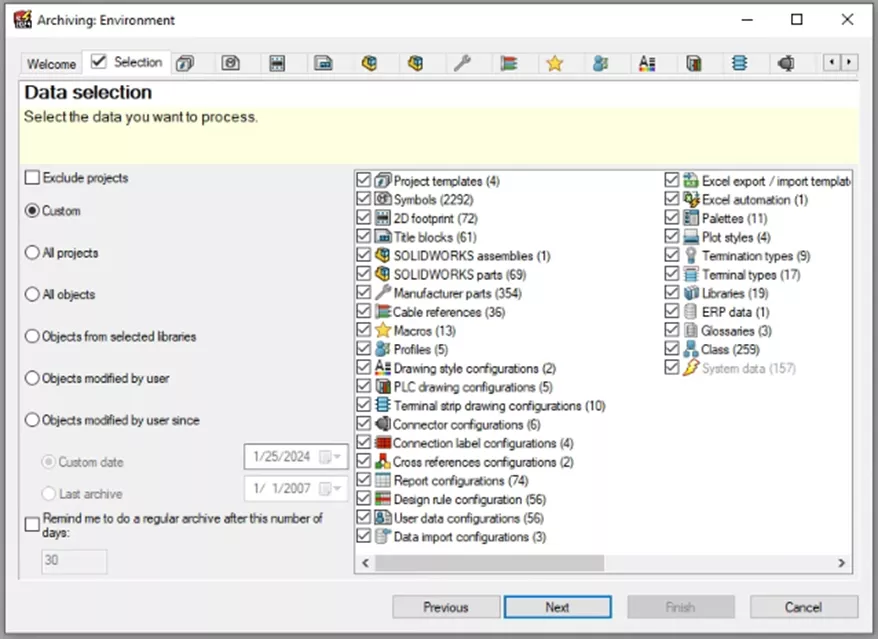
Figure 4: Data Selection
At the start, every piece of your environment is selected. You can see this in the right section of the Selection page. This section lists every possible item that can be archived as well as how many of those items are available.
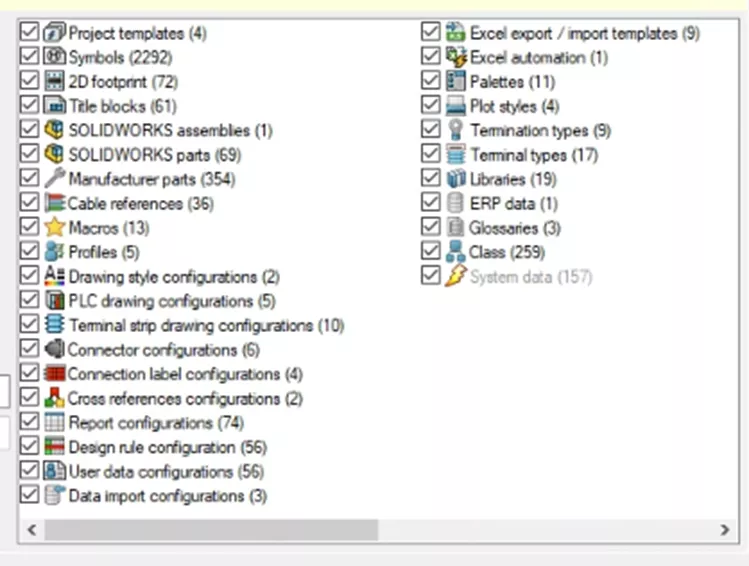
Figure 5: Items to Archive
Other options that can be selected are:
- All Projects
- This will only archive the projects and has no other selections needed.
- All Objects
- This will archive everything in your environment besides your projects. There are no other selections in this process.
- Objects from Selected Libraries
- Selecting this option is the same as All Objects, except in the next tab you will be allowed to select which libraries to include or exclude.
- Objects Modified by User
- As you work with SOLIDWORKS Electrical, you will need (and it is recommended) to create your own items such as symbols or manufacturer parts. This option allows you to grab everything your users have modified.
- Objects modified by User Since
- This is the same as the previous selection, but now you can choose to capture items modified after a certain date or since the last Environment Archive was taken.
The final selection on this menu is the Reminder option. With this, SOLIDWORKS Electrical will remind you to take an Archive after a set number of days. For this example, select Custom and hit Next.
As you make a Custom Archive, you will notice a tab for every item type and when on that tab, a list of every item. This is so you have full control over what to include. As you can see from the Project Templates tab, the default templates are listed (you will see more if you have created custom templates).
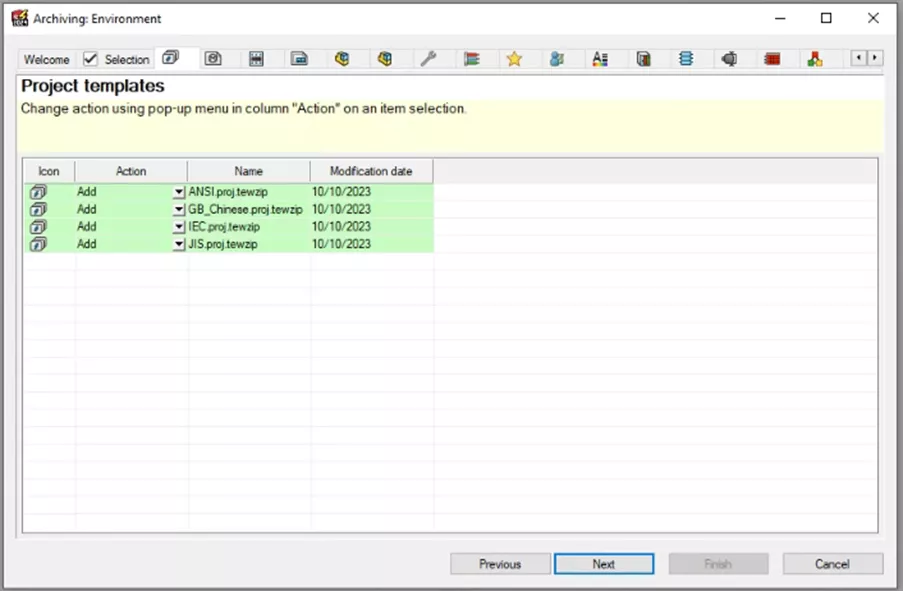
Figure 6: Project Templates
There are four columns: Icon, Action, Name, and Modification date.
The Icon column shows what type of item you are working with, the Name column tells you the name of the item, and the Date Modification column shows when this item was last modified. The Action column is what we are the most concerned with. When first creating an Archive, the Action column is set to “Add” for all items, assuming you want to capture everything. However, if you do not want to capture certain items, you can change this. At the drop-down are two options: Add or Do nothing.
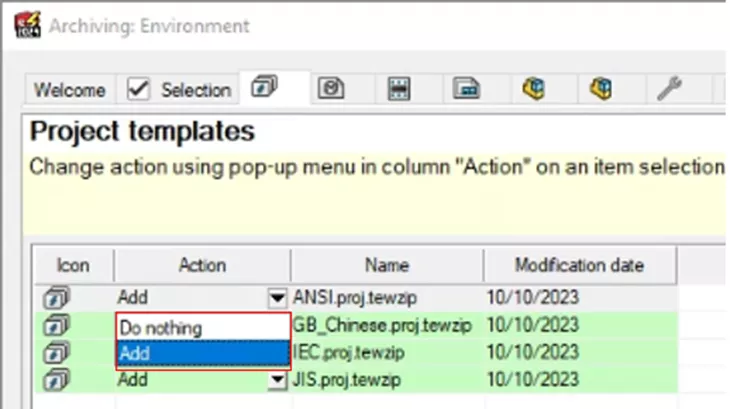
Figure 7: Add or Do Nothing
Select Add to include this item or select Do Nothing to not include this item. For the most part, grabbing everything is desired, so in this example, we will continue to hit Next until the end.
In versions older than SOLIDWORKS Electrical 2024, the Finish button will be selectable, and hitting Finish will take you to the Finish tab.
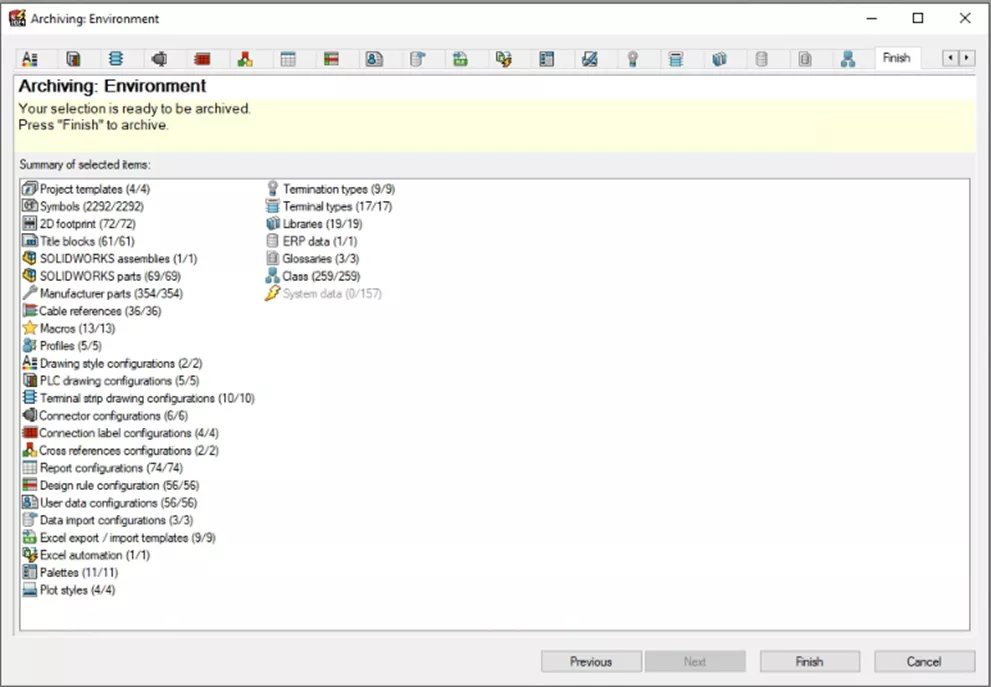
Figure 8: Finish Tab
On the Finish tab, you can review what is being added. Next to each item type is a count for the number of items being added compared to the total number of items that could be added. In this example, we are adding everything, so the two numbers should match.
Once everything looks good, hit Finish. You are prompted to name the Archive and where it should be saved. Make those selections and hit Save.
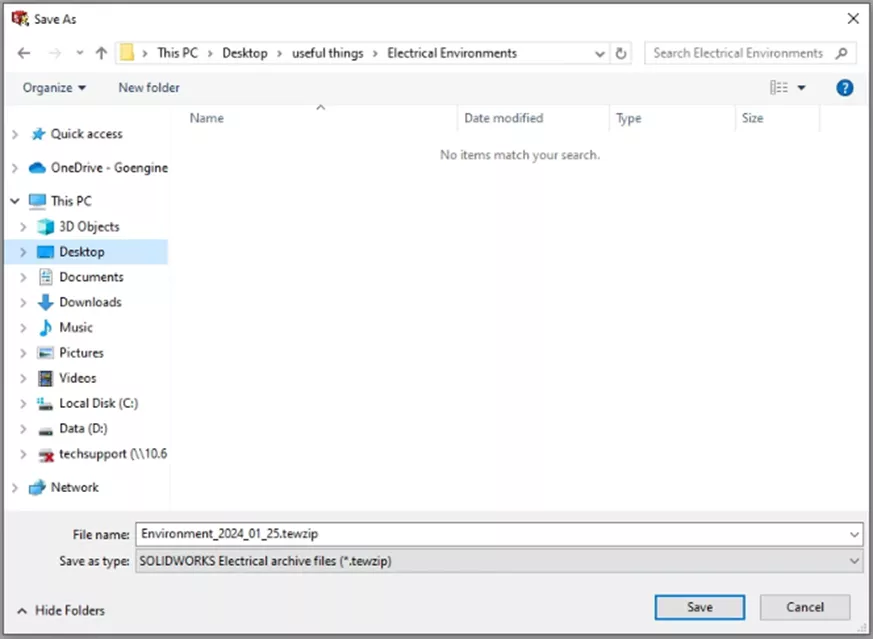
Figure 9: Save As
After hitting Save, SOLIDWORKS will run a check on all the items selected and generate a report.
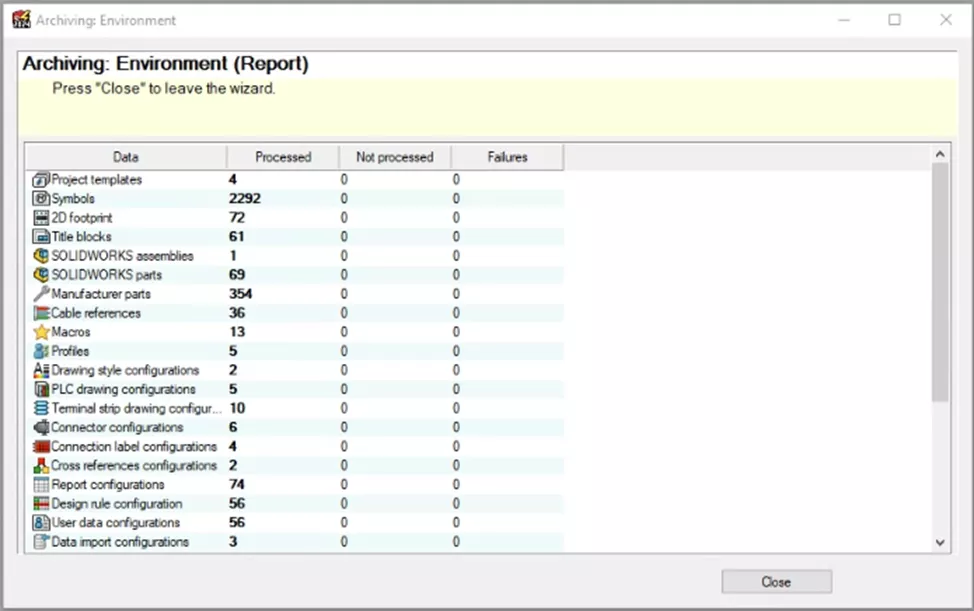
Figure 10: Report
This report will show the number of items processed, not processed, and failures.
Not processed items are the items you chose not to include.
Failures alert you about any items that could not be included due to corruption or other factors. After reviewing the report, select Close.
SOLIDWORKS will begin to compile and save the archive. During this process, you might see green progress bars appear on the screen and then disappear. Make sure to let this go until you see the Archive complete menu where it will ask you if you would like to open the folder containing the Archive.
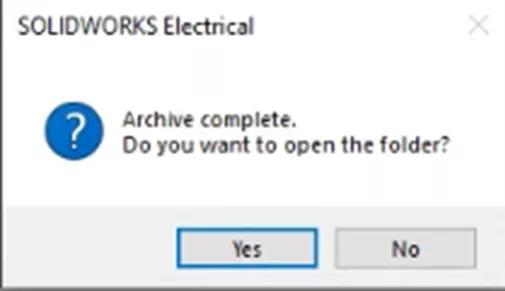
Figure 11: Archive Complete
Now that we have the Archive, all our data is saved. A good practice after making an Environment Archive, is to double-check its integrity, to confirm the process completed without issue. To do so, run your Archive through most of the unarchiving process. When doing this, you will see practically the same menus as you did before when archiving. Continue until you get to the report page.
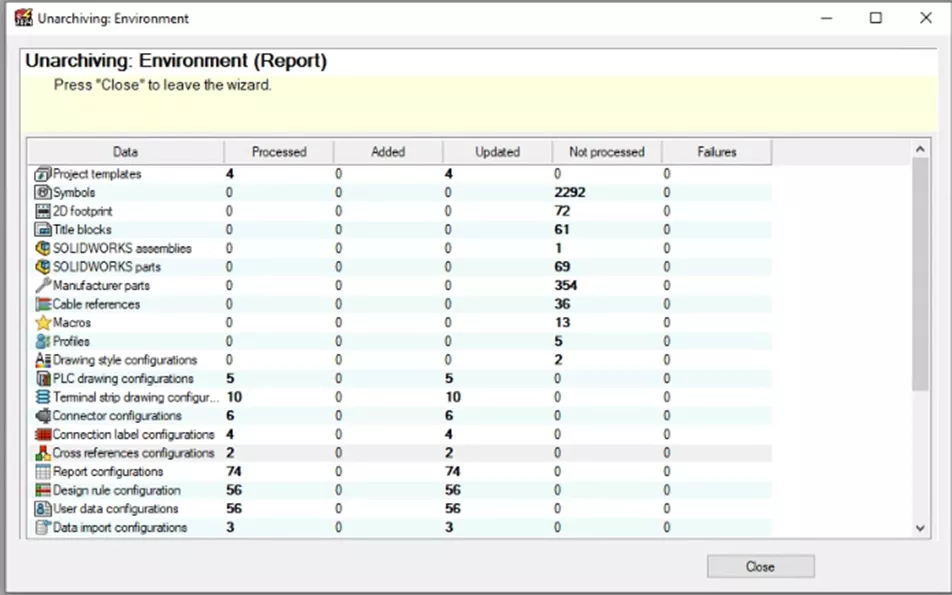
Figure 12: Unarchiving Report
On the report page, you are looking for any failures. If there are 0 failures, your Archive is complete with no issues. Whether you are upgrading, migrating, or just creating a backup, you can use this to restore your environment.
Editor's Note: This article was originally published in January 2015 and has been updated for accuracy and comprehensiveness.
Expand Your SOLIDWORKS Electrical Skillset
Wrapping Attribute Text in SOLIDWORKS Electrical
How to Delete or Replace a Cable in SOLIDWORKS Electrical
SOLIDWORKS Electrical Manual SQL Instance Creation
Removing Combs from SOLIDWORKS Electrical PLCs
SOLIDWORKS Electrical 2D: Changing the Automatic Root Value for Symbols
About Nathen Blas
Nathen Blas is a SOLIDWORKS Technical Support Engineer based out of our Headquarters in Salt Lake City, Utah. He earned his Bachelor’s degree in Mechanical Engineering at the University of Utah in 2018 and joined the GoEngineer family that same year.
Get our wide array of technical resources delivered right to your inbox.
Unsubscribe at any time.