How to Install SOLIDWORKS with the PDM Client
SOLIDWORKS PDM Professional and SOLIDWORKS PDM Standard client can be installed at the same time as SOLIDWORKS. Installation uses the SOLIDWORKS Installation Manager located on the SOLIDWORKS DVD or downloaded from SOLIDWORKS.
Follow the steps linked here to download and extract SOLIDWORKS. The article, SOLIDWORKS PDM – Complete Guide to Client Installation has more granular steps and troubleshooting within the client’s local view.
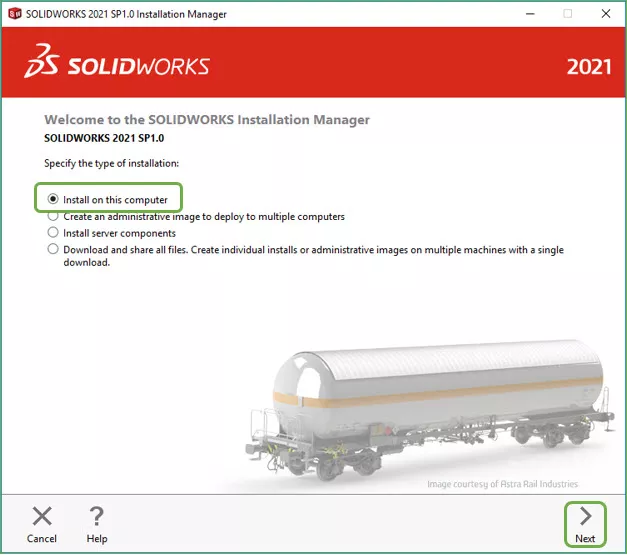
Once the Installation Manager has been started, select Install on this computer and select Next.
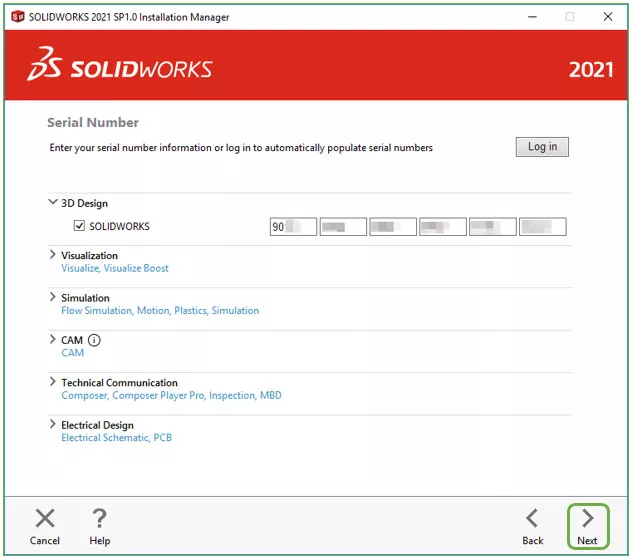
On the Serial Number page, input your serial numbers for SOLIDWORKS and any additional tools and select Next.
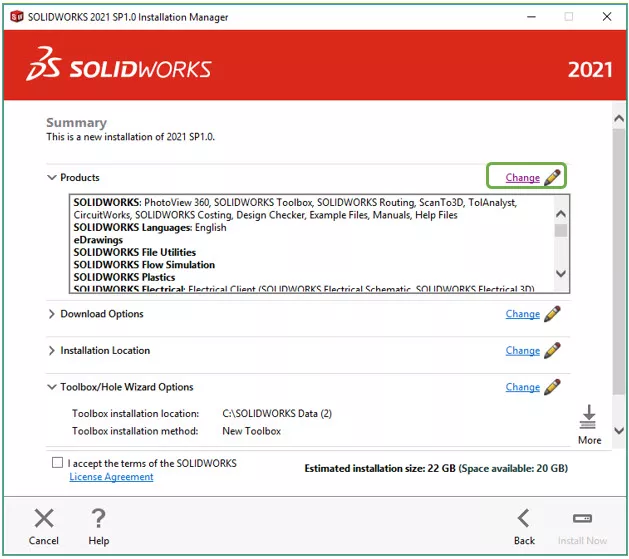
On the Summary page, select Change next to Products.
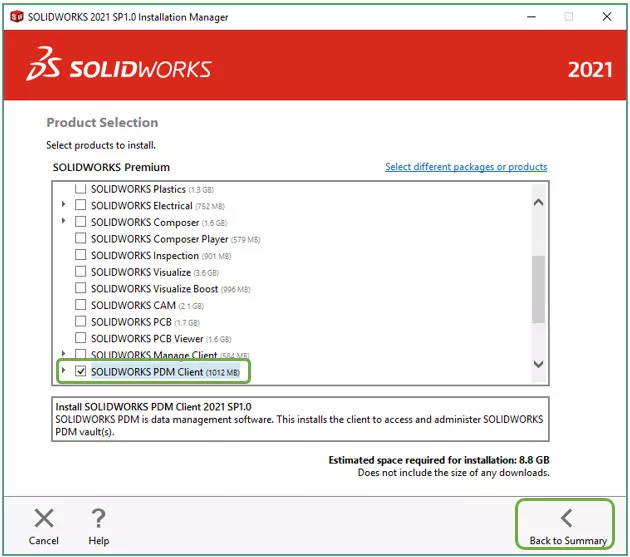
On the Product Selection page, select the software you want to install and uncheck the parts you do not. Make sure the SOLIDWORKS PDM Client is selected and select Back to Summary.
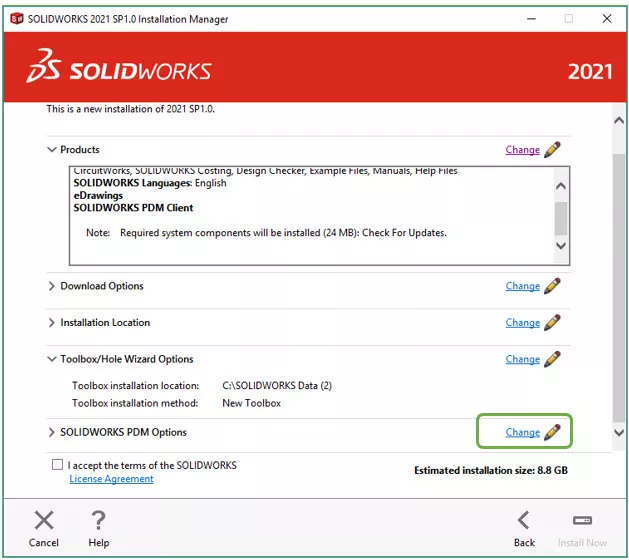
Back on the Summary page, select Change next to SOLIDWORKS PDM Options.
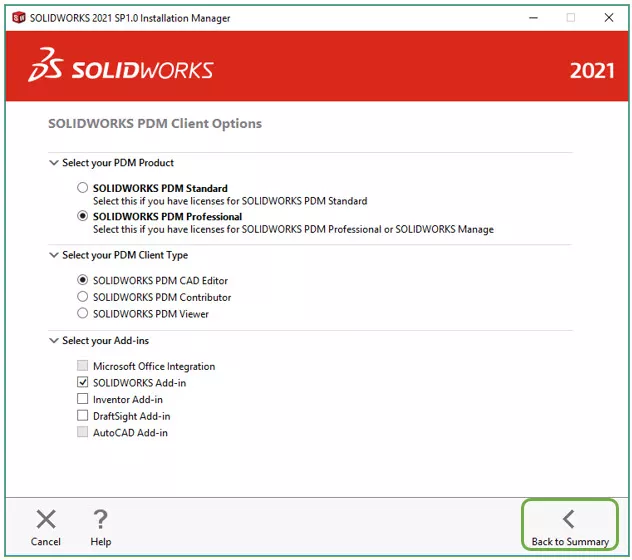
Select the SOLIDWORKS PDM Product, Client type, and any Add-ins you need. Consult your PDM administrator to see which options to select. One of the most frequent causes for not being able to connect to the vault later is choosing the wrong PDM product here, so take a moment to make sure you have the correct selection.
Once the SOLIDWORKS PDM Client options have been selected, click Back to Summary.
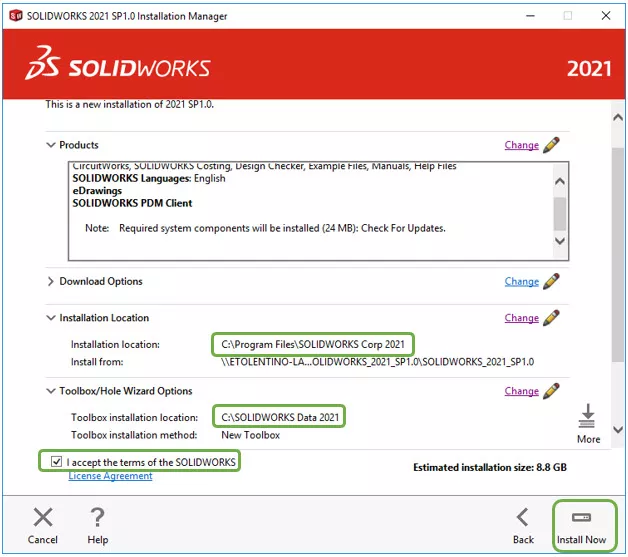
Back on the Summary page read and accept the License Agreement from SOLIDWORKS. Click on the checkbox to accept the terms.
- The Installation Location and Toolbox/Hole Wizard Options can be changed. GoEngineer suggests changing the name of the installation to reflect the SOLIDWORKS version for future reference.
- Select Install Now.
Creating the SOLIDWORKS PDM Vault View
With the PDM Client now installed, the Vault View must be created to connect to the vault. The View Setup tool can create the Vault View and is found in Start > Programs > SOLIDWORKS PDM > View Setup.
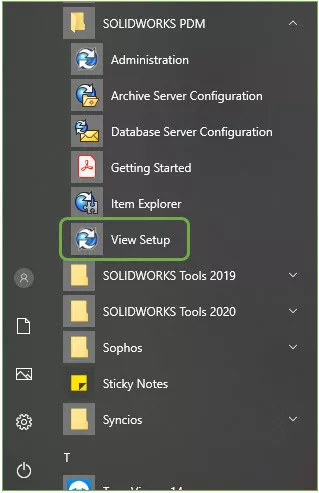
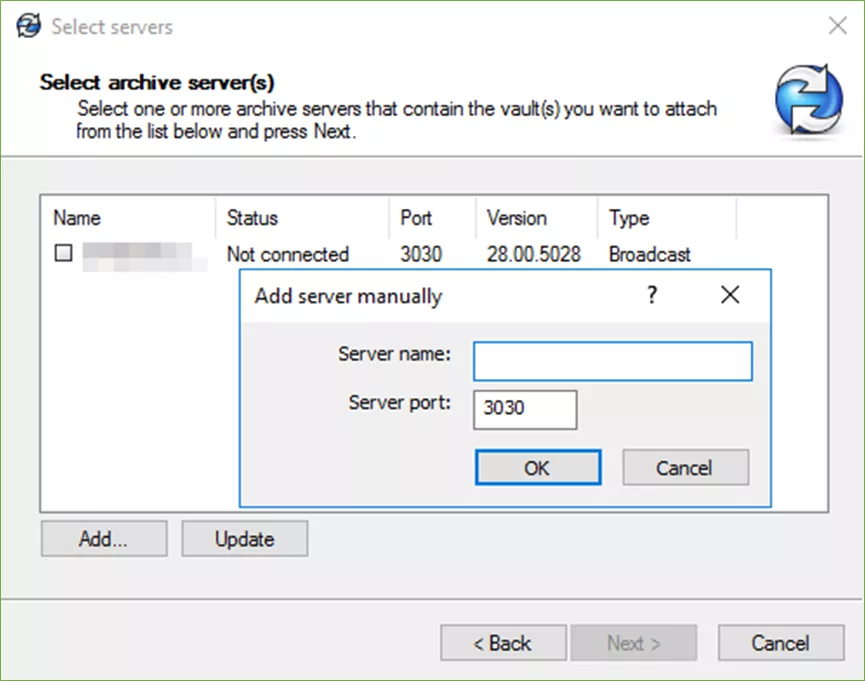
In the View Setup tool, click Next to begin the process. If your PDM Server is already listed, you can select the checkbox next to it and click Next. If your PDM Server is not listed, select Add… and enter the server name.
Select Next once the server has been selected.
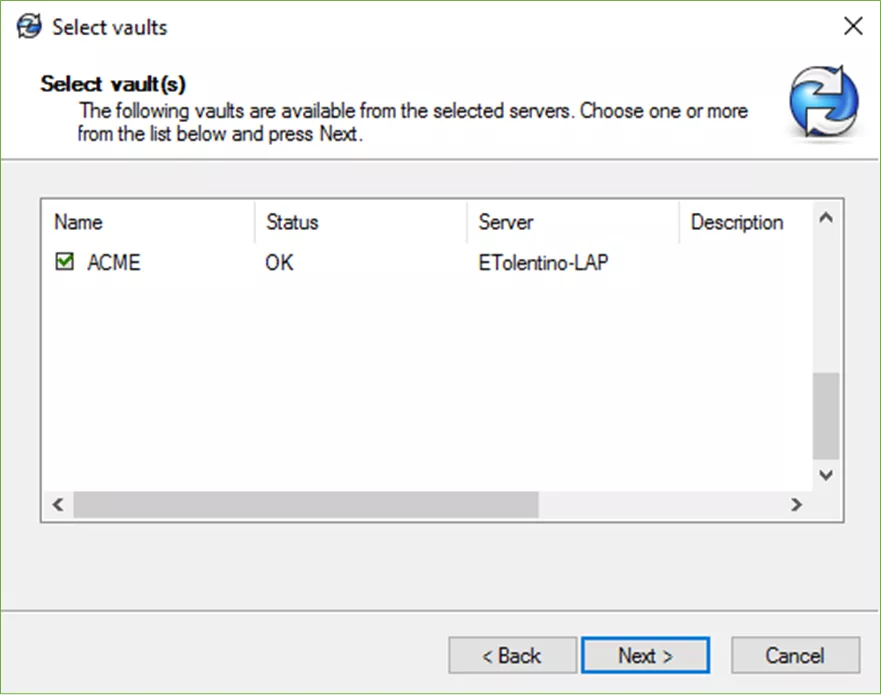
Select the Vault that you want to connect to and click Next.
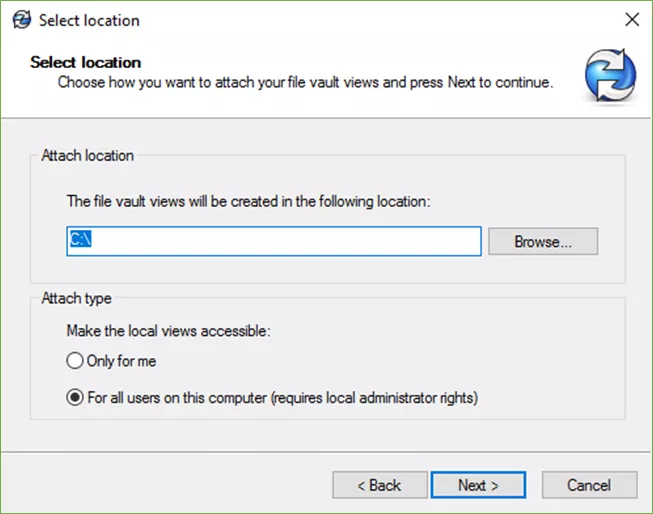
Select the location for where you want the Vault View to be installed, and the Attach type. We suggest that the Vault View be installed on the root of the C drive (or some other internal storage drive.) to avoid exceeding the Windows path character limit.
It is also very important that this drive location not be in a Dropbox, Sync, or other cloud sharing folders, as these types of software and services do not have the capacity nor work with the SOLIDWORKS PDM database and can damage relationships and meta data between files.
For Attach type, choose who will have access to this Vault View. It is best to use the default "For all users on this computer" setting unless there is a need to have the Vault View only be accessible to a particular user such as if the computer is shared with other users.
Once the selections are made, click Next.
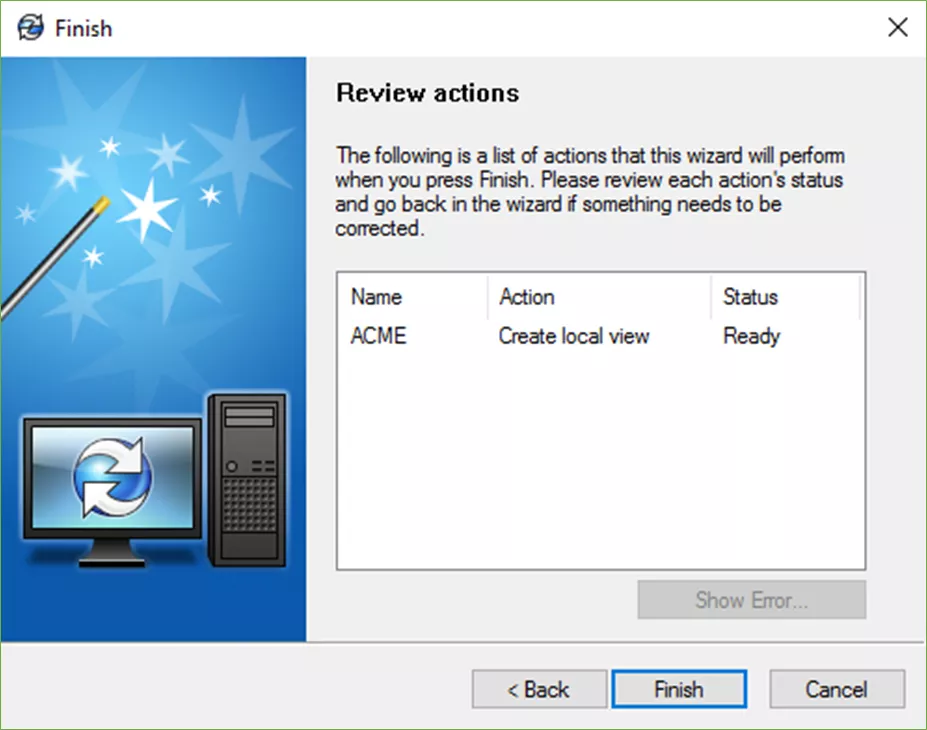
Review the settings and click Finish to add the Vault View to this computer.
Once the Vault View is created, you can find it in the installed location and accessing it by logging in.
You’ve successfully installed the SOLIDWORKS PDM Client and created your Vault View. For more information about SOLIDWORKS PDM, check out the articles listed below.
PDM Training
The focus of the SOLIDWORKS PDM Administrator training course is the fundamental skills and concepts central to the successful use of SOLIDWORKS PDM Professional. If you are someone who will setup and/or administer SOLIDWORKS PDM Professional, this class is for you! Learn more below.
Learn More About SOLIDWORK PDM
Always Show SOLIDWORKS PDM Icon (Blueberry)
Enabling the SOLIDWORKS PDM Administration Tool Shortcut
Greyed Out Vault View in SOLIDWORKS PDM: Quick Tip
SOLIDWORKS PDM: Create and Deploy a Local View File
Updating Data Cards with XML Import for SOLIDWORKS PDM Professional

About Enrico Tolentino
Enrico graduated from California State Polytechnic University with a degree in Engineering. He is a data management specialist at GoEngineer based in Southern California. A car guy, Enrico frequents the SoCal open track days to test his limits. And, of course, his corgi's name is Rally. :)
Get our wide array of technical resources delivered right to your inbox.
Unsubscribe at any time.
