Creating Exploded Views in SOLIDWORKS with Selection Sets
Creating Exploded Views in SOLIDWORKS can get frustrating when selecting the same entities for each explode step. Using the Selection Sets tool helps streamline the process. This tutorial demonstrates how.
Creating Selection Set
The first step is to create Selection Sets for the assembly model. To do this, first, select the components that you want to group. The example below shows the Green parts being grouped into a Selection Set.
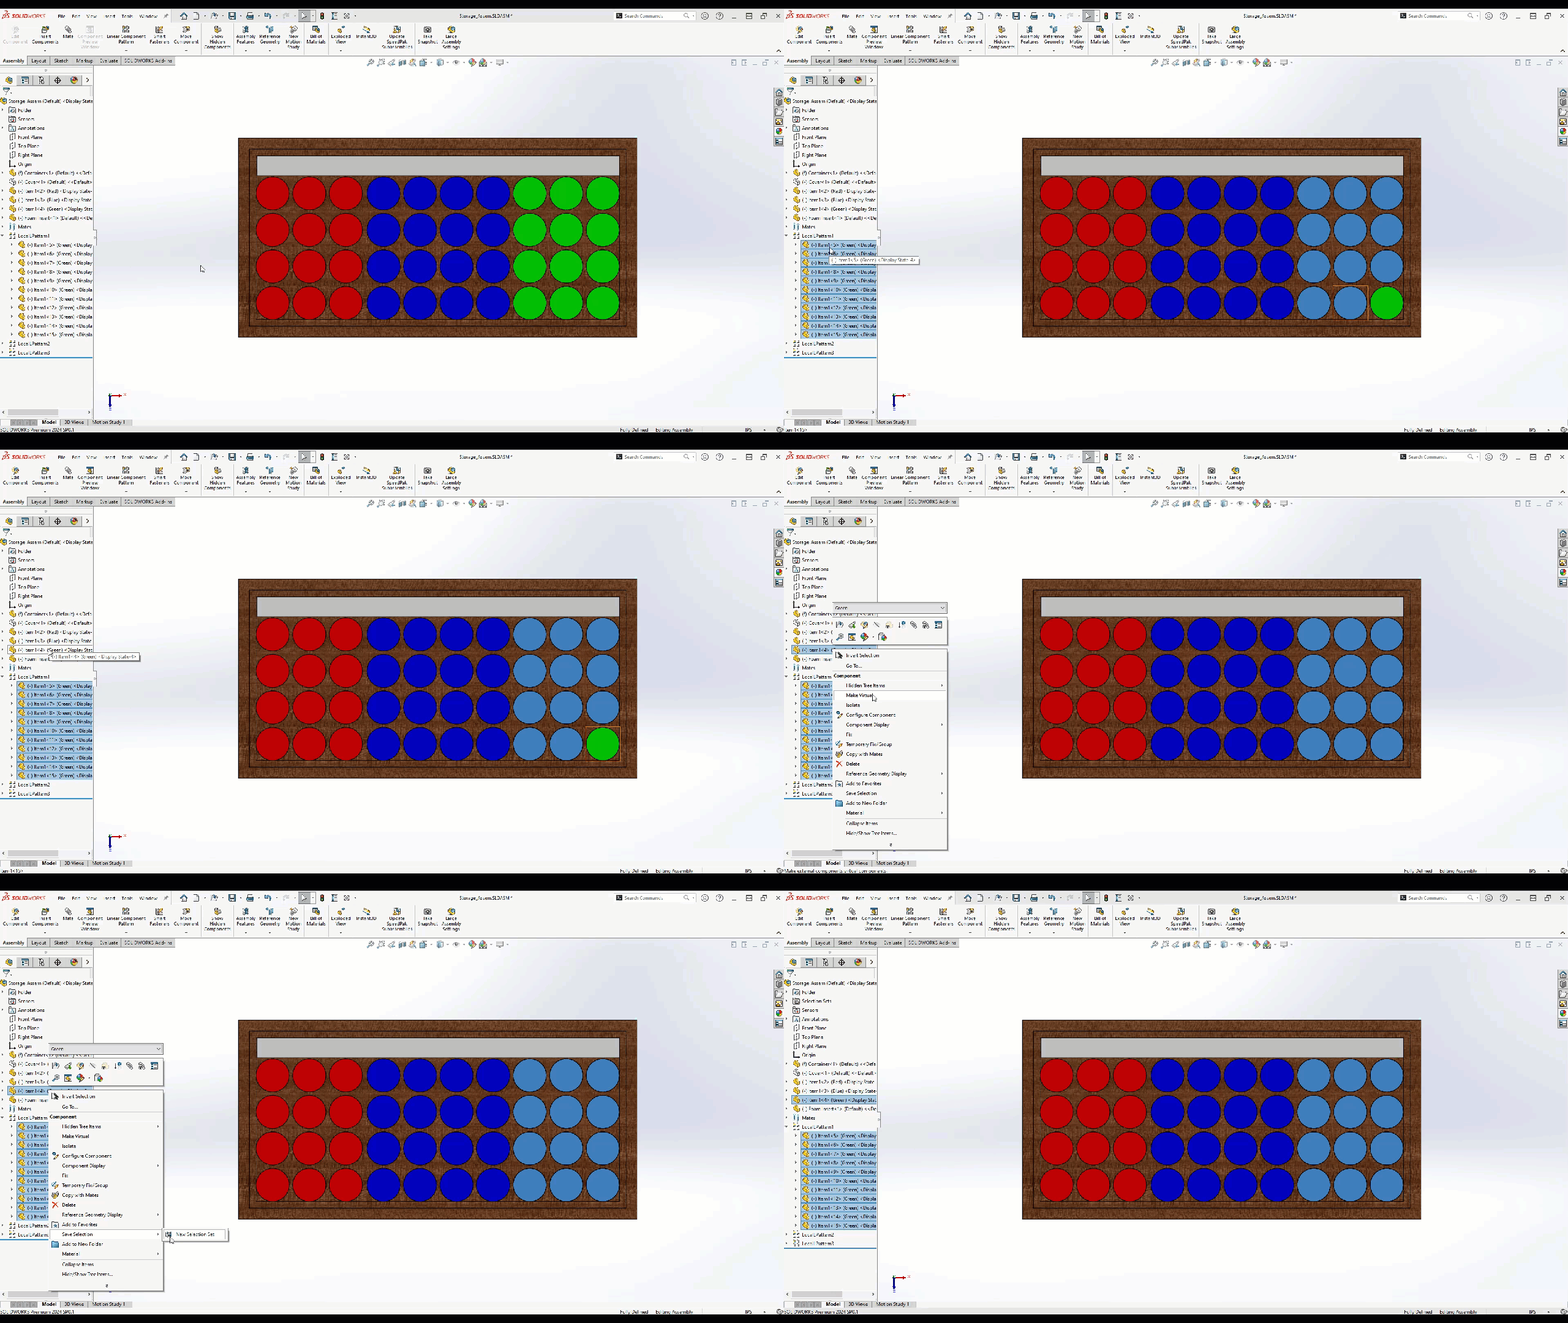
After the Selection is created, you can rename them to help clarify what is in each grouping to further optimize your creation of the Exploded View. This can be done by expanding the Selection Sets folder in the FeatureManager Design Tree, right-clicking the selection set, and selecting the option to Rename Tree. This can be seen below for renaming the last selection set to Green.

Once the Selection Sets are ready, they can be put to use when creating the Exploded View making it easier to select components. Selection Sets can also be created when the model is exploded.
Creating the Exploded View
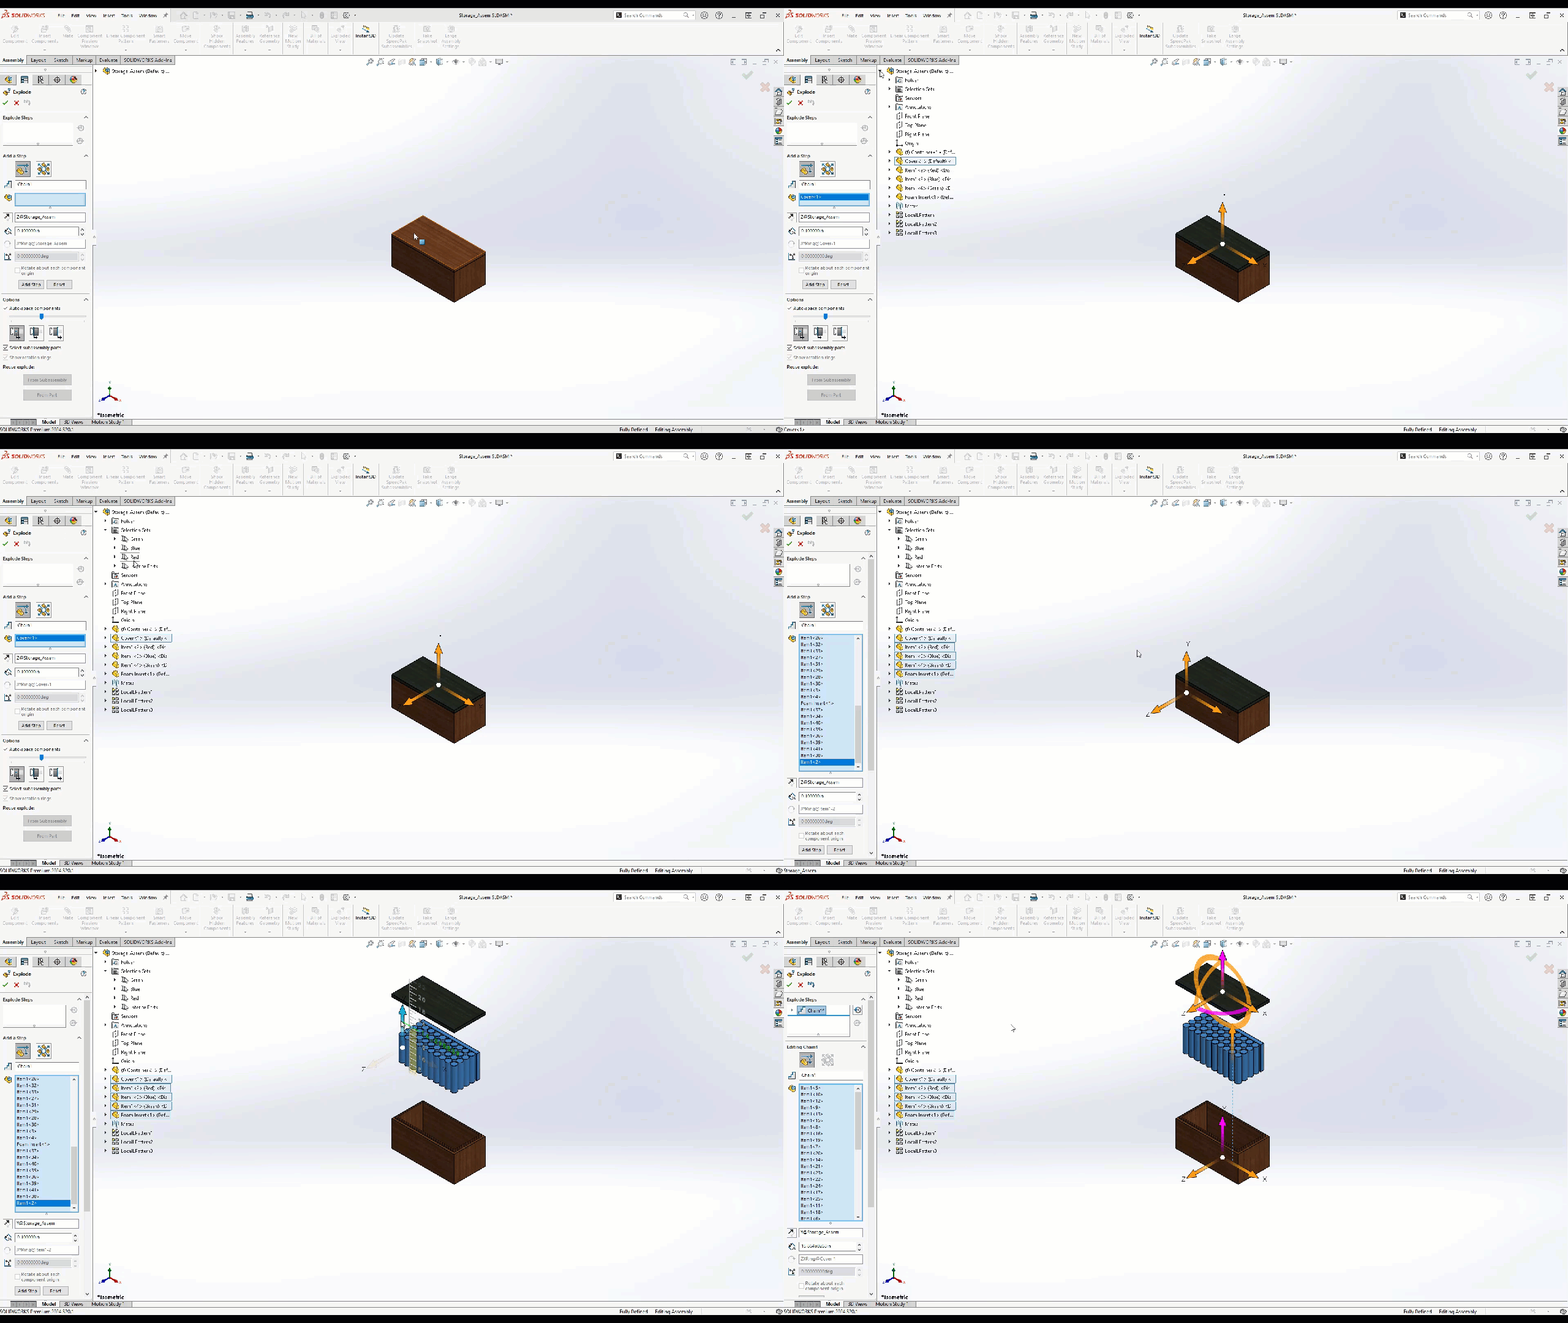
To create the Exploded View, select the Configuration tab, right-click the active Configuration, and select the option New Exploded View.

With the Exploded View PropertyManager open, you can utilize the Selection Sets to quickly select all the components that need to move. Shown below is the Cover being selected along with the Interior Parts Selection set to create the first step.
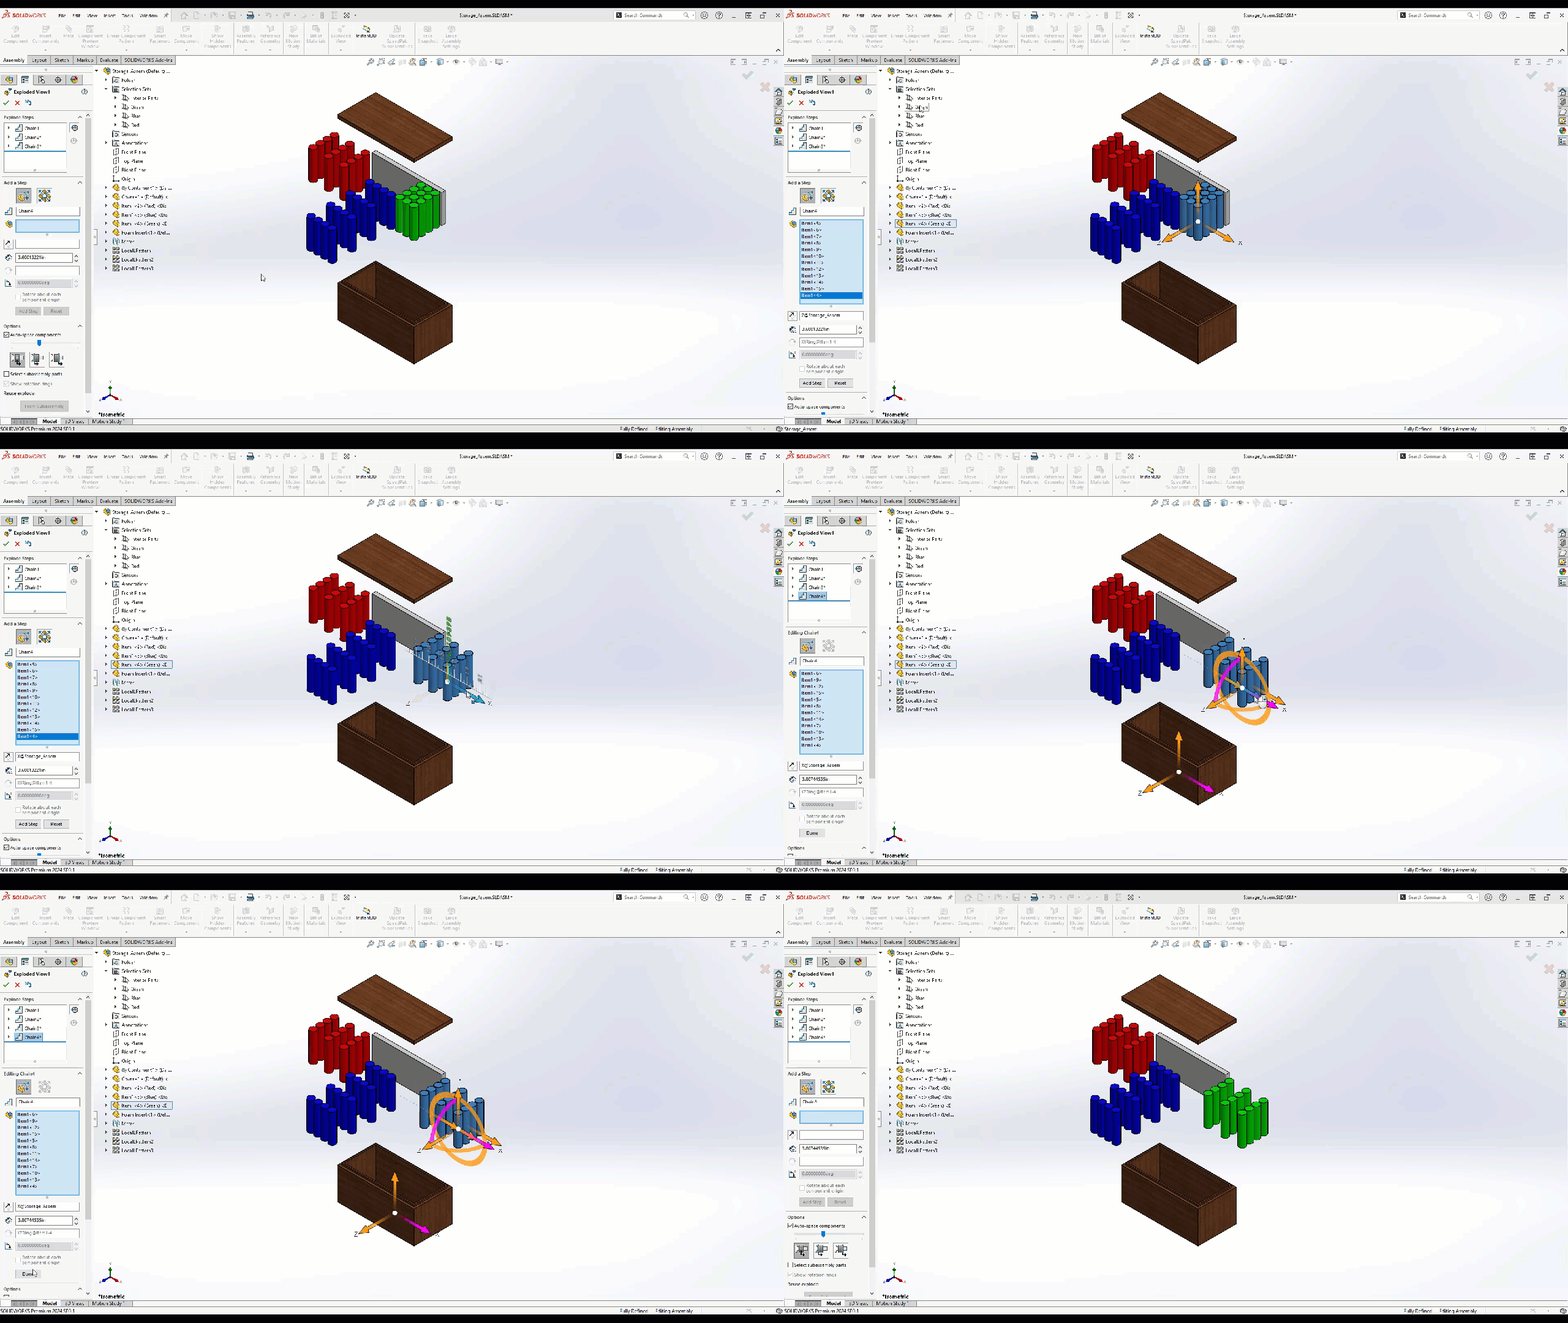
After this explode step is done, you can utilize the other colored Selection Sets to create additional steps in the Exploded View. The final explode view step shown below is for the Green items.
Pre-Existing Explode View
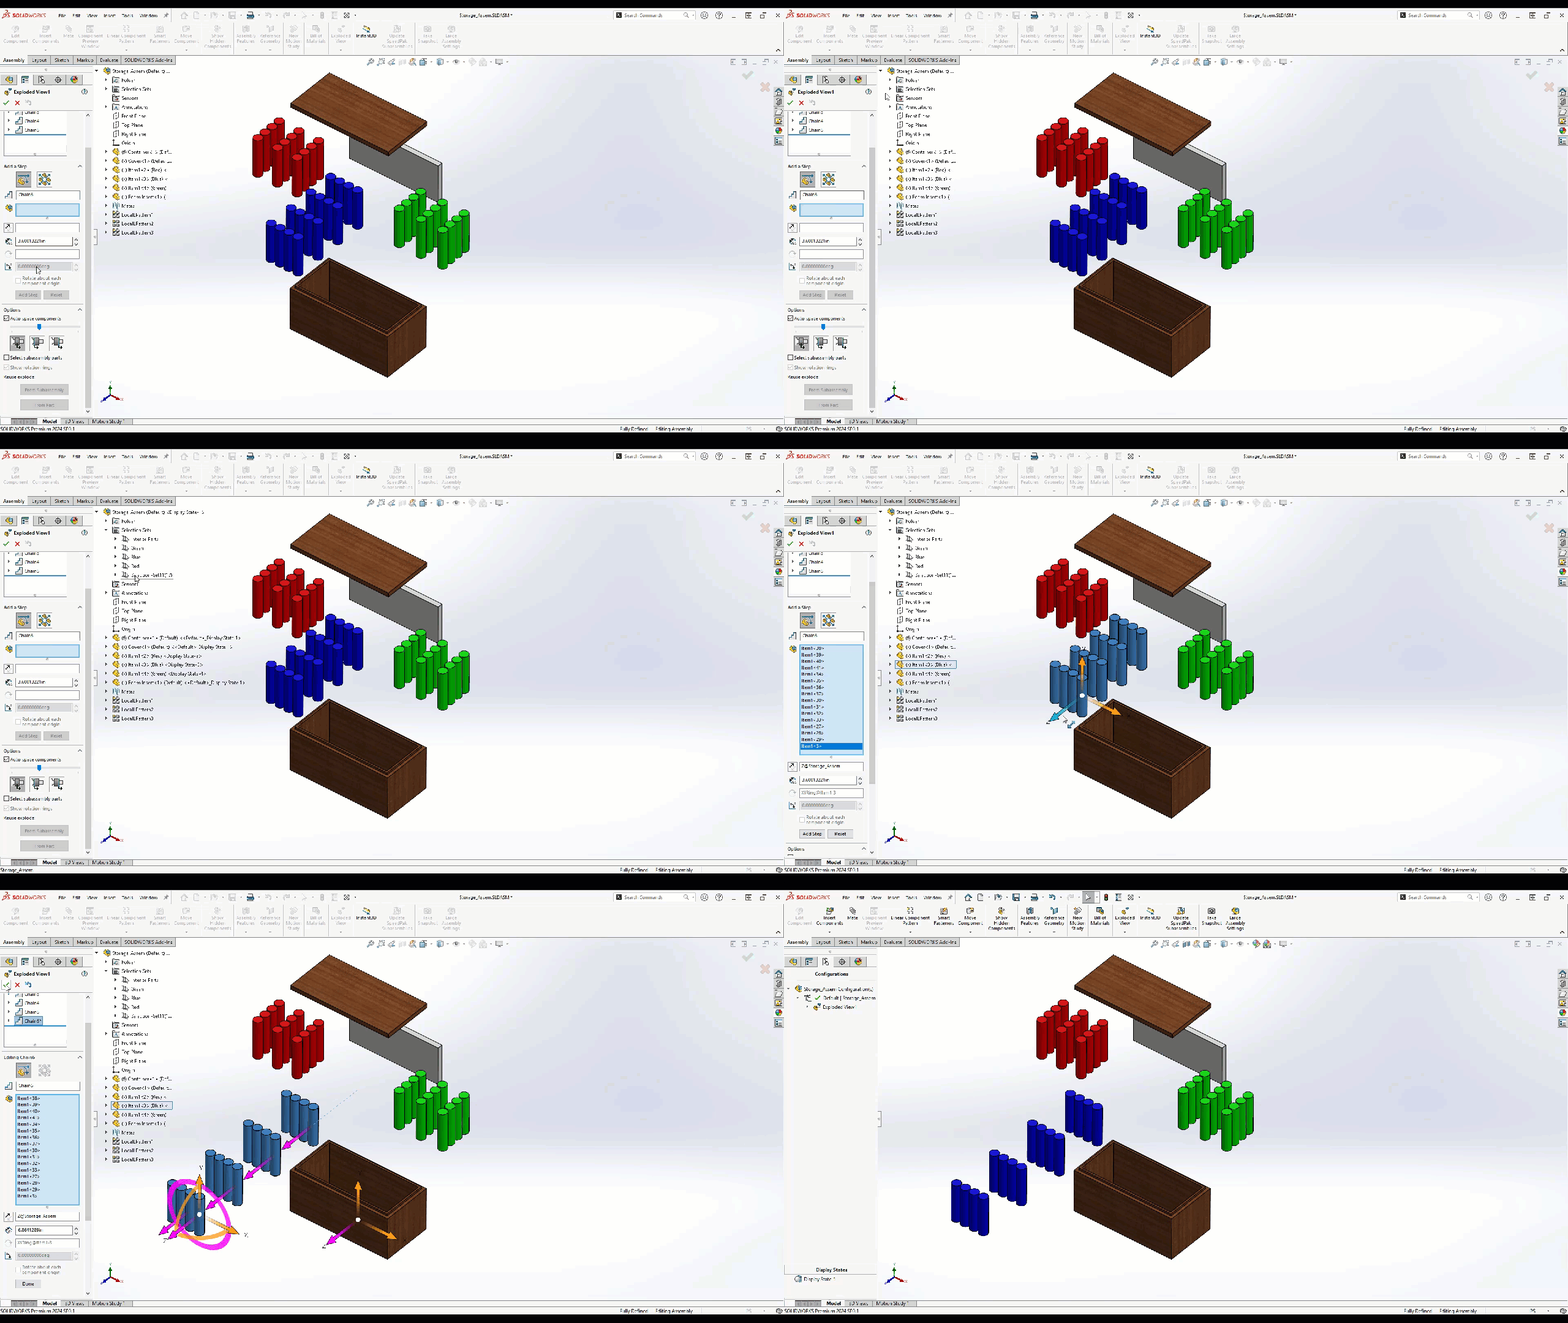
If you already have an existing Exploded View without any Selection Sets, you may be wondering... how does this help me? Well, you are in luck, as you can still create the Selection Sets for the components in question, and in SOLIDWORKS 202X and newer, you can create the Selection Sets from the previous Explode Step. This can be seen below where the Selection Set is created from Chain 3 by right-clicking the Explode Step Components window and selecting the option to save Selection Set.
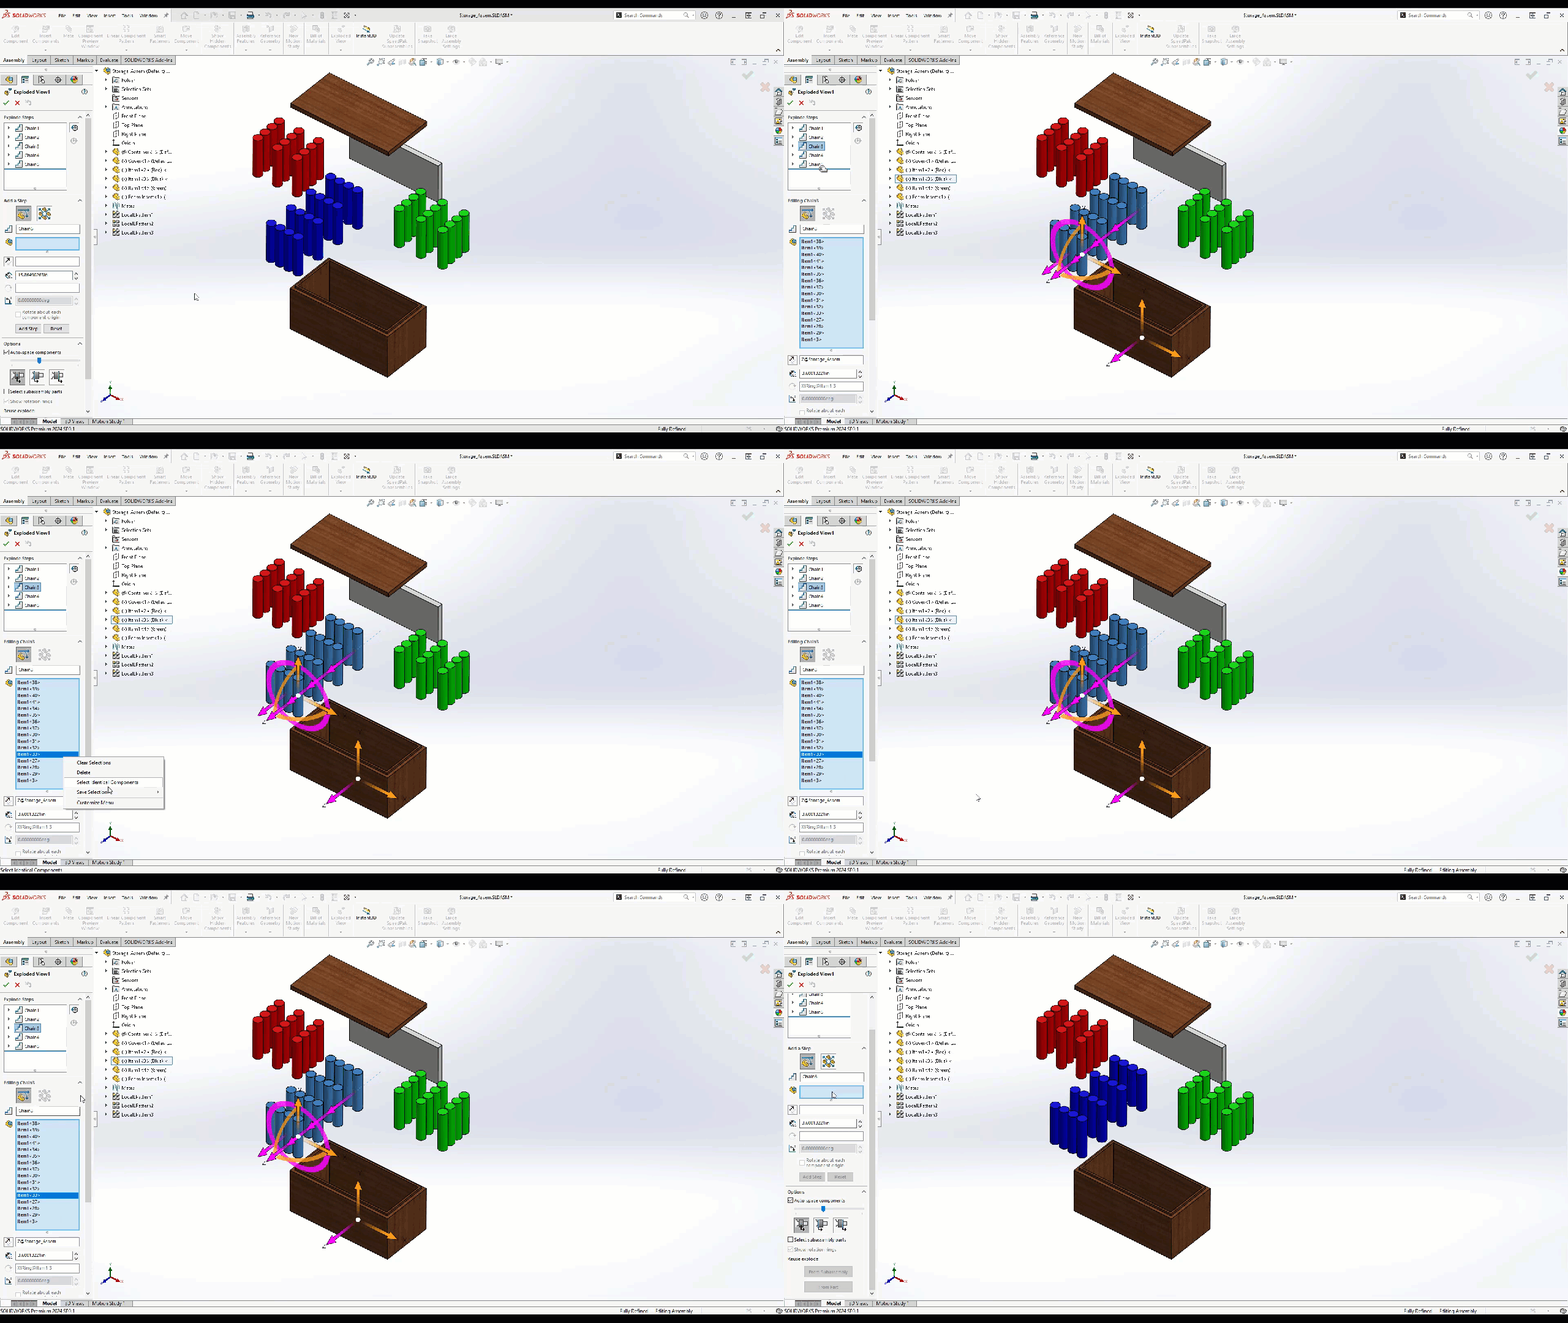
The newly created Selection Set can then be used in the new explode step without having to exit the command and re-enter it.
Considerations
When creating the Selection Set, I recommend selecting the items from the FeatureManager Design Tree or using the Click Drag to the left for the Light-Green selection box to ensure you are grabbing the bodies and not the faces for the Selection Set. The Selection Set can be applied in other areas, such as grouping parts together to hide en masse or even updating the appearance of the parts in the Selection Set.
I hope this information helps speed up the process when creating Exploded Views in SOLIDWORKS with Selection Sets. Check out more tips and tricks below. Additionally, join the GoEngineer Community to participate in the conversation, create forum posts, and answer questions from other SOLIDWORKS users.

SOLIDWORKS CAD Cheat Sheet
SHORTCUTS ⋅ MOUSE GESTURES ⋅ HOT KEYS
Our SOLIDWORKS CAD Cheat Sheet, featuring over 90 tips and tricks, will help speed up your process.
Related Articles
Working With Exploded Views in SOLIDWORKS:
Create Radial Explode SOLIDWORKS:
Smart Explode Lines in SOLIDWORKS Explained:
Animating an Explode View in SOLIDWORKS
How to Customize the SOLIDWORKS Hatch Pattern File
About Blaze Johnson
Blaze Johnson is a Sr. SOLIDWORKS Support Engineer at GoEngineer.
Get our wide array of technical resources delivered right to your inbox.
Unsubscribe at any time.
