How to Create a Sunlight Environment in SOLIDWORKS Visualize
In SOLIDWORKS Visualize Professional, a sunlight environment can be used to stage a model under a realistic sky using light from the sun. In this tutorial, we’ll cover how to create a sunlight environment and review some parameters for dialing it in.
How to Add a Sunlight Environment in SOLIDWORKS Visualize
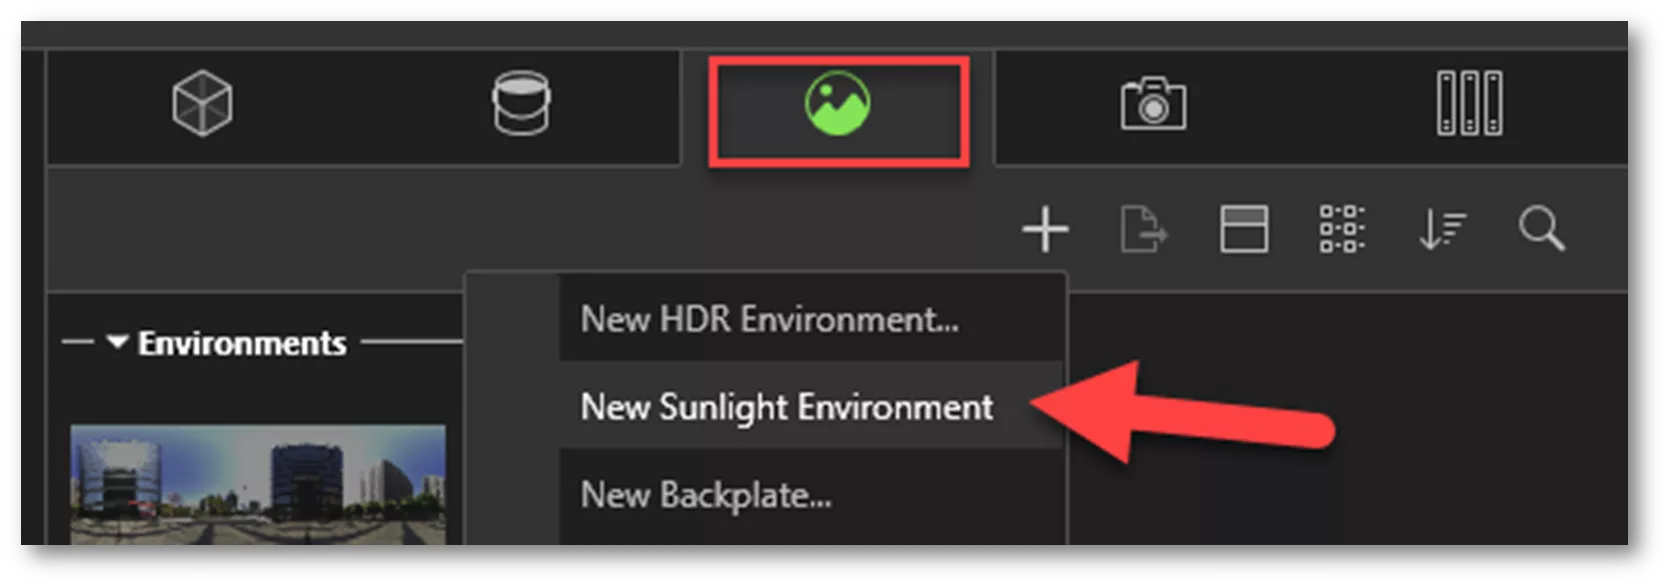
In the SOLIDWORKS Visualize Palette, select the Scene tab, click the Plus icon (+), and choose New Sunlight Environment.
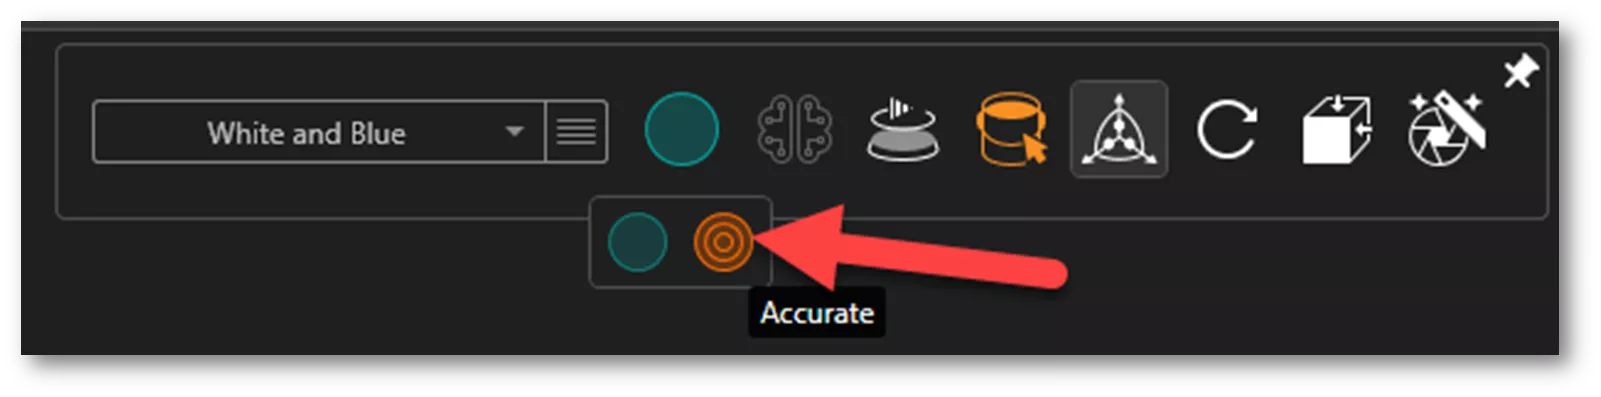
After adding the sunlight environment, it’s a good idea to change the viewport display to Accurate mode. This is the preferred mode for accurately dialing in the sunlight parameters.
Sunlight Environment Settings Overview
To access the sunlight environment settings, click the Scenes tab and select the Sunlight environment icon. The properties pane will appear, displaying the General, Sunlight, and Advanced tabs.
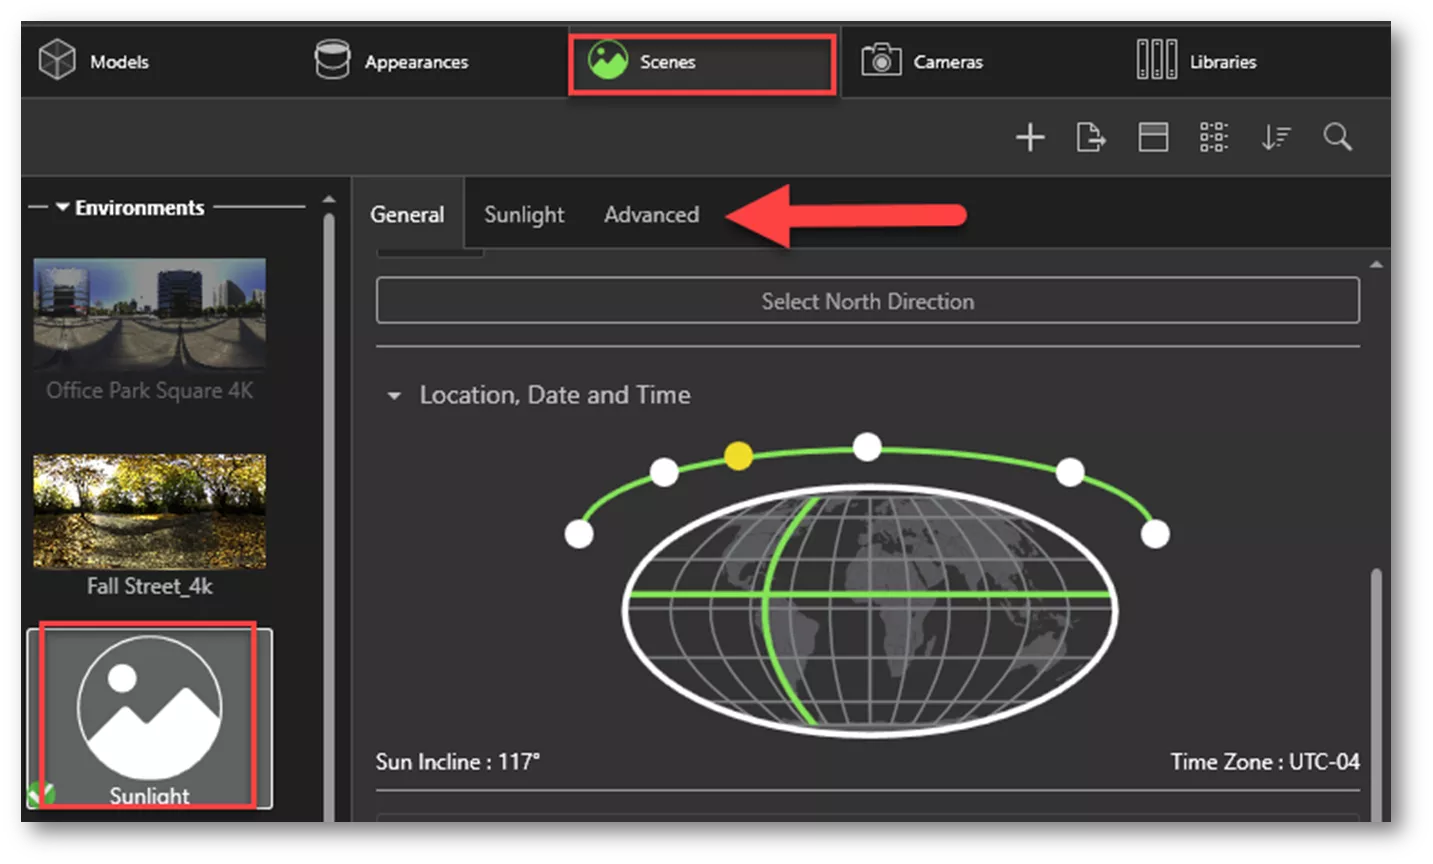
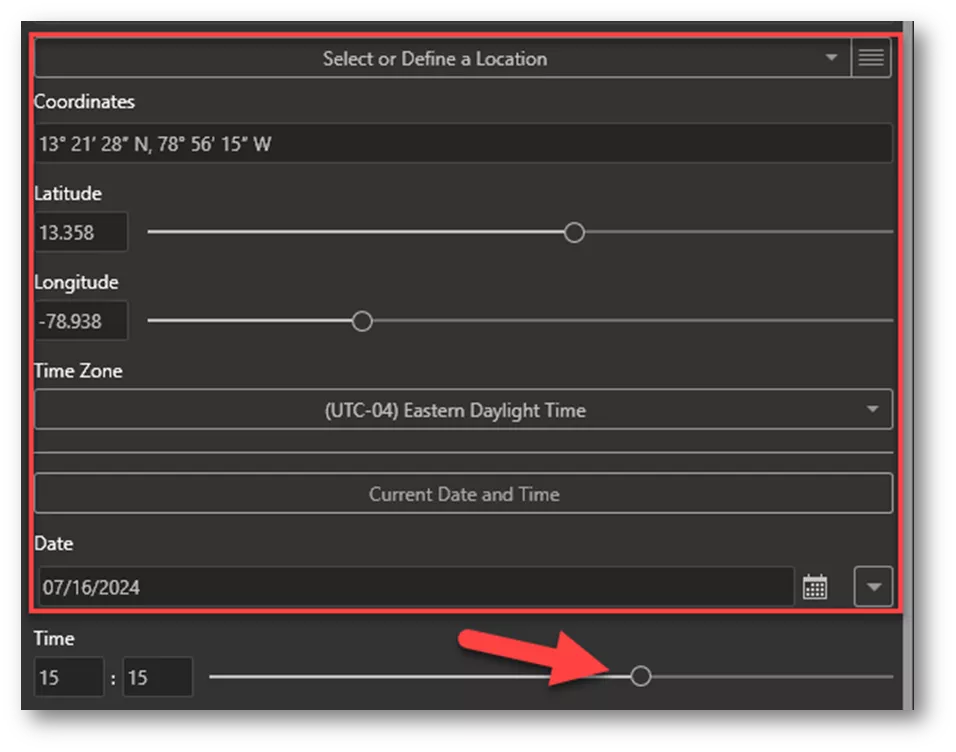
General Tab
The General tab is where the time, date, and location of the scene are located. Visualize defaults to the time, date, and location set for the device when a sunlight environment is created, so it is a good idea to check this before rendering.
As shown above, the location can be adjusted using the globe’s latitude and longitude lines. The latitude and longitude lines can be dragged to the desired position.
Click the sun icons above the globe to view the sun at different positions. You can also key in coordinates, select or define a location, adjust for daylight savings, or manually enter a time and date. Lastly, use the time slider to scrub through the day to see how the sun’s movement interacts with the model.
Sunlight Tab
The Sunlight tab contains settings for:
- Haze
- Red-Blue Shift
- Saturation
- Horizon Blur
- Sun Brightness
- Sun Diameter
- Sun Glow
- Floor
- Night Color
See an example of each of these settings and their effects below.
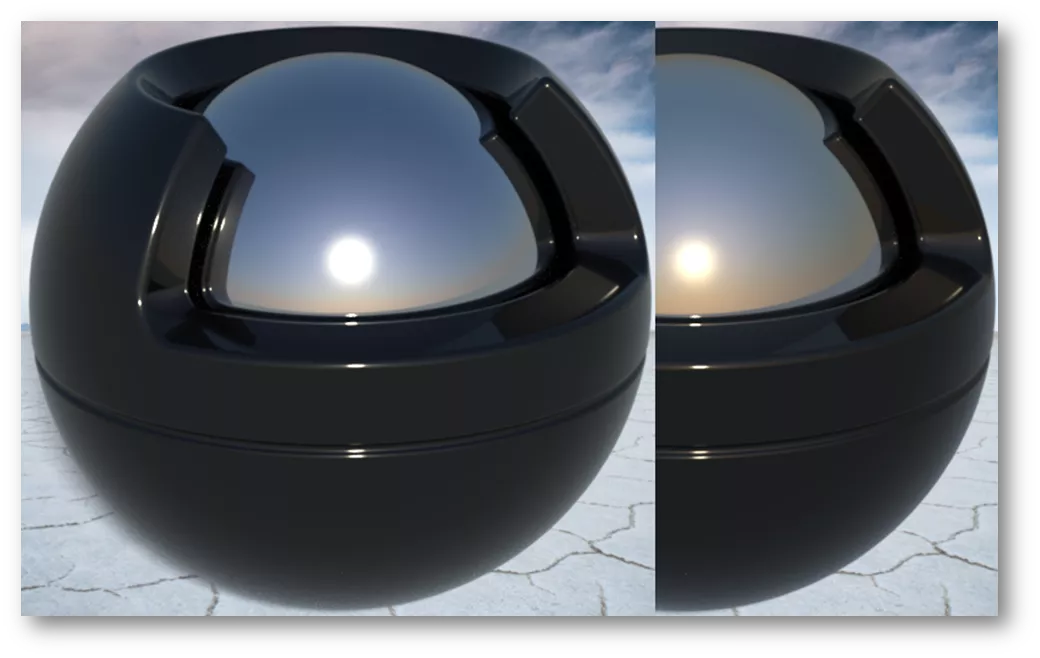
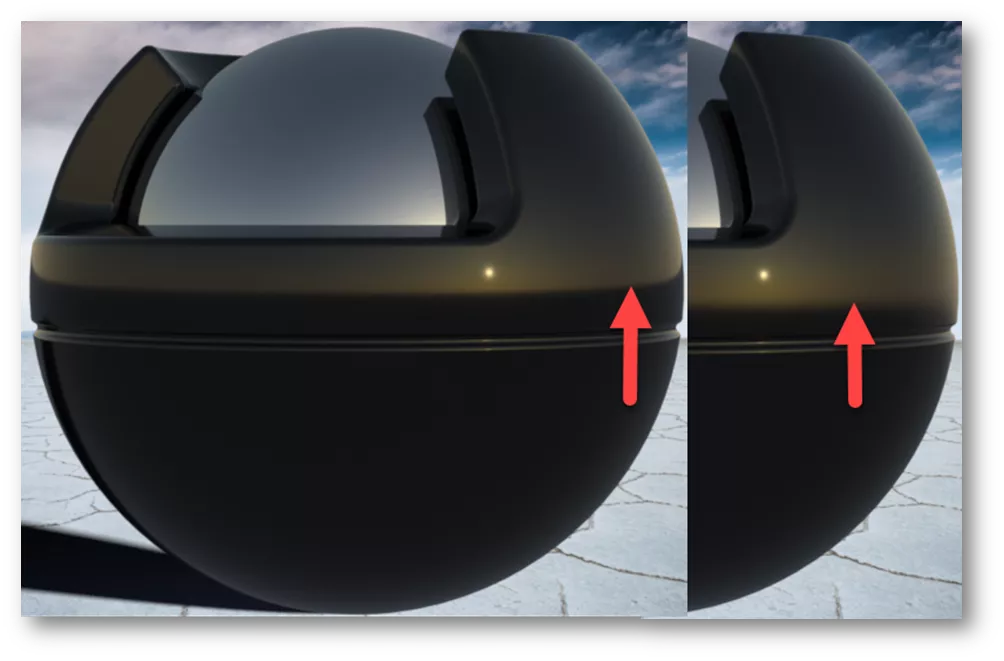
Haze decreases or increases the height of environmental haze.
Red-Blue Shift changes the color temperature from cool to warm.
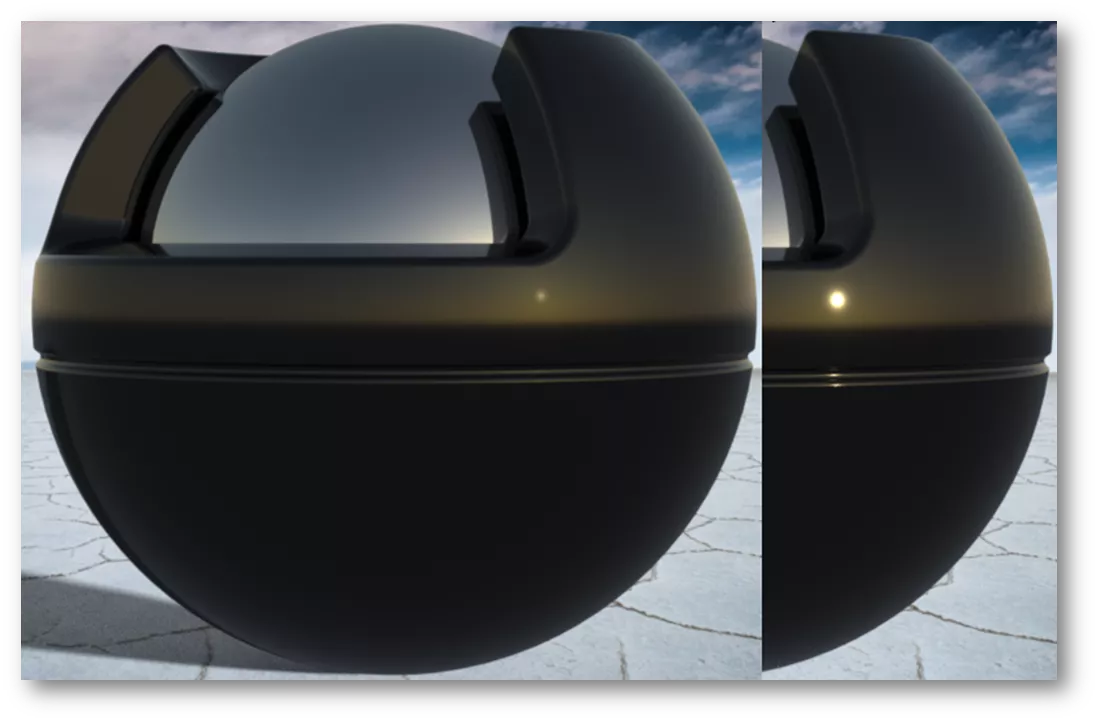
Saturation decreases or increases the intensity of color from the sunlight.
Horizon Blur controls how sharp the horizon appears in scene reflections.
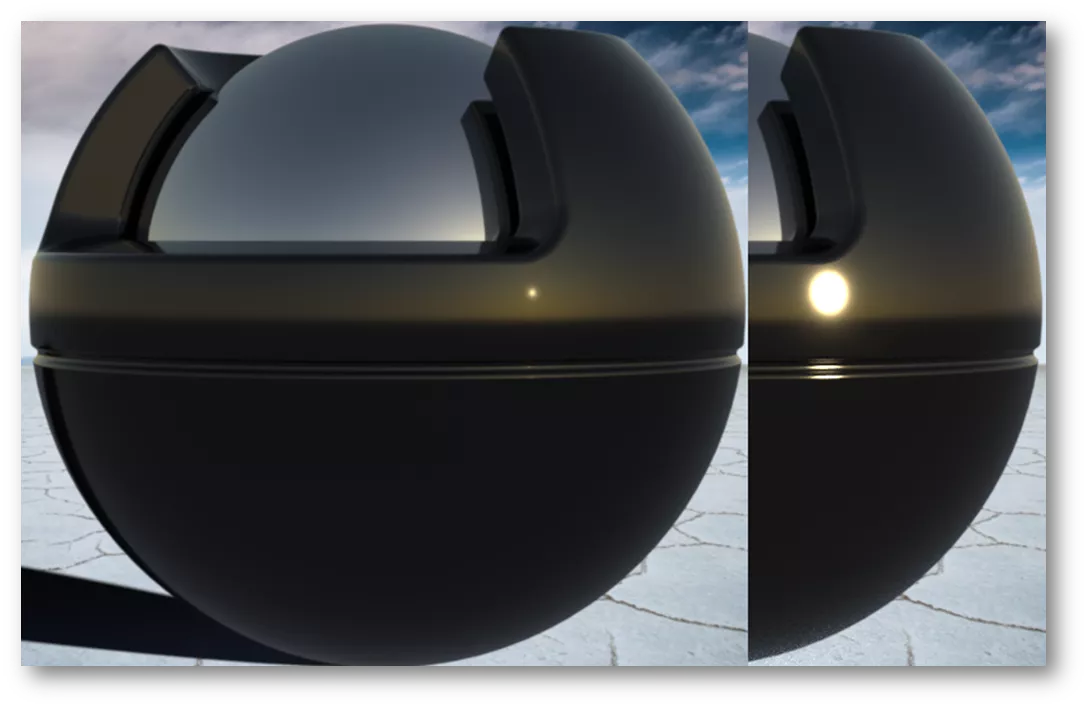
Sun Brightness decreases or increases the brightness of light emitted from the sun. Keep in mind that increasing the brightness will increase the overall brightness of light. Scene brightness may need to be adjusted accordingly.
Sun Diameter decreases or increases the size of the sun.
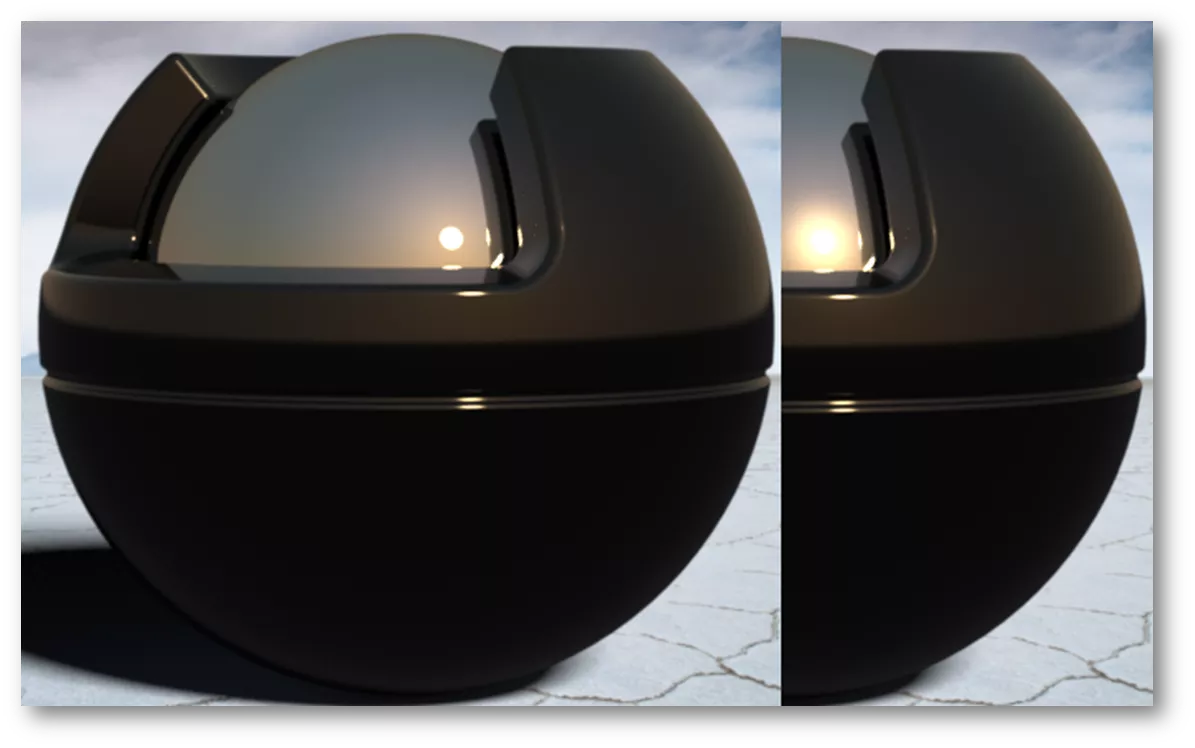
Sun Glow blurs the outline of the sun.
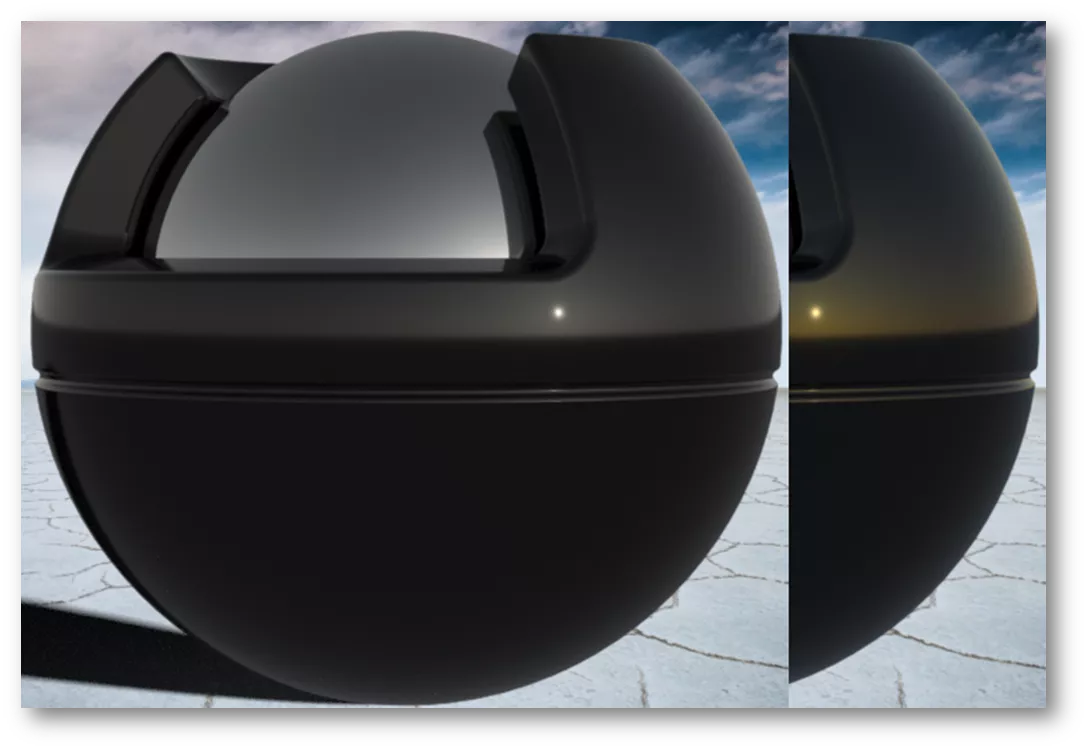
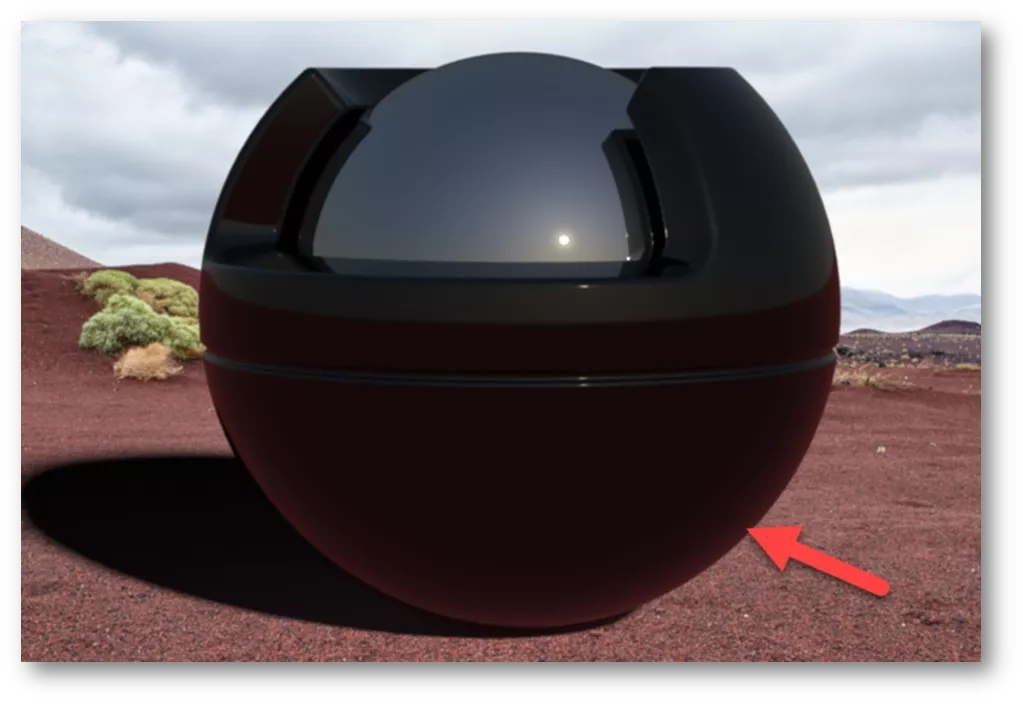
Floor Color changes the color reflections on the bottom of the model. Color can be changed to match the scene. In the image below, red is added to match the background floor color.
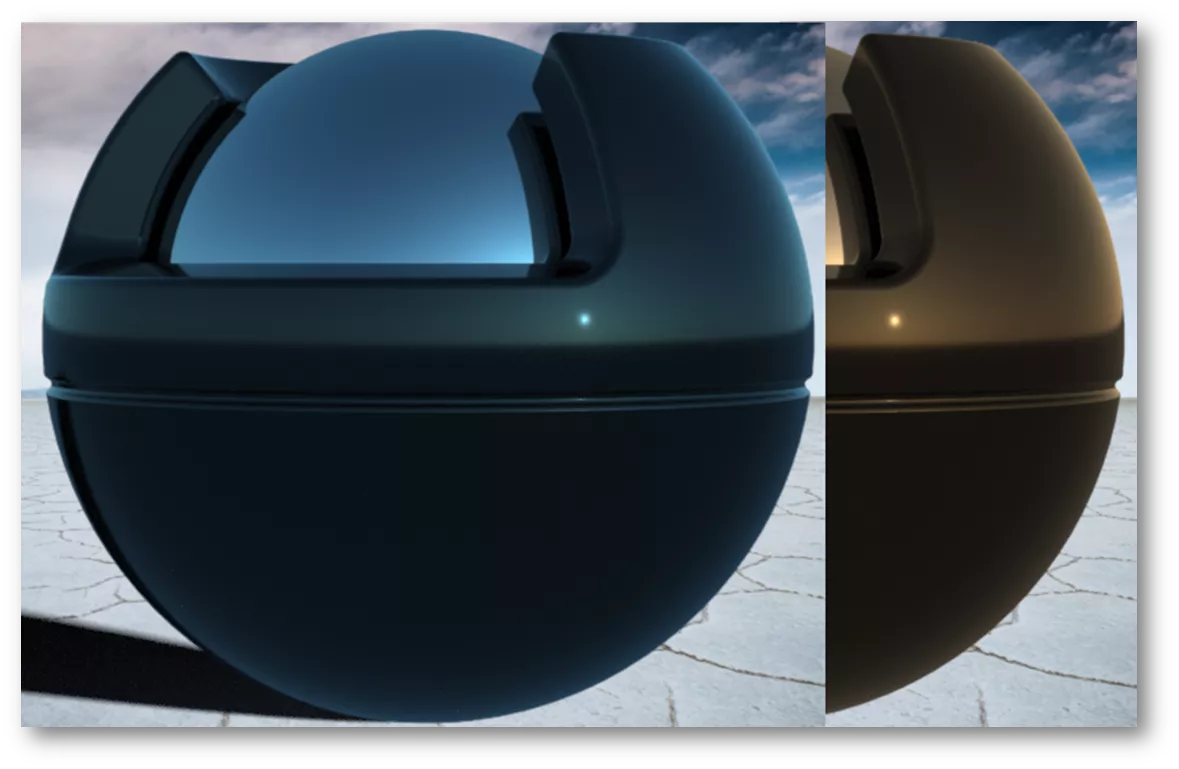
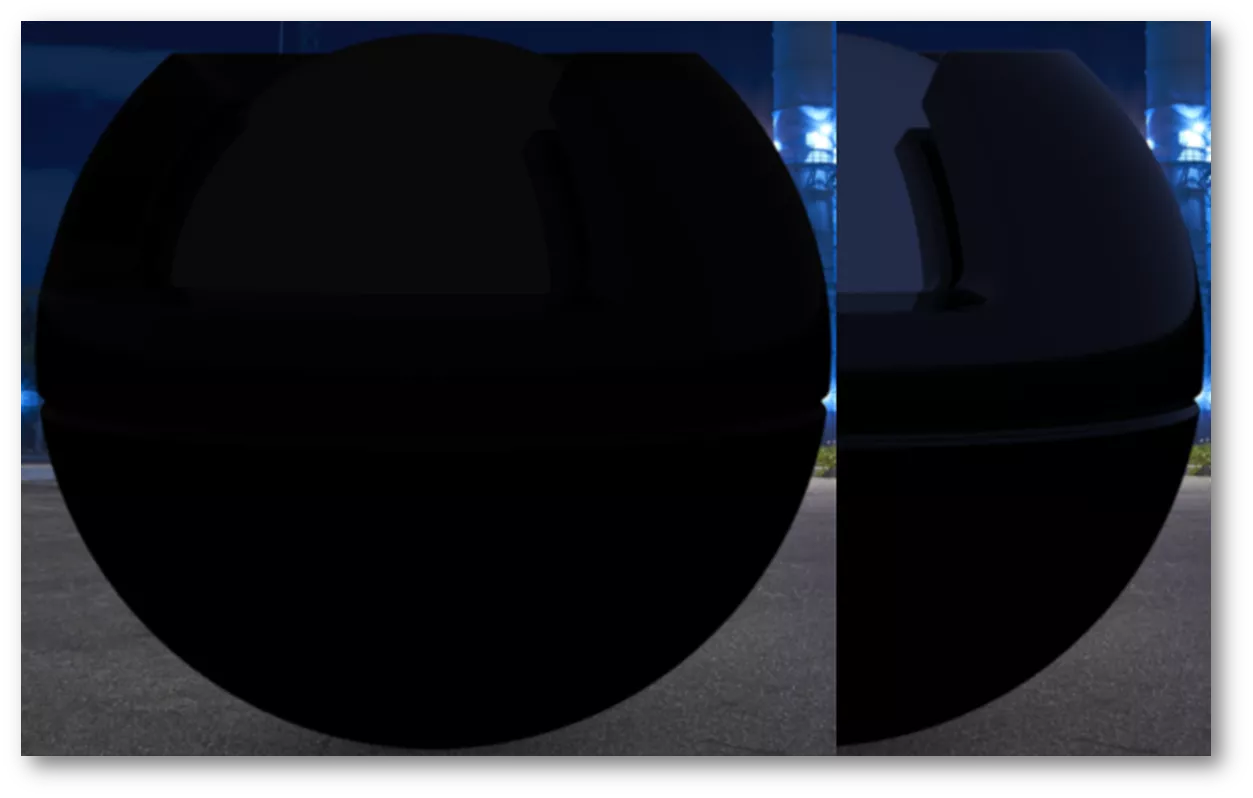
Night Color can be changed to keep a scene from completely going dark at night and affect the hues at dusk and dawn. Below, the night color was changed from black to medium blue. Brighter colors will further increase the brightness of ambient light.
Advanced Tab
The Advanced tab contains standard scene parameters. These parameters are not unique to a sun study environment.
How to Create a Sunlight Study Animation
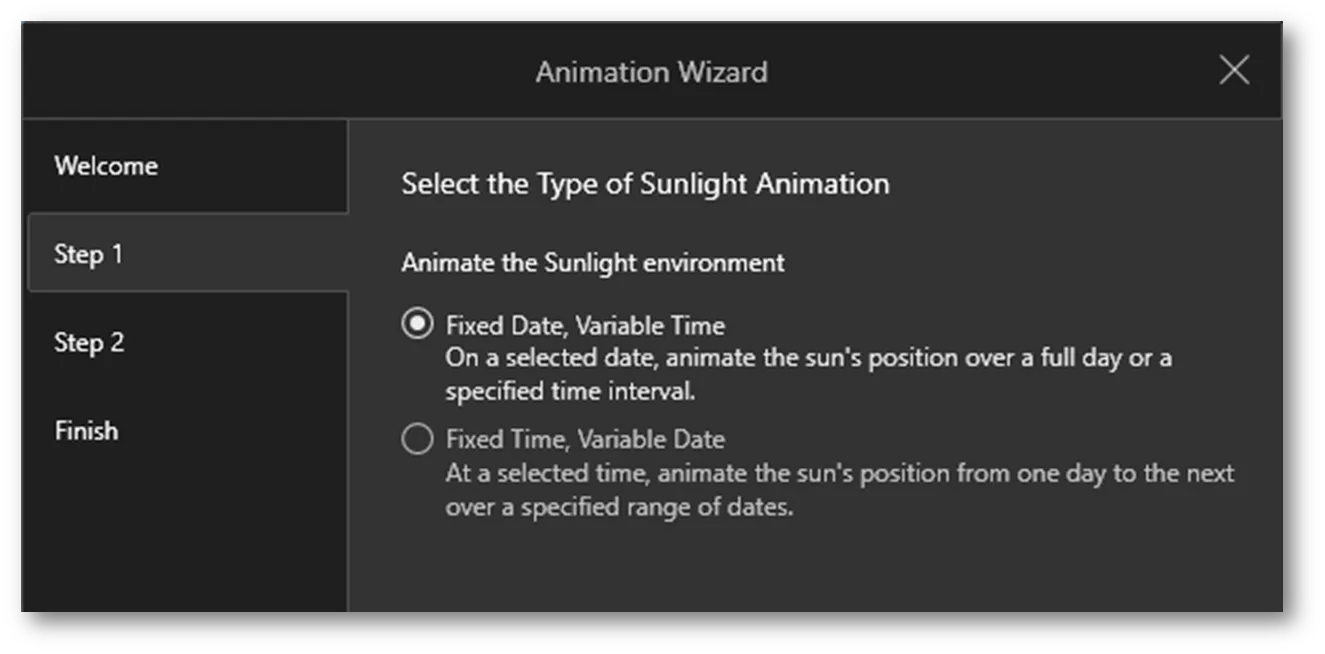
To create an animation of the sunlight study, first, turn on the Animation Timeline. Go to View, then click Show Timeline. The timeline will be displayed at the bottom of the interface. From here, click Launch Animation Wizard. In the Animation Wizard, click Sunlight and choose Next.

In Step 1, choose which type of animation to create: Fixed Date, Variable Time or Fixed Time, Variable Date. The former animates the sun’s position over a full day or a specified time interval. The latter animates the sun’s position from one day to the next over a specified range of dates.
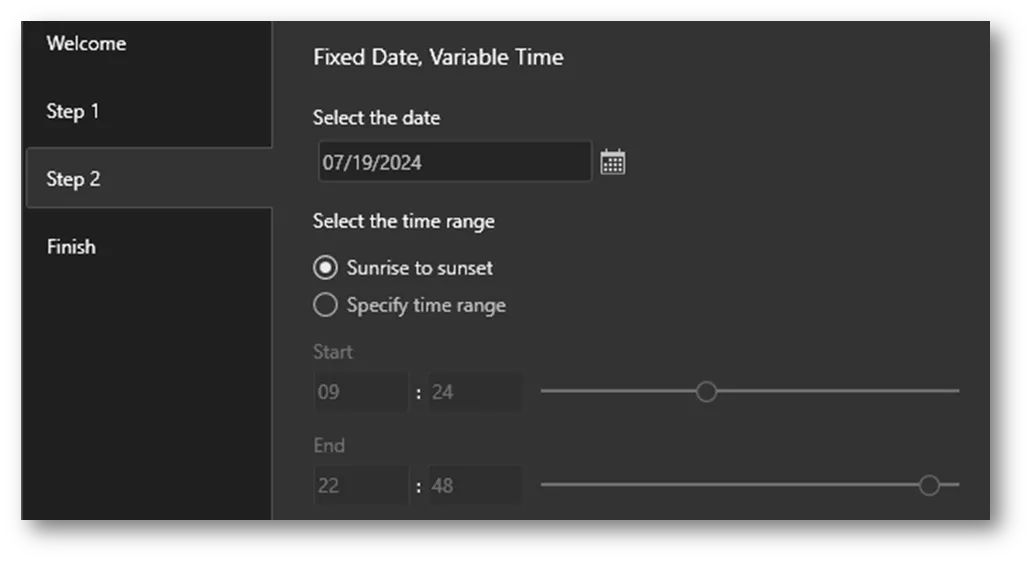
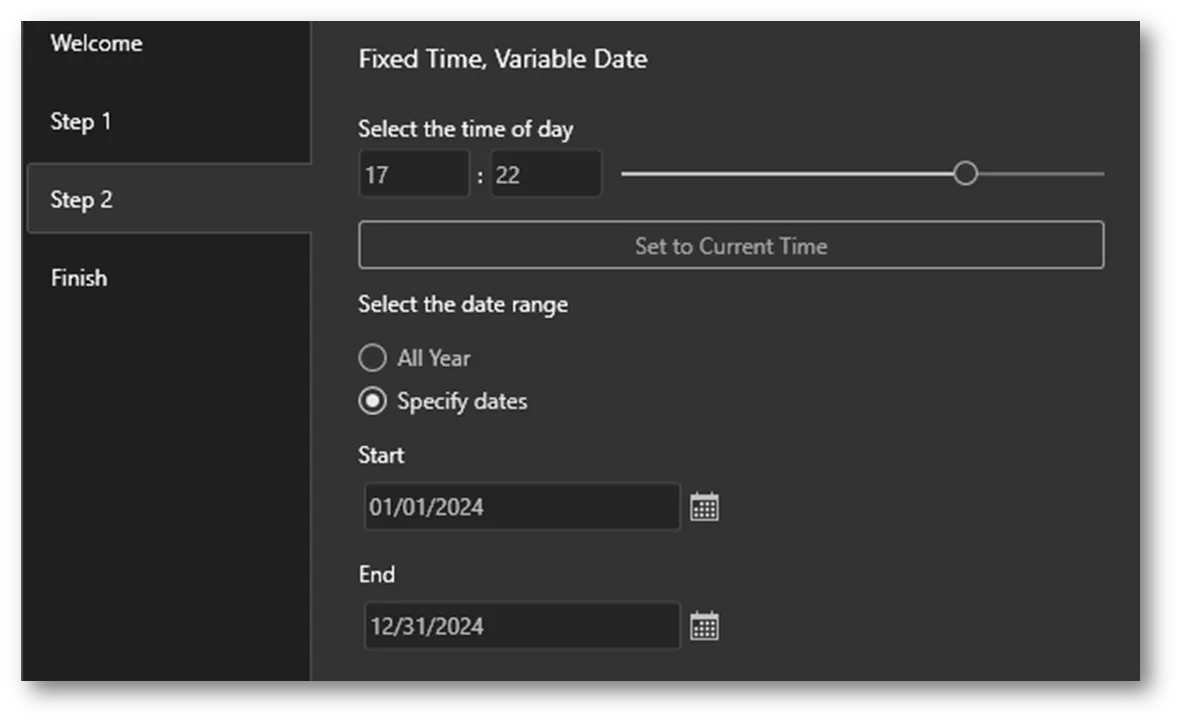
In Step 2, specify the time and dates. For Fixed Date animations, you can specify the animation to be sunrise to sunset, or specify a time range from start to finish. For Fixed Time animations, you can specify the time of day and choose all year, or specify a range of dates.
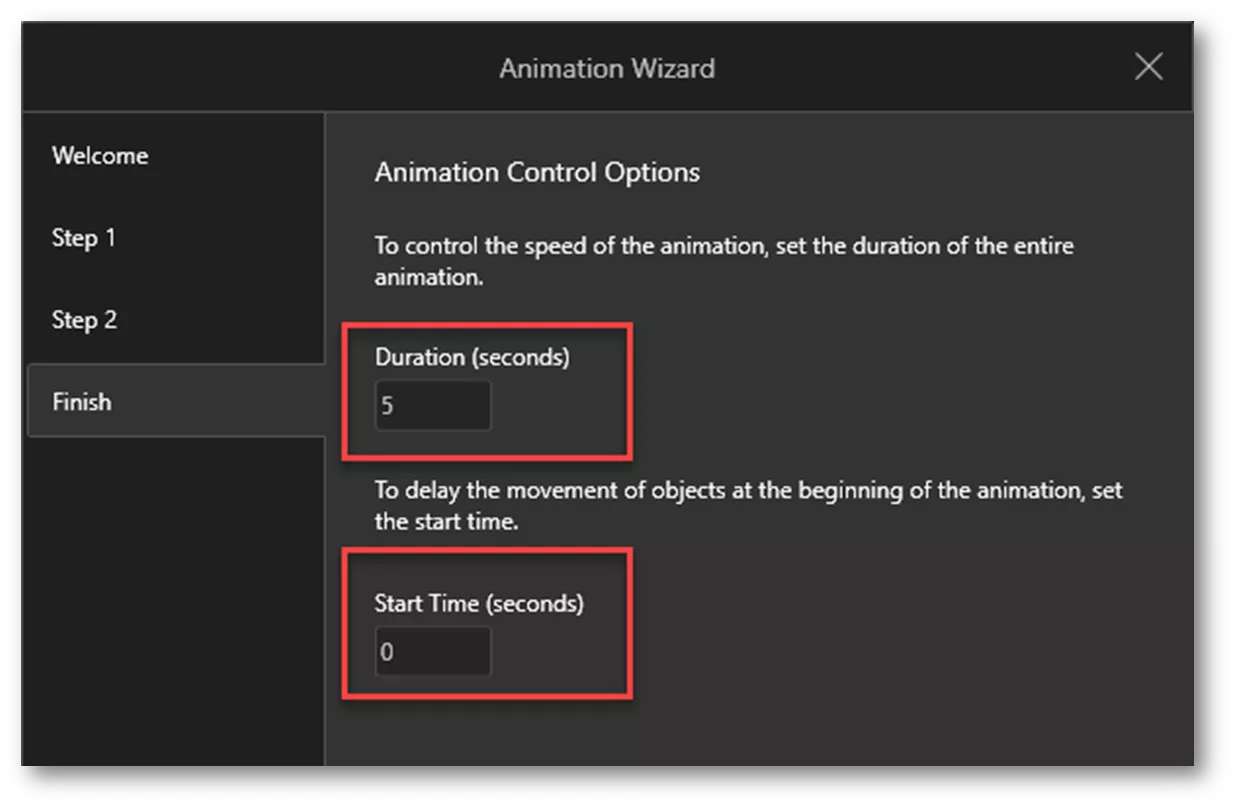
Once times and dates are entered, click Next, set the duration and start time of the animation, and click Finish.
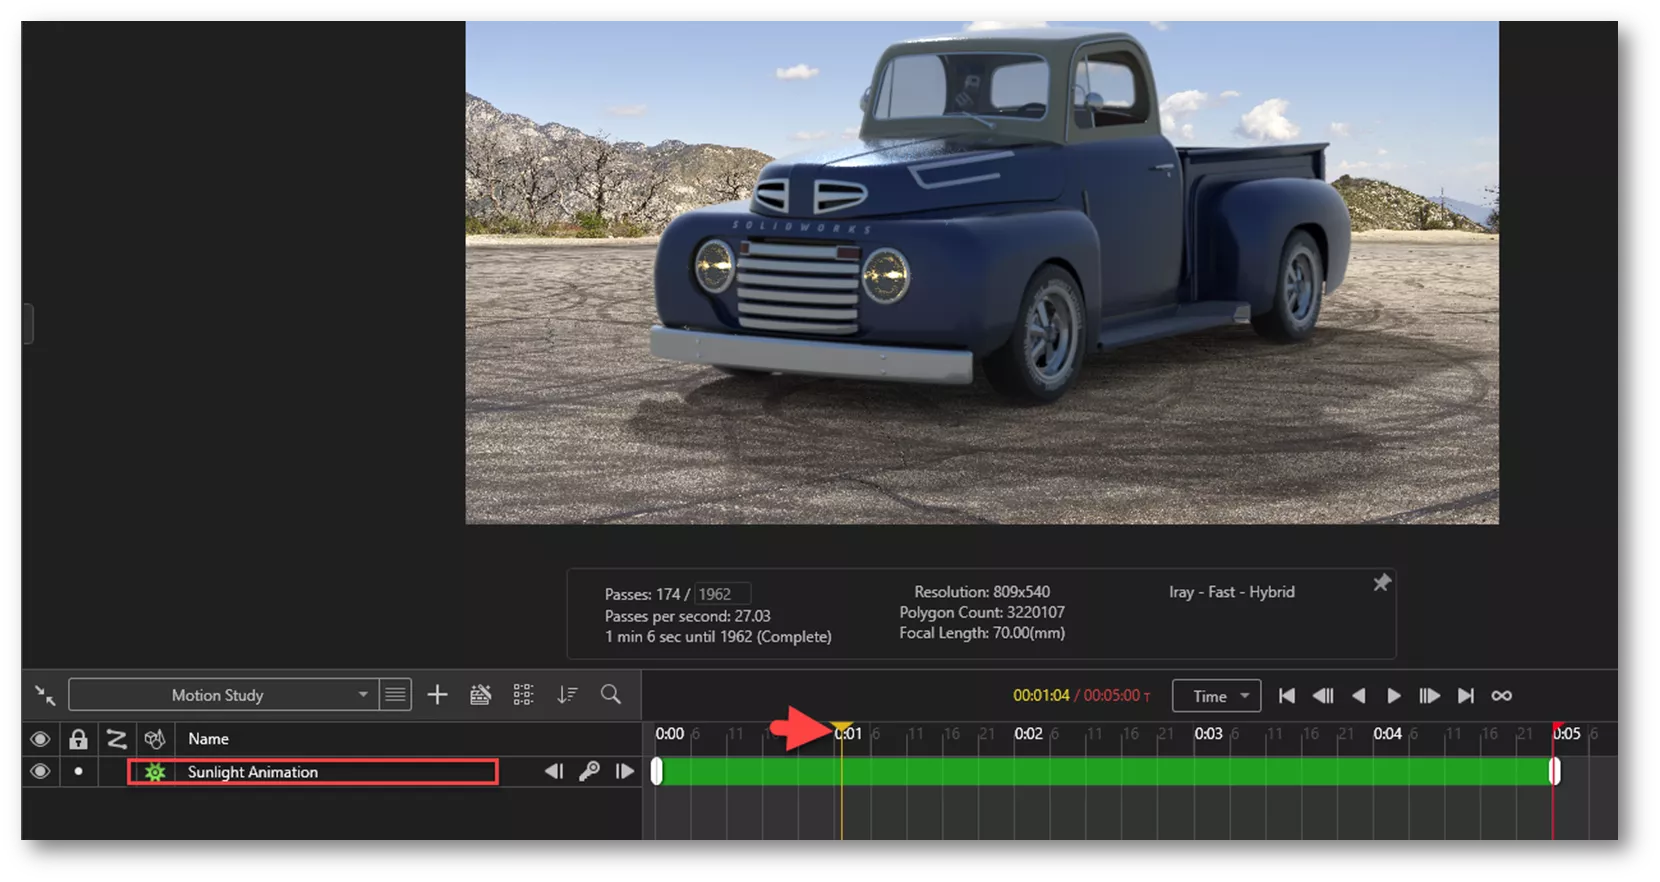
After clicking finish, a sunlight animation will be added to the timeline. Use the timeline controls to scrub through the animation and verify everything looks good before rendering the animation.
I hope you found this tutorial explaining how to create a sunlight environment in SOLIDWORKS Visualize helpful. Check out more tutorials below.
Additionally, join the GoEngineer Community to participate in the conversation, create forum posts, and answer questions from other SOLIDWORKS users.
Visualize Training
Want to take your SOLIDWORKS Visualize skills to the next level? Our SOLIDWORKS Visualize training course covers how to leverage 3D CAD data to create photo-quality content in the fastest and easiest way possible, from images to animations, interactive web content, and immersive virtual reality.

Related Articles
Adding Color to SOLIDWORKS Visualize Projects
SOLIDWORKS Visualize Lighting: Standard vs. Professional
SOLIDWORKS Visualize: Applying Textures & Texture Mapping
How to Fade Geometry in SOLIDWORKS Visualize Professional

About Zach Brown
Zach Brown is a certified SOLIDWORKS Expert and a Technical Support Engineer. Prior to working at GoEngineer, he spent 15 years as a mechanical designer, CAD support tech, and instructor using SOLIDWORKS. His hobbies include playing guitar, riding motorcycles, and skiing.
Get our wide array of technical resources delivered right to your inbox.
Unsubscribe at any time.