SOLIDWORKS Visualize Lighting: Standard vs. Professional
Lighting plays an important role in creating photorealistic images, and the tools available in SOLIDWORKS Visualize vary between the Standard and Professional versions. SOLIDWORKS Visualize Standard provides a simple-to-use lighting system that is friendly to new users, whereas SOLIDWORKS Visualize Professional builds on that with additional options such as point or area lights for finer control. Visualize Professional also features the option to create a Sunlight Environment for simulating outdoor lighting conditions.
SOLIDWORKS Visualize Standard - HDR Environments
The lighting in SOLIDWORKS Visualize Standard is determined by HDR (High Dynamic Range) Environments. HDR Environments are an image format that contains a wide range of dark to light shading. The environments are mapped as a sphere around your project to establish a lighting environment where the brightness is determined by the RGB values of each pixel in the image.
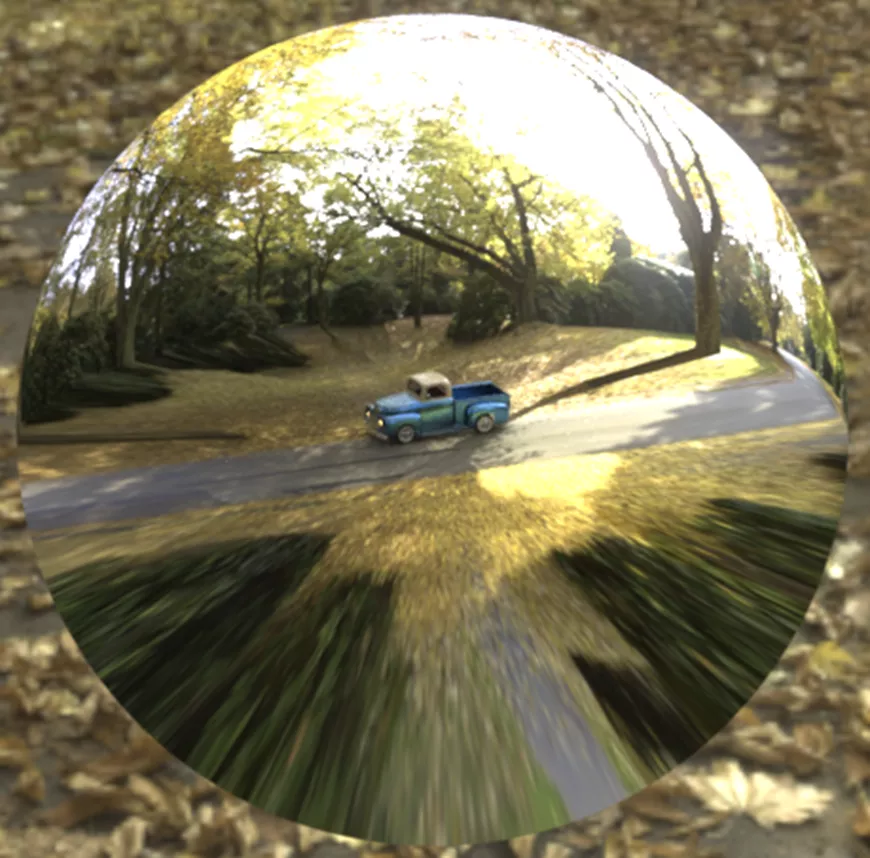
Typically, HDR images are made from real-life environments. This leads to a believable lighting convention, helping to enhance the realism of your renders. SOLIDWORKS Visualize, when installed, will have multiple HDR images to choose from both locally and available from the cloud library.
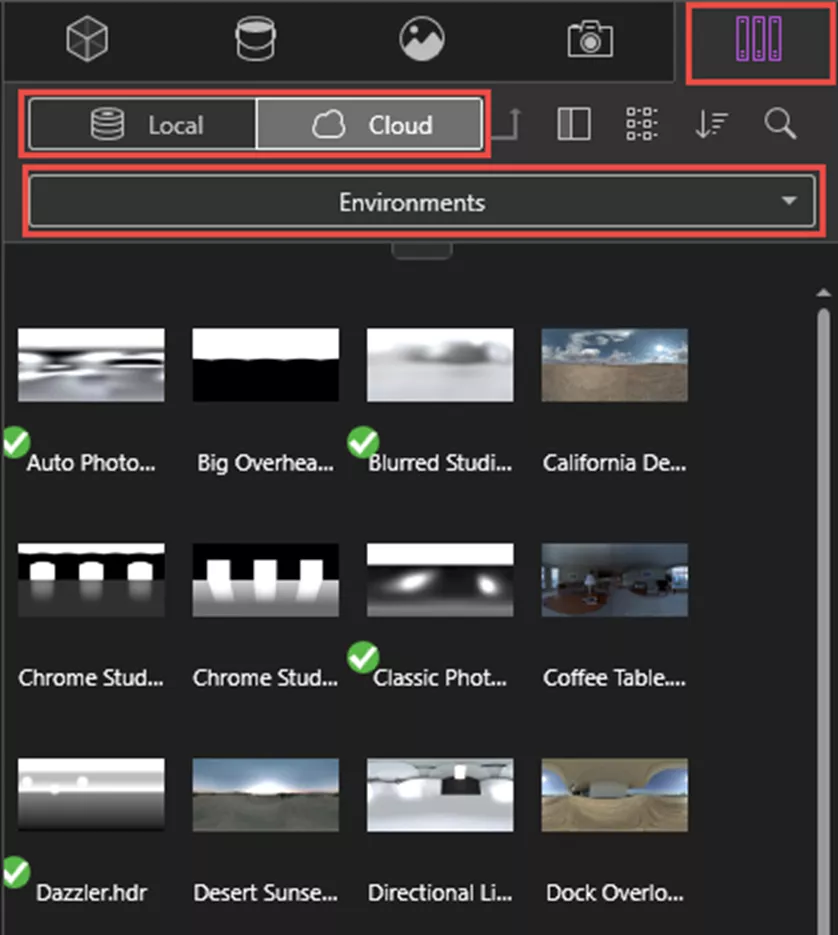
The cloud libraries can be accessed by navigating to the File Libraries tab in the top right corner of Visualize. From there, you can toggle between Local and Cloud. Then, use the dropdown to select the type of item you’re searching for, such as Environments.
HDR Environments create the lighting for the part and determine what is shown on reflective surfaces. The image below is an example of another stock HDR environment that comes installed with Visualize.
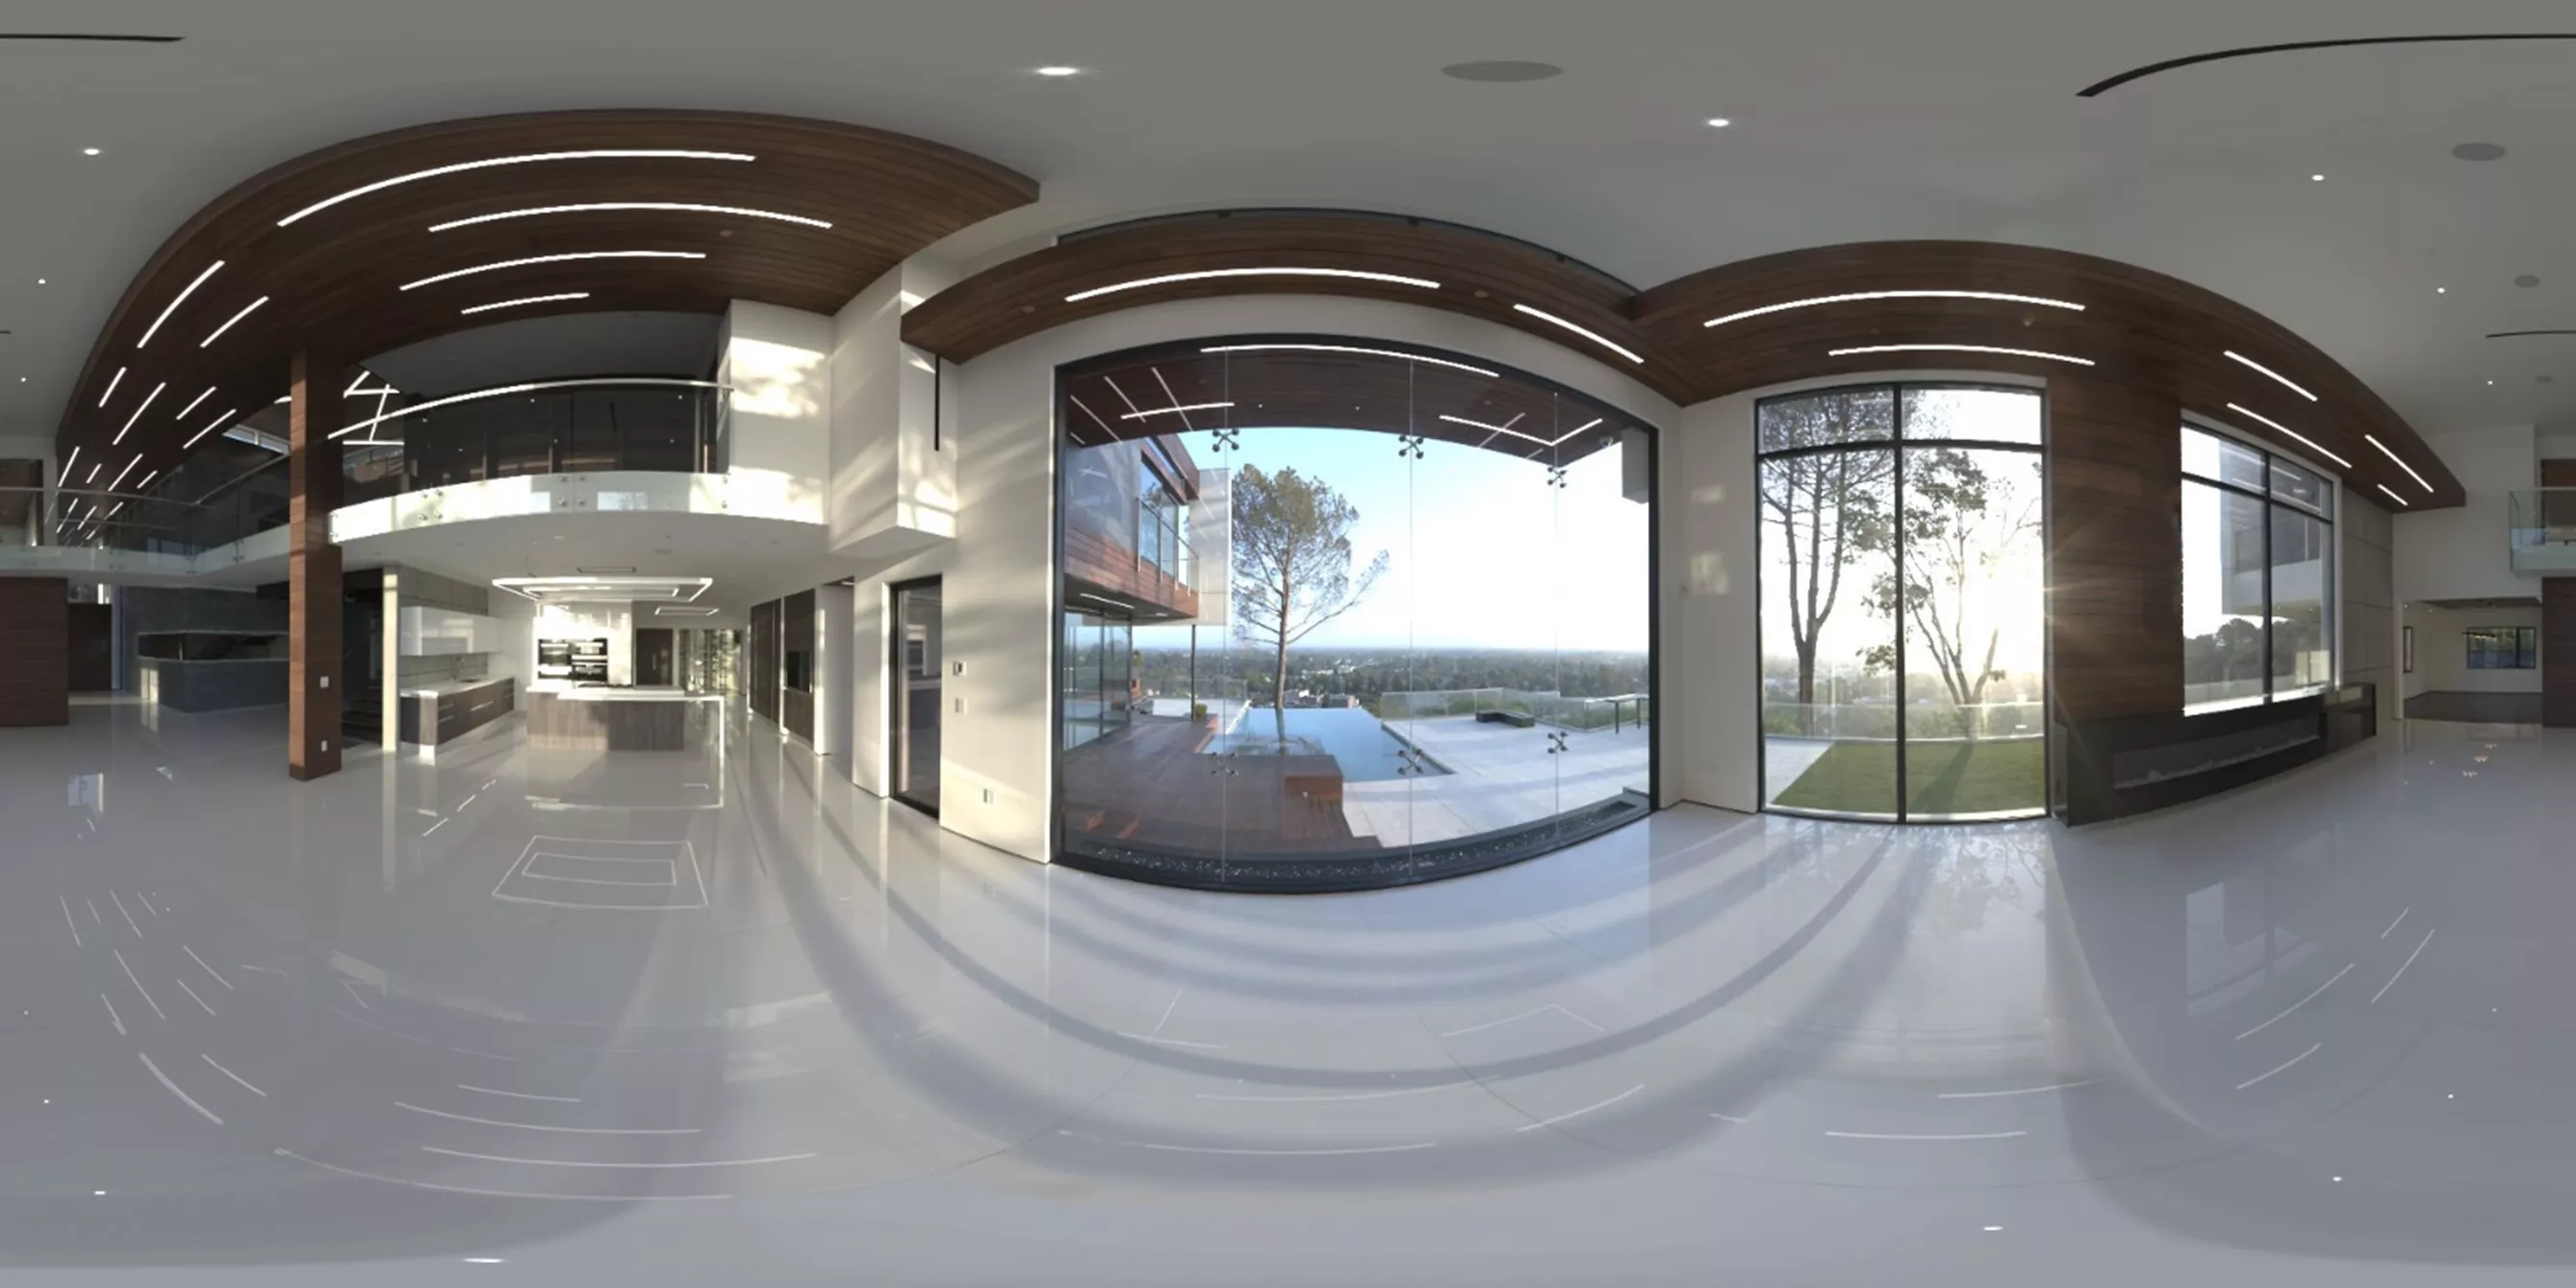
On a very reflective surface like chrome, the environment is clearly visible in the resulting reflection. This effect is more subtle with less reflective surfaces but helps ground a render as being part of a believable environment.
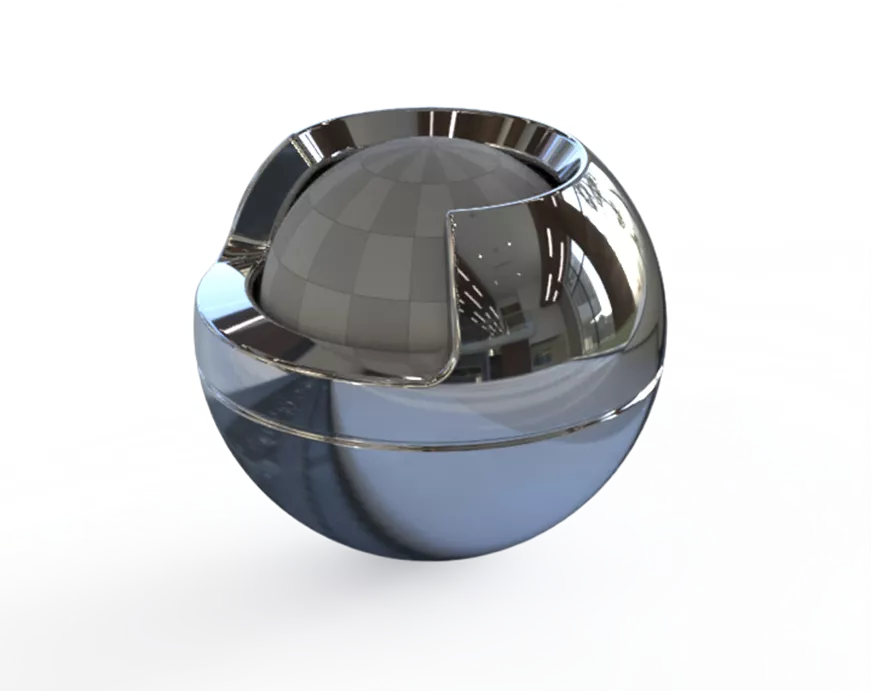
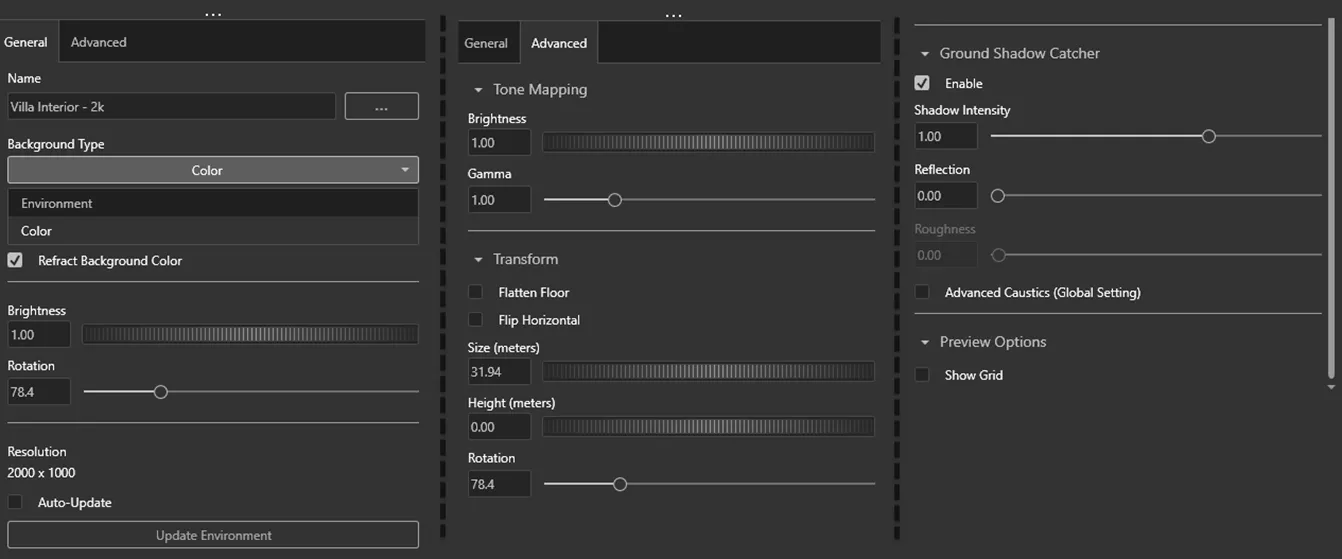
HDR Environments can be fine-tuned and adjusted in a variety of ways such as the overall brightness of the environment, its rotation, and the intensity of the shadows it creates.
SOLIDWORKS Visualize Professional - Lights
While SOLIDWORKS Visualize Standard provides a very solid base to build on with HDR Environments, SOLIDWORKS Visualize Professional unlocks the ability to create and place individual light sources. These light sources can be your sole method of lighting a project or can enhance existing lighting created by HDR environments.
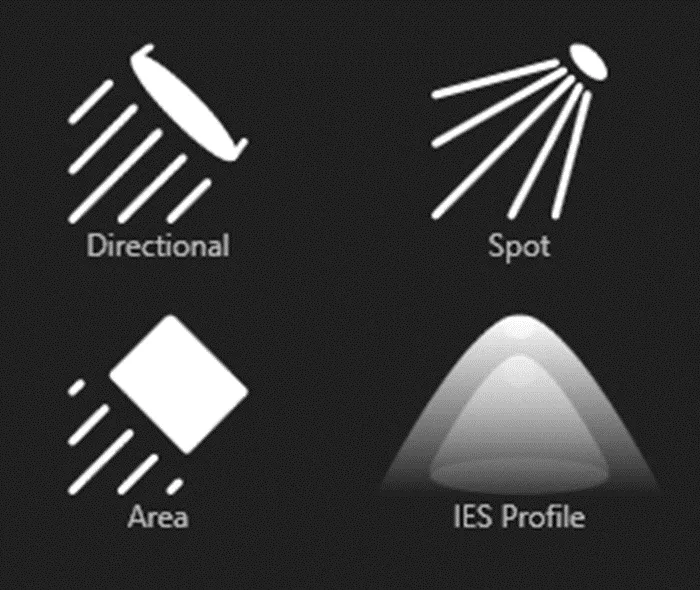
The types of lights that can be added are:
- Area – Light source that is a chosen shape: Point, Rectangle, Cylinder, Disc.
- Direction – Parallel Light coming from a specified direction.
- Spot – Light source coming from a single point.
- IES Profile – Lights that cast a profile similar to real-world lights, typically shown cast along nearby walls or ceilings.
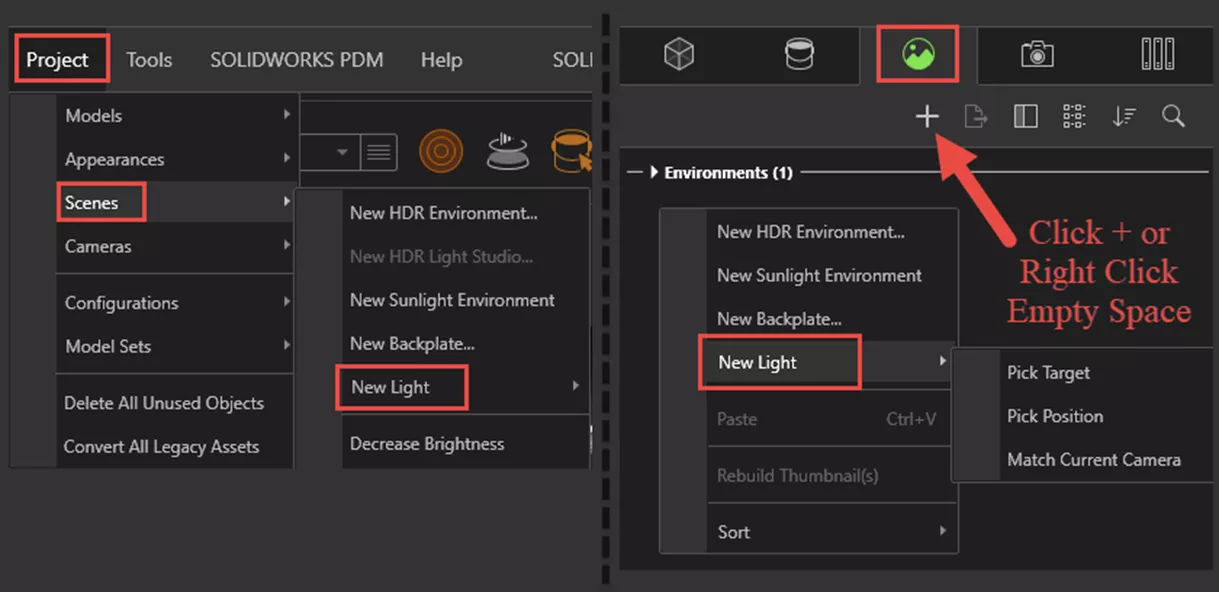
To insert one of the above lights into a project, navigate to Projects > Scenes > New Light. Alternatively, click the plus icon within the Scenes tab in the top right corner of Visualize, or right-click in your project > Add > New Light.
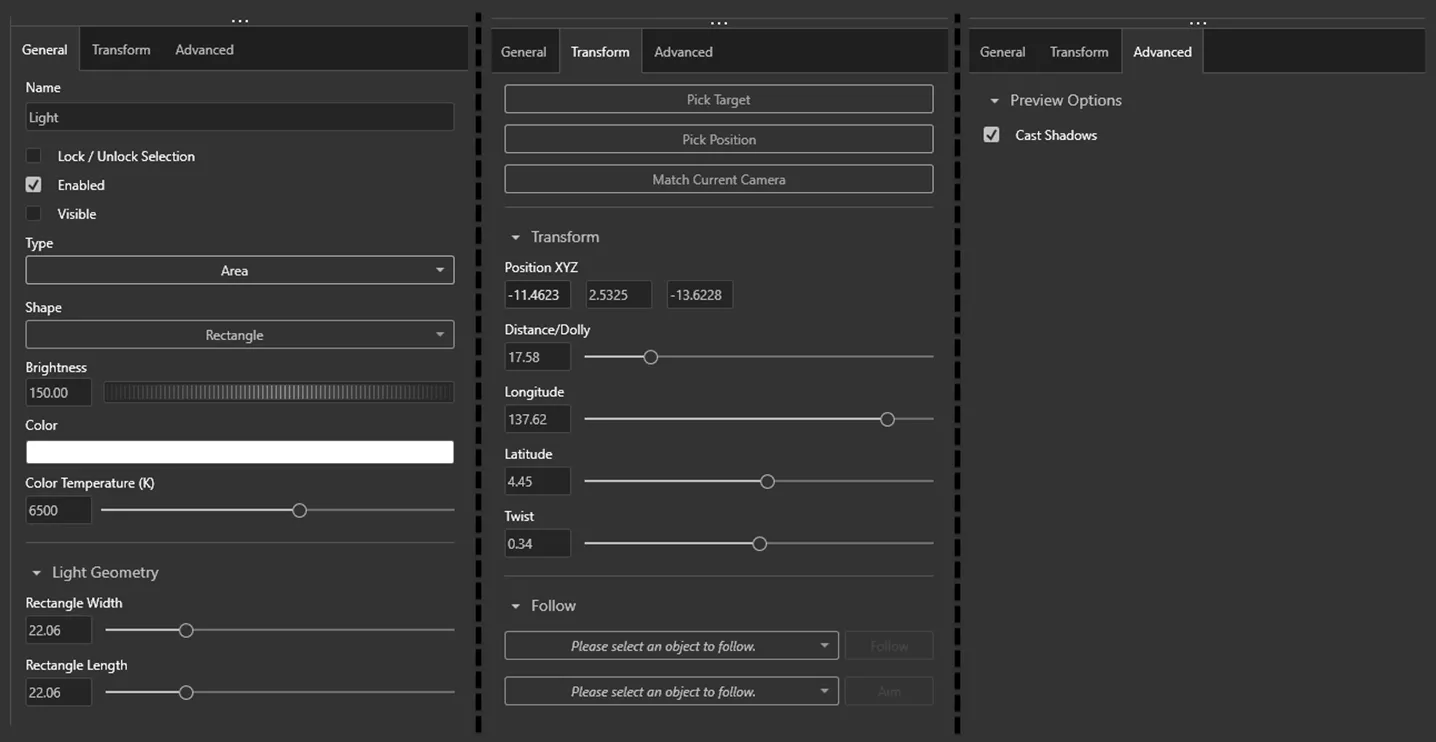
The placement of the light is determined by what is selected when it is created. This placement can easily be changed or adjusted later in the transform subtab of the light parameters.
The options when creating the light are Pick Target, Pick Position, or Match Current Camera.
Once a light is created, much like an HDR environment, it has various parameters that can be adjusted.
Visualize Professional - Sunlight Environment
SOLIDWORKS Visualize Professional offers one additional method of lighting called a Sunlight Environment.
A Sunlight Environment can be used as an alternative to an HDR image environment and can still be used alongside the individual lights that SOLIDWORKS Visualize Professional can create. This method allows you to specify a location in the world, the date, and the time of day to simulate an outdoor environment fitting those conditions.
To insert a Sunlight Environment into a project, navigate to Projects > Scenes > New Sunlight Environment. Alternatively, you can click the plus icon within the scenes tab in the top right corner of Visualize, or right-click in your project > Add > New Sunlight Environment.
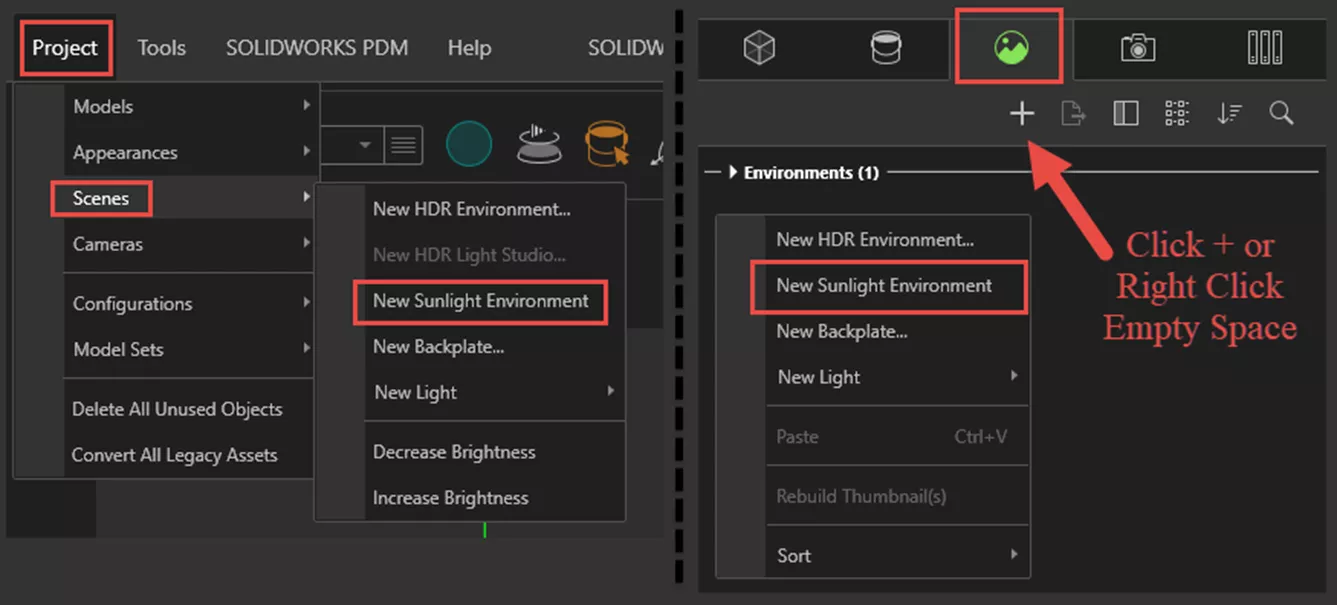
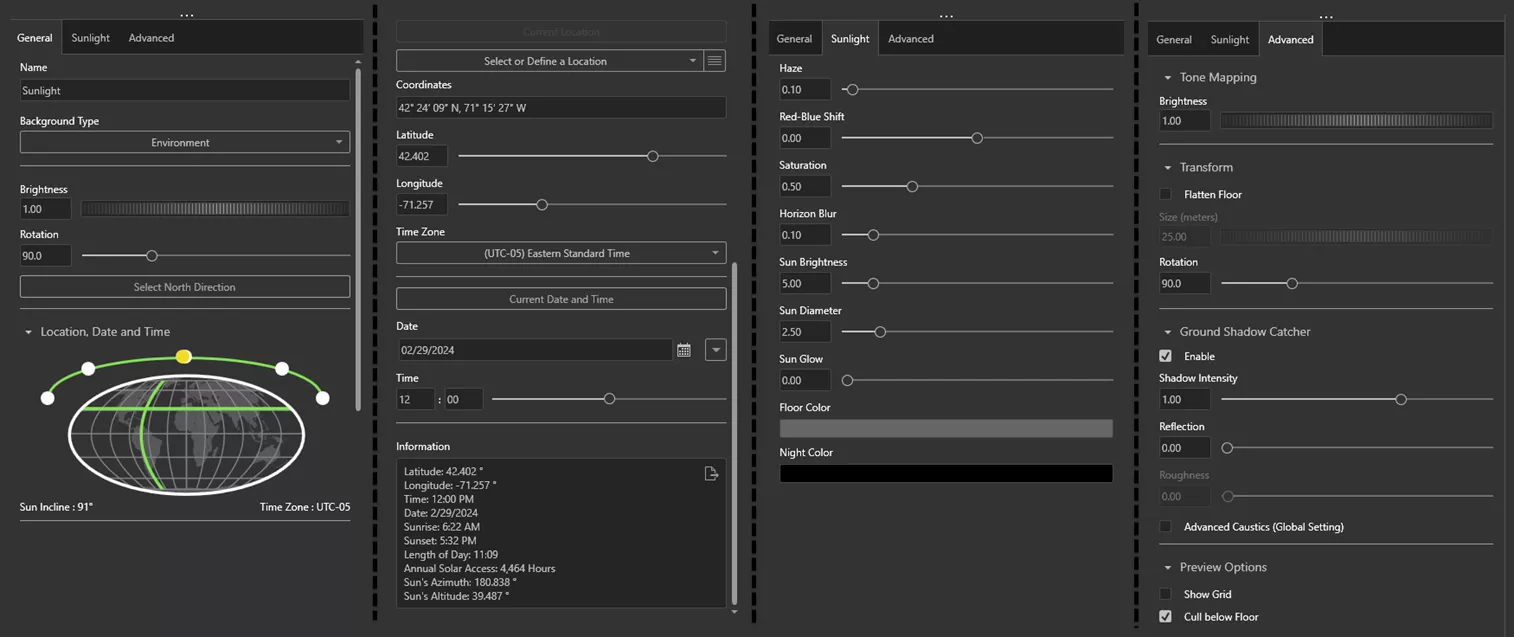
Once you’ve created a Sunlight Environment, it can be adjusted in the environment section of the scene tab within Visualize. The settings include the ability to specify Location, Date, and Time, as well as characteristics of the Sun. Some options will be similar to how HDR environments can be adjusted with things like overall brightness, flattening the floor as well as rotating the environment itself.
That concludes the different SOLIDWORKS Visualize lighting options available in the Visualize Standard version and the expanded options available within Visualize Professional. Be sure to check out our other Visualize articles such as the new features available in SOLIDWORKS Visualize 2024!
Related Articles
SOLIDWORKS Visualize: Applying Textures & Texture Mapping
How the SOLIDWORKS Visualize Denoiser Tool Works
How to Fade Geometry in SOLIDWORKS Visualize Professional
About Braden Leasure
Braden Leasure is a Sr. SOLIDWORKS Technical Support Engineer at GoEngineer.
Get our wide array of technical resources delivered right to your inbox.
Unsubscribe at any time.