How to Create Custom Cosmetic Threads in SOLIDWORKS
While extensive, the SOLIDWORKS Cosmetic Thread feature does not contain every Standard and every size in the world. For users working with custom holes or Standards not listed in SOLIDWORKS by default, it may be necessary to create custom Cosmetic Thread specifications.
The list of Cosmetic Threads comes directly from the Hole Wizard. To create a new Cosmetic Thread, add the associated hole size to the Hole Wizard. After doing this, you must modify the Hole Callout Format File so that the callouts for your custom Cosmetic Threads populate correctly.
Add a Custom Hole Size
In this example, my goal is to create a 1/2-16 ANSI Inch Tapped Hole. To do this:
- Open the Toolbox Settings application.
- Go to 1 – Hole Wizard.
- Select a default Hole Wizard Standard. In the top left corner of the central pane, click the Copy Standard button. You’ll be prompted to enter a name for your new custom Standard. After you pick one, Toolbox Settings will take a few minutes to create the copy.
Note: We take this extra step because, when adding sizes to an existing hole type in an existing Standard, the best practice is to make a customized copy of the Standard for those extra sizes and to leave the default Standards unchanged.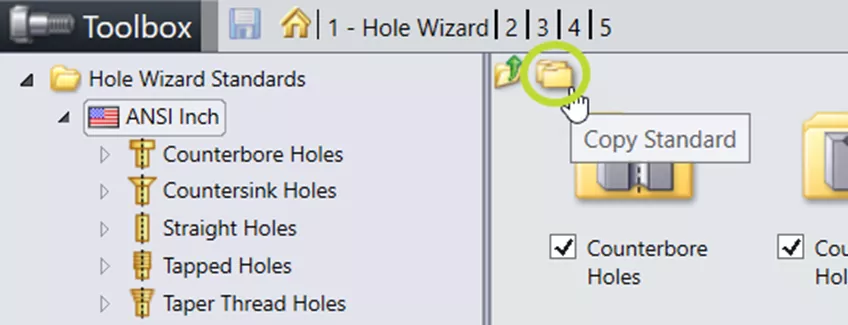
Figure 1: Copy Standard button in ANSI Inch Standard - Select your custom Standard, then select the hole type to which you want to add a size.
- Click the Add New Size button at the top of the list of sizes on the Sizes page.
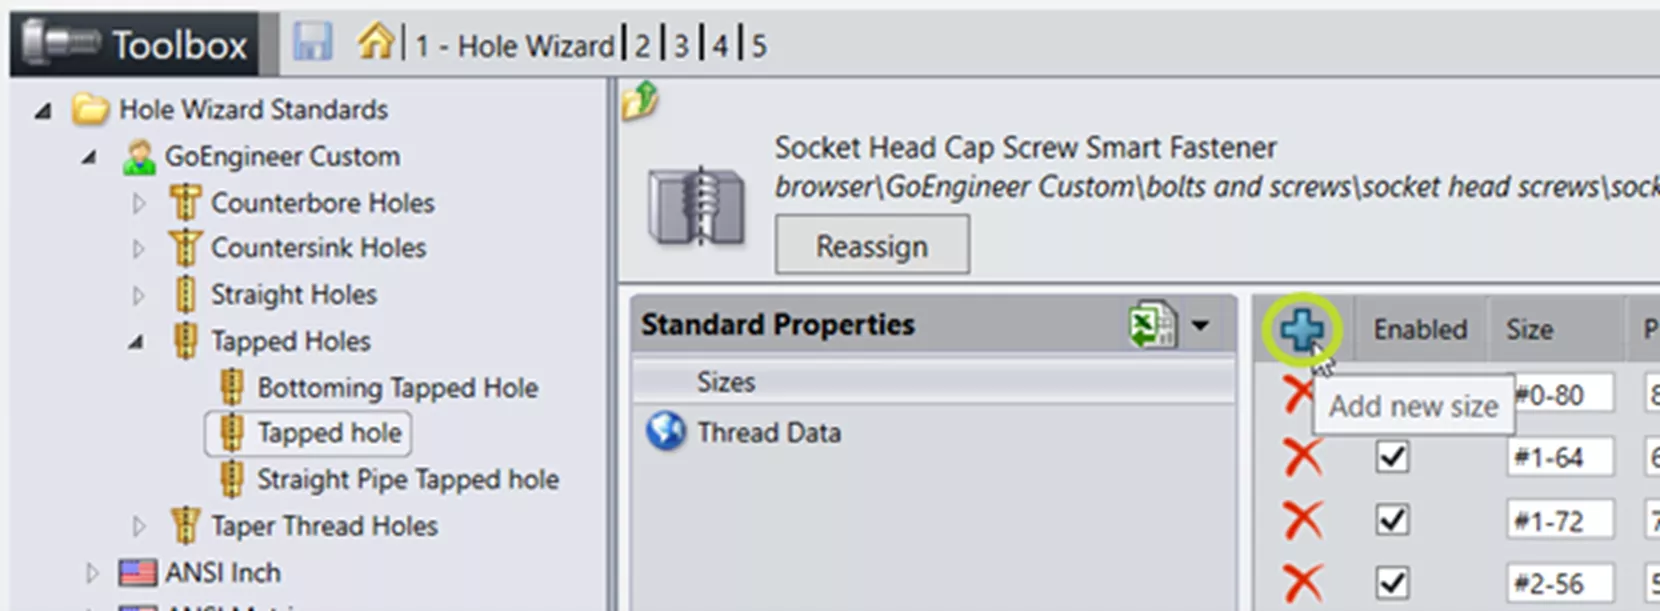
Figure 2: "Add New Size" button - In the Add New Size dialog box that appears, initially, enter a dummy number like 0 or 1 for all values, then click OK.
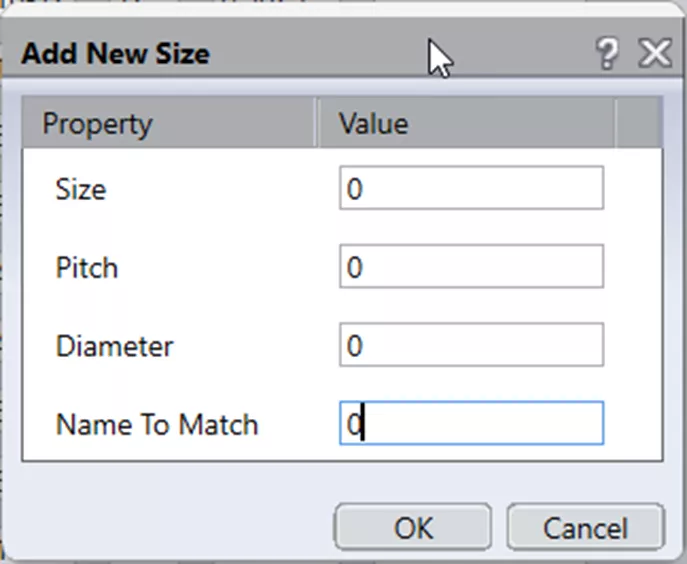
Figure 3: Add New Size dialog box - Scroll down the list of sizes to find the newly created one and enter your desired values for Size, Pitch, Diameter, and Name To Match. The format for Size needs to match the other sizes (i.e., it must be in the format Diameter-Pitch).

Figure 4: Row for new Size edited with correct values - Switch to the Thread Data page and repeat steps 5-7.
Note: The full_size value must match the associated Size entered on the Sizes page. SOLIDWORKS uses these values to determine which row on the Sizes page is associated with which row on the Thread Data page. - Save.

Figure 5: Save button in Toolbox Settings
Your new custom Standard and your new custom Size should now appear in both the Hole Wizard feature and the Cosmetic Thread feature.
Update The Hole Callout Format File
You may notice that, immediately after creating your new size, the Thread Callout section in the Cosmetic Thread PropertyManager is blank. SOLIDWORKS looks to the calloutformat.txt and calloutformat_2.txt files to determine the appropriate syntax for a hole callout. By default, only default Standards are listed in these files. To get hole callouts working correctly for your custom Cosmetic Threads, you must add your custom Standard to these text documents. To do this:
- Check where SOLIDWORKS is looking for the Hole Callout Format file by going to System Options > File Locations > Hole Callout Format File.
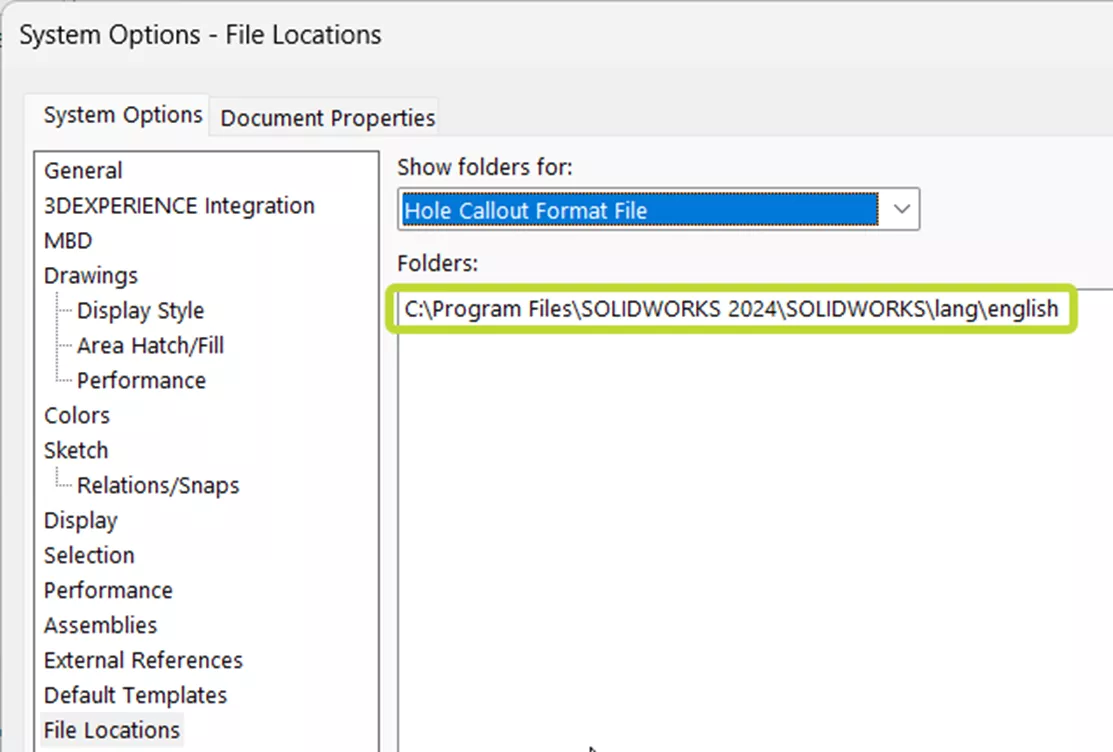
Figure 6: System Options > File Locations > Hole Callout Format File - Browse to this location in a Windows File Explorer.
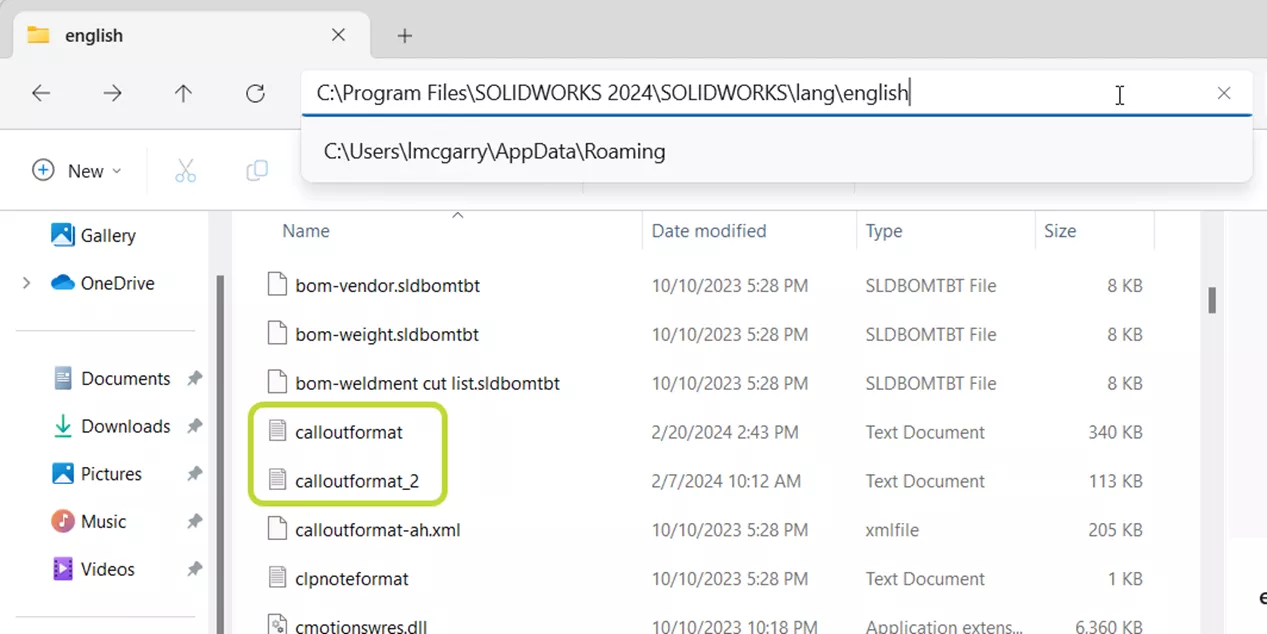
Figure 7: Hole Callout Format File location on my computer - Open calloutformat.txt in Notepad.
- Find the section for the default Standard that you copied. In this example, I used ANSI Inch.
- Highlight and copy that section.
- Paste at the end of the text document, right above VARIABLES.
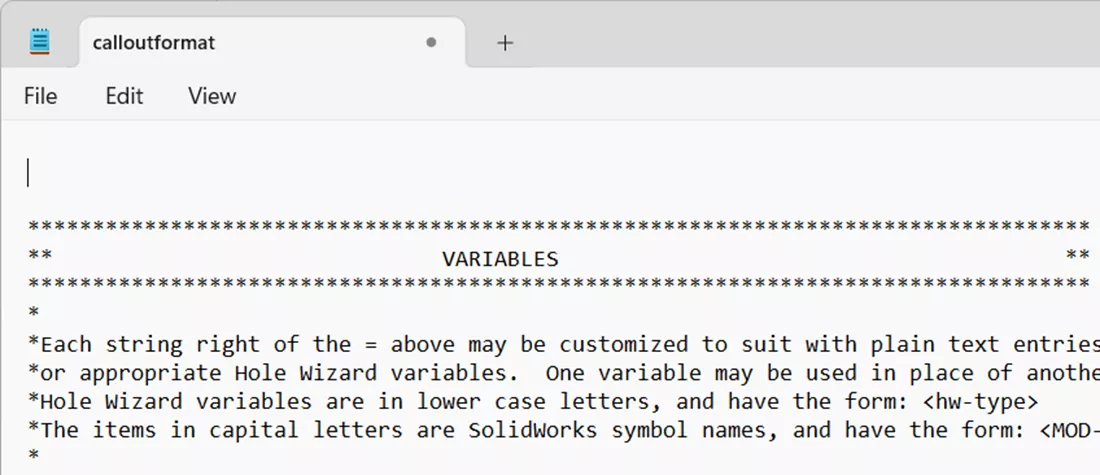
Figure 8: VARIABLES section in calloutformat.txt - Go through the copied section and replace the original Standard name with your custom name. The standard name must be in all caps.
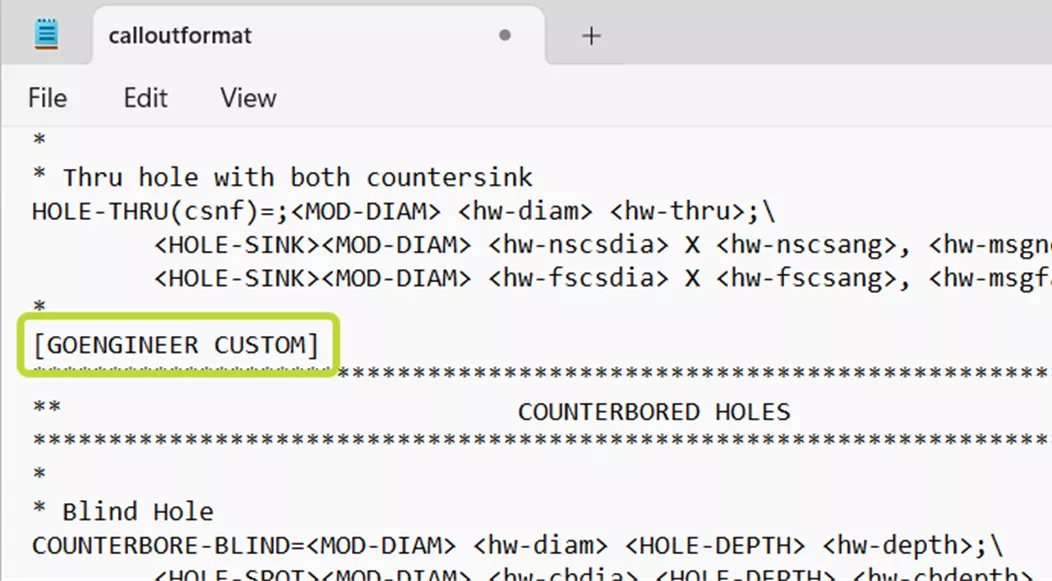
Figure 9: Standard section in calloutformat.txt with custom Standard name - Save calloutformat.txt.
Note: If you are unable to save into the directory in which you found calloutformat.txt, save it to a location like your Desktop or Downloads folder instead. Then, cut and paste it into the correct folder. If this still fails due to permissions issues, you may need to contact your internal IT for help granting you access. - Repeat with calloutformat_2.txt.
I hope this article explaining how to create custom cosmetic threads in SOLIDWORKS helpful. Check out more tips and tricks listed below. Additionally, join the GoEngineer Community to participate in the conversation, create forum posts, and answer questions from other SOLIDWORKS users.

SOLIDWORKS CAD Cheat Sheet
SHORTCUTS ⋅ MOUSE GESTURES ⋅ HOT KEYS
Our SOLIDWORKS CAD Cheat Sheet, featuring over 90 tips and tricks, will help speed up your process.
Learn More About Cosmetic Threads
Using Cosmetic Threads: SOLIDWORKS Best Practices
Missing Cosmetic Threads and How to Fix Them in SOLIDWORKS
How to Show Cosmetic Threads in SOLIDWORKS Assemblies
SOLIDWORKS Cosmetic Thread Upgrades

About Lauren McGarry
Lauren McGarry is a Certified SOLIDWORKS Expert based out of San Diego, California. She earned her Bachelor of Science degree from Case Western Reserve University and has been with GoEngineer as a Technical Support Engineer since 2016.
Get our wide array of technical resources delivered right to your inbox.
Unsubscribe at any time.