How to Automatically Create Folders in SOLIDWORKS PDM
With SOLIDWORKS PDM, users often like to create folders to organize data for a specific project and place all of the relevant data within a given project folder. Oftentimes, at the organization/company level, there is a competing desire to enforce uniformity and consistency within the folder structure and during the folder creation process.
As a result, it’s often the case that standard user accounts are prevented from creating ad-hoc folders on their own. For these situations, SOLIDWORKS PDM Professional has a functionality called a Template that can be used in such circumstances: where users can’t be allowed to create folder structure without restrictions but can be allowed to run a Folder Template script that is programmed to create a project folder structure using approved rules and naming conventions.
This article will demonstrate a simple example of the Folder Template functionality and will create a simple Template to create and serialize the naming convention of a project folder.
Template Prerequisites
Before getting started, there are a few prerequisites to setting up a template. Check if users have permissions, a serial number has been set up, and a template card has been generated.
Prerequisite 1: Check Permissions
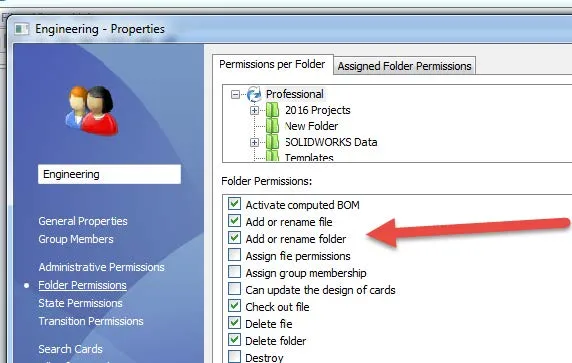
In this example, the Engineering Group will have permission to generate new folders. In this group, Engineers, the users have the Add or rename folder permission checked.
Prerequisite 2: Create a Serial Number
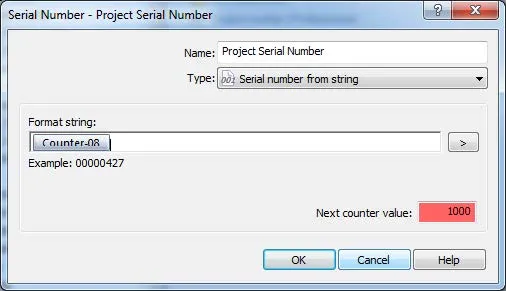
Create a serial number to automatically name your files. This example uses an 8-digit counter starting at 1000.
Prerequisite 3: Create a Template Card
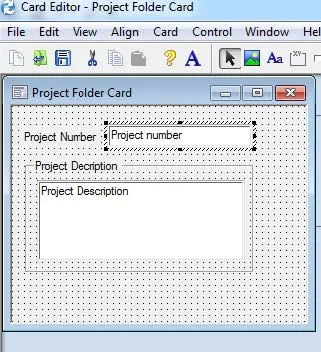
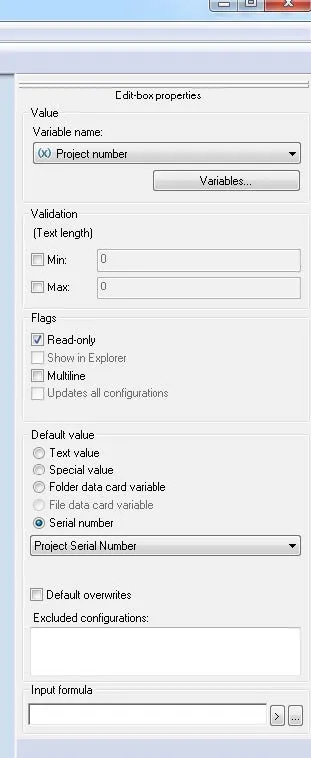
I have created the following Template Card with the following settings. When the user creates a new folder, the Project Number will be automatically generated and the user will be prompted to put a description in the Project Description field.
Creating the Folder Template
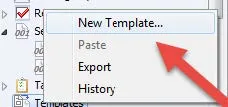
Once the prerequisites have been set up, the folder template can be created. Open the Administration tool, right-click Templates and select New Template.
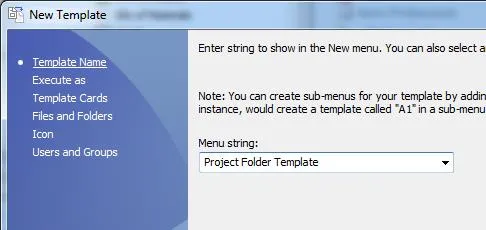
Name your template. This Example uses Project Folder Template.
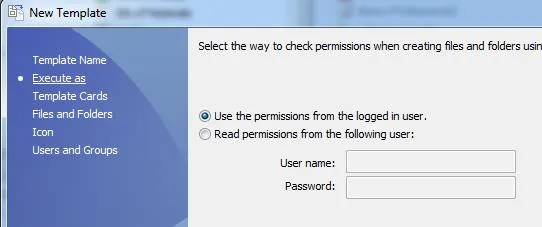
It is recommended to use the permissions of the logged-in user to create folder templates and manage folder permissions within a user group.
Select Next to link the Template Card created in prerequisite 3.
Select Add Card.
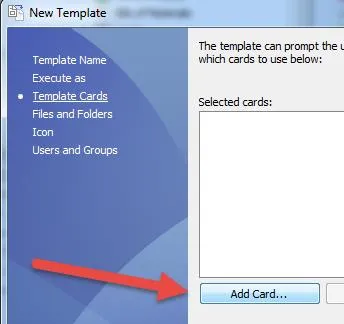
Select your Template Card. This example uses the Project Folder Card.
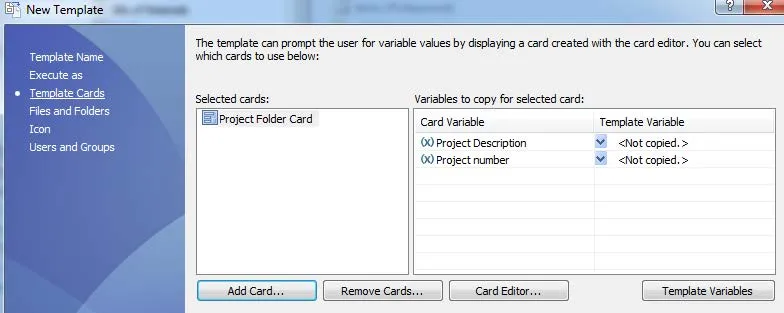
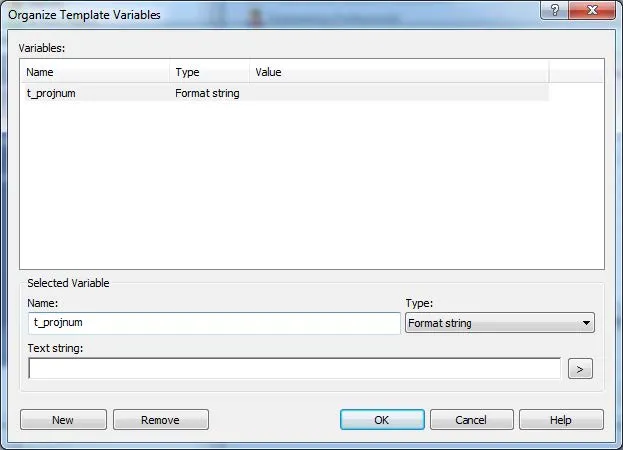
The variables in the template cards are automatically imported, but the template variables need to be linked to the card variables. Before the template variables can be linked, they must be created. To create the variables, select Template Variables.
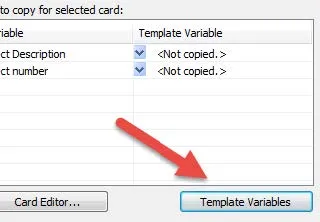
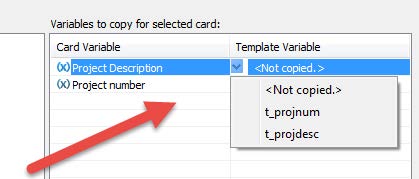
This example will use two template variables “t_projnum”, which will be linked to the card variable Project Number, and “t_projdesc” which will be linked to the Project Description.
Click the drop-down arrow in the template variables to link the card variables.

Select Next to set up Files and Folders.
The Files and Folder section allows users to set the location where the template will be created.
First, the current root folder can be selected or a new root folder can be created. This example uses the root folder Engineering Projects.
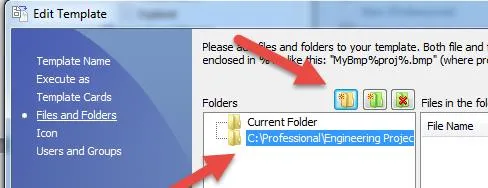
A New Folder needs to be created under the root folder. This will be the location where the Project Folders will be generated. Variables can be linked to generate the new folder names based on the previously created serial number that is linked to the template card and template variables.
The variable will be t_projnum and must be enclosed in the percent symbol %%.
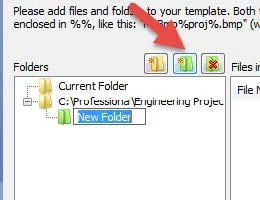
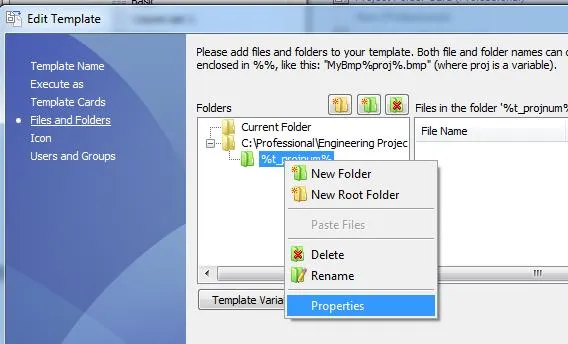
So, %t_projnum% will be the folder name.

Once the folder has been created, we have to link the template variables back to the template card variables. Right-click the %t_projnum% folder, select properties.
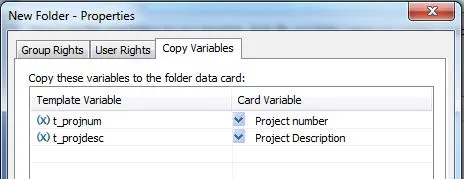
Select Copy Variables.

Select the Variables in the drop-down list, all Variables that have been created in PDM will be shown. The Project Number and Project Description variables will be linked in this example.
Select Next to add an Icon.
An Icon is not required, however, any icon can be selected to show for the creation of the new folders. For this example, <.item> will be selected. Select Next.
![]()
The final step in creating a template will be adding groups or users. This example adds the Administrators and Engineering groups.
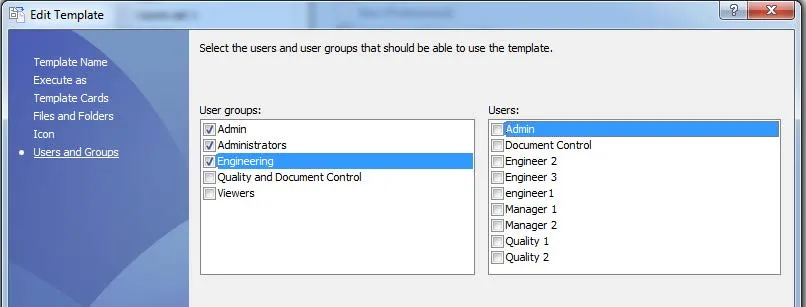
Congratulations, a template has now been created! However, it is important to test the template to ensure the prerequisites and templates are working correctly. Test the template by creating a new folder in the set location.
Testing the Template
To test the template, go to the file view. Select the location that you have set the template to create in folders. In this example, it is C:\<vaultname>\Engineering Projects.
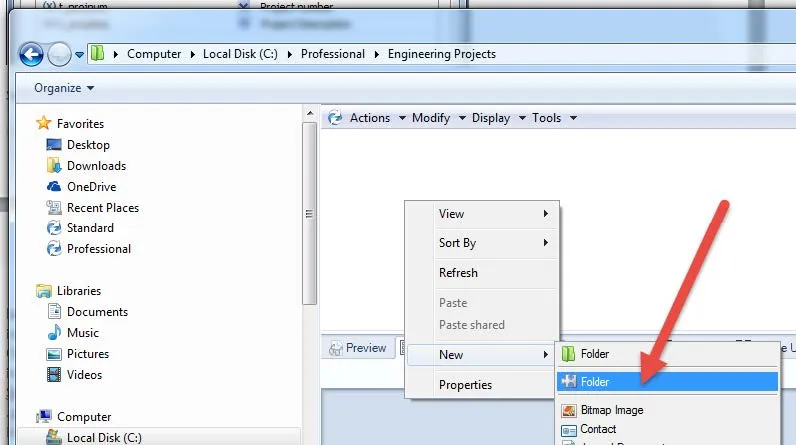
When Folder is selected, the template card created in Prerequisite 3 should pop up. The Project Number field is populated with the serial number created in Prerequisite 2 the user is prompted for a description.
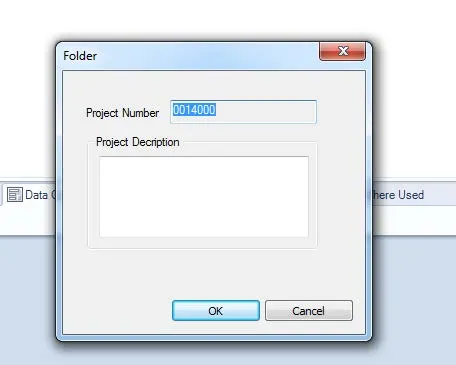
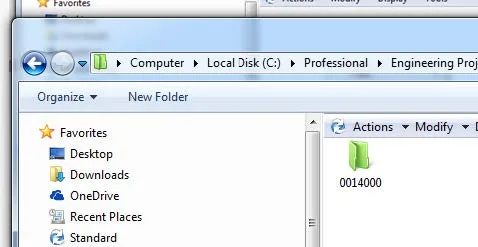
If the folder populates with the serial number, dance wildly around the office as the art of creating templates in SOLIDWORKS PDM has been mastered! Congratulations!
Learn More about SOLIDWORKS PDM & Templates
How to Adjust Template Settings in SOLIDWORKS
SOLIDWORKS Default Template Error
Using PDM Templates Inside SOLIDWORKS
Creating a SOLIDWORKS Property Tab Builder Template

About GoEngineer
GoEngineer delivers software, technology, and expertise that enable companies to unlock design innovation and deliver better products faster. With more than 40 years of experience and tens of thousands of customers in high tech, medical, machine design, energy and other industries, GoEngineer provides best-in-class design solutions from SOLIDWORKS CAD, Stratasys 3D printing, Creaform & Artec 3D scanning, CAMWorks, PLM, and more
Get our wide array of technical resources delivered right to your inbox.
Unsubscribe at any time.