SOLIDWORKS PDM - Excel Document as a Form
Filling out forms is always a drag. Automating those forms with data cards and transition updates is a great way to alleviate that burden. In this article, you'll learn about form automation with SOLIDWORKS PDM. There are many forms we see around the industry, so we’ll start with an example in Microsoft Excel.
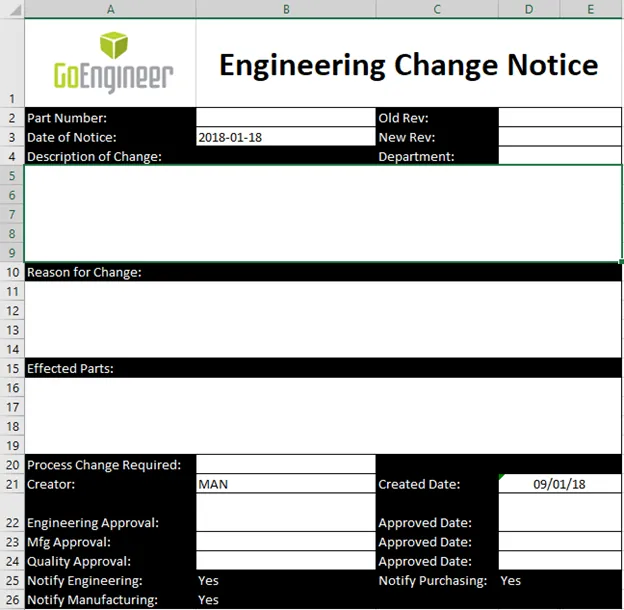
Here we have an example of an Engineering Change Notice form.
Now, to map these properties to our file and our data card, we will need to start with the variable setup. For Microsoft Office documents, the setup is pretty simple and should be familiar.
For each variable we are mapping we will want to use the attribute block CustomProperty.
This should be familiar as it is the same that we would use for SOLIDWORKS documents.
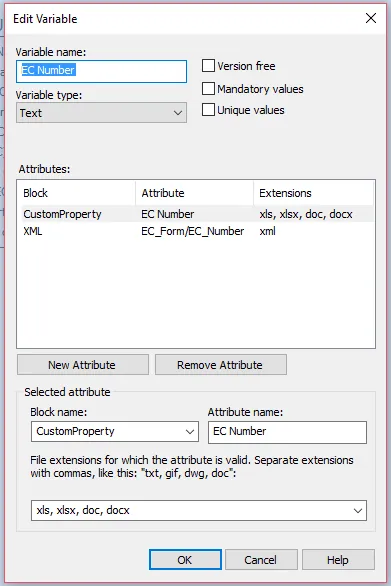
Set this to use the proper extensions that we are intending to use and the rest of the options can be set at your discretion.
We then turn to our spreadsheet to set up the variables inside for display.
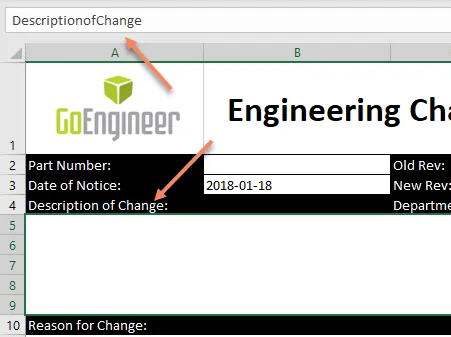
The first step to this is to create a named range. It’s generally a good recommendation to name this range something close to your variable/attribute name for ease of setup later.
Note: No spaces can be used in the name of a range.
See that in the image below I have simply pushed all of the text together without spaces.
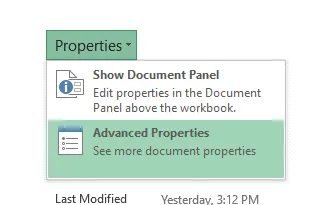
After these ranges have been named, it is time to map the custom properties to those ranges. To do this go to File > Info > Properties > Advanced Properties.
In the dialog, go to the Custom tab.
Here we find a list of properties that are already defined. If your variables haven’t mapped to the file yet, that is fine since we will create the link here. If they are mapped, that is fine as well, we will link their pre-existing values to ranges.
To do this, select the name in the list or type a new name.
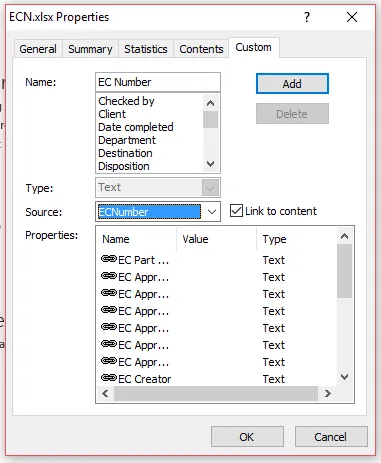
Check the box for Link to content and select the named range from the Source dropdown. Click add to add it to the list. From here on out, those cells will be filled in with our values from the data card.
From here we can make things even easier by creating a template to help us fill in values or serialize a naming convention. We can also create actions in our workflow transitions to automatically fill in names and dates for approvals.
There are of course some pros and cons to this technique.
I’ll break them down a bit here. By no means is this an all-encompassing list.
Pros
- Your company’s forms are probably already in Excel (or some other Office format), so the translation isn’t difficult.
- If they aren’t already in Excel, this is an easy program for anyone else to learn and create forms.
- The setup for this is fairly simple and intuitive. The process works similarly for other office formats.
Cons
- The SOLIDWORKS PDM Preview window does not update until the file has been checked out, opened, saved, and checked back in.
- Requires Microsoft Office on any machine that would need to view/print it.
- It does not handle changes down the line to the form/format with ease. (i.e., as your company uses the process and changes the formatting or logo, old forms will not update to the new format without manual updates.)
Learn More About SOLIDWORKS PDM
Customizing SOLIDWORKS PDM Checked Out By Column
Not Selecting All References During Transitions
Ultimate Guide to SOLIDWORKS PDM Permissions
Setting the Preview Tab Viewer in SOLIDWORKS PDM

About Bryce Hooper
Bryce has been using SOLIDWORKS since 2008 in multiple roles across multiple industries from industrial vacuum to RV frame design. He spent many of those years spent as a PDM administrator, implementing 3 PDM vaults along the way. He earned his CSWP in 2019, followed by his CSWE in 2013. Programming is a passion that has followed Bryce through his various positions, writing custom business applications to improve design processes. In his spare time Bryce is a gamer, a maker, and a brewer.
Get our wide array of technical resources delivered right to your inbox.
Unsubscribe at any time.