SOLIDWORKS Path Mate Explained
In SOLIDWORKS, the Path Mate is useful when trying to constrain a selected point on an assembly component to a path. It offers control over the pitch, yaw, and roll of the component as it treks through the path.
In SOLIDWORKS, Path Mate is located in the Mate (Assembly toolbar) > Advanced tab > Path Mate. (Figure 1)
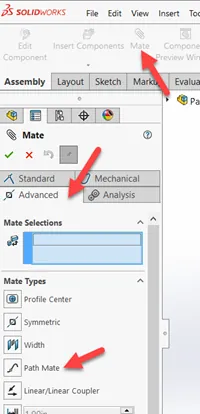
Figure 1: Path Mate location
When using Path Mate, the first mate selection is for the component vertex; this is the point in the component that will pierce and travel along the path. (Figure 2)
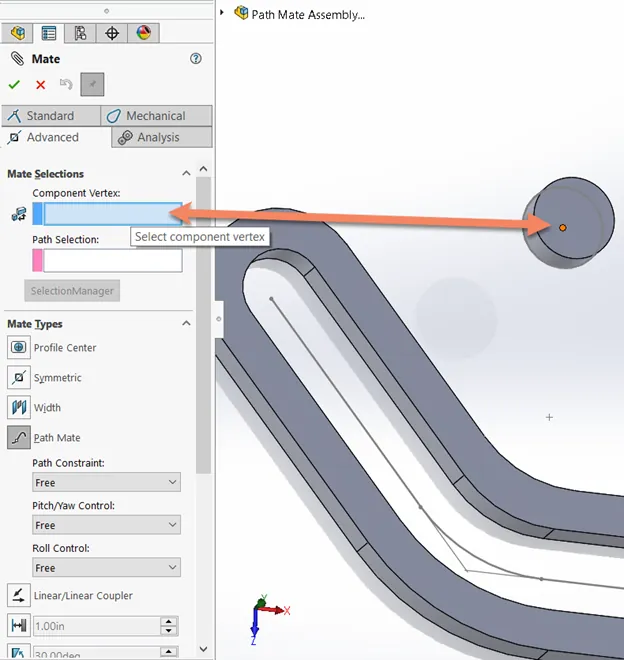
Figure 2: Select component vertex
The second mate selection is the Path Selection. Here you will choose a curve, edge, or sketch entity. If you have more than one entity to select, click on the SelectionManager. (Figure 3)
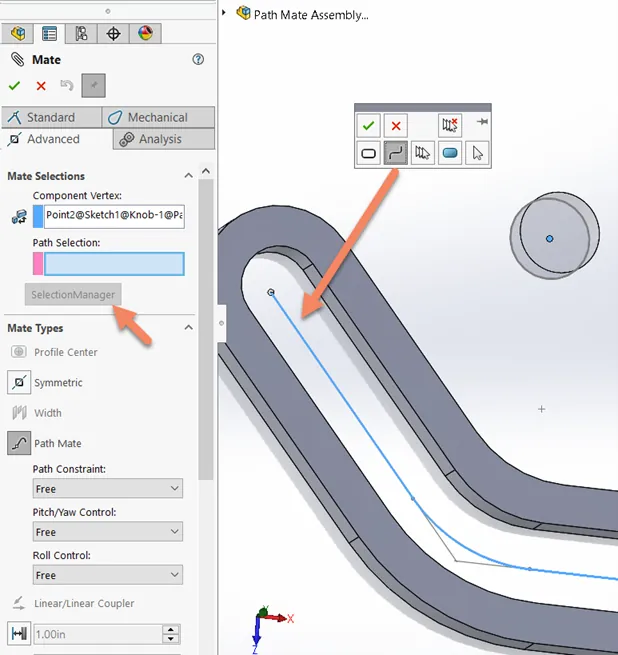
Figure 3: Path Selection
To optimize the movement of the component along the path, we are given Path Constraint, Pitch/Yaw Control, and Roll Control.
Path Constraint allows you to constrain the vertex with a specified distance from the end of the path or as a percentage along the path. (Figure 4)
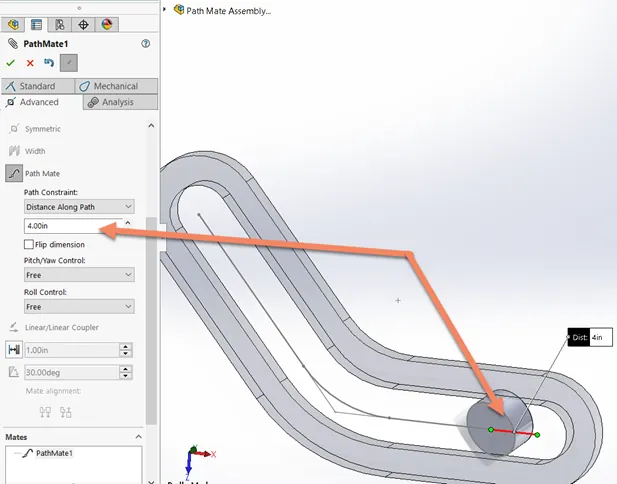
Pitch/Yaw Control constrains one axis of the component to be tangent to the path. (Figure 5)
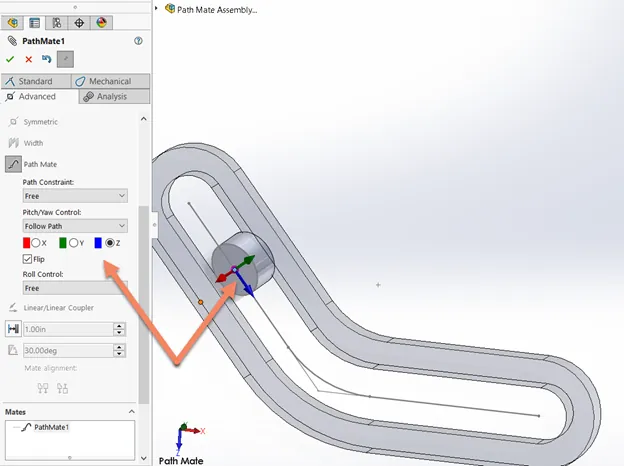
Figure 5: Pitch/Yaw Controls
Roll Control constrains one axis of the component to align with a vector you select. You must select a linear edge or planar face for Up Vector. (Figure 6)
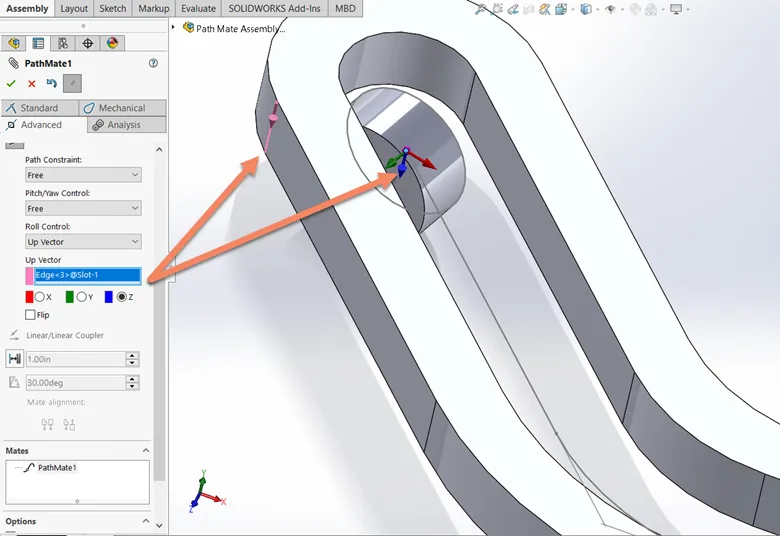
Figure 6: Roll Controls
Tip: You cannot use the same axis for both Pitch/Yaw Control and Roll Control.
More SOLIDWORKS Tips & Tricks
How to Mirror Parts in SOLIDWORKS Two Different Ways
Using Cosmetic Threads: SOLIDWORKS Best Practices
SOLIDWORKS Wrap Feature Tutorial
Global Variables in SOLIDWORKS Explained

About Rodolfo Gutierrez
Rodolfo Gutierrez is a Mechanical Engineer by profession specializing in SOLIDWORKS, Routing, PDM, Sheet Metal, and Weldments. Lucky husband and goofy dad. Loves productivity hacks.
Get our wide array of technical resources delivered right to your inbox.
Unsubscribe at any time.