SIMULIA CST Studio Suite Installation Guide with Managed DSLS License Server Option
CST Studio Suite is the electromagnetic analysis software package, developed by SIMULIA, used to design, analyze, and optimize Electromagnetic Systems. This blog will provide step-by-step instructions explaining how to install CST Studio Suite with the Managed DSLS (Dassault Systèmes License Server) option.
Managed DSLS, which stands for Dassault Systèmes Licensing Service, is a free service offered by Dassault Systèmes to customers who purchase CST Studio Suite or their other products.
Managed DSLS is a cloud-hosted licensing service that removes the need for a dedicated physical machine to act as the licensing server. The service is managed entirely by Dassault Systèmes and requires almost no intervention by you, the user, or an IT team.
Moreover, if you are connected to an external network, there is no need for a VPN, which would have been the case if the licensing were configured locally using FLEXnet or Hosted DSLS. Therefore, you can connect to any network and still use CST Studio without worrying about connecting to your company's network.
If GoEngineer is your VAR and you encounter any difficulties performing these steps, do not hesitate to reach out to our Technical Support team.
- Step 1: Receive authentication file (.LIC)
- Step 2: Create the DSLICSRV.TXT file
- Step 3: Download the CST Studio installation files
- Step 4: Install CST Studio Suite on the client machine
- Step 5: Connect the client to the server for the licensing
- Step 6: Select Solver options – SimUnit Tokens or Credits
Note: If your Managed DSLS License server has been previously installed for Dassault Systèmes products, proceed to Step 3.
Step 1: Receive Authentication File (.LIC)
When you request the Managed DSLS licensing option for CST Studio Suite, you or your purchasing department should have received an email from DoNotReply.ag.license-keys@3ds.com with your CST license file. This is a *.LIC file. If you did not receive this in your inbox, check your Junk or Spam Folder.
The authentication file, which has a ". LIC" extension, proves your identity to access your company’s licenses. Unlike license keys, the authentication file is not tied to a ComputerID. That means that you can deploy the same file on multiple machines. Additionally, this authentication file has no expiration date, so it only needs to be deployed once.
Copy the authentication file (.LIC) to every computer you wish to run CST Studio on and place it in C:\ProgramData\DassaultSystemes\Licenses\<FILENAME>.LIC. Create this folder if it does not exist.
ProgramData is a hidden folder that can be accessed by typing the folder name in the address bar:

Step 2: Create the DSLICSRV.TXT File
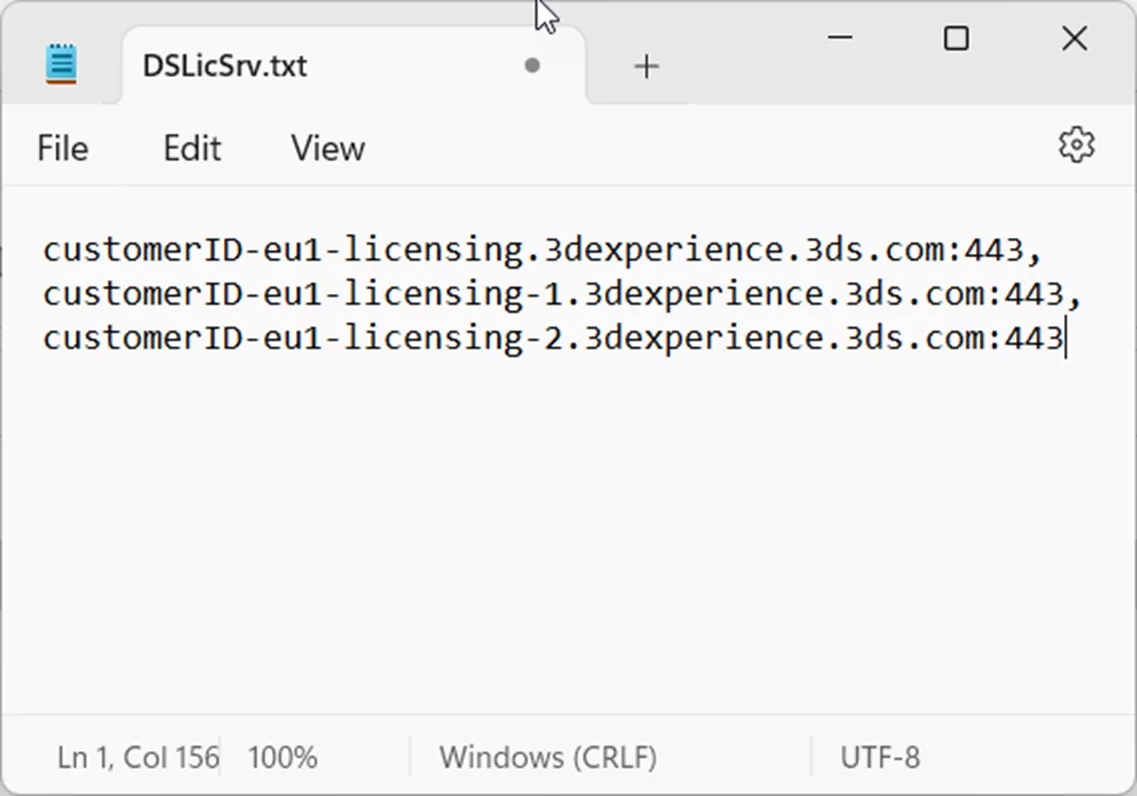
On the same computer and in the same folder (C:\ProgramData\DassaultSystemes\Licenses\), use Windows Notepad to create the text file named DSLicSrv. This file references the Managed Licensing Service and its redundant servers listed online. The contents are specified in the email from Dassault Systèmes:
customerID-eu1-licensing.3dexperience.3ds.com:443,
customerID-eu1-licensing-1.3dexperience.3ds.com:443,
customerID-eu1-licensing-2.3dexperience.3ds.com:443
In this case, make sure customerID is the customer identifier (Tenant ID or Online Instance ID) provided by Dassault Systèmes.
Step 3: Download the Installation Files
You can download the installation files required for CST Studio Suite from software.3ds.com.

Login to the software download portal using your 3DEXPERIENCE ID. These were the credentials you used to accept the CLOSA (licensing agreement) for the SIMULIA tools you purchased.
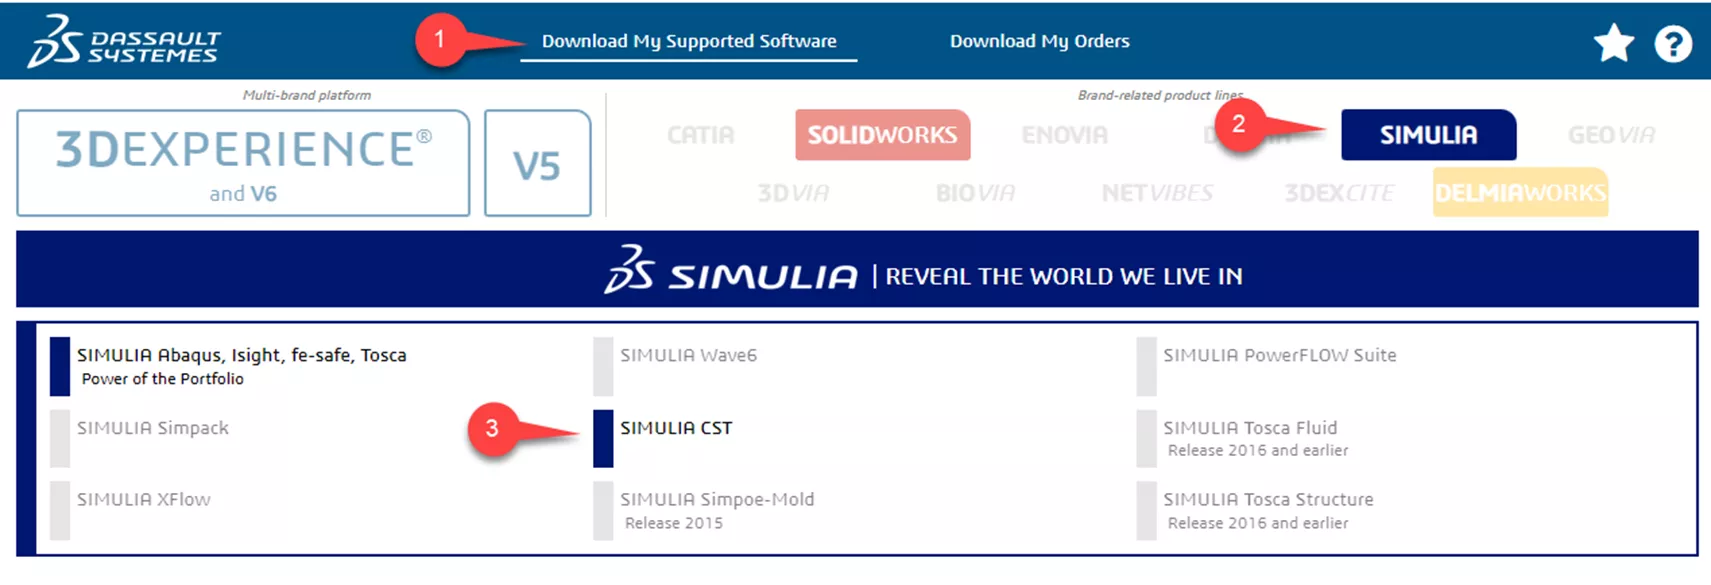
Once you log in, select these buttons in the following order to access the installation files:
Download My Supported Software (1).
Select Simulia (2).
Select Simulia CST (3).
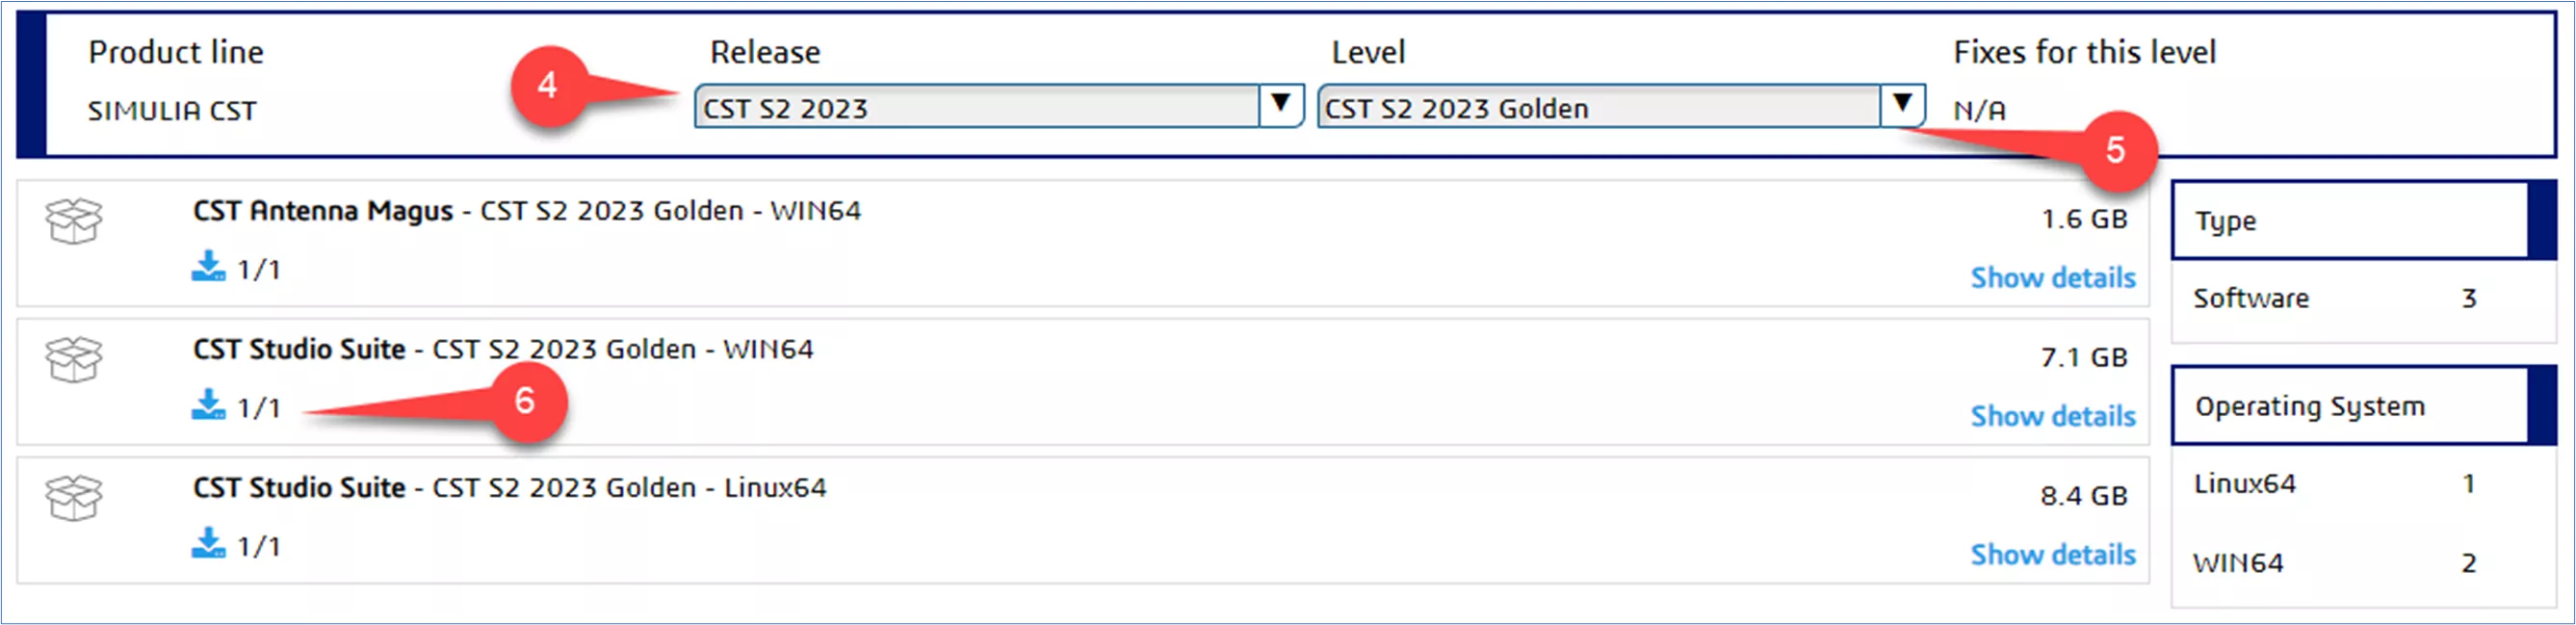
Select the required release (4) and the Golden level (5). This is the base level that needs to be installed. All software updates (hotfixes or Fix packs) are installed over these files.
Select the file under CST Studio Suite – CST S2 2023 Golden – WIN64 (6) to download them. This download file is around 7.1 GB in size, so make sure you have enough disk space.
After the download is complete, extract the files.
Important Note: It is recommended to use the 7-Zip extraction utility to extract the installation files.
Step 4: Install CST Studio Suite on the Client Machine
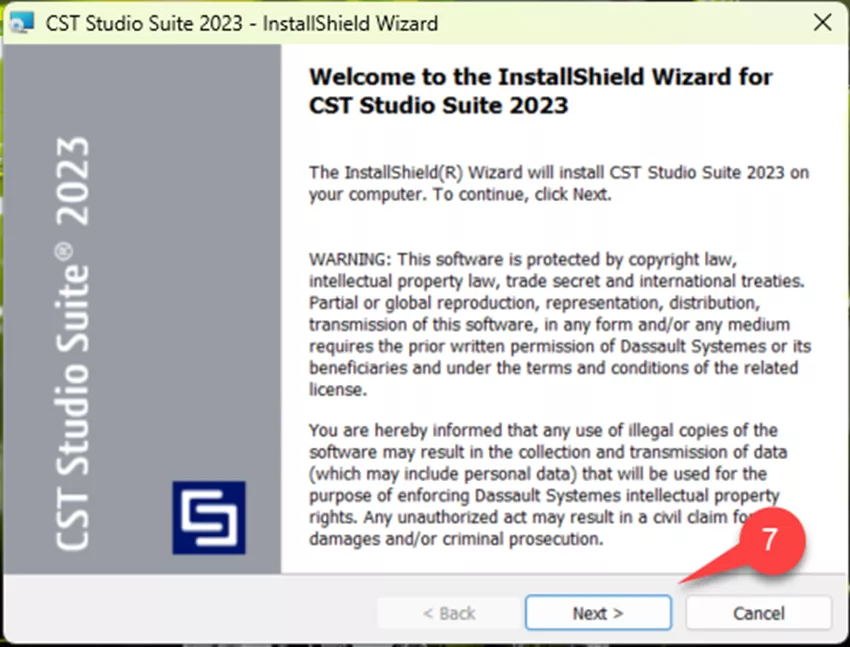
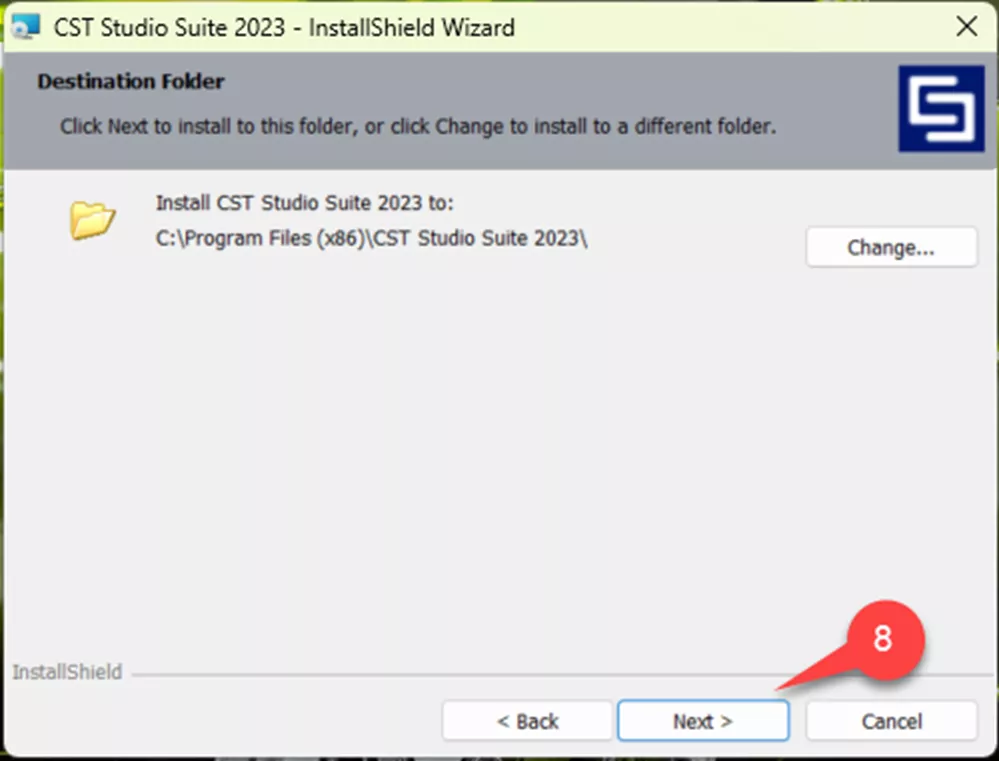
Locate the file named setup.exe that is under sub-folder CST_S2_202x.CST_S2_202x.SIMULIA_CST_Studio_Suite.Windows64\SIMULIA_CST_Studio_Suite.Windows64 in the installation folder you created in the previous step. Right-click setup.exe and Run as Administrator. In the following step, click Next(7) and follow the instructions in the installation window screenshots.
Select the following options in the installation prompts:
Choose the installation location (8).
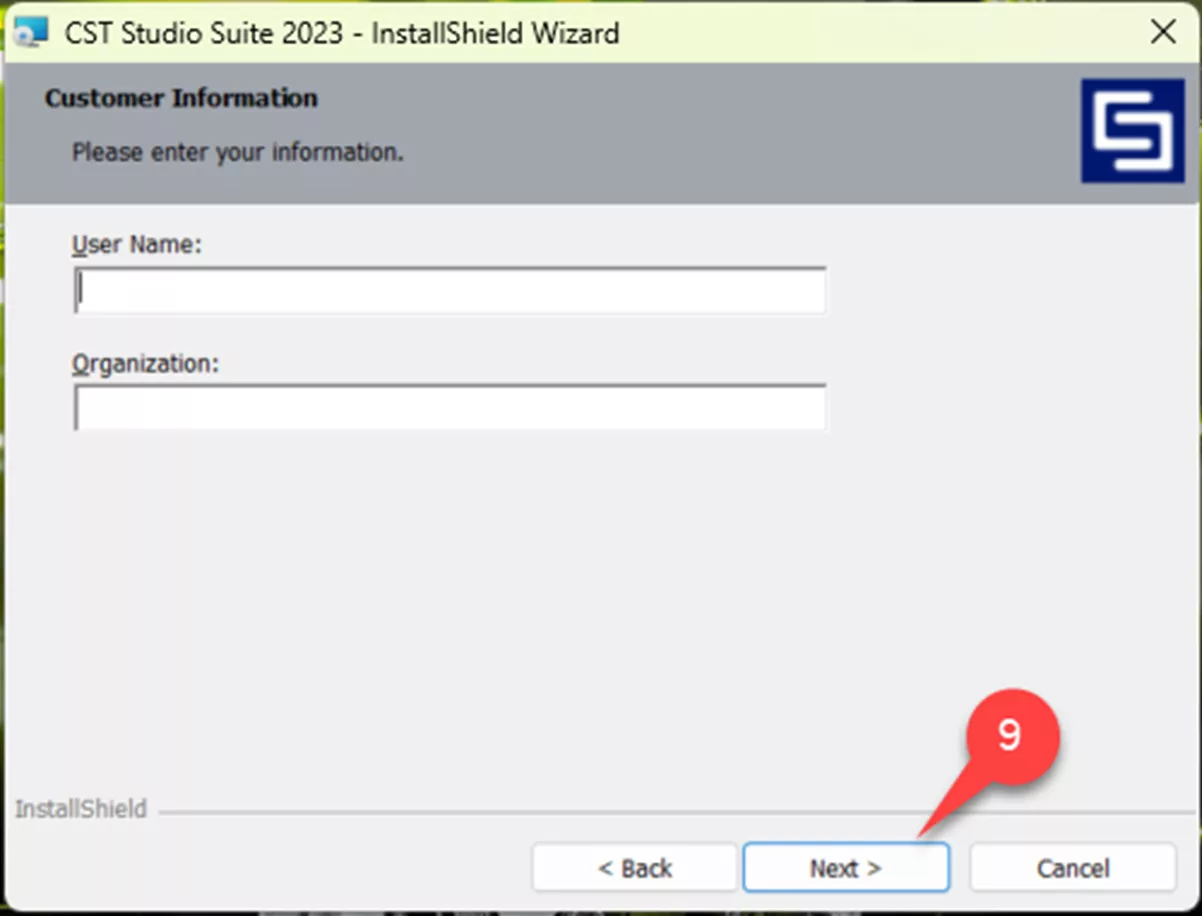
Type in a User Name and Organization (9).
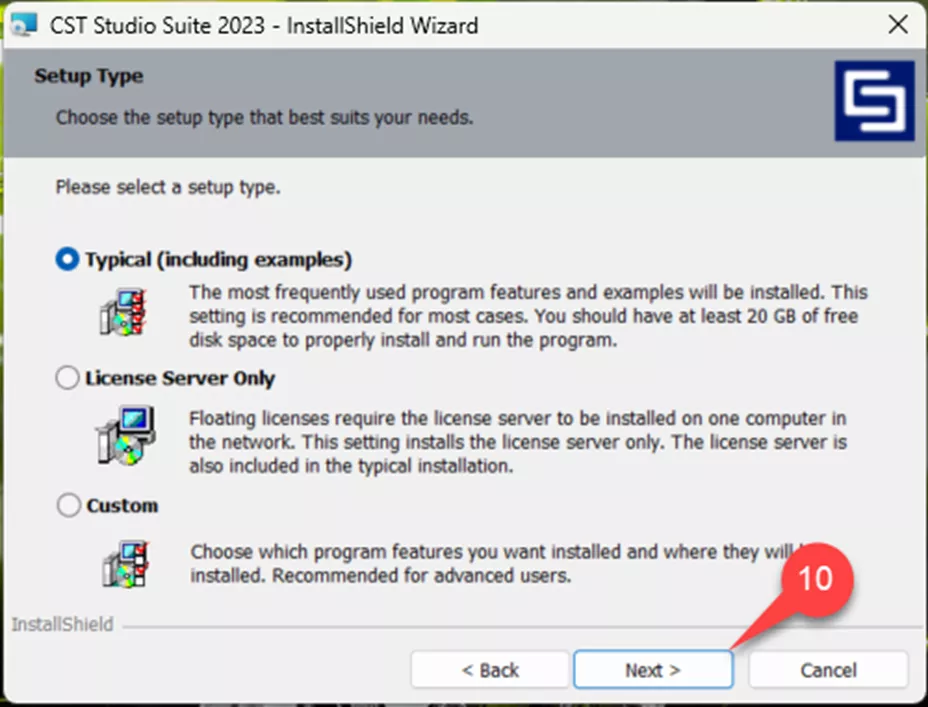
Choose Typical (including examples) for the Setup Type (10).
Select Instal (11).

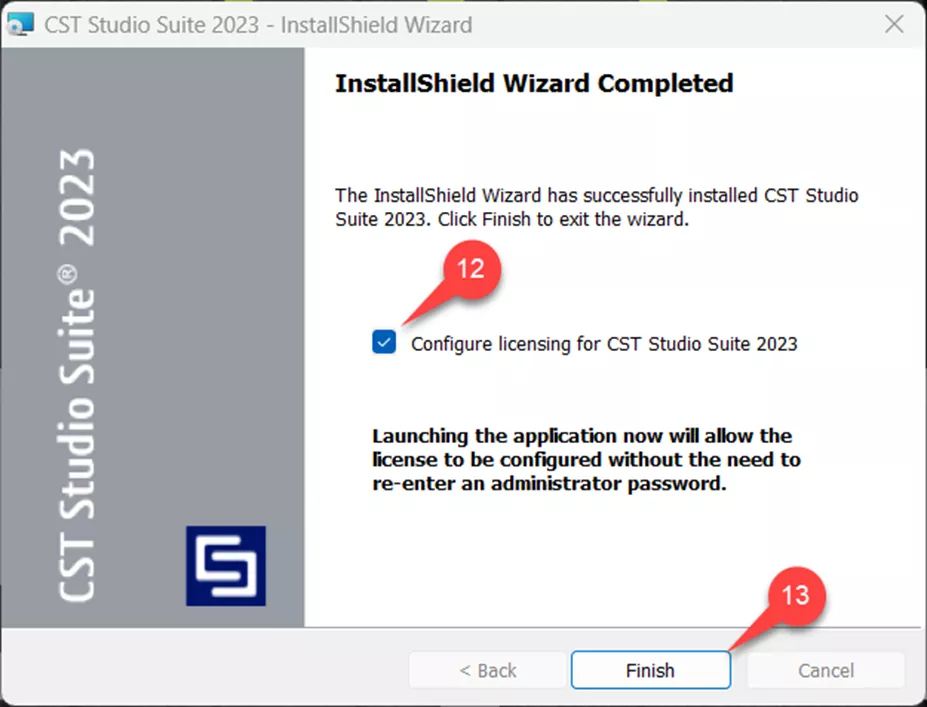
Activate the Configure licensing for CST Studio Suite box (12) and select Finish (13) to launch CST Studio and configure the licensing.
If you are using the FlexNet License option or the Hosted DSLS License server, you can follow the instructions in the CST Studio Suite – Getting Started manual in the install directory. "C:\Program Files (x86)\CST Studio Suite 202x\Documentation\CST Studio Suite - Getting Started.pdf"
Step 5: Connect the Client to the Server for the Licensing
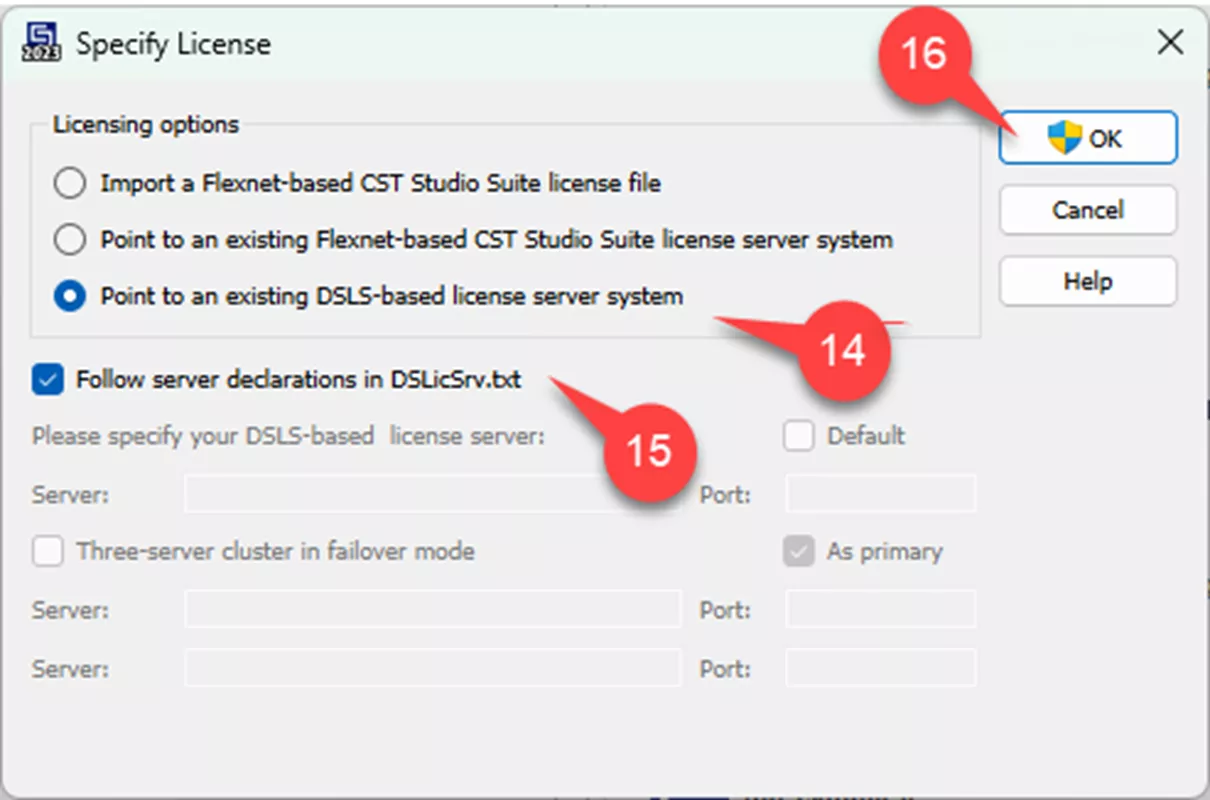
Once launched, you will encounter a Specify License dialog box. Select the Point to an existing DSLS-based license server system (14) option. Activate the Follow server declarations in DSLicSRV.txt checkbox. (15) Click OK (16).
You will receive a message that the License has been successfully configured.
Step 6: Select Solver Options
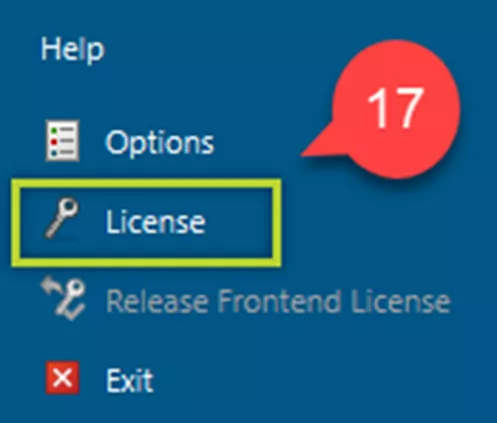
The Unified License model uses SimUnit Credits or SimUnit Tokens during the solver process for CST Studio. The simulation units need to be set to the proper type for the solver to work. With CST open, select License (17) in the left pane.
The License popup has the Simulation Units dropdown. Select either Credits or Tokens (18).
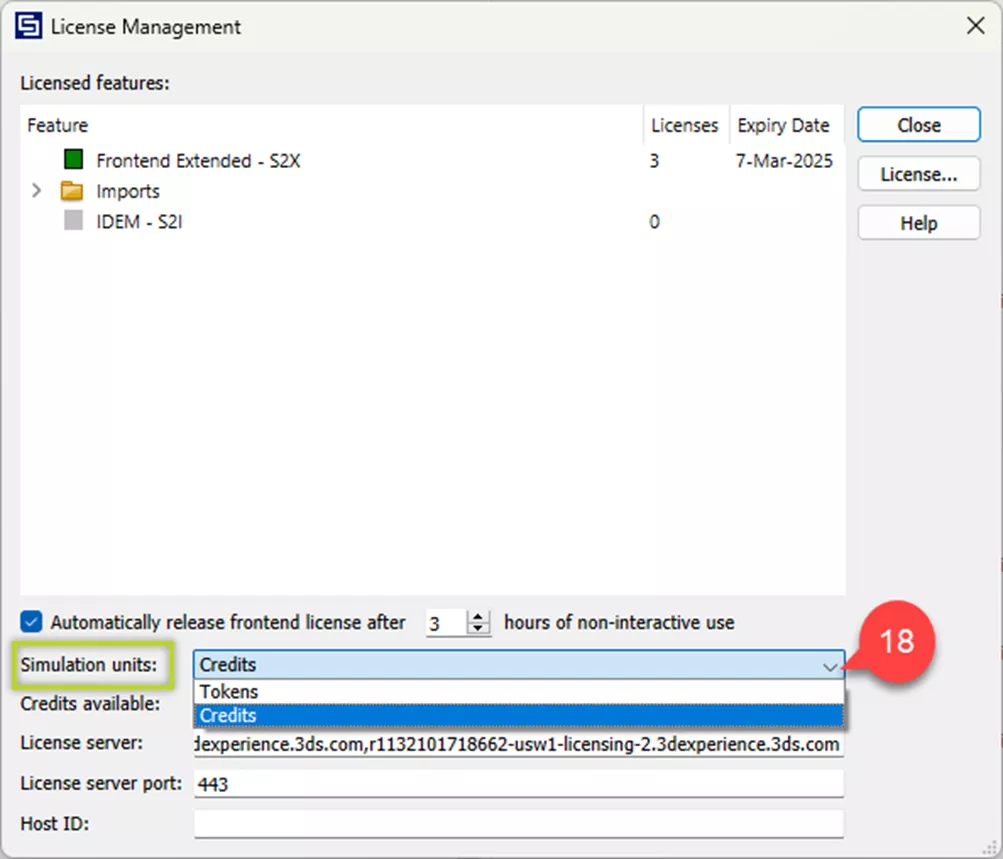
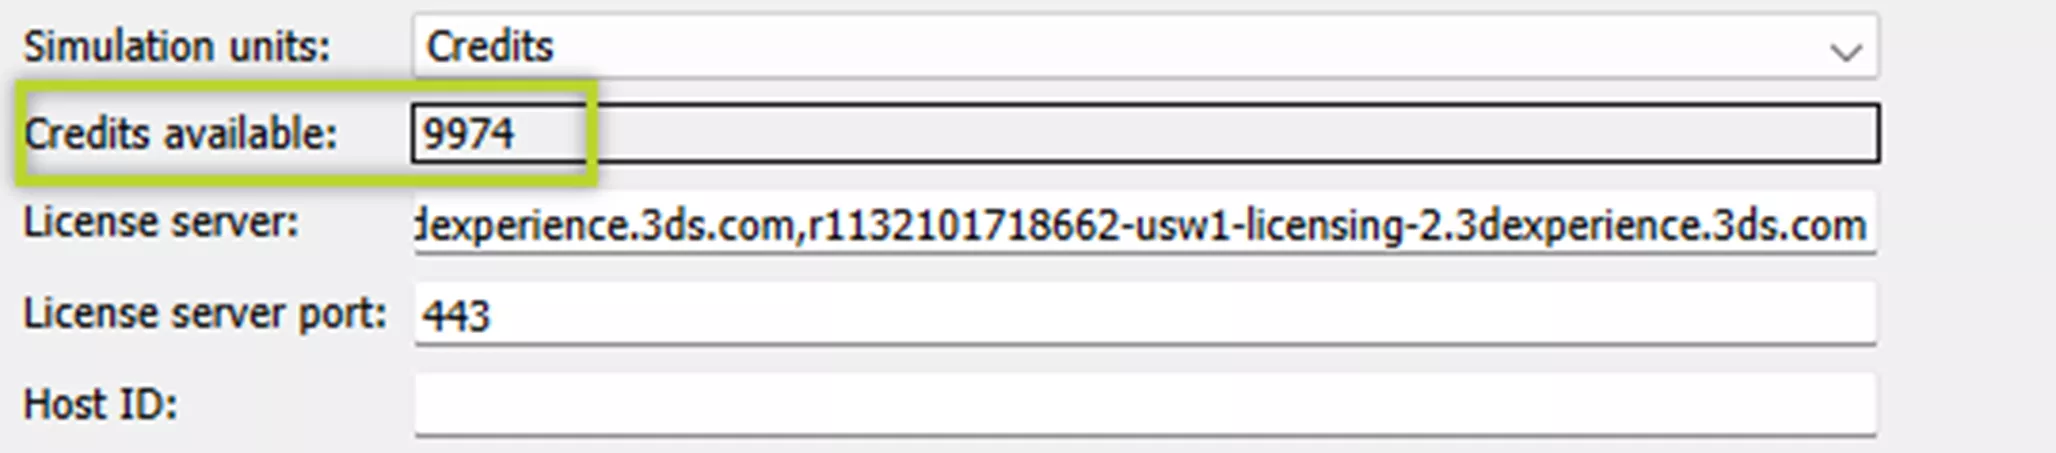
Once selected, Credits available will show you how many SimUnit Credits or Tokens you have available.
This concludes the installation process for CST Studio Suite with the Managed DSLS License Server.
Related Articles
Advancing Engineering Simplicity: SIMULIA’s New Unified Licensing Model
SIMULIA CST Studio Suite 2024 - What's New
FEA and CFD Analysis Software: What to Know Before You Buy
Optimizing Your Workstation Budget for Design & Engineering Applications: Simulation

About Jeff Lendermon
Jeff Lendermon is an Applications Engineer for GoEngineer supporting the SOLIDWORKS Plastics simulation software. Jess has over 30 years of experience in the Plastic Injection molding industry, he applies his experience and knowledge of the industry to help customers see the benefits of utilizing the tools within SOLIDWORKS Plastics.
Get our wide array of technical resources delivered right to your inbox.
Unsubscribe at any time.