Record a Basic SOLIDWORKS Macro
Macros are scripts that automate tasks inside of SOLIDWORKS. If you're new to SOLIDWORKS Macros, you may be wondering if you need to understand scripts or know how to write code - the answer is no! There is a handy tool you can use that captures mouse clicks, menu choices, and keystrokes and records them - much like a video.
How do SOLIDWORKS Macros Work?
To obtain a SOLIDWORKS Macro, all you have to do is click the record button, complete the task you would like to automate in SOLIDWORKS, then click the stop recording button. When you are done recording, the script will automatically be written for you. Save the script file, and you are ready to start using your new macro.
Let’s look at a simple example. We will add the hole in the top of a candlestick.
How to Record a Macro in SOLIDWORKS
Steps for recording a macro:
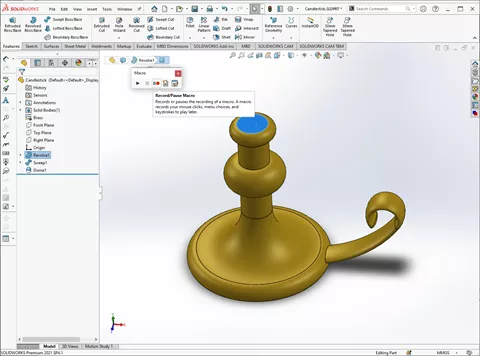
- Click the Record / Pause button on the Macro toolbar.
- Perform the tasks in SOLIDWORKS as you would normally.
- Click the Stop button on the Macro toolbar.
- Save the macro to a location of your choosing.
The Macro toolbar can be accessed from the Tools menu.
Another quick way to find it is to use the Command search.
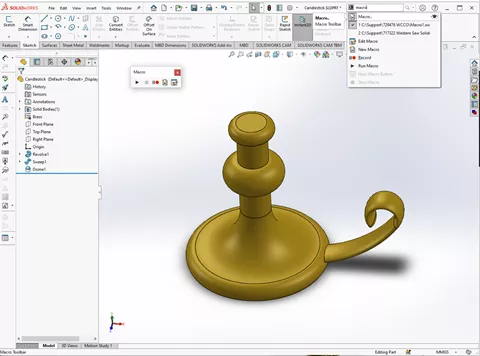
Learn more about Command Search and other tech tips below.
Suggested Article >> Favorite SOLIDWORKS Tips from Tech Support
In this example, the top face of the candlestick was selected before clicking the Record button from the Macro toolbar.
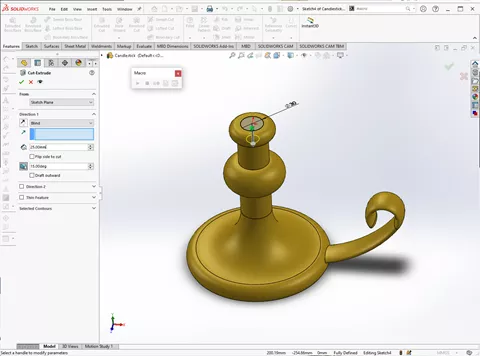
A 30mm circle is sketched on the top of the candlestick and an extrude cut is added. The cut is 25mm deep with a 15° draft.
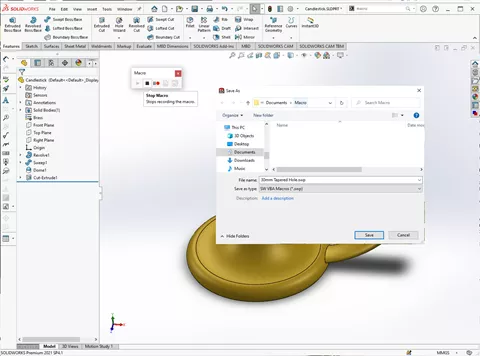
After exiting the extrude cut, the Stop Macro button is selected. Select a location to save your new macro, and give it a meaningful name.
In this example, it was named 30mm Tapered Hole.
To see it in action, the bottom of the candlestick is selected, the Run Macro button is picked, and the 30mm Tapered Hole macro is opened from the popup dialog.
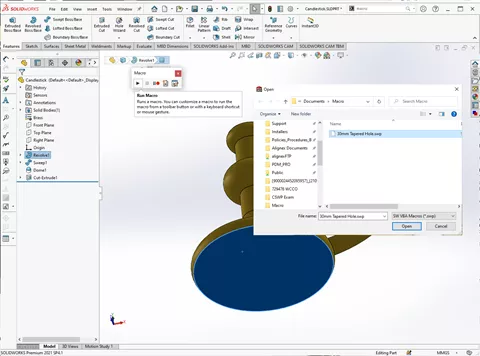
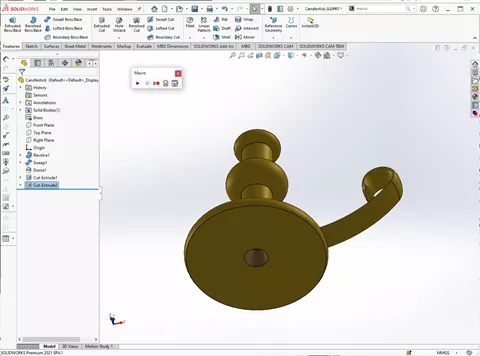
Just that easy, a hole was added to the bottom of the candlestick.
Assign SOLIDWORKS Macro to a button
How to assign a Macro to a button in SOLIDWORKS:
- From the Tools menu, select Customize.
- Select the Shortcut Bars tab.
- Select Macro from the list of Toolbars.
- Click and drag the New Macro button from the Customize dialog to the CommandManager or any other toolbar.
- Select the three dots on the Macro line of the Customize Macro Button dialog.
- Navigate to the saved macro script file
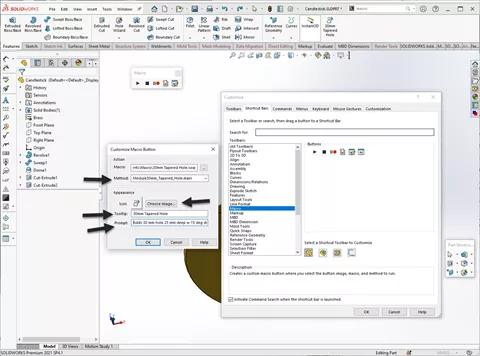
- Fill in the Tooltip, Prompt, and Method fields. (All optional)
- Assign the icon an image (also optional).
Below is a step-by-step tutorial of these instructions.
From the Tools menu, select Customize.
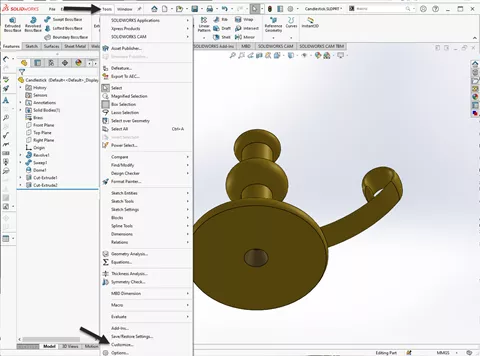
Select the Shortcut Bars tab. Select Macro from the list of toolbars, then click and drag the New Macro button from the customize dialog to the CommandManager or any other toolbar.
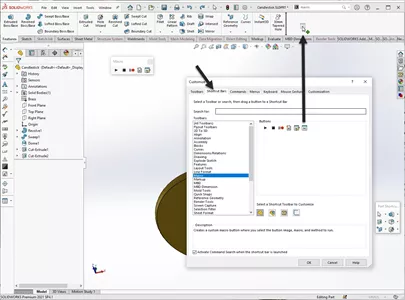
The Customize Macro Button dialog will pop up. Select the three dots in the Macro line of the dialog to navigate to the script file that was saved.
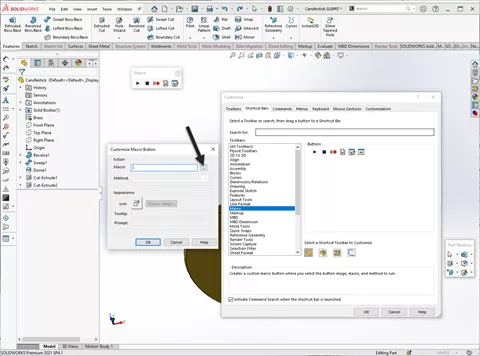
Optionally: Information can be added to the Method, Tooltip, and Prompt fields of the Customize Macro Button dialog. An image can also be assigned to the button if you choose.
Want to learn more about SOLIDWORKS? Check out more tips and tricks below.
More SOLIDWORKS Tutorials
SOLIDWORKS Weldment Profiles & Weldment Tools Guide
Top 10 SOLIDWORKS Tutorials of 2021
SOLIDWORKS Dialog Box Off Screen Solutions
SOLIDWORKS Mold Tools: Split Line & Parting Line Explained

About Chris Geringer
Chris is a Technical Support Engineer at GoEngineer. When Chris isn't assisting customers, he enjoys biking and volunteering with a group that preserves vintage aircraft.
Get our wide array of technical resources delivered right to your inbox.
Unsubscribe at any time.