Exporting SOLIDWORKS Models for BIM and AEC Software
Are you exporting SOLIDWORKS models to a BIM program like Revit? Thanks to the built-in functionality of 3D Interconnect, you have a few different export options, including ACIS (.sat), RFA (.rfa), and IFC (.ifc). If you select to save as an ACIS or RFA file, you can implement some of the functionality of the SOLIDWORKS Defeature tool.
What is BIM format and AEC Software?
BIM stands for Building Information Modeling, and AEC stands for Architecture, Engineering, and Construction. It is sometimes necessary for SOLIDWORKS users to collaborate with users of other software made specifically for BIM and AEC applications, such as Revit and ArchiCAD. Because these programs use different file formats, your SOLIDWORKS project likely needs to be converted before opening it with one of these programs.
Export to AEC
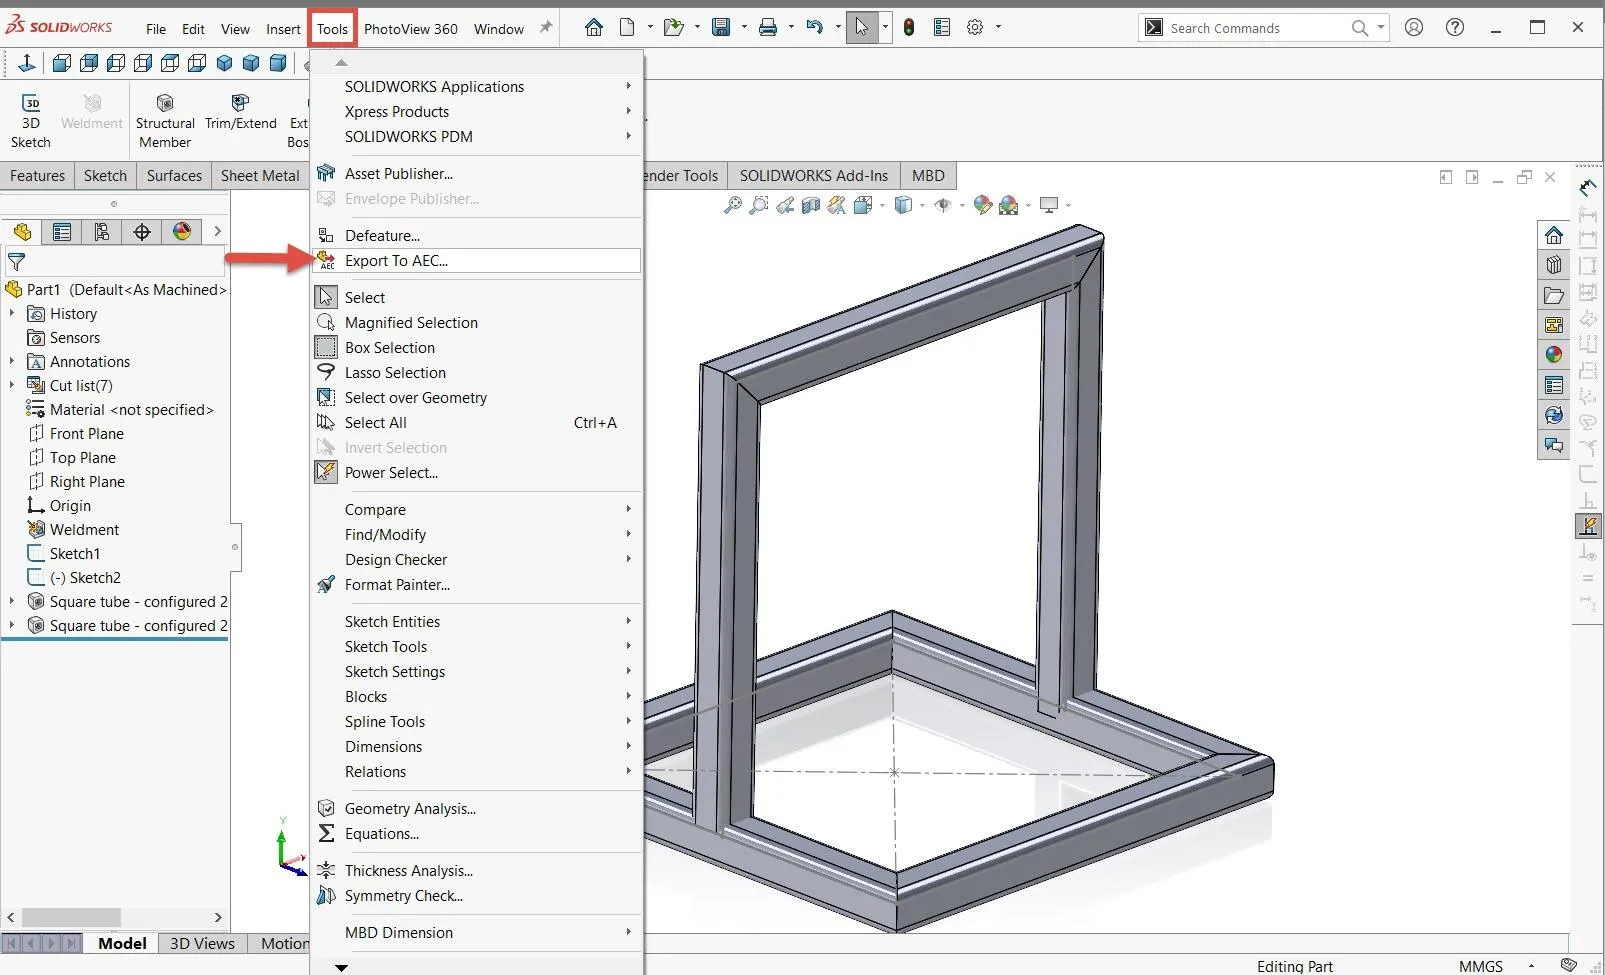
SOLIDWORKS has enhanced functionality for saving ACIS and RFA files that can be accessed when using the Export to AEC tool. This tool is located under Tools > Export to AEC.
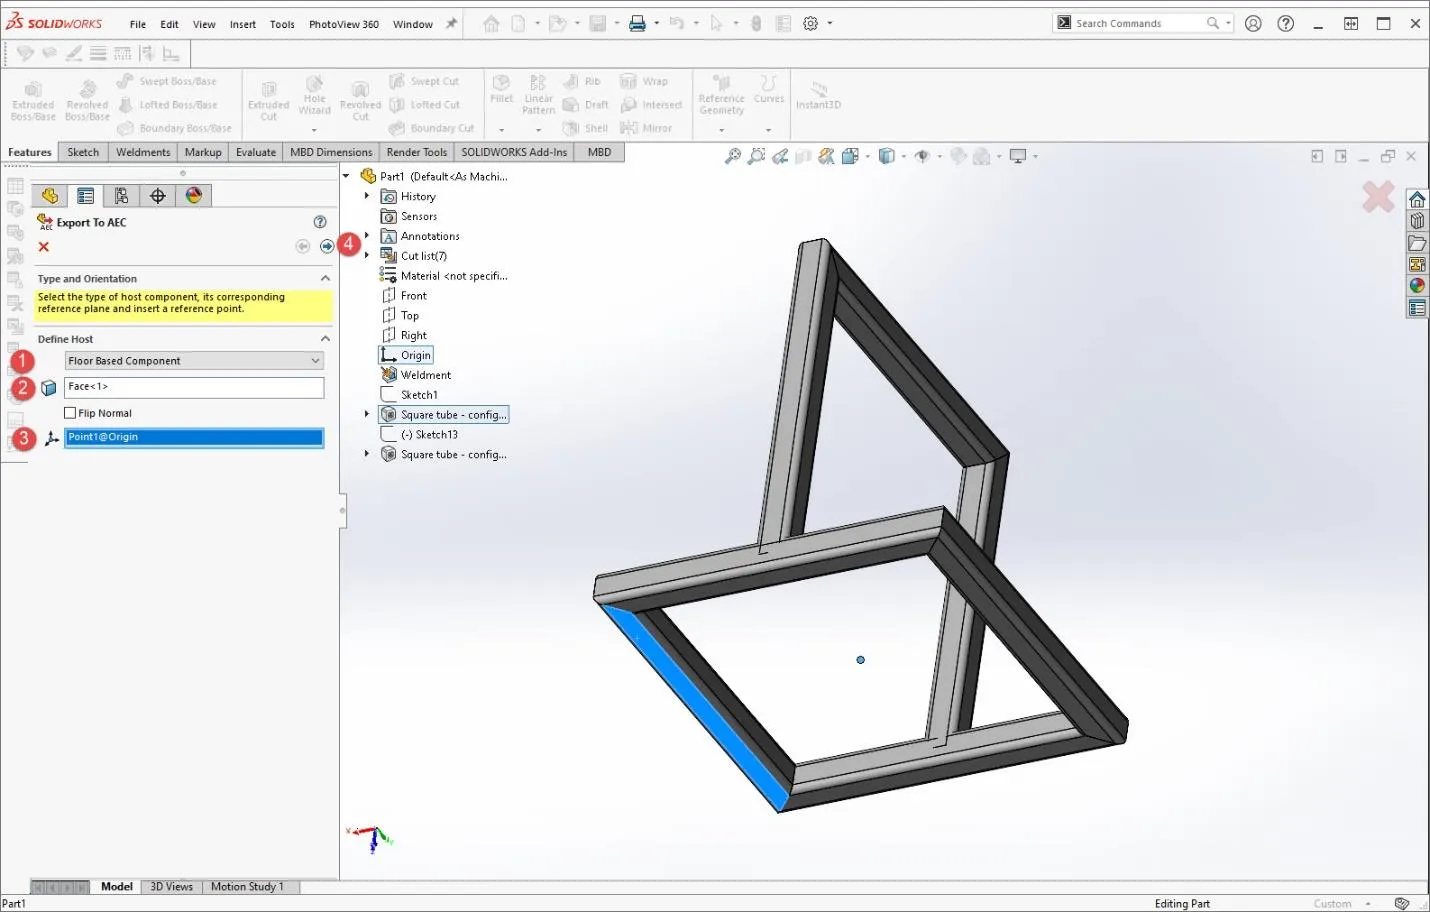
Next, specify how the model will interact with its environment. To do this, we first specify whether it is a floor, ceiling, or wall-based component.
We then select a face that will be attached to this location (in this example, we chose the floor).
Our third selection is the center point that will locate the part (I chose the origin, as this is the center of my floor-mounted part). After making your selections, click the next arrow.
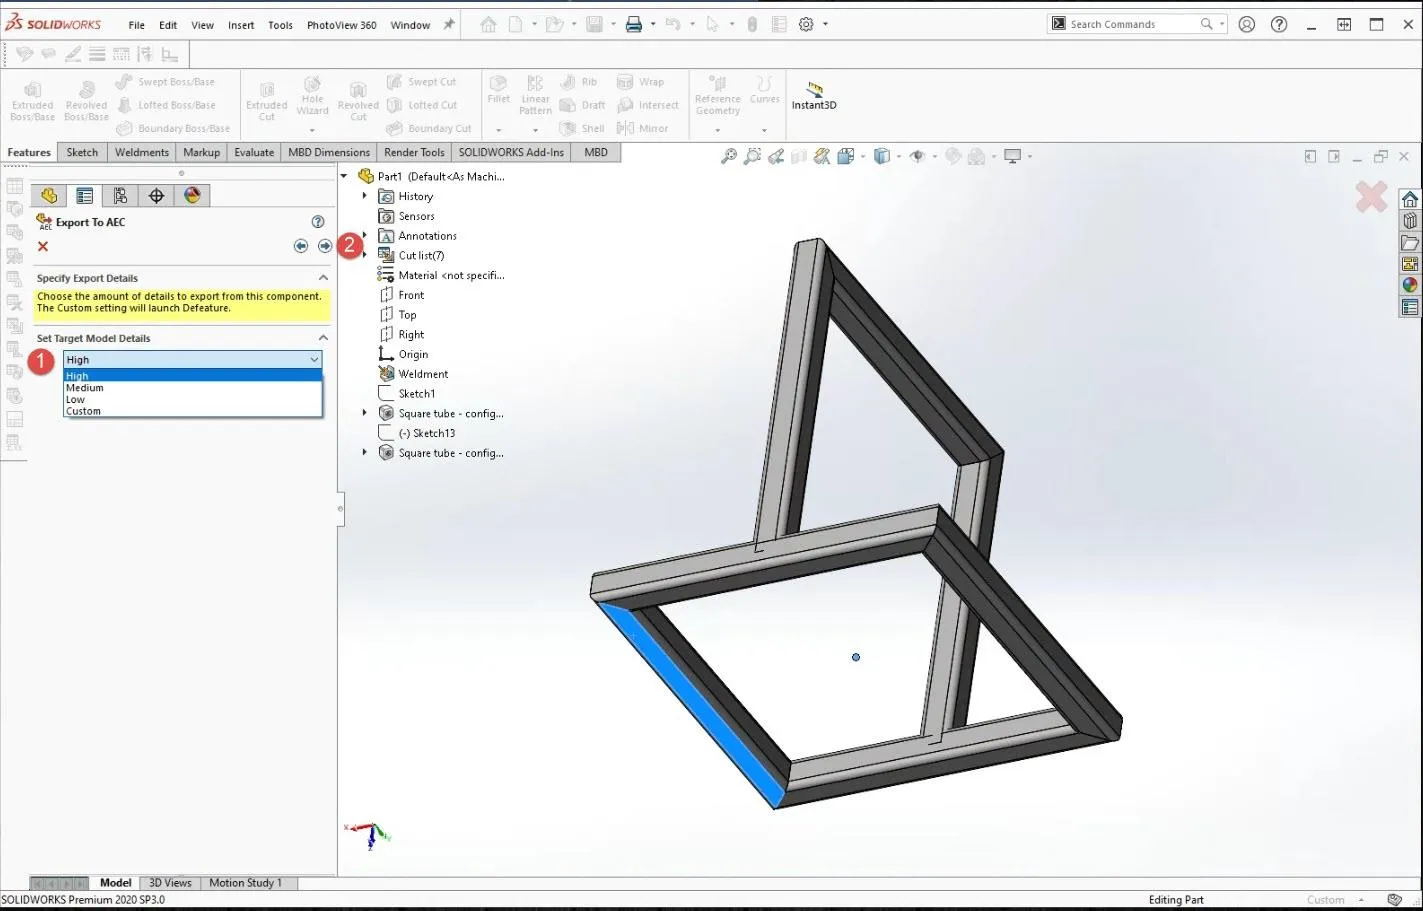
In the next step, we will select the level of detail. This setting has similar functionality to the SOLIDWORKS Defeature tool, and, if we select Custom, we can specify the level of detail that is carried over into the exported file using some basic Defeature options. Because I want a high level of detail for this part, I selected High from the list of predefined detail settings. Click the next arrow again.
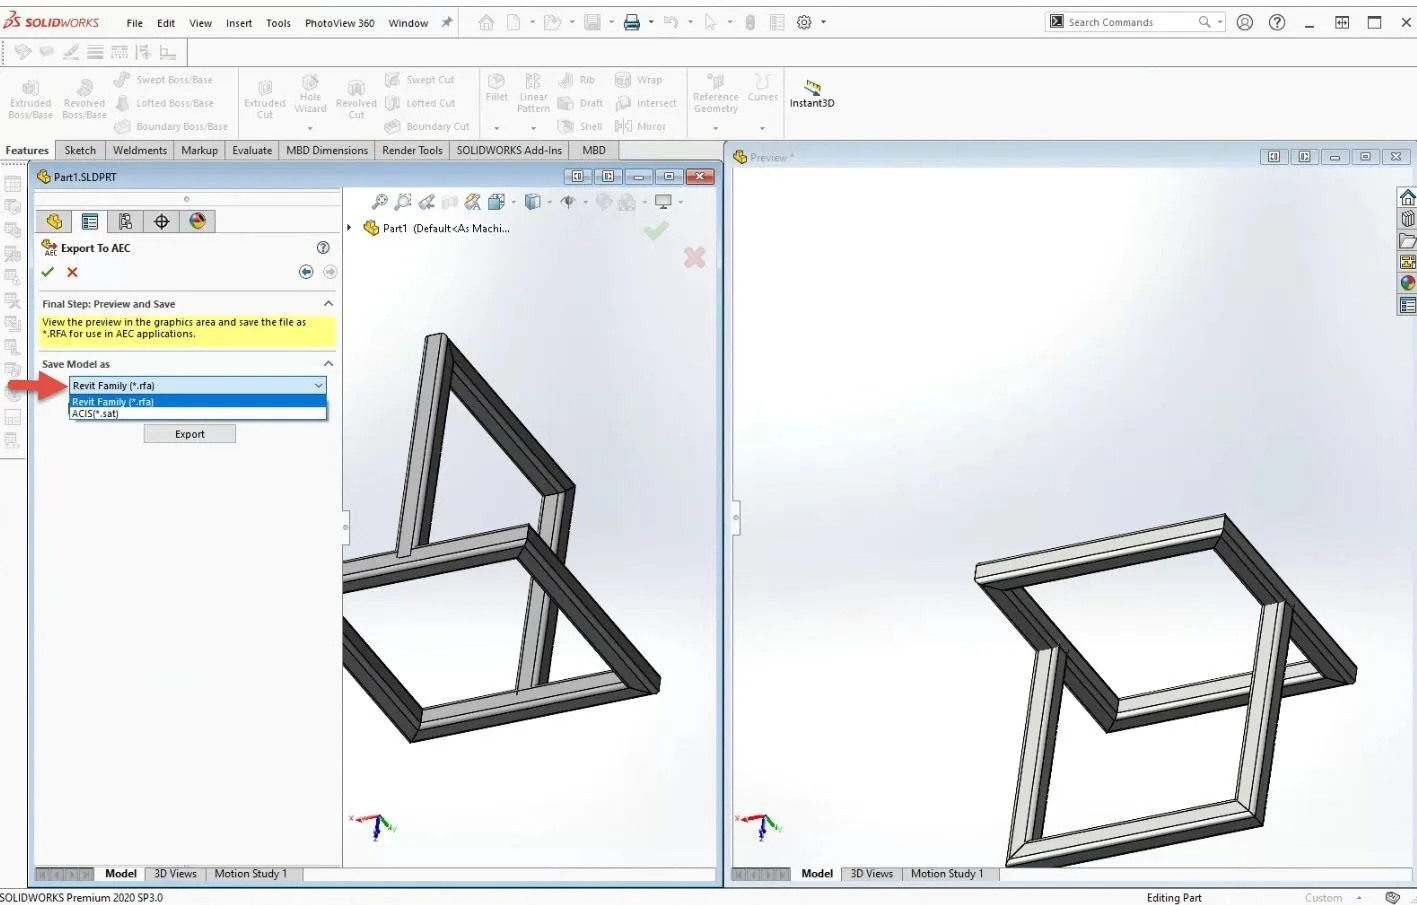
In the final step, select the format—either .rfa or .sat (ACIS). The format you choose depends on the software you intend to open the file with.
File > Save As
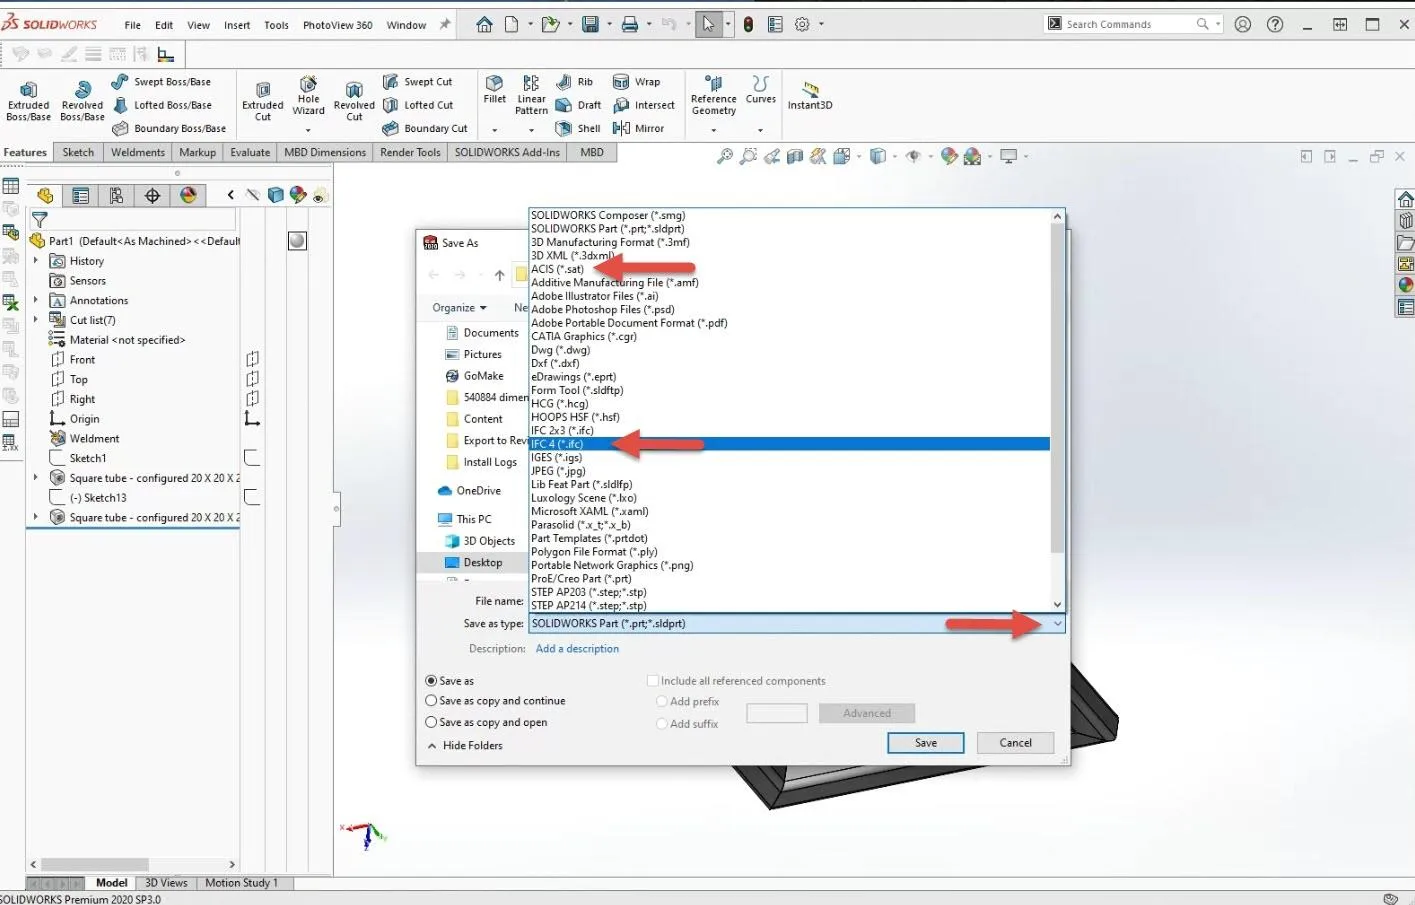
In a hurry? SOLIDWORKS can export files to other BIM formats such as IFC (for ArchiCAD) and ACIS (.sat) by selecting File > Save As, then select the file type in the dropdown menu.
There is nothing wrong with using this method, but it gives the user fewer options and does not offer RFA functionality.
More SOLIDWORKS Tutorials
SOLIDWORKS Combine Feature Tutorial
Working with Exploded Views in SOLIDWORKS
Inserting Model Dimensions into a SOLIDWORKS Drawing
Scaling a Part in SOLIDWORKS 2 Different Ways

About Gary Ballentine
Gary Ballentine is a Mechanical Engineer based out of our Headquarters in Salt Lake City, Utah. He earned a Bachelor’s degree from the University of California, Davis, a certification in Technical Writing from San Francisco State University, and a Bachelor’s degree in Mechanical Engineering from the University of Utah. Gary has been part of the GoEngineer family since April 2019 as a Support Engineer and Certified SOLIDWORKS Instructor.
Get our wide array of technical resources delivered right to your inbox.
Unsubscribe at any time.