DraftSight 101 - Basic 3D Shapes
To create 3D objects in DraftSight, DraftSight Premium (either stand-alone Premium or Enterprise Plus) is required. This article is an introduction to basic 3D shapes (box, pyramid, wedge, cone, cylinder, sphere, and torus) and explains how to access the tools to create them.
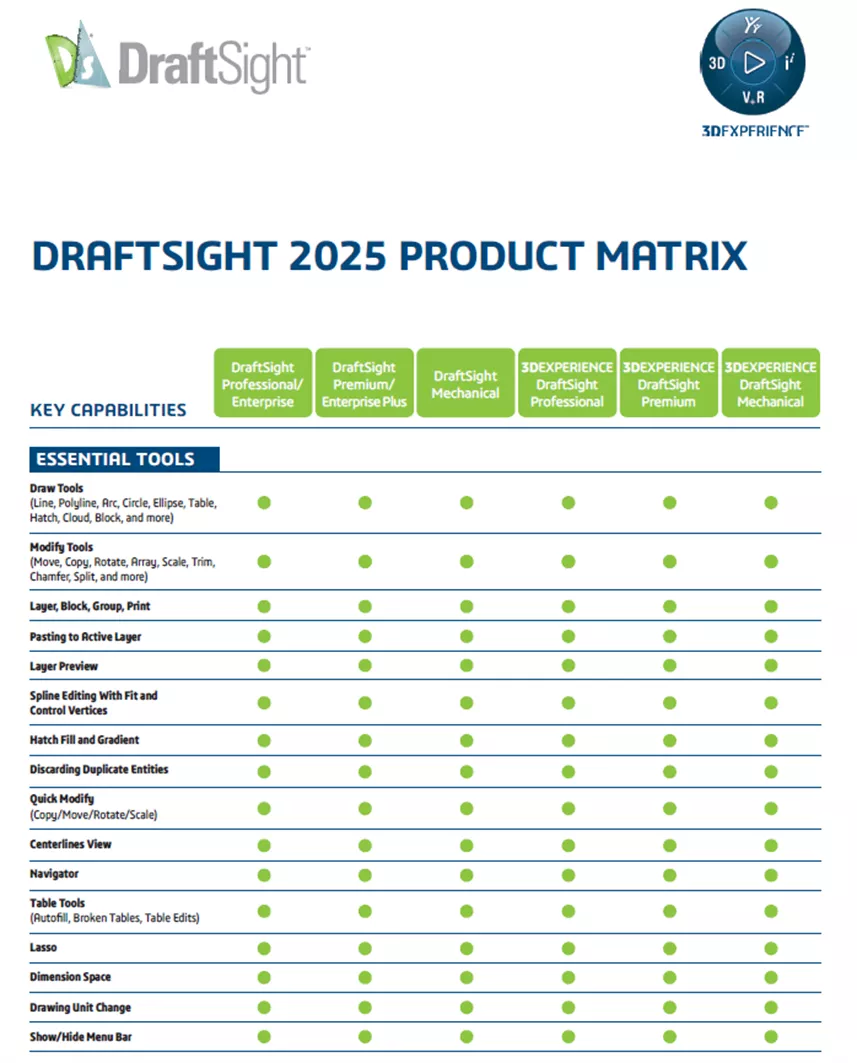
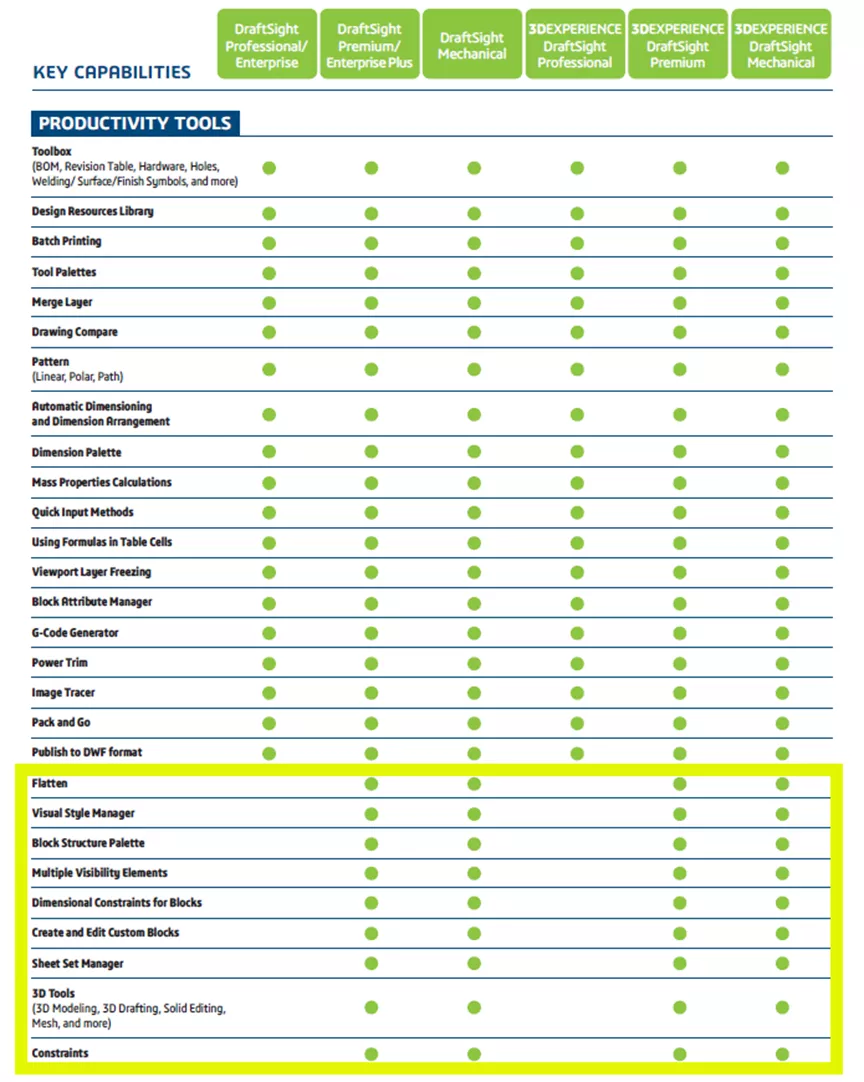
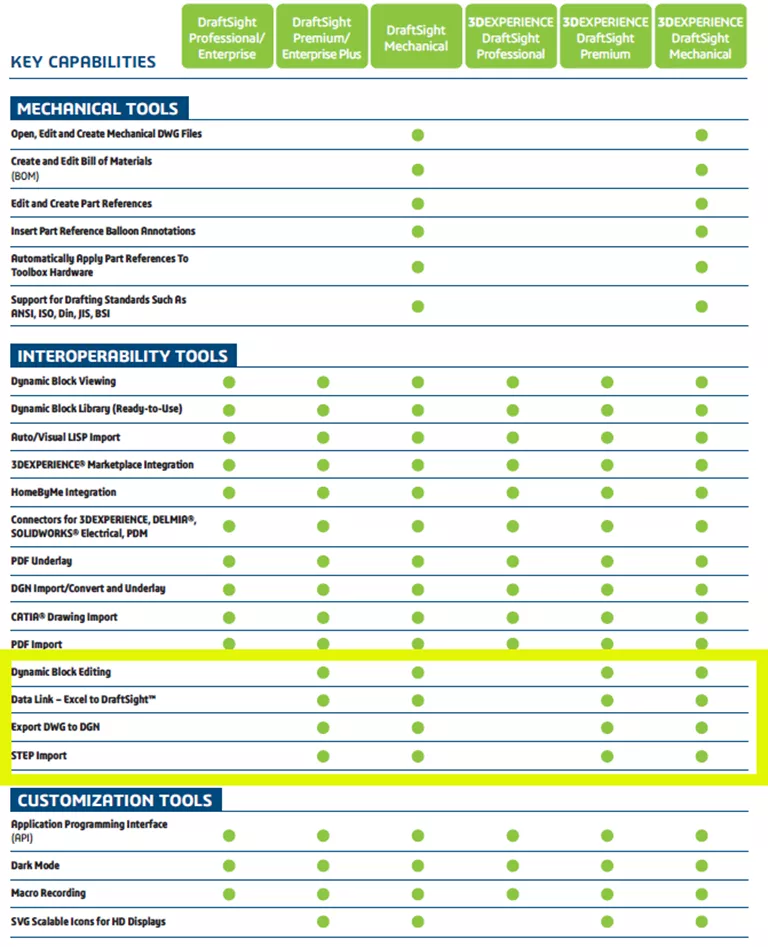
Below is the DraftSight Features Matrix with the Premium tools highlighted.

Below is the standard DraftSight interface. Notice in the upper right corner that the Drafting and Annotations workspace is active, and the ribbon tools and tabs are available.
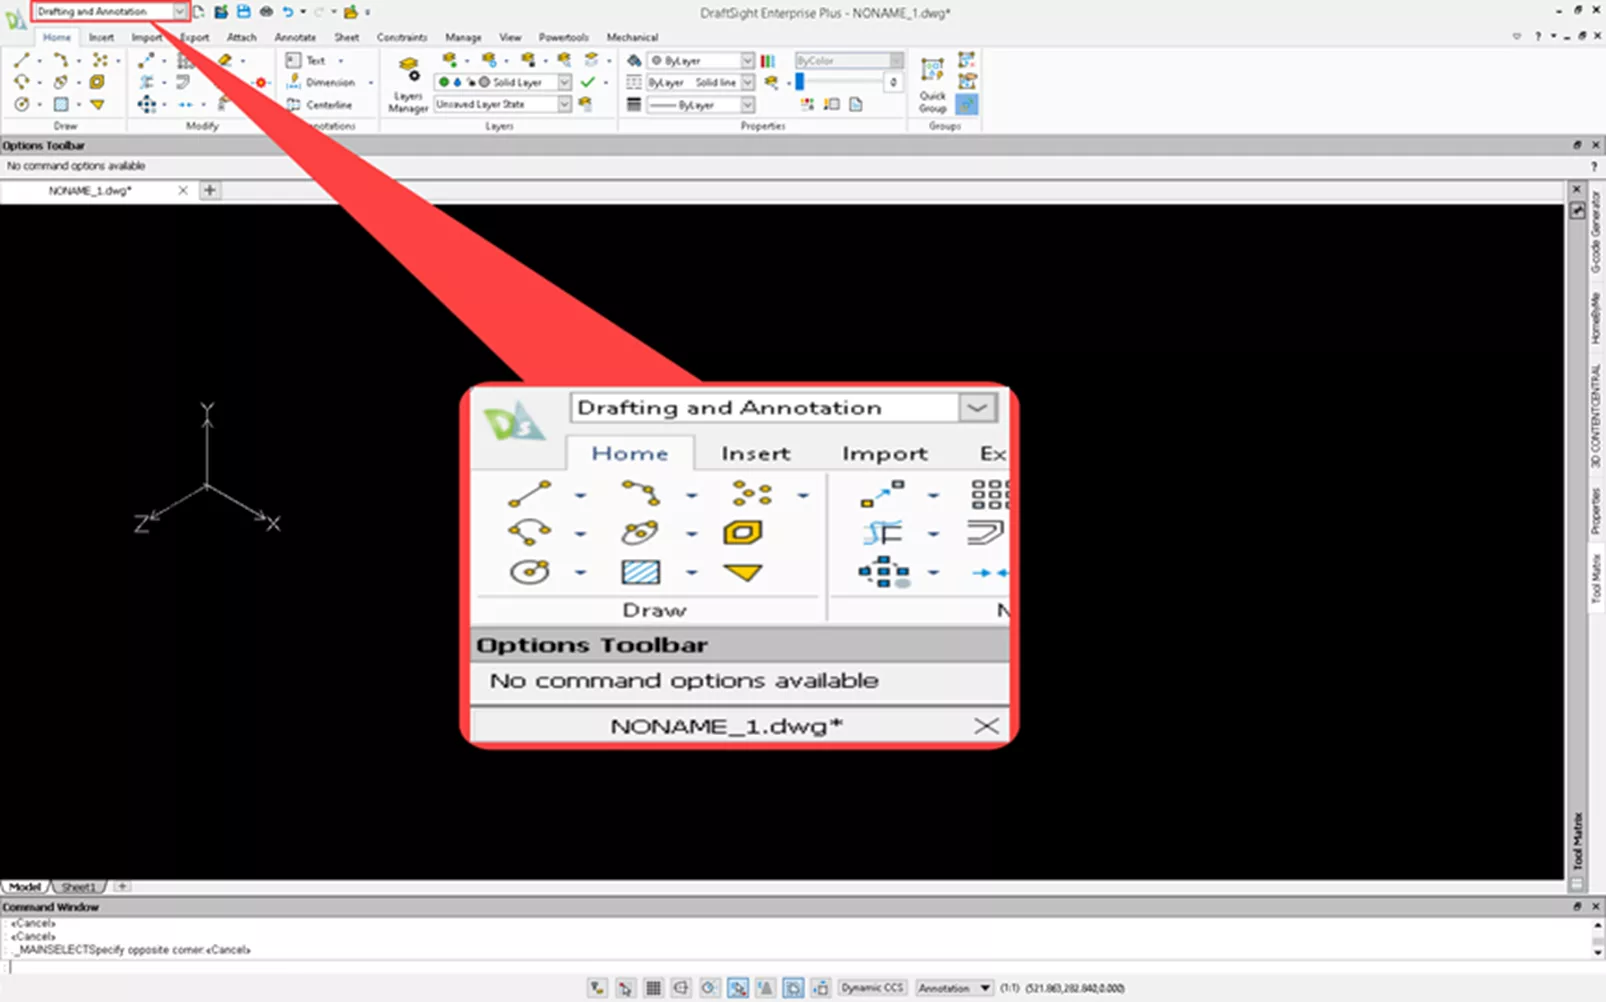
Change the workspace to 3D Modeling to access the tools you need.

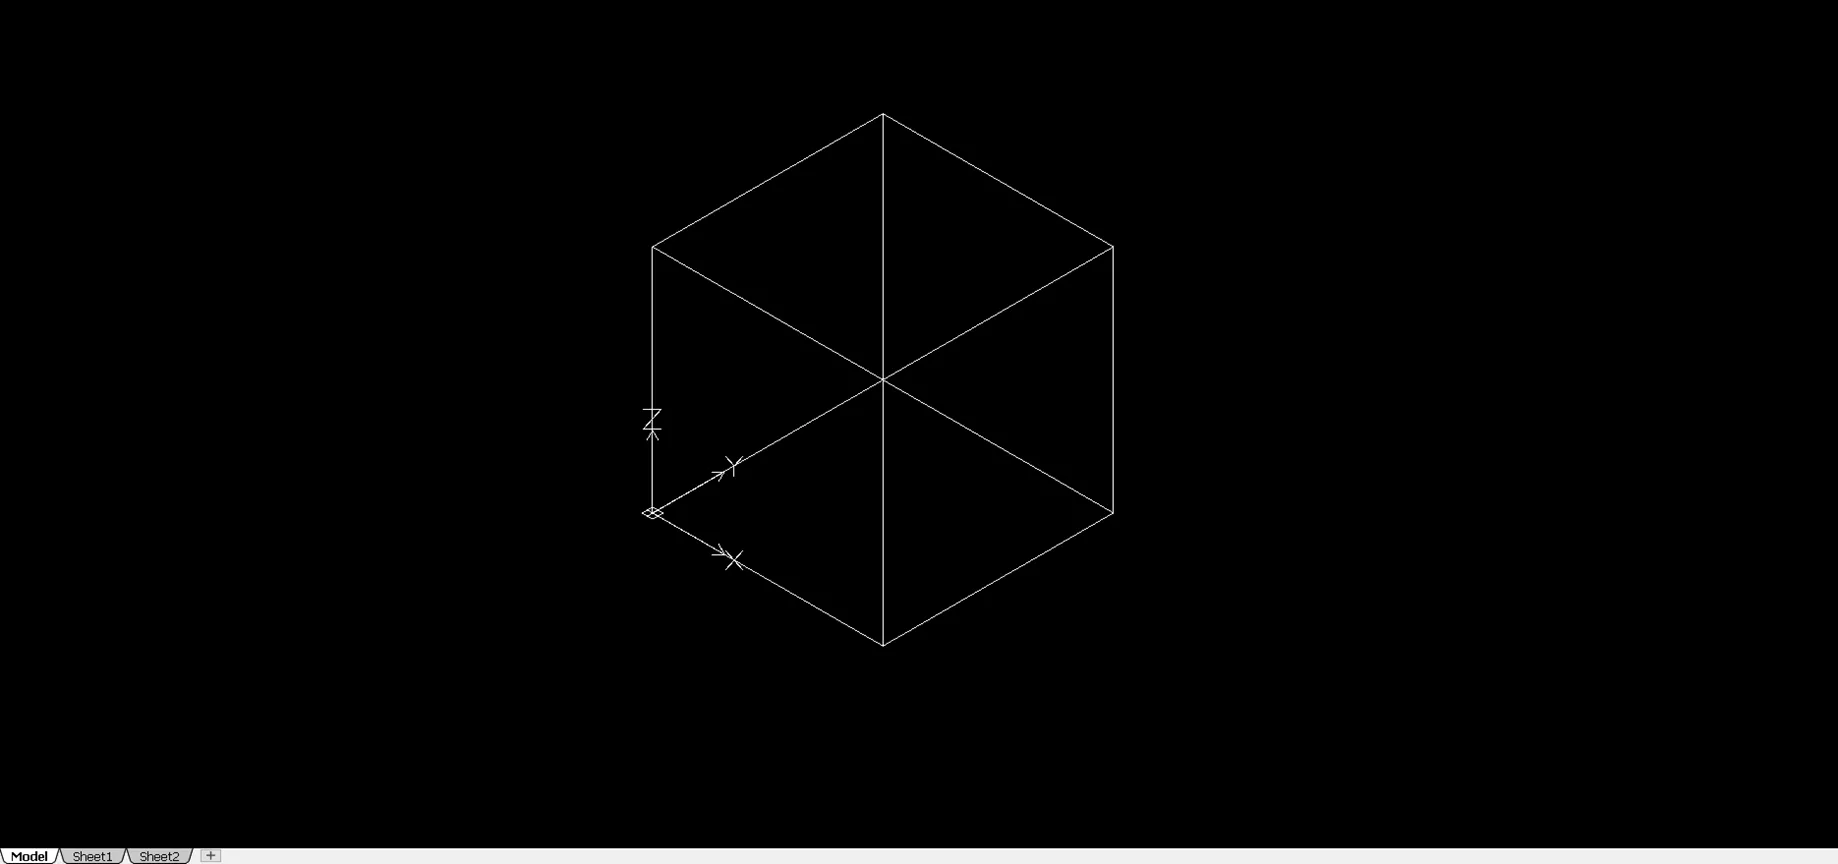
Select the View tab > Views > SE-Isometric and change the view to Isometric to see all three axes.
Create a Box
In the Home tab, select Box. The first input will be the first corner. Enter 0,0,0 in the command window. Either move your cursor to 10,10 or enter 10,10. Lastly, click in the positive Z-axis to set the height or enter 10. Your shape should look like this:
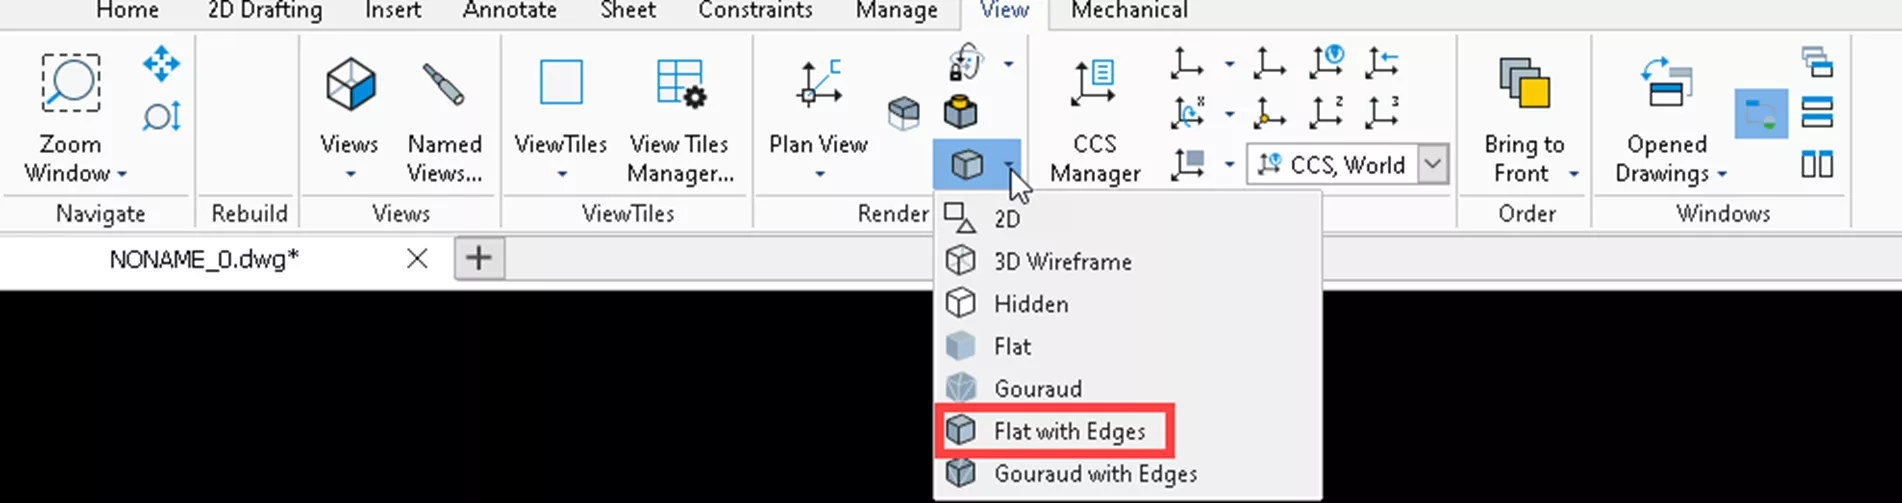
To view the box as a solid, open the View tab, select the Shadeview button dropdown, and select Flat with Edges.
The result will look like this:

Select the solid and hit the Delete key.
Create a Pyramid
At the Home tab, select the Box dropdown and the Pyramid tool. The first input will be the center of the base. Enter 0,0,0 in the command window. Either move your cursor to 10,0 or enter 10. Lastly, click in the positive Z-axis to set the height or enter 20. Since the shaded view was already on your shape should look like this:

Select the solid and hit the Delete key.
Create a Wedge
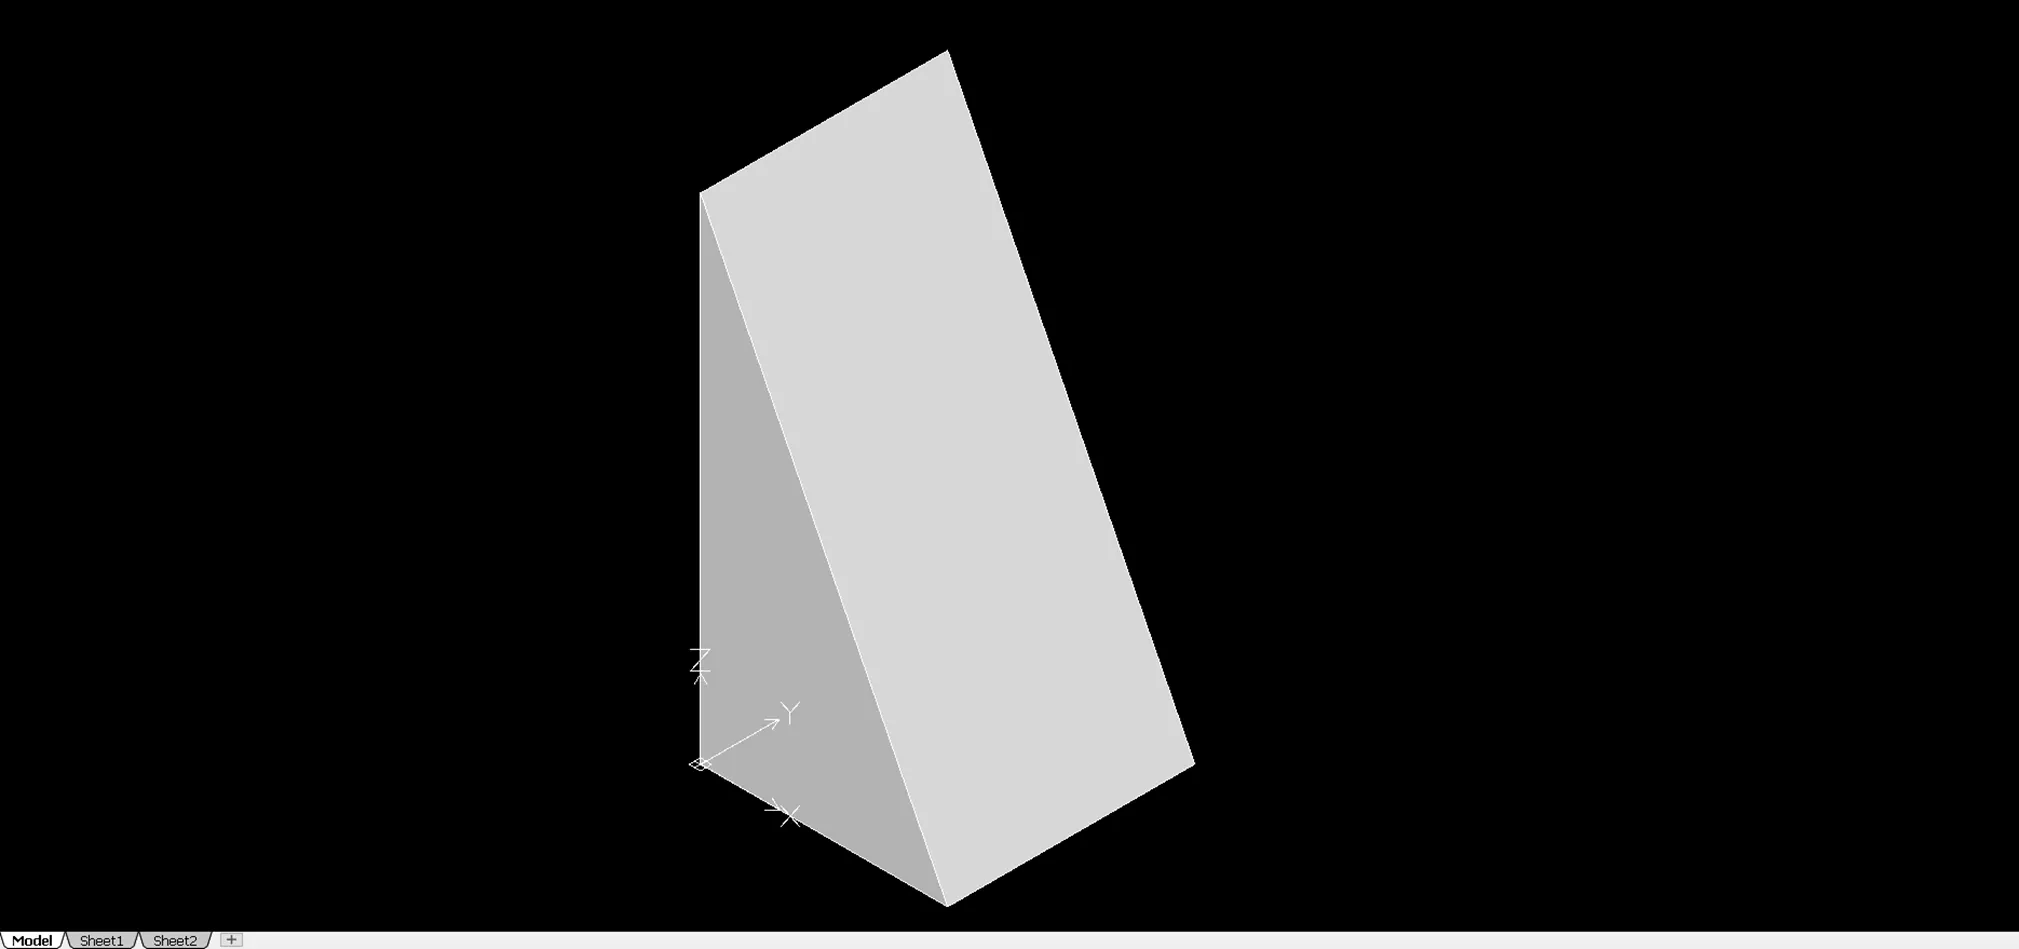
Go to the Home tab, select the Box dropdown and the Wedge tool. The first input will be the corner of the base. Enter 0,0,0 in the command window. Either move your cursor to 10,10 or enter 10,10. Lastly, click in the positive Z-axis to set the height or enter 20. Since the shaded view was already on your shape should look like this:
Select the solid and hit the Delete key.
Create a Cone
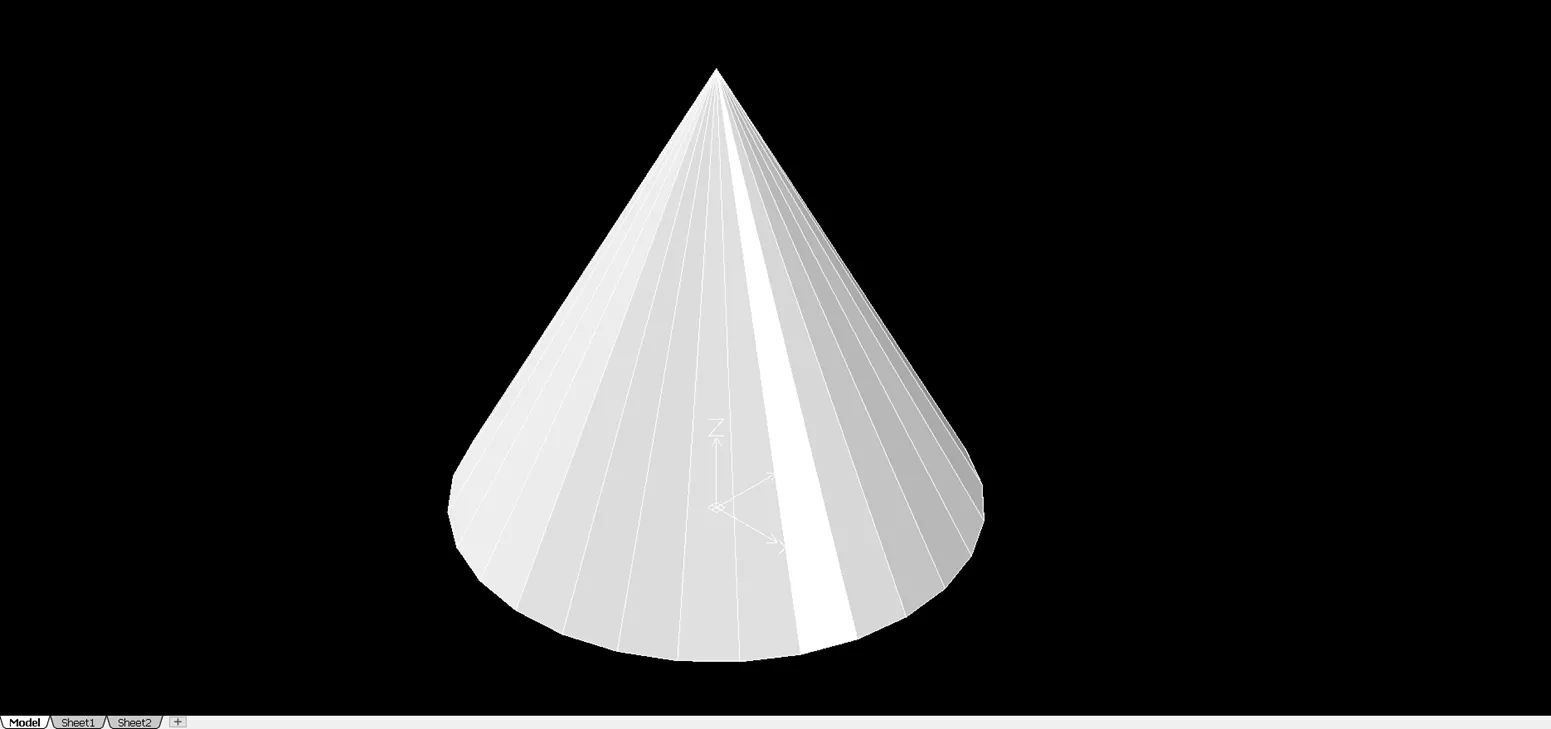
Go to the Home tab and select the Cone button. The first input will be the corner of the base. Enter 0,0,0 in the command window. Next will be the radius. Either move your cursor to 10,0 or enter 10. Lastly, click in the positive Z-axis to set the height or enter 20. Since the shaded view was already on, your shape should look like this:
Select the solid and hit the Delete key.
Create a Cylinder
Go to the Home tab, select the Cone dropdown, and then the Cylinder button. The first input will be the center point of the base. Enter 0,0,0 in the command window. Next will be the radius. Either move your cursor to 10,0 or enter 10. Lastly, click in the positive Z-axis to set the height or enter 20. Since the shaded view was already on, your shape should look like this:
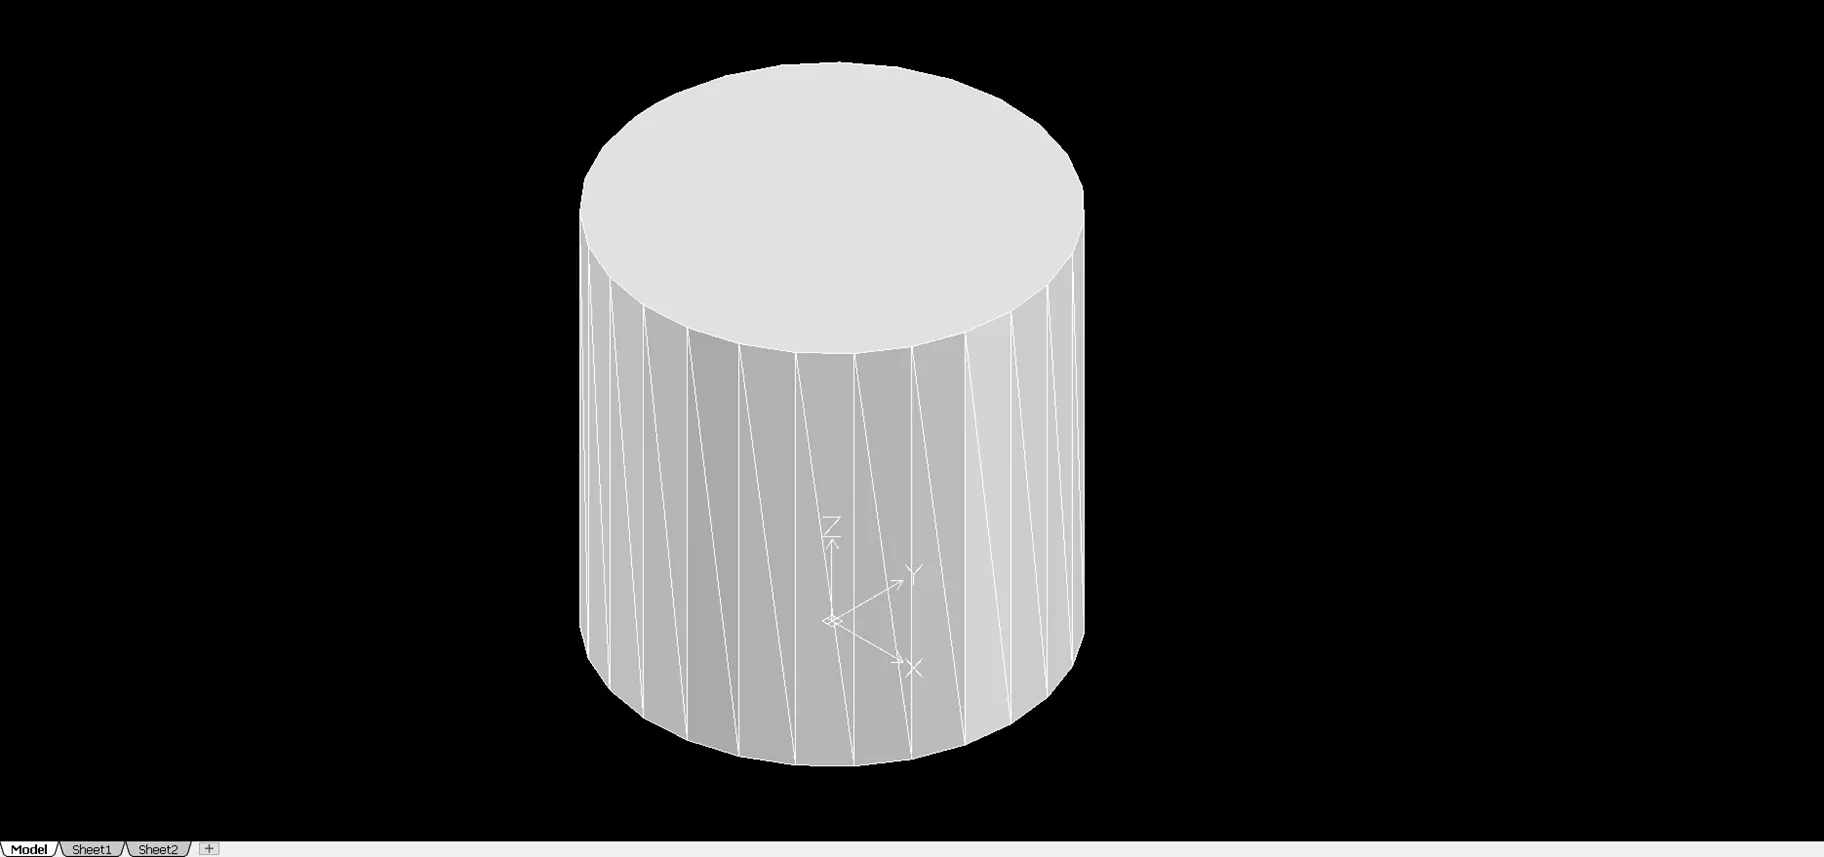
Select the solid and hit the Delete key.
Create a Sphere
Go to the Home tab, select the Cone dropdown, and then the Sphere button. The first input will be the center point of the sphere. Enter 0,0,0 in the Command Window. Next will be the radius. Either move your cursor to 10,0 or enter 10. Since the shaded view was already on, your shape should look like this:
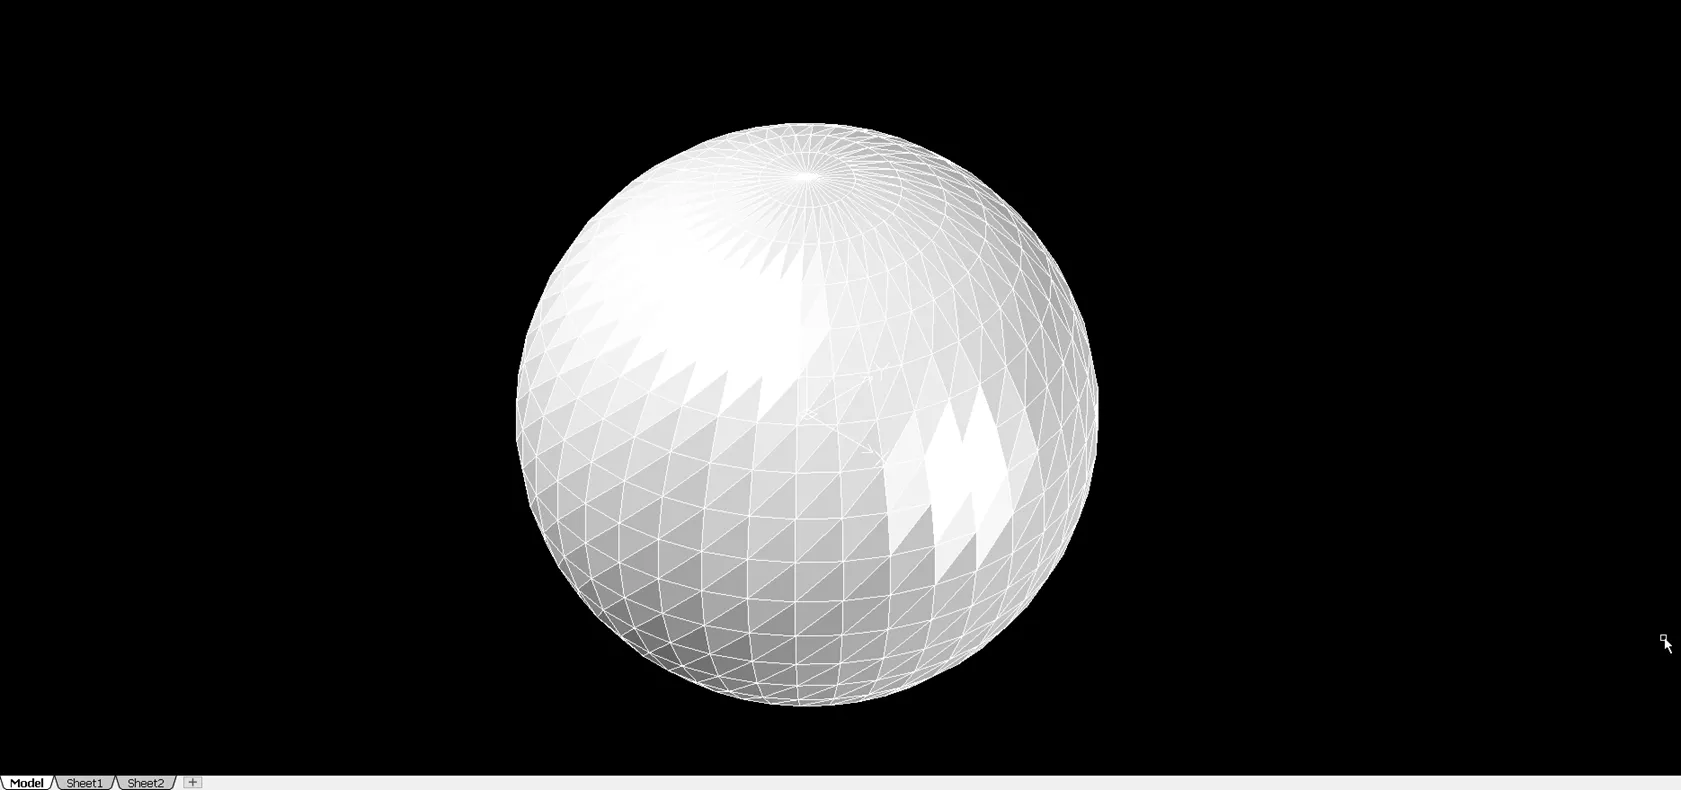
Select the solid and hit the Delete key.
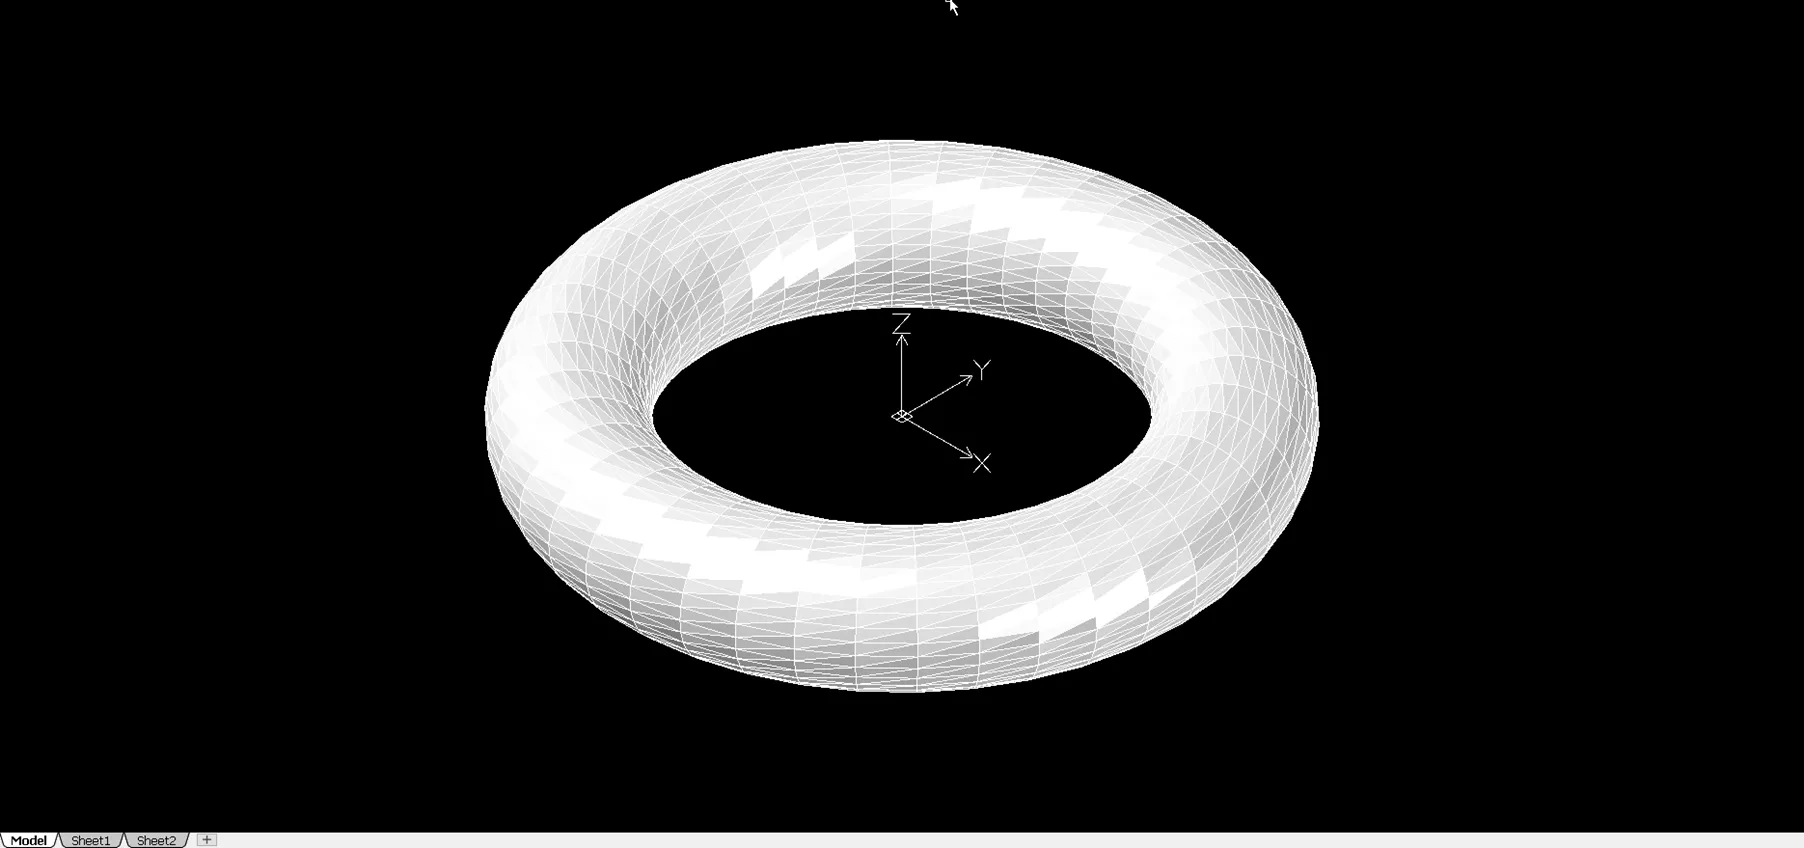
Create a Torus
Go to the Home tab, select the Cone dropdown, and then the Torus button. The first input will be the center point of the sphere. Enter 0,0,0 in the command window. Next will be the radius. Either move your cursor to 20,0 or enter 20. The last input is for the radius of the tube. Move your cursor to 25,0,0 or enter 5. Since the shaded view was already on, your shape should look like this:
That covers the basic SOLIDWORKS shapes in DraftSight Premium and Enterprise Plus. Check out more tips and tricks below. Additionally, join the GoEngineer Community to create forum posts, enter design contests, and answer questions from other DraftSight users.
DraftSight Training
Want to take your DraftSight skills to the next level? Enroll in our DraftSight Essentials online training course. For new users and former AutoCAD users, this course is designed to use the DraftSight software through the user interface. Learn how to make coordinates, create drawings, modify entities, properties, and more.

Editor's Note: This article was originally published in February 2022 and has been updated for accuracy and comprehensiveness.
Related Articles
Using Sketched Contours to Create 3D Extrusions in DraftSight
How to Create Simple 3D Models with DraftSight
DraftSight Make Flat Snapshot Workaround
Master Layers in DraftSight with Layer States Manager

About Dennis Barnes
Dennis Barnes is a CSWE, CSWI and a Sr. Applications Engineer based out of the Albuquerque, NM office since 2012. He has a BS in Computer Science from Chapman University and has been using SOLIDWORKS since 2005.
Get our wide array of technical resources delivered right to your inbox.
Unsubscribe at any time.