SOLIDWORKS PDM Copying a Value from the Folder into a File’s Properties
In SOLIDWORKS PDM, folders are used to group files in a meaningful way. For example, files unique to a project might be saved in a folder for that project. It might be useful to have the project the file belongs to as one of its properties. On a drawing, this property can be displayed on the face of the drawing.
It might be useful to have the Project name copied from the folder into the file property Project. This article will explain how to do this.
Note: To save modified data cards, the user must be logged into the vault view with an account that has the folder permission, Can update the design of cards
Copying the folder value into a drawing
SOLIDWORKS PDM can be set up so that when a file is first placed into PDM, it copies information from the folder in which it is saved into the file properties.
This works great when creating new files, but what if a file was saved in the wrong folder? Or the project name changes? Is there a way to get the information from the folder to all files in the folder?
Yes, there is, and it builds on the configuration set up in the first method.
New Files Get Folder Value
In this section, we will set up SOLIDWORKS PDM so new files added to a folder will get the Project Name copied into their properties.
The first step is to create a variable in the PDM Admin tool for Project Name. We will assign attributes to it. These attributes are the properties in the file that will contain the Project value.
Create a New Variable
In the PDM Admin tool, right-click on Variable and select New Variable.
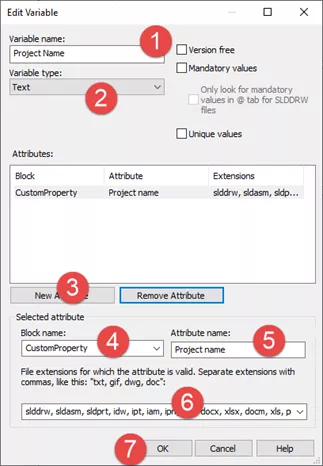
In the Edit Variable dialog box, perform the following steps:
- Type in the variable name – Project Name.
- Verify the variable type is Text. This is the most common type of variable.
- Select New Attribute.
- Select the Block name CustomProperty. If this is missing, you can type it in. Note there is no space between Custom and Property.
- Enter the file property name. This is the name of the property in the file.
- Specify which file extensions this will apply to. Place a “,” between the extensions.
- Select OK to save the variable information.
Add the variable to the folder and file data cards
For the information to flow between the file and SOLIDWORKS PDM, the value must be in the file’s data card. For the information to flow from the folder to the file data card, the information must be in the folder’s data card.
File Data Card
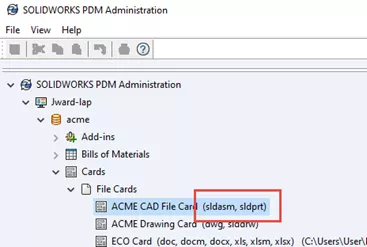
Edit the card used for parts and assemblies. These can be different cards, but, in my vault, they both use the same card. You can tell which file a card uses by the path it is saved in and the file extensions next to the card name.
If there is no path, then the card is saved at the root of the vault. Data cards apply to the folder they are saved in and all subfolders – until another data card is encountered.
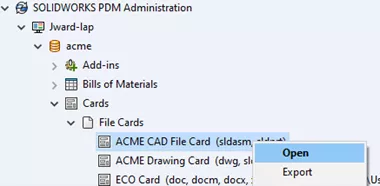
Right-click the card name and choose Open or double-click the name.
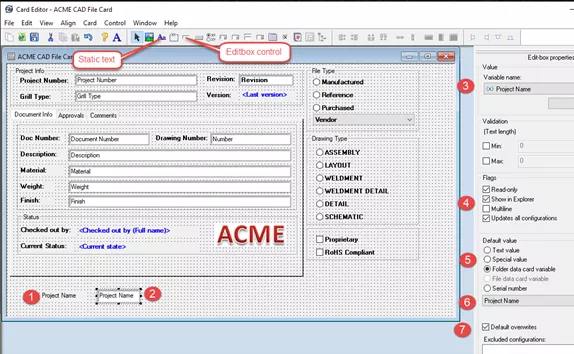
Refer to the screenshot below for the following:
- Use Static text to add the label for the variable.
- Select Static Text and click where you want the label.
- Edit the text in the box that appears in the top right.
- Use an Editbox control to add the control that is tied to the variable.
- Select the variable name from the list of variables.
- In this example, we are using Project Name.
- Select flags
- Read-only as we want this value to come from the folder data card.
- Show in Explorer.
- Updates all configurations as this value should be the same for all configurations.
- Default Value. When a file is added to the vault, the Default Value is used for the variable value. We want this value to come from the folder the file is saved to. Select Folder data card variable.
- Select the variable. In our case, this is Project Name.
- Select Default overwrites. With this checked, the default value will replace any value the file already has for this variable. If this is not checked, then the value in the file is NOT replaced. In our case, we want the value from the folder to overwrite anything the file might already have.
- Save your changes.
Folder data card
In the PDM Administration tool, expand “Cards: Folder cards”. Select the folder data card that applies to the folder in which you will keep your files. In my case, I only use one folder card in my vault.
Double-click the folder card or right-click and choose Open to open the card in the Card Editor.
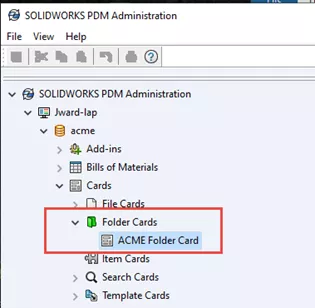
Add the variable to the folder card in the card editor.
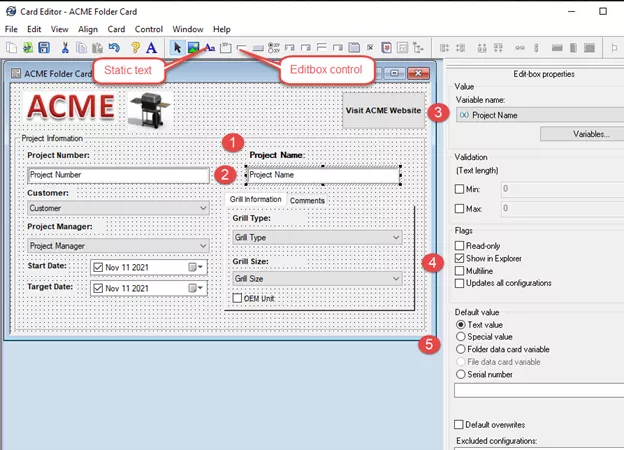
Refer to the screenshot below for the following steps:
- Use Static text to add a label for the variable value.
- Add an Editbox control for the variable.
- Select the variable Project Name for the control.
- Allow editing of this variable in the folder card.
- Leave the default value as a text value.
- Save your changes.
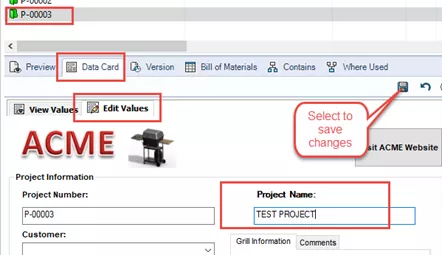
With the cards modified and saved, we are ready to work in the local vault view. In the view, go to the top-level folder to enter the value. In this case, we have project folders, so we will select the project folder and enter a value for the Project Name.
Edit the folder variable
- Select the folder
- Then the tab Data card
- Select the sub-tab Edit Values
- Enter the value
- Select the Save icon in the top right
- This value will propagate to all subfolders
- Any files added to a subfolder will now get this value in their file properties automatically.
This file was added after the data card changes. Note that the Project Name was automatically copied to its data card.
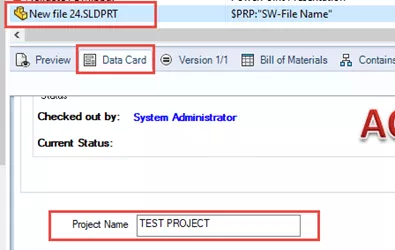
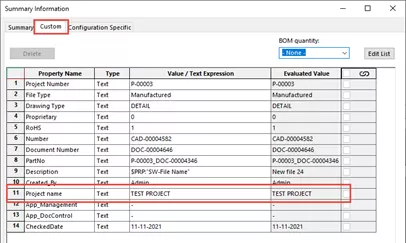
In the file properties, we see the new variable has been added with the value entered in the folder.
Update files already in the folder
Again, this is great for new files being added to the folder. But what about the files that are already in the folder before we made these changes?
We can propagate the value for this variable that was entered in the folder to any or all the files in the folder.
First, check out the files in the folder you want to update. Files must be checked out to make this change.
Right-click the folder that contains the files to update. Right-click the folder in the navigation pane of Explorer.
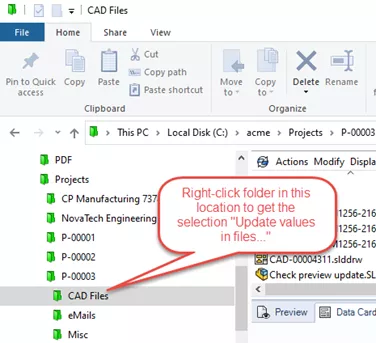
Look for the selection Update values in files…
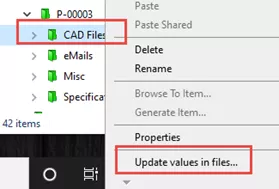
The process starts with choosing which files to update. There are six (6) steps.
Step 1 allows you to choose files by words in the file name.
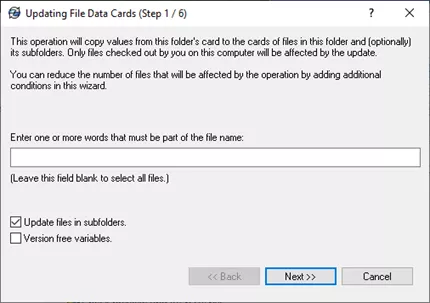
In our case, we will ignore this option.
Choose Next.
Step 2 allows us to specify files in certain workflow states.
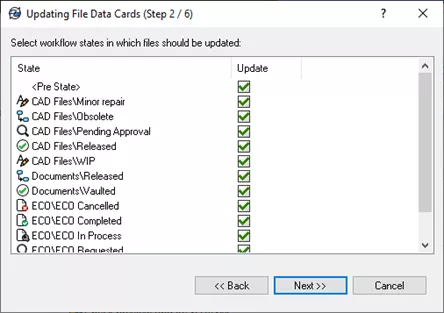
In our case, we determined which files to update based on which files we checked out. So, we will leave this at the default with all states selected.
Select Next.
Step 3 verifies which files will be updated. You can uncheck any files that you don’t want to update.
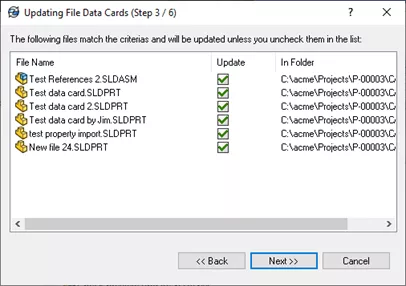
In our case, we will update all listed files. Select Next.
Step 4 allows us to choose which variables to copy into the files.
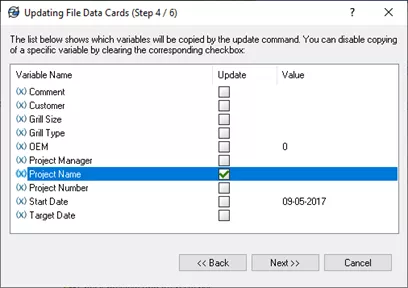
In our case, we only want to copy the Project Name, so we select that.
Select Next.
Step 5 allows us to choose which configurations to update. You can add any configurations you have that aren’t listed.
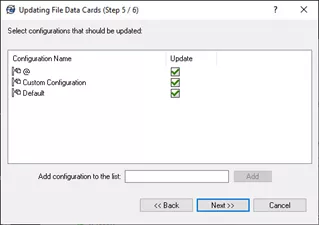
If one of the files being updated has been checked in with the configuration name, that name will be listed.
Step 6 is verification that the command is about to execute. Select Finish.
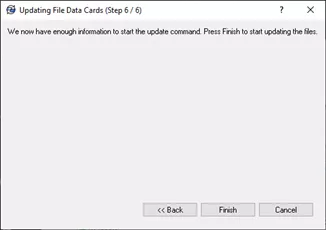
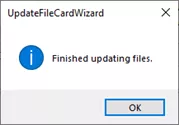
You will receive a message when the process is finished updating files.
Select a file to verify the folder value was copied to the files.
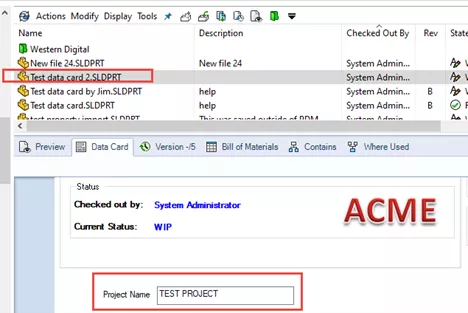
Files are ready to be checked in.
More SOLIDWORKS PDM Tutorials
How to Set Up Dynamically-controlled Card Lists in SOLIDWORKS PDM
SOLIDWORKS PDM and SQL Server Performance Considerations
New SOLIDWORKS PDM Column Configurations
SOLIDWORKS PDM Web2 Guide: Server Setup, Accounts, Application Pools & Testing

About Jim Ward
Jim Ward is a part of the GoEngineer SOLIDWORKS PDM Support team. He has a BSME from CSU, Chico. He worked in design for about 12 years then moved into a SOLIDWORKS support role. The last several years have been focused on SOLIDWORKS PDM Professional (formerly Enterprise PDM).
Get our wide array of technical resources delivered right to your inbox.
Unsubscribe at any time.