Fix Abaqus CAE IOError Permission Denied
After installing Abaqus CAE, you may get the following IOError error message when trying to run the software.
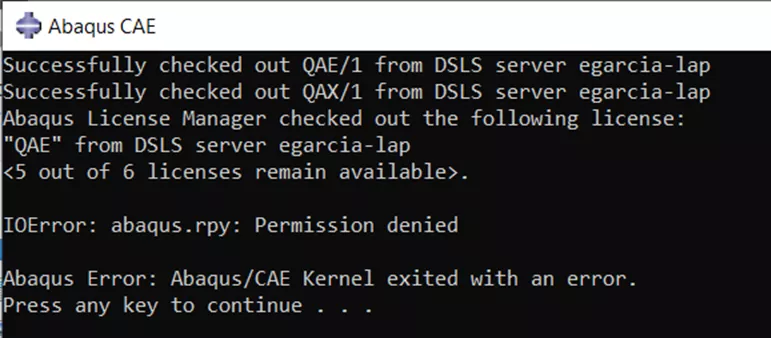
This would require you to run as Administrator every time and may be problematic if you do not have full administrative rights to your workstation. After some investigation, the issue has to do with write permissions to your Abaqus CAE work directory. The default directory is usually C:\Temp
You can resolve this by launching Abaqus from a new directory, one that you have full permissions for. There are a few ways to do this. In this article, I review step-by-step directions for two methods that you can launch Abaqus CAE from a new directory.
Method 1
The first method is perhaps a bit less popular. This is an example of launching Abaqus CAE from the command prompt after changing the directory to a new folder named “NEW_WORKING_DIRECTORY.” I have also verified that the new directory I will be using has full permissions.
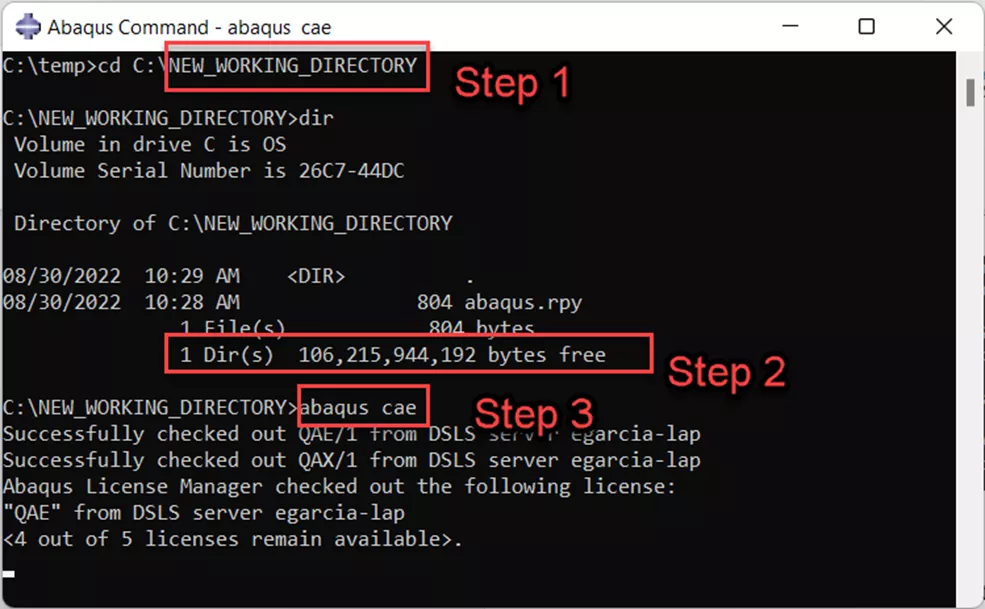
In step 1 of the above picture, I launched the Abaqus Command prompt and changed the directory to a new folder named “NEW_WORKING_DIRECTORY.”
For Step 2, I entered “dir” to get some information about the directory and verify that I have plenty of disk space to run my analysis.
For step 3, I typed “abaqus cae” to launch the software from this new work directory.
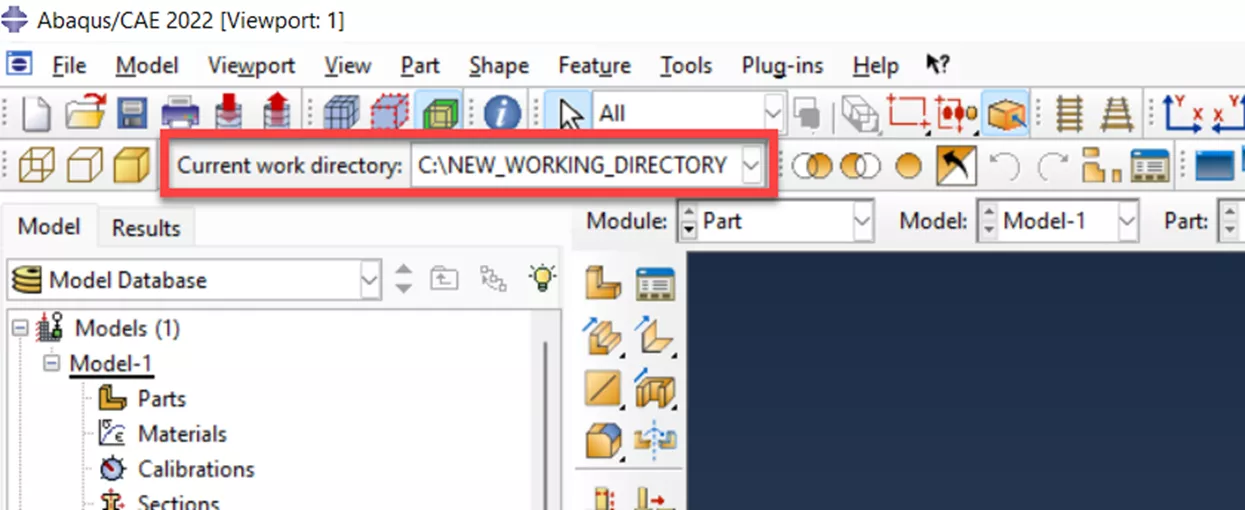
After Abaqus CAE launches, we can confirm that my work directory has changed.
Method 2
A more common way to resolve this error message, is to edit the Abaqus CAE shortcut that you are using to launch in Windows and change the “Start In” directory to a directory that you have full permissions to. For this example we will change the directory to the folder named “NEW_WORKING_DIRECTORY.”
I will outline the steps below. This workflow is the same in Windows 10 and for Windows 11.
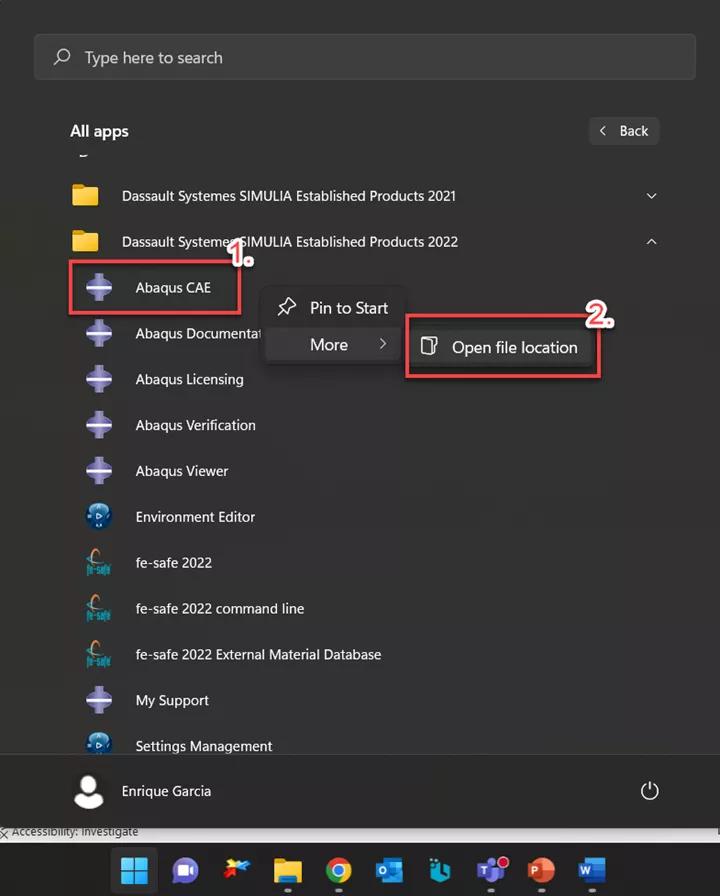
- From the Windows Start Menu, navigate to your Abaqus CAE start menu shortcut. Right-click on the line item for Abaqus CAE and expand the More menu item. Select Open file location.
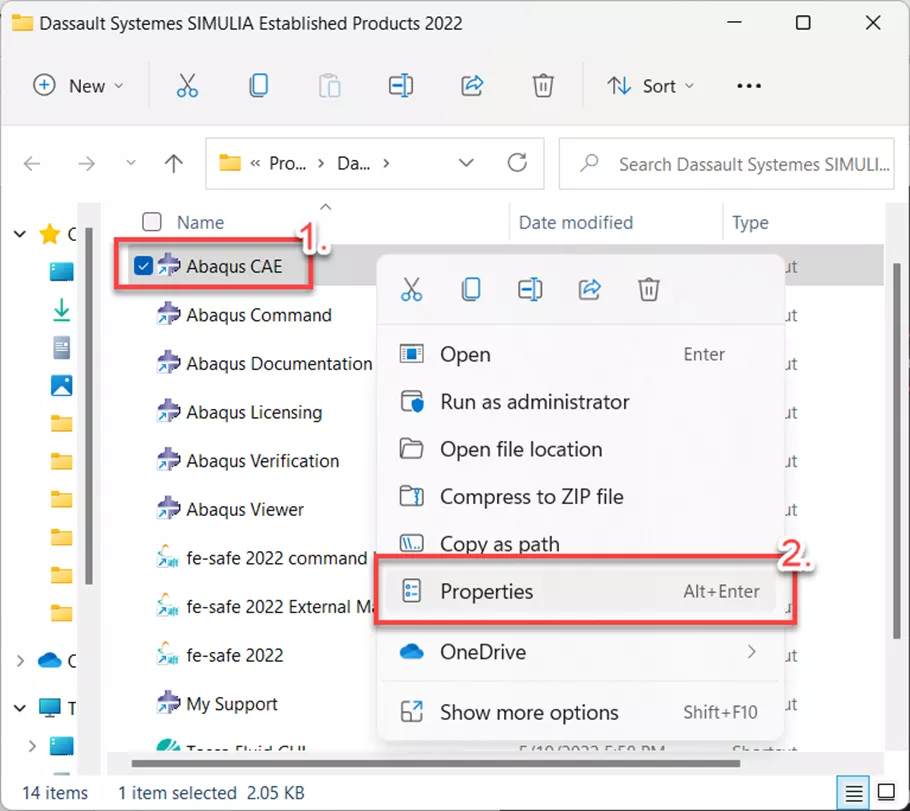
- From the Windows File Explorer window, right-click on the Abaqus CAE shortcut and select Properties.
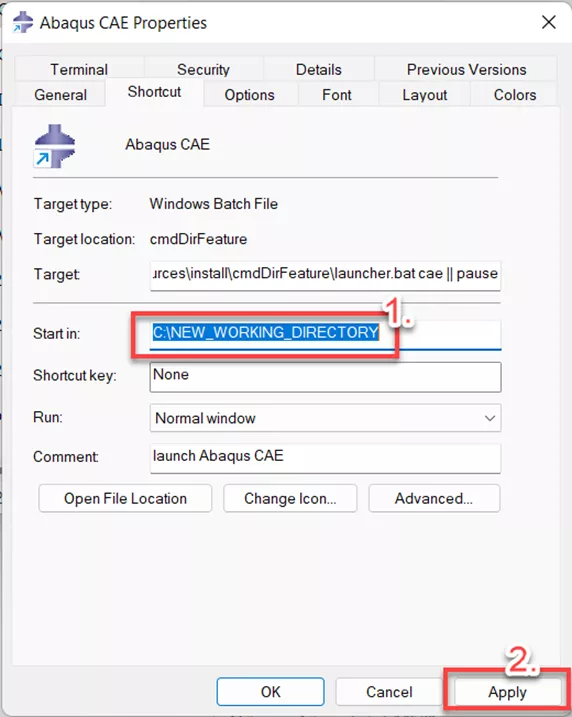
- In the Start in property field, enter the new folder directory verified as having full permissions. For our example, the directory is called “NEW_WORKING_DIRECTORY. Click Apply then OK to close the properties window.
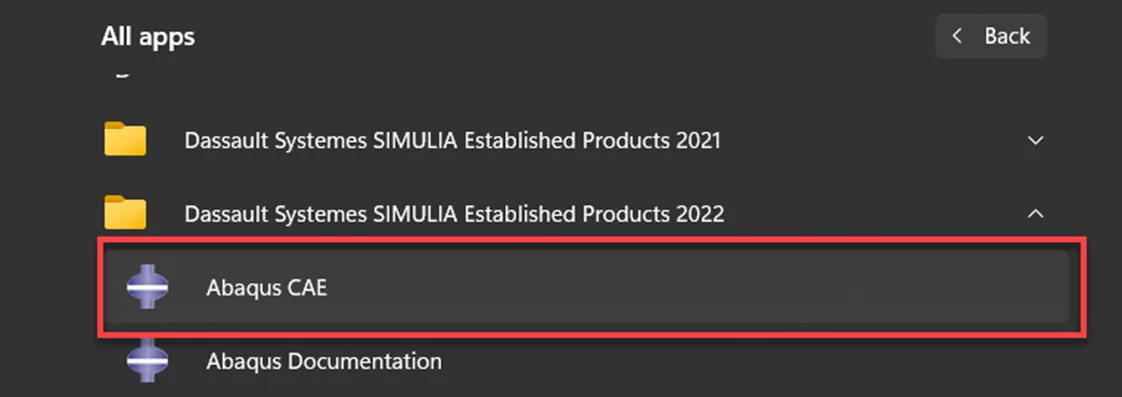
- With the Start in directory now modified, launch Abaqus CAE normally from the Windows Start menu.
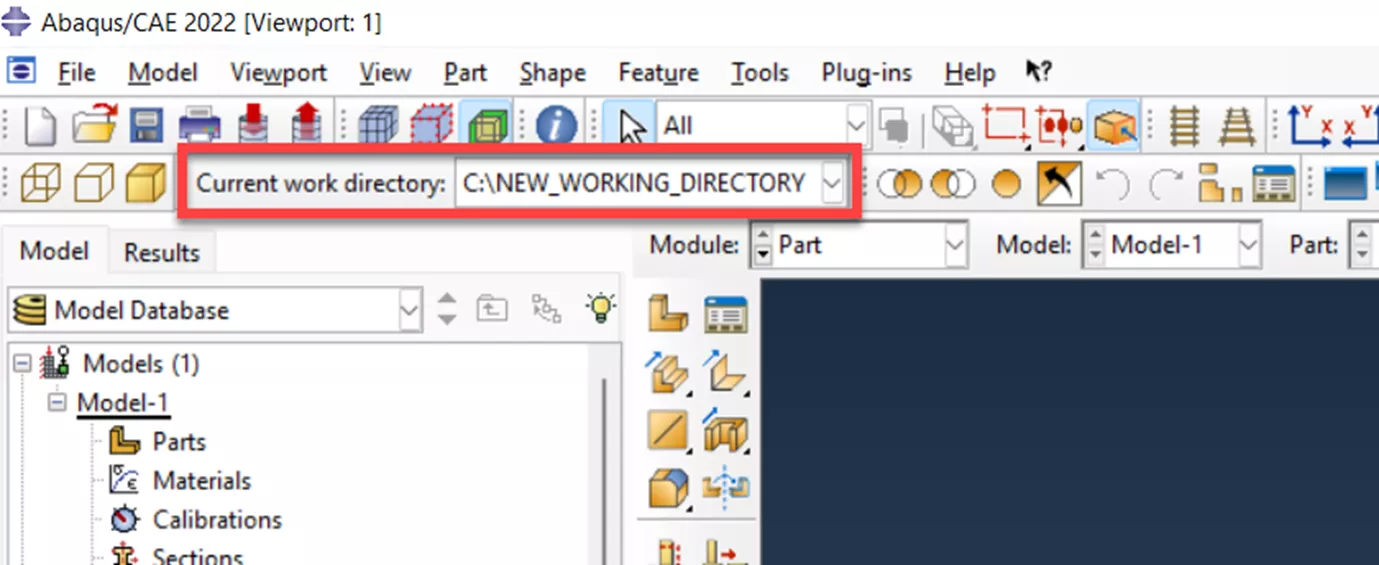
This article was a step-by-step guide on how to resolve a fairly common error message of IOError: Permission denied that a user can get when trying to run Abaqus CAE. This typically occures when a new installation of Abaqus CAE or when permissions have been changed on your workstation.
Editor's Note: This article was originally published in June 2022 and has been updated for accuracy and comprehensiveness.
I hope you found this tutorial helpful. Check out more tips, tricks, and tutorials listed below.
Related Articles
3DEXPERIENCE Platform Beam Analysis
CST Studio Suite for Electronic Design
CST Studio Suite: Antenna Design and Analysis
3DEXPERIENCE SIMULIA: Better Industrial Equipment Design

About Enrique Garcia
Enrique has been involved in technical training since 2007 with SOLIDWORKS and Simulation tools and currently specializes in Simulation Products. He is a CSWE and was given Elite Application Engineer status at SOLIDWORKS world in 2018. Enrique holds a Bachelor's Degree in Biomedical Engineering from Arizona State University. He has worked alongside and learned from companies in the medical device industry developing orthodontic devices that specializes in the rehabilitation needs of many types of patients.
Get our wide array of technical resources delivered right to your inbox.
Unsubscribe at any time.