eDrawings Professional - Add Custom Stamps
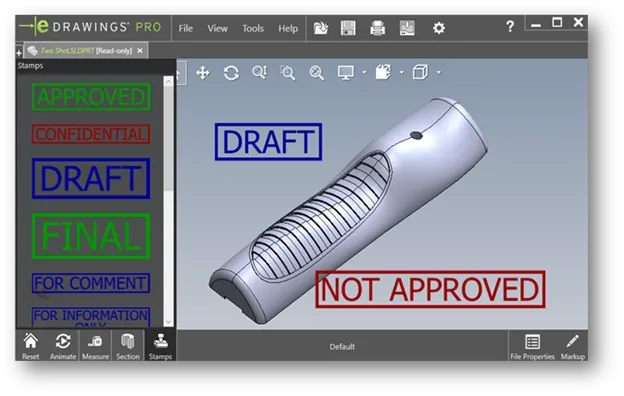
If you have eDrawings Professional, you can add markups to your files for collaboration purposes. One of the tools useful for markups is the stamp tool. eDrawings Professional provides several built-in stamps, but did you know there is a way to add custom stamps as well? We will take a look at how to do this.

How to Create Custom Stamps in eDrawings
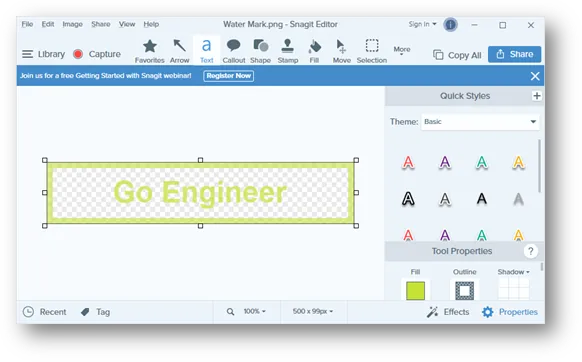
eDrawings does not provide a way to make the stamps, so you will have to create these in a photo editing software such as Adobe Photoshop, or a screengrab tool like Snagit. Supported file types for stamp images are PNG, TIF, GIF, JPEG, and BMP format.
Note: eDrawings will support transparency in png, tif, and gif formats.
How to Load Custom Stamps in eDrawings
For this example, I created a 500 x 100 pixel image in Snagit that I will use as a watermark on my eDrawings file.

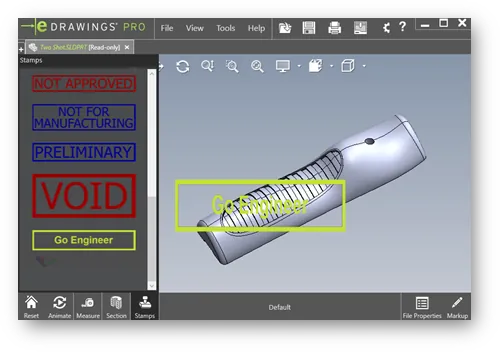
To get this stamp to show up in eDrawings, I will make sure eDrawings is closed, then save the file to C:\Program Files\SOLIDWORKS Corp\eDrawings\lang\english.
Then start eDrawings and open the file, then go to Stamps, or Tools -> Stamps.

How to Change File Location for Stamps in eDrawings
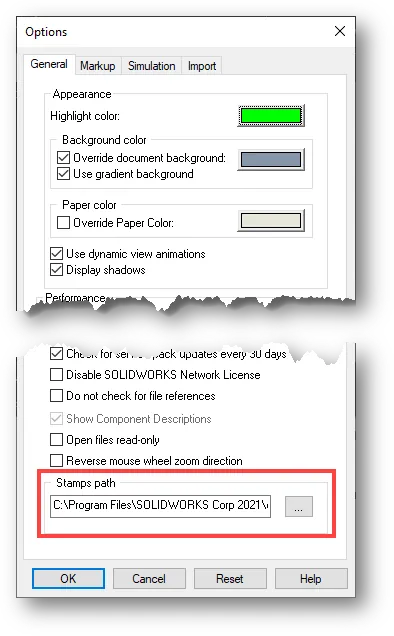
If there are multiple users who need to access the custom stamps in eDrawings, you can the file location to a shared drive.
To do this, go to Tools-> Options -> General tab and click the browse button for the Stamps path.

Related Articles
Design Faster and Smarter with SOLIDWORKS 2021

About Zach Brown
Zach Brown is a certified SOLIDWORKS Expert and a Technical Support Engineer. Prior to working at GoEngineer, he spent 15 years as a mechanical designer, CAD support tech, and instructor using SOLIDWORKS. His hobbies include playing guitar, riding motorcycles, and skiing.
Get our wide array of technical resources delivered right to your inbox.
Unsubscribe at any time.