Adding Weldment Profile Packs from SOLIDWORKS Content
SOLIDWORKS Weldments is a powerful tool to create structural framework quickly and effectively. In order to keep download file size as small as possible during installation, SOLIDWORKS initially comes with very few weldment profiles to work with. Fortunately, more complete profile packs are available for download from SOLIDWORKS Content. This guide will go over how to download and set up these weldment profile packs.
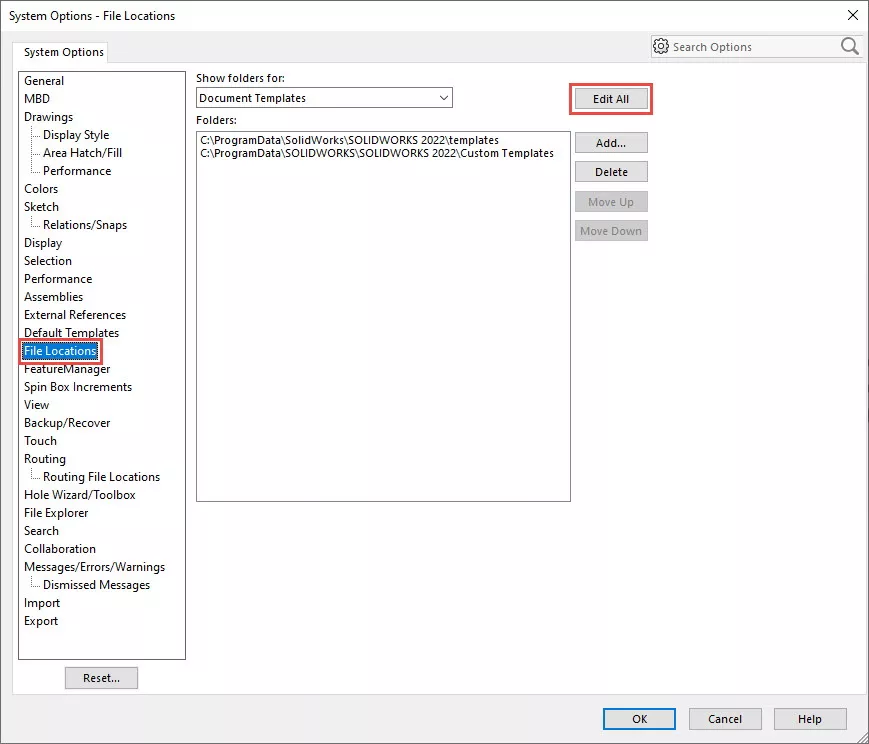
Step 1.) Check the file location listed for Weldment Profiles under Tools > Options > System Options > File Locations > Show folders for: Weldment Profiles.
Note: The file location can be changed to any preferred location, but it is advised to have only one file location listed for weldment profiles. The reason for this will become apparent later.
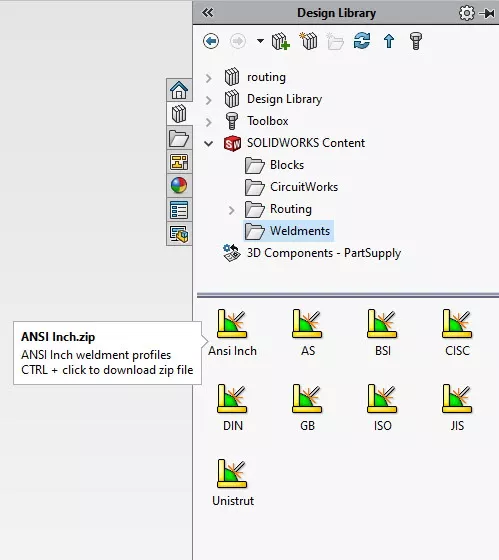
Step 2.) Download a weldment profile pack by holding “CTRL” and clicking on a Standard available in SOLIDWORKS Content. The profile packs are found in the Design Library tab of the Task Pane > SOLIDWORKS Content > Weldments.
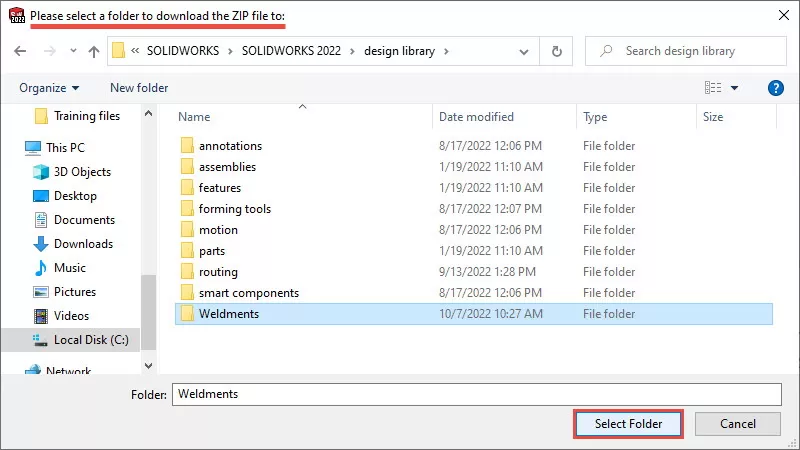
Step 3.) A “Browse For Folder” window will pop up. Pick a folder location to download the .zip file containing the weldment profiles. You can put this directly into the existing weldment profile folder location if you like.
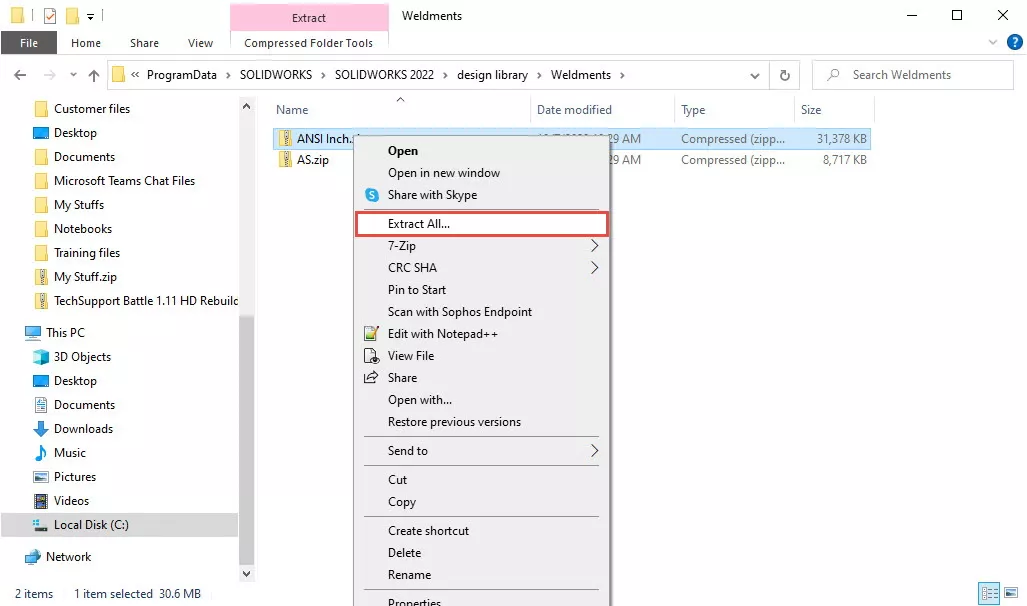
Step 4.) Right-click on the .zip file that you downloaded and choose Extract All. Choose to extract to the weldment profile folder location from Step 1.
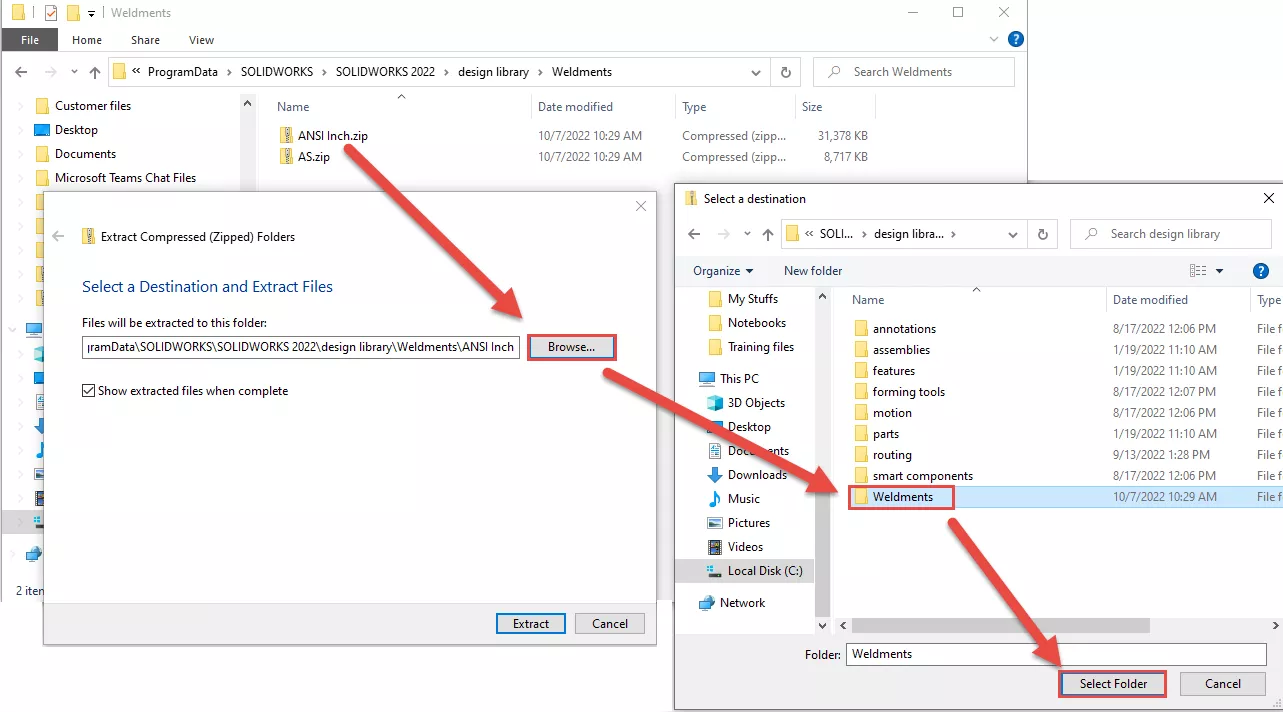
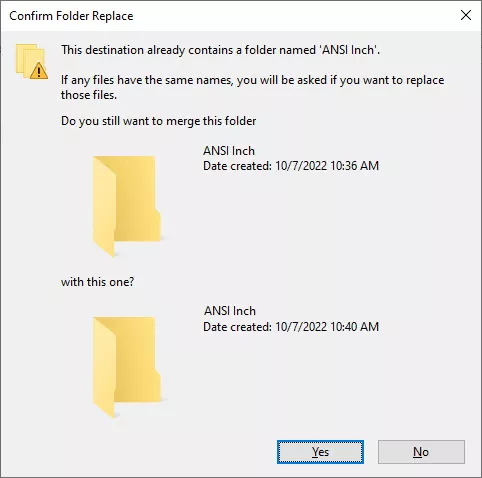
Step 5.) If you are brought to a “Confirm Folder Replace” window (below), click No and proceed to Step 6. If this window does not appear, skip to Step 7.
Note: If you have previously created custom weldment profiles and have added them to this folder, you may want to copy them to a safe location and bring them back after extracting the new profile pack. You could also merge the two files (pick ‘Yes’), but this may require some “clean-up” for maximum operability.
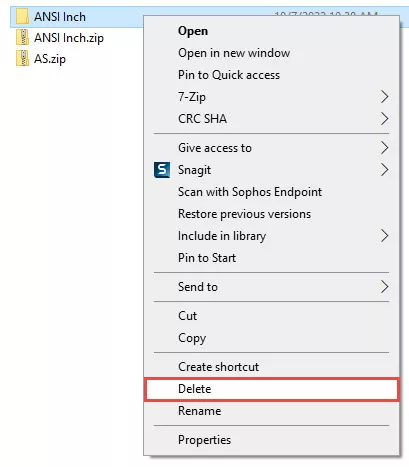
Step 6.) Delete the existing folder with the same name as the standard you have downloaded (in this case, “ansi inch”). The downloaded file set contains all profiles contained in the original folder and will replace them. Deleting the old folder will make sure there are no redundant profiles in your library.
After deleting the folder, go back to Step 4.
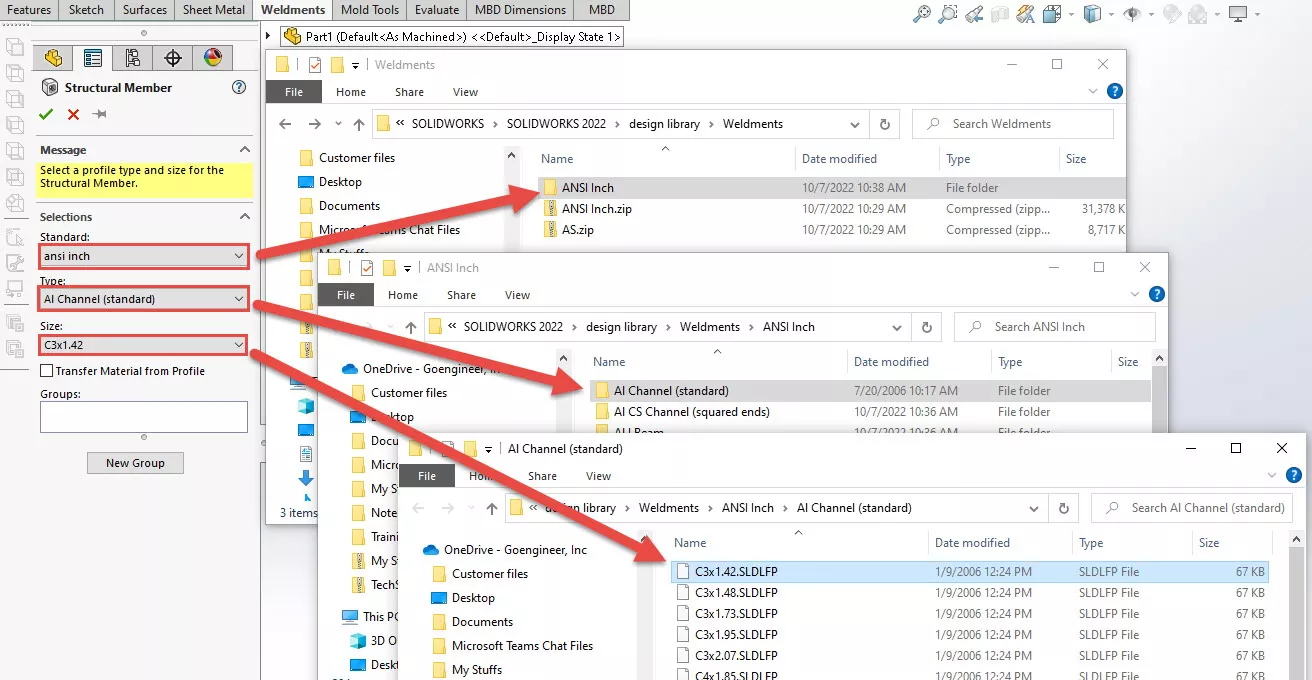
Step 7.) With the .zip file extracted, you should now see all of the weldment profiles available when adding a Structural Member in SOLIDWORKS Weldments.
The important thing to note is the folder structure of the files you have added. When you are in the Structural Member PropertyManager, the “Standard” dropdown is populated with the folder names of the folders found directly within the “Weldment Profiles Folder Location” in your System Options (Step 1); the “Type” dropdown is populated with the folders inside the “Standard” folder (‘ANSI Inch’ below); and the “Size” dropdown is populated with the weldment profile files (.SLDLFP) found in the “Type” folder (‘Al Channel’ below). If you have any blank dropdown lists, make sure that your file locations and folder structure are correct.
I hope you found this article helpful. Check out more SOLIDWORKS tutorials below.
Editor's Note: This article was originally published in January 2013 and has been updated for accuracy and comprehensiveness.
More SOLIDWORKS Tutorials
SOLIDWORKS Weldment Configurations
SOLIDWORKS Tutorial: Using Split Lines with Variable Size Fillets
The Ultimate Guide to SOLIDWORKS Splines
SOLIDWORKS Fill Pattern Tool Explained

About GoEngineer
GoEngineer delivers software, technology, and expertise that enable companies to unlock design innovation and deliver better products faster. With more than 40 years of experience and tens of thousands of customers in high tech, medical, machine design, energy and other industries, GoEngineer provides best-in-class design solutions from SOLIDWORKS CAD, Stratasys 3D printing, Creaform & Artec 3D scanning, CAMWorks, PLM, and more
Get our wide array of technical resources delivered right to your inbox.
Unsubscribe at any time.