Creating a 3D Printed Race Medallion Hanger Using SOLIDWORKS
The first step to being successful is identifying a solution to a problem, I learned that on Shark Tank. In this case, my problem was that I had a bunch of race medallions laying around that I wanted to display. I looked online and the costs were expensive, and I thought heck, I can design my own. So, I fired up SOLIDWORKS, made a model, collaborated with my colleague Jeff Lendermon on the final design of a medallion hanger. Here is how it all happened.
The Problem:

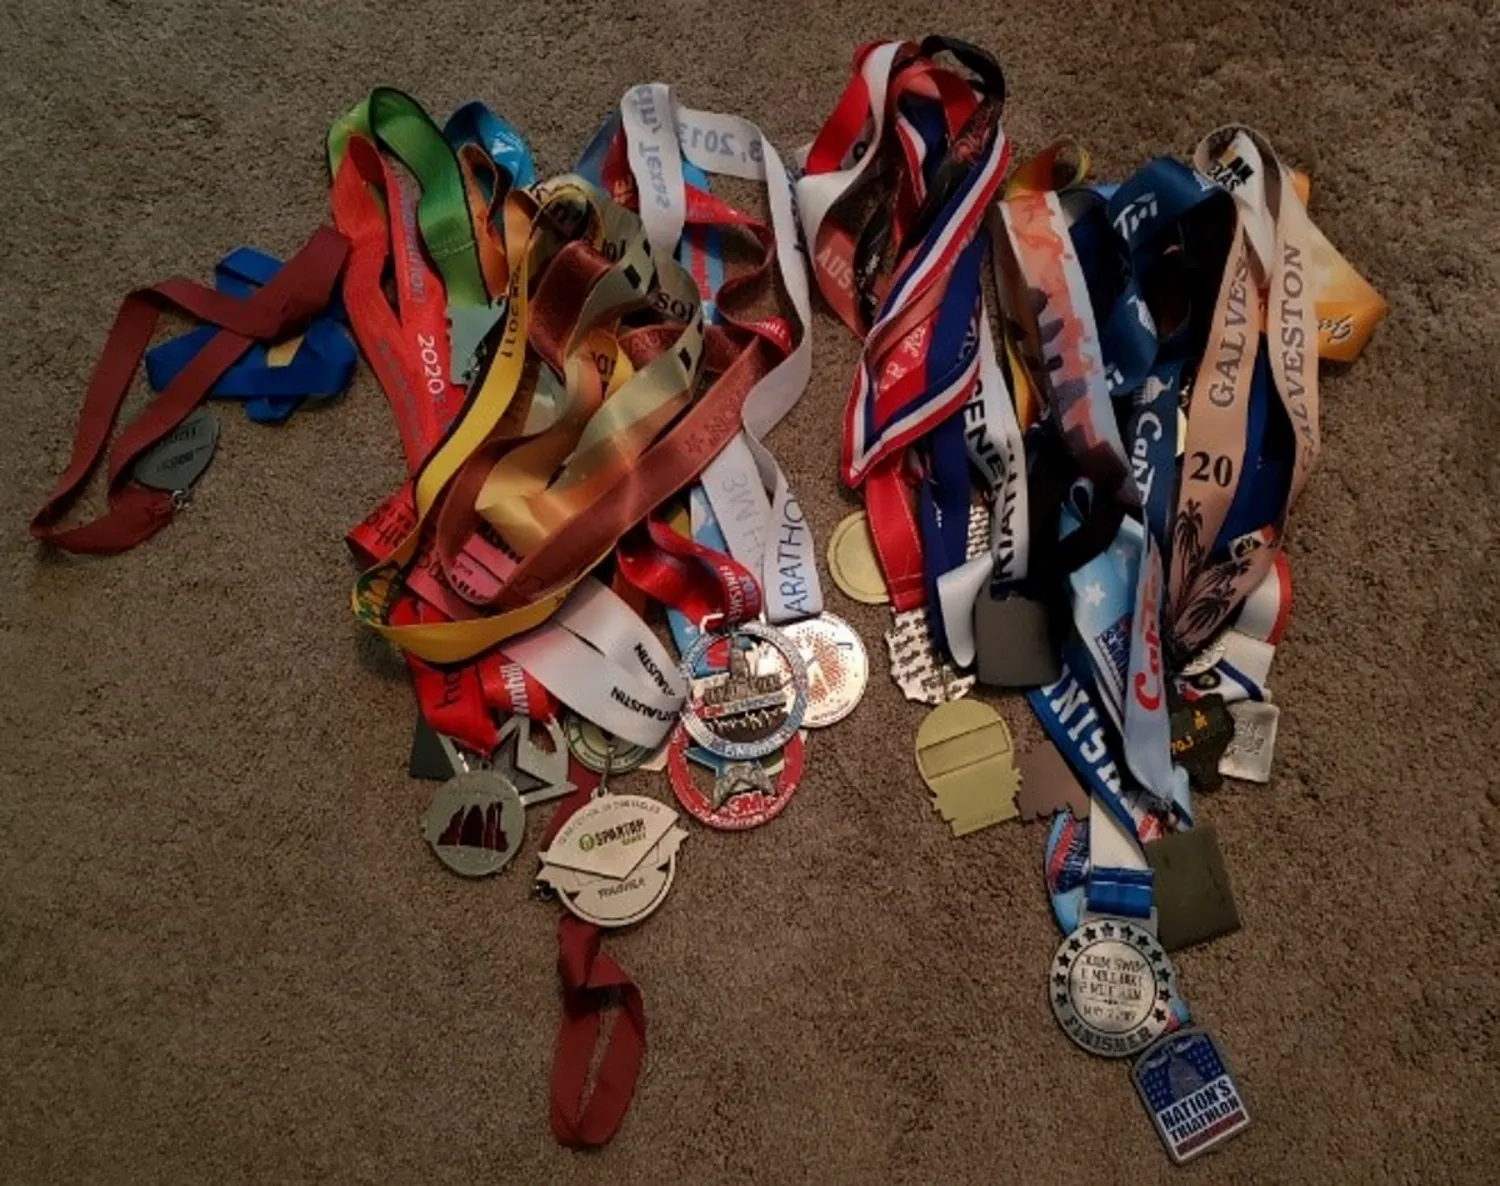
Figure 1. What a mess!
My name is David and I have an addiction to competition. There I said it, it is out of the way. Ever since I was a kid, I loved to compete. Golf, basketball, Ironman, UNO, you name it, I love a competition. Around 10 years ago, I started competing in triathlon and running events. It started with a local sprint which lead to two Ironman events and dozens of marathons and half marathons.
For each event, you receive a medal for finishing, and over the past 10 years, I have participated in over 80 races and this collection of finisher medals was just sitting in a box in the closet (see Figure 1. What a mess!). After doing some online searches and realizing the crazy costs, I thought, “Hey, I can do that.” So, I went upstairs and started designing.
Solution Planning:
I talked to my colleague Jeff Lendermon from our Houston office about 3D printing these hangers deciding what machine, colors, and build tray sizes. Jeff recommended using the Stratasys Fortus 450 that has a build tray size of 16”x14”x16” max. I then measured some medallions for size and spacing and made a model. Originally, I was looking to the mounting holes to be 16” on center, knowing most home construction wall studs are 16” on center. If the holes alone were 16” on center, the backplate was obviously bigger than the build tray. So, we adjusted the design so we can use dry wall anchors and the backplate would fit the build tray.
Solutions:
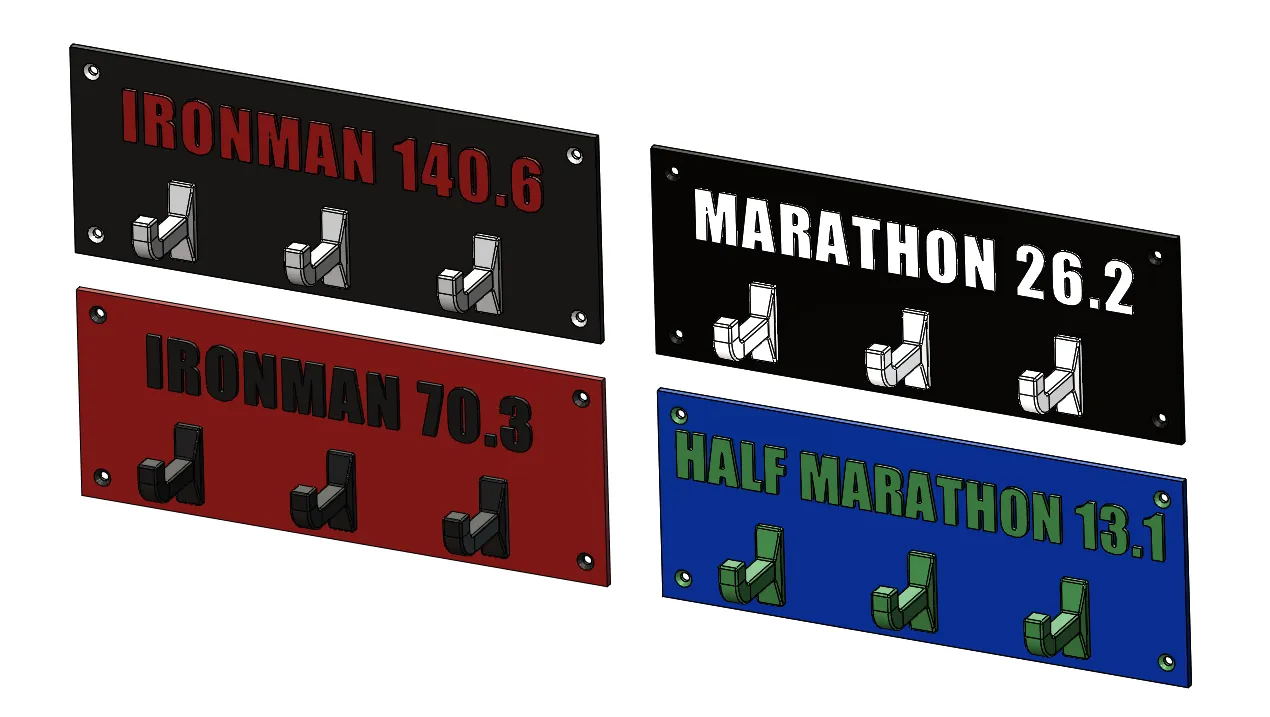
Originally, this was a single solid body part. However, Jeff had a great recommendation that we change the design so that the hooks lock into the backplate. This would allow us the ability to print additional hooks in case one gets broken. Great idea, so we adjusted the model to have a back plate with three hooks. We made multiple configurations for marathons, Ironman, Half-Ironman, and triathlon races in general (see Figure 3. Configurations below).

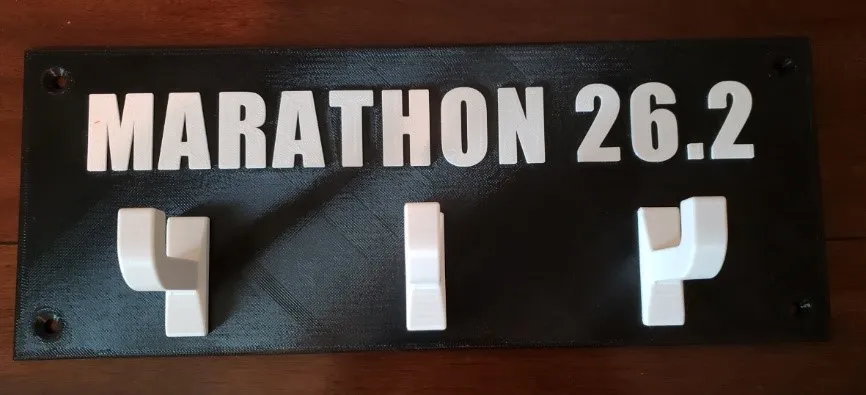
Figure 2. Printed part.
From here all we had to do was print and test. Like I mentioned earlier, Jeff printed the backplate then the hooks (see Figure 2 Printed Part to the right). We tested the fit and now the only thing left was the installation.

Figure 3. Configurations.
Installation:
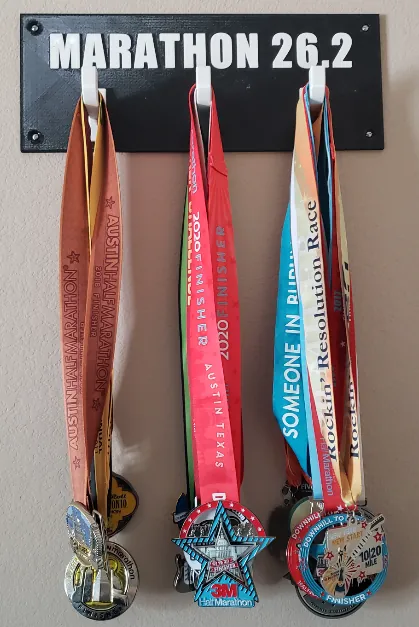
I went to local hardware store got some drywall anchors and installed them using the holes in the back plate as a template. Using four screws, I then fastened the hanger assembly to the wall and hung up some of my race medallions (see Figure 4. Installed to the right). Thanks Jeff, this project came out great!

Hope this inspires you in some of your personal projects around the house and let us know what cool solutions you come up with. Now GoEngineer something amazing!
Get inspired! See more design hacks, 3D printed projects, tips and tricks from our engineering team by subscribing to our blog.

About David Cersley
David has been using SOLIDWORKS since 2005 across multiple industries most notably Golf Club Design. He owned and operated a successful design and consulting company that used SOLIDWORKS to bring napkin sketches to production. The industries he's been a part of range from Medical, Aquaponics, Forging, CNC Shops, Roto-Molding factories. He is a proud father to daughter Emmaline (8) and is a husband of 19 years. He is a two-time Ironman finisher and recently qualified for the Boston Marathon.
Get our wide array of technical resources delivered right to your inbox.
Unsubscribe at any time.
