When customizing your drawings in SOLIDWORKS Electrical it sometimes is necessary to include rows and columns on your title blocks.
First go to Library > Title blocks Manager > [open or create the titleblock you want to have rows]
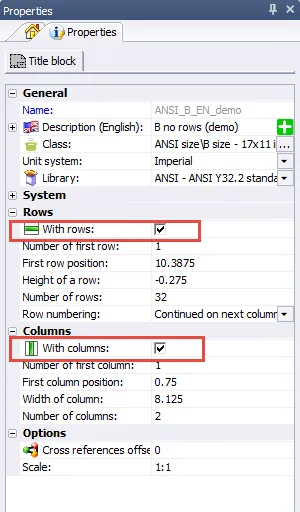
This example uses an ANSI B sized titleblock (11”X17”)
Make sure that you have rows and columns enabled. Go to the properties tab on the right hand side and check the boxes for with rows and with columns.
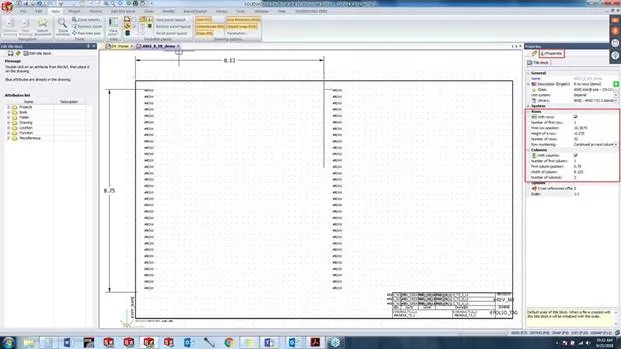
I have a couple of linear dimensions on my title block just to measure where I want the rows to start and understand the space I have to work with. I have drawn a couple of simple lines to define where I want the first row to be and where the second column starts.
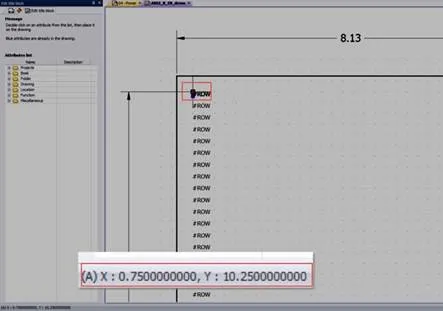
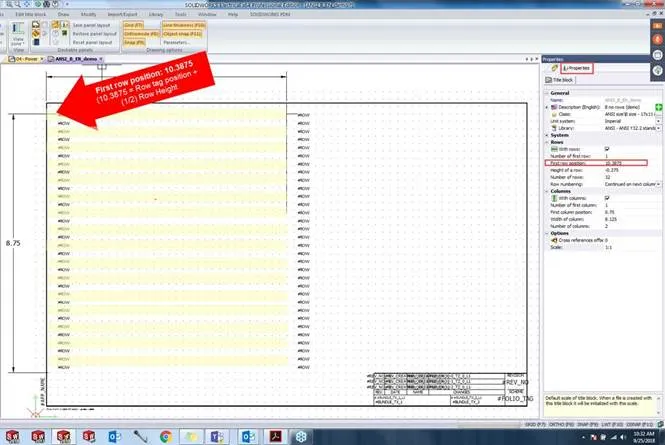
My first row, first column attribute is in the upper left hand corner. The handle for the attribute is located at (0.75, 10.25) on the grid. It’s important to understand where your attribute tag is. This does NOT define where the row actually is, if you move this tag around the sheet it’ll report whatever row/column it happens to be sitting inside at any given moment.
The row has a row height which defines the thickness of the bands (Mine is -0.275 because I want the rows to increment in the negative Y direction).
You want your row tags to be inside of the bands you define in the properties tab.
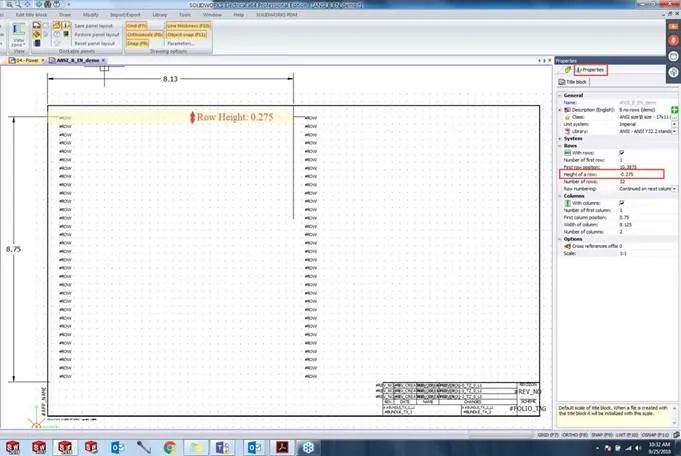
I wanted to make sure my row attributes will be smack in the middle of those row bands so I offset my first row position slightly above that row attribute tag.
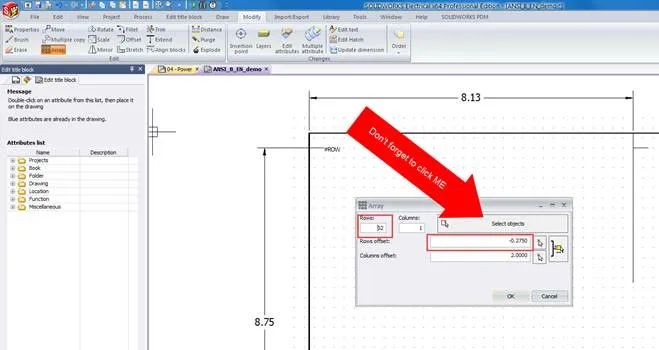
I have my first row attribute set up and I don’t want to repeat that brain damage if I can help it. So I want to copy my row attribute down in a formulaic manner so each one falls inside of those row bands. I went to the Modify Tab > Array.
Set the number of rows you want and input that row height in the row offset. I usually do only one column at a time because at this point I haven’t decided how wide I want my columns. Click the Select Objects button to select the thing you want to copy. Once you have selected the thing you want, just right click to get back to this dialogue and then hit OK.
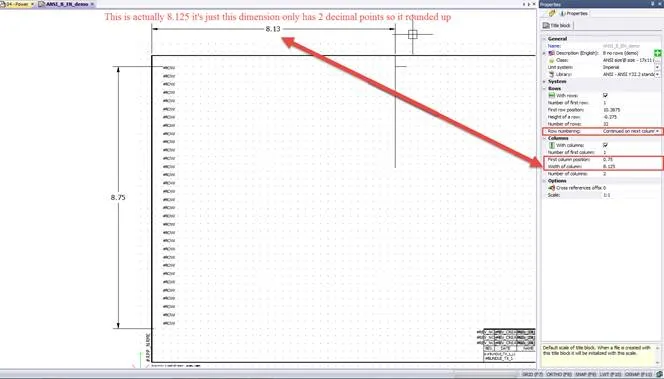
At this point we go back to our titleblock properties and make sure we have the Row numbering set at Continued on next column. Then we define where our first column starts, in my case it’s 0.75. Then you just have to tell it how wide you want each column to be, I chose 8.125. And then tell it how many total columns you want.
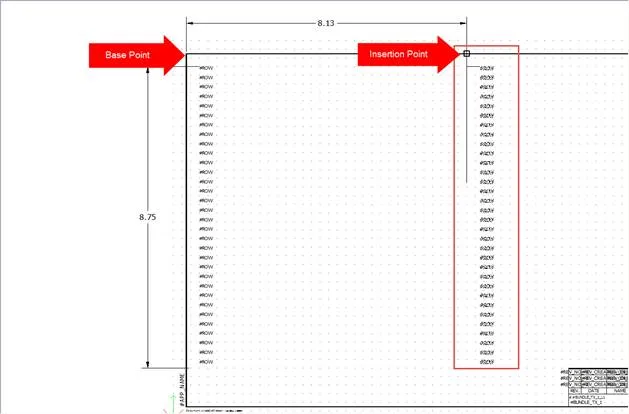
At this point all you have to do is copy all of those row tags to the second column position. I used a copy with insertion point. I used my OSnaps to draw a line right in the middle of the title block. So I could copy from the upper left hand corner and then
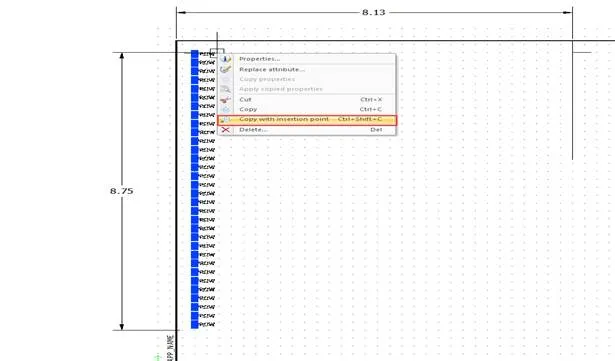
select the top of that line for my pasting insertion point.
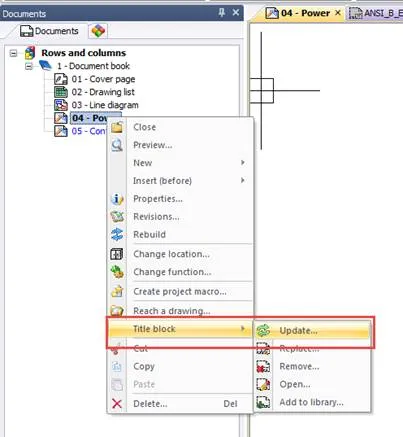
Remember to save your titleblock. Then go test it out in a project to make sure those all are incrementing correctly. If you are editing an existing one that’s already in a project don’t forget to update the title block.
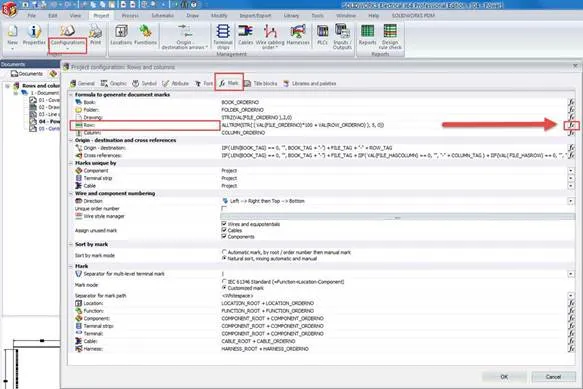
The final step is to make sure the rows are formatted the way you want. Essentiallly the idea is Sheet Order Number + Row Order Number. This formula is in Configurations > Project > Mark
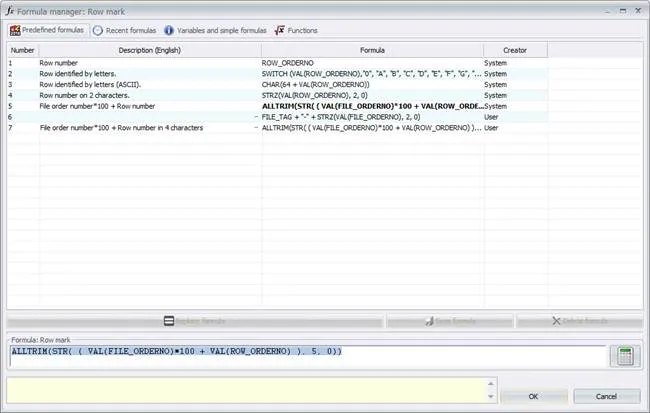
I found a default one that looks like what you wanted.
TLDR: ALLTRIM(STR( ( VAL(FILE_ORDERNO)*100 + VAL(ROW_ORDERNO) ), 5, 0))
Essentially it extracts the numerical value of the file order number (ex: drawing #3) and multiplies it by 100 (example ->300). Then it adds the row number to it so depending on which part of the sheet the attribute is on (01, 02, 03). Then It trims it down to a certain number of digits)
Change the formula to what you want. You can copy and paste the formula right into the box by using ctrl+v.
Then you can click Ok.