How to Save in SOLIDWORKS: File Save, Save as Copy, and More
SOLIDWORKS users often want to experiment with a part they are working on, but want to do it ‘safely’ as to not adversely change what they have already done. Or, on the other hand, make very subtle changes, in an existing assembly with a different name.
If there isn’t a PDM system in place that safely stores previous versions, another alternative technique is to use the File Save, Save As, Save As Copy, Save As Copy with References, and Pack and Go options in SOLIDWORKS (keep in mind that a PDM system always trumps this method).
This article will show you the different techniques to save documents in SOLIDWORKS. It is up to the user to decide what kind of save is required to accomplish the end goal. Each technique is different, but all techniques can be useful at some point in time. However, not saving correctly (not understanding the saving method) can create adverse consequences.
File Save
File Save is a standard save command as seen in any other program. Before you can proceed with any other save technique, the files must first be created and saved in some directory; CTRL+S is the hotkey for saving files. (Think of saving an item in Microsoft Word, PowerPoint, etc.)
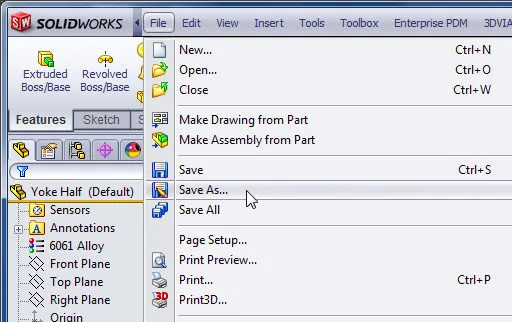
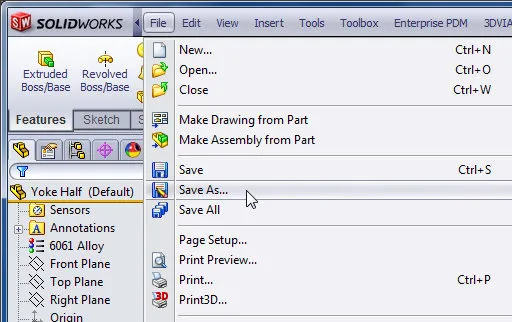
File Save As
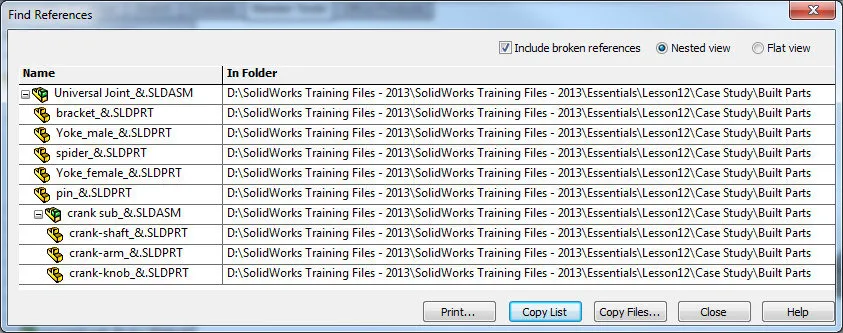
Original
Simple “Save As” with a new name
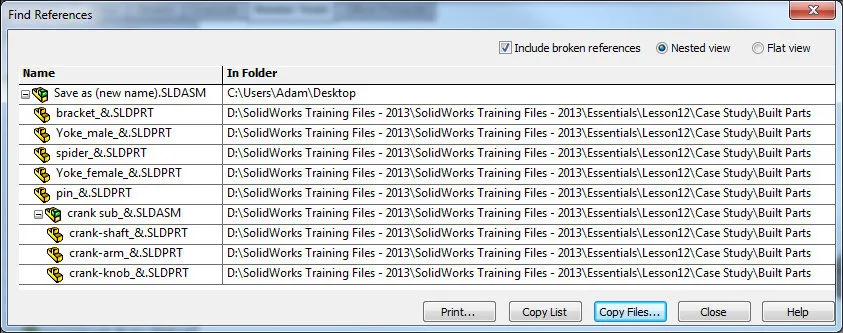
Note that only the top-level component directory has changed. All child components and subassemblies in “Save As (new name)" are still linked to the original “universal joint”. Also notice that the newly named “Save As” file is active/open in SOLIDWORKS.
Save as copy
Original
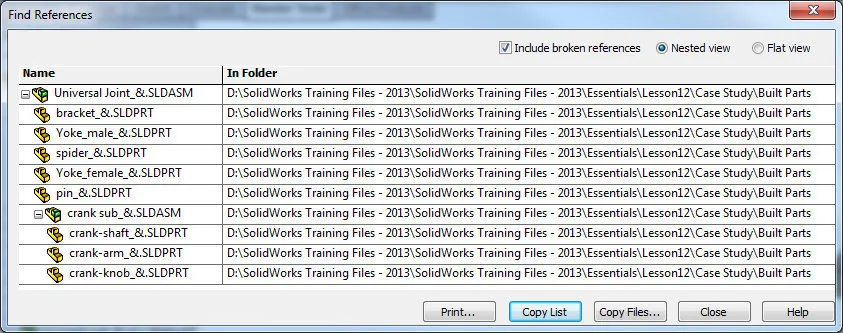
Save as Copy Checked
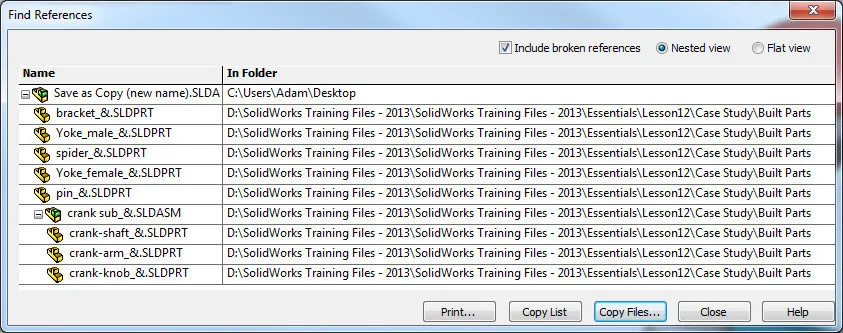
Note: When Save as Copy is checked, an identical copy is made and saved to the specified directory. However, the save is completed in the background and the “copied file” does not auto-open in SOLIDWORKS. To edit the copied version, you must browse to the file, open, and then edit. Think of this as a precautionary measure when modeling. If you are going to make changes to a model, but are unsure if the rebuild will be as desired, then Save as Copy, so you have a backup (a snapshot) just in case. Also, notice the references are the same as “Save As”.
Save as Copy with References
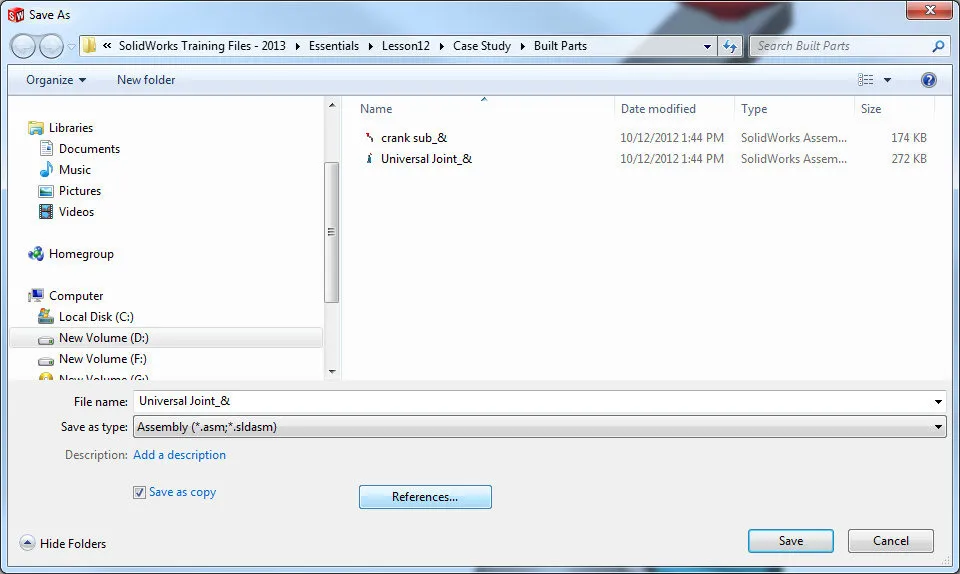
*Remember to click the “References” button to open additional saving options.
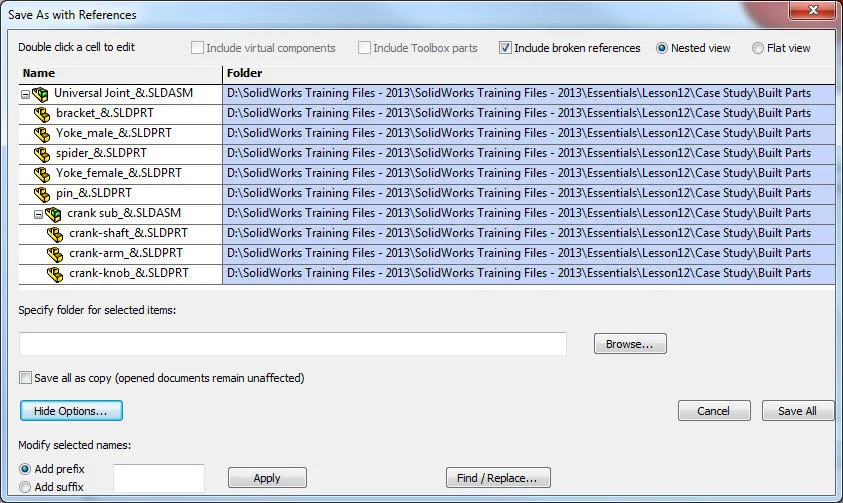
Note: The references of the child components have not changed yet. We will accomplish this in the following steps:
- Shift select or control select the components that you wish to save with the desired references. In this case, I shift selected all.
- Next, browse to a location/directory where you want to save the files. In this case, I browsed to the desktop and created a new folder to save all the components of this assembly.
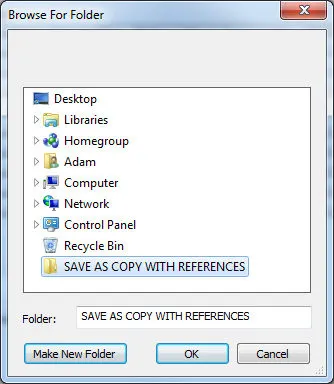
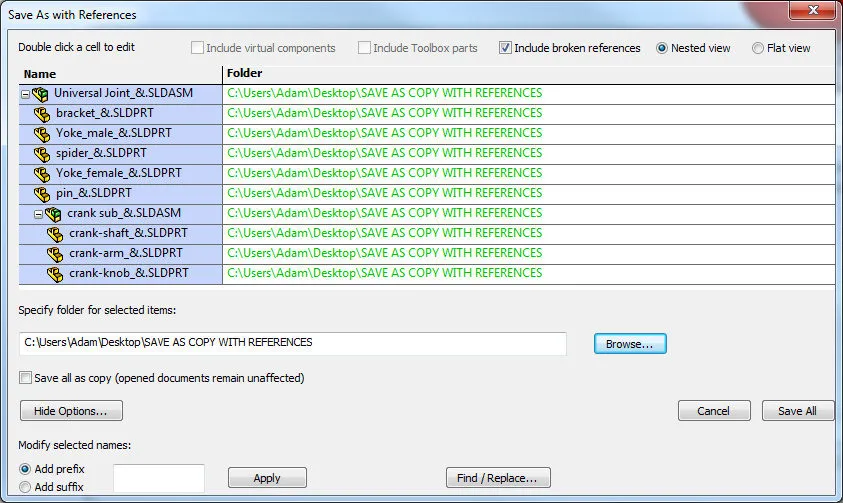
When you click OK, the directory in the Save as Copy with References window updates showing the new file paths. Note that the green text represents changes, see below.
There is also an option to “find/replace” and add “suffix.prefix”. I added REV1 in the prefix box and clicked apply. Again, note that the green text represents changes, see below.
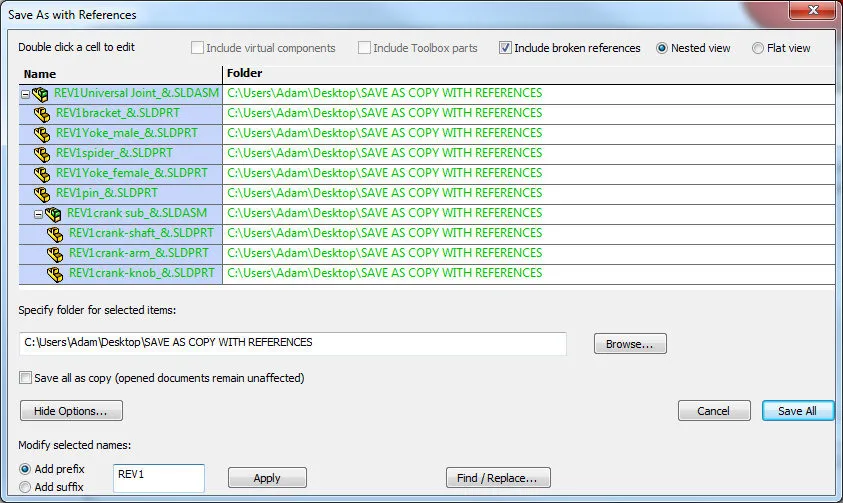
See that the file names are now “REV1___(part name)___”

Lastly, click to save and a folder is created in your specified directory (the desktop for me) and all the files pertaining to the original “universal joint assemble” are now isolated in this new folder, with new names and therefore a new directory. So now these two files/projects are two separate entities entirely and can be edited independently. When Save as Copy is complete, the newly saved file (top-level assembly) is automatically opened and all referencing files (child parts and sub-assemblies) are loaded to memory.
PACK AND GO
Pack and Go is more powerful than Save as Copy with References and is meant for the easy export of information on complete projects. Pack and Go has options that include saving to a different directory, saving all files selected to a zip folder, email after packing, and can include all drawings, simulation, custom decals, appearances, and scenes.
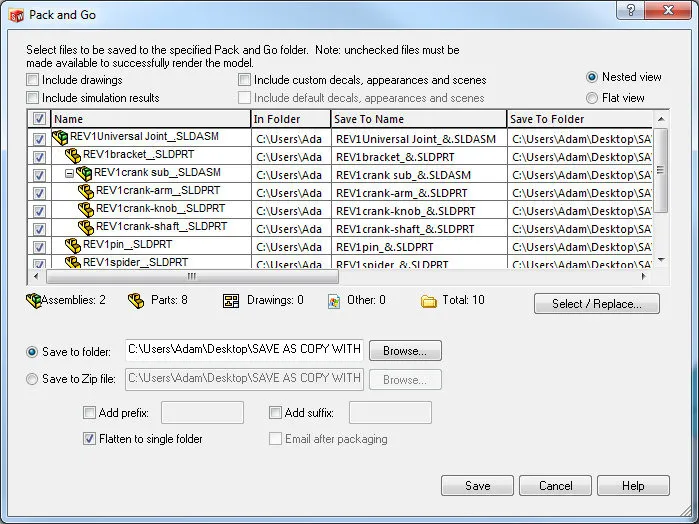
Notice, that replace prefix and suffix are still available and work the same in Save as Copy. Pack and Go is a sure way to safely save files. When in doubt, my suggestion is to always use Pack and Go.
Note: If you do not see the pull-down menus, hover your cursor over the SOLIDWORKS Logo and they will fly out.

Then you can PIN them to stay open by clicking the thumbtack.
I hope you found this article helpful. If you want to be notified when new tips and tricks are posted please subscribe.
Related Articles
SOLIDWORKS Pack & Go vs. Copy Tree Tool Comparison
Subset of Configurations - Save as Copy
SOLIDWORKS Edit All File Locations
SOLIDWORKS Copy Settings Wizard Made Easy

About Adam Hughes
Adam Hughes is an Applications Engineer based in Santa Ana, California and is SOLIDWORKS Elite Certified. Adam enjoys teaching where his students range from those in high school, to college undergrads to mechanical engineers with 20 years experience.
Get our wide array of technical resources delivered right to your inbox.
Unsubscribe at any time.