SOLIDWORKS Hole Table Callout Options
The feature of a Hole Table is a very good and stable function. This feature in SOLIDWORKS allows you to quickly contain the location and size values of a set of related holes conveniently in one table. However, some options can be changed depending on what you want displayed or what happens to be displayed by default.
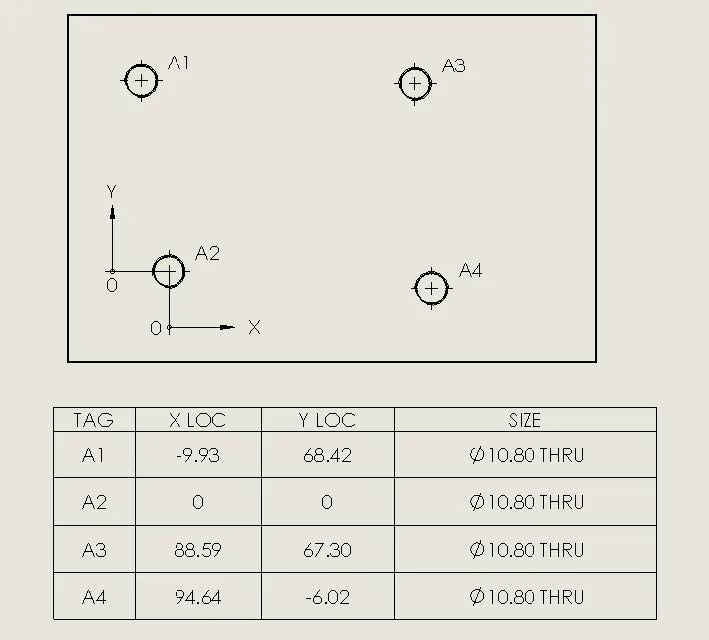
Looking at the following example, I inserted a Hole Table to detail the requirements of the pattern that I have on the part:

When designing the part, I inserted the holes using the Hole Wizard as M12x1.25 – 6H holes, yet they are showing up as Ø10.80 THRU.
What’s happening is the cells are being defined by the geometry of the feature, not the Hole Wizard Data.
So, how do I change this?
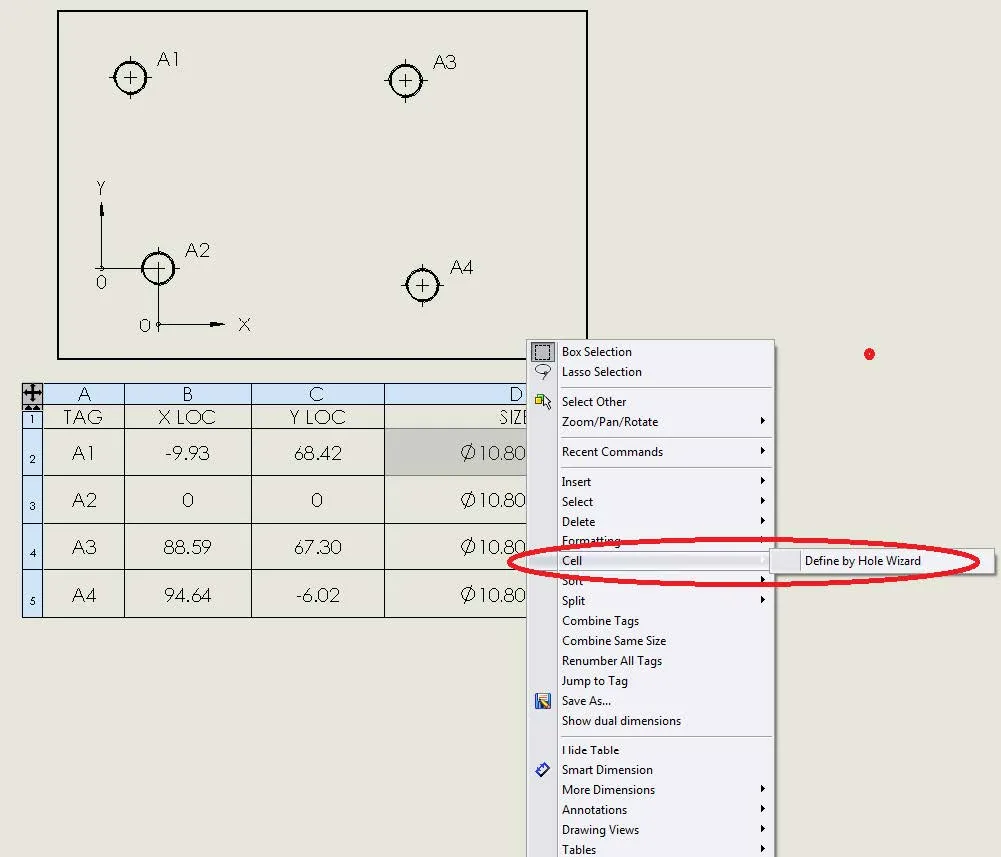
It is very simple. Right mouse click on the cell with the incorrect data and select “Cell” which will show a pop out selection of “Define by Hole Wizard”:

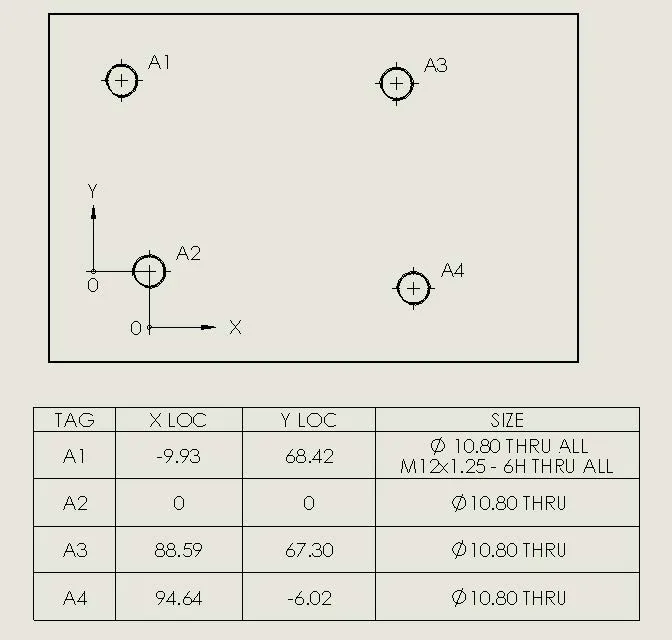
Click again in the cell to update the setting and the data will be changed:

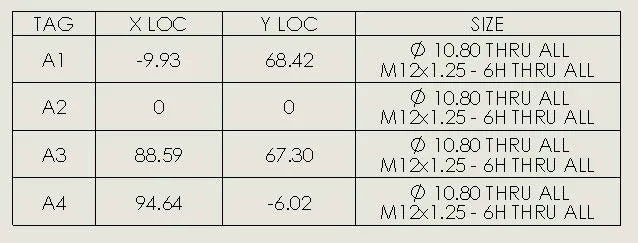
Do this for all the incorrect cells and the data will now show the correct value:

As you can tell, this is a toggle between the two values and can be changed back just as easily.
These are just some tips and tricks to help you with Hole Table data. For more SOLIDWORKS tips and tricks check out the links below.
More SOLIDWORKS Tips & Tricks
SOLIDWORKS 2020 Hole Callouts in Section View
4 Part Modeling Tools that are Time Savers

About GoEngineer
GoEngineer delivers software, technology, and expertise that enable companies to unlock design innovation and deliver better products faster. With more than 40 years of experience and tens of thousands of customers in high tech, medical, machine design, energy and other industries, GoEngineer provides best-in-class design solutions from SOLIDWORKS CAD, Stratasys 3D printing, Creaform & Artec 3D scanning, CAMWorks, PLM, and more
Get our wide array of technical resources delivered right to your inbox.
Unsubscribe at any time.