Five SOLIDWORKS Tips You May Have Never Seen Before!
NOTE: Five SOLIDWORKS TIPS First Release May 2013 – Updated December 2019
OK. Chances are if you’ve been around SOLIDWORKS for any significant amount of time, you may have seen some of these SOLIDWORKS Tips before, but I’ll be surprised if more than a handful of seasoned SOLIDWORKS Users have seen all five of these Tips and Tricks. While I’ve shown countless SOLIDWORKS Tips in my time, these five are some of my personal favorites.
While I originally wrote this article around the release of SOLIDWORKS 2013, EVERY SINGLE ONE of these tips STILL holds up now with SOLIDWORKS 2020 available!
#5 SOLIDWORKS TIPS: Selecting an Edge and Starting a Sketch
This particular feature simply does several things with minimal input……a SOLIDWORKS trademark.
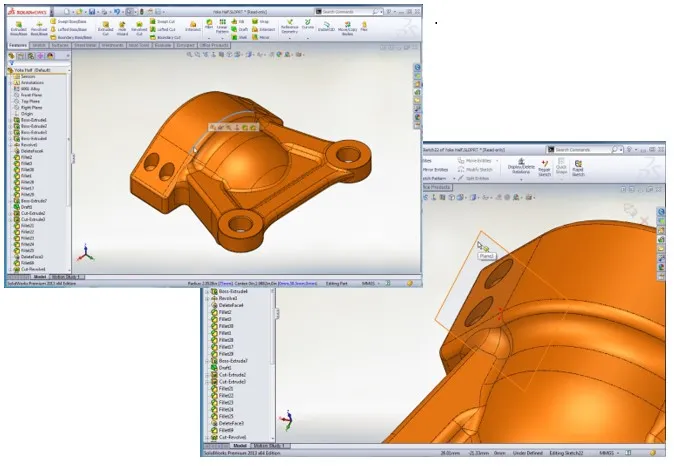
Simply select any Edge of any Solid Body and click INSERT | SKETCH
A Sketch Plane is created automatically, Normal to the Edge Selected, with the Origin Coincident to the End Point nearest to where the Edge was selected.
This operation supports any Edge type from Linear and Prismatic to completely Organic and Lofted.
You could also use INSERT | Reference Geometry to add a Plane Perpendicular to a Curve, but this takes care of all those steps AND starts a new Sketch
#4 SOLIDWORKS TIPS: Loop Select
Do you like using Convert Entities but wonder why it only converts the exterior edges of a Face? Tired of manually selecting each and every edge of that inside loop?
I’ve got your answer in 2 clicks!!!
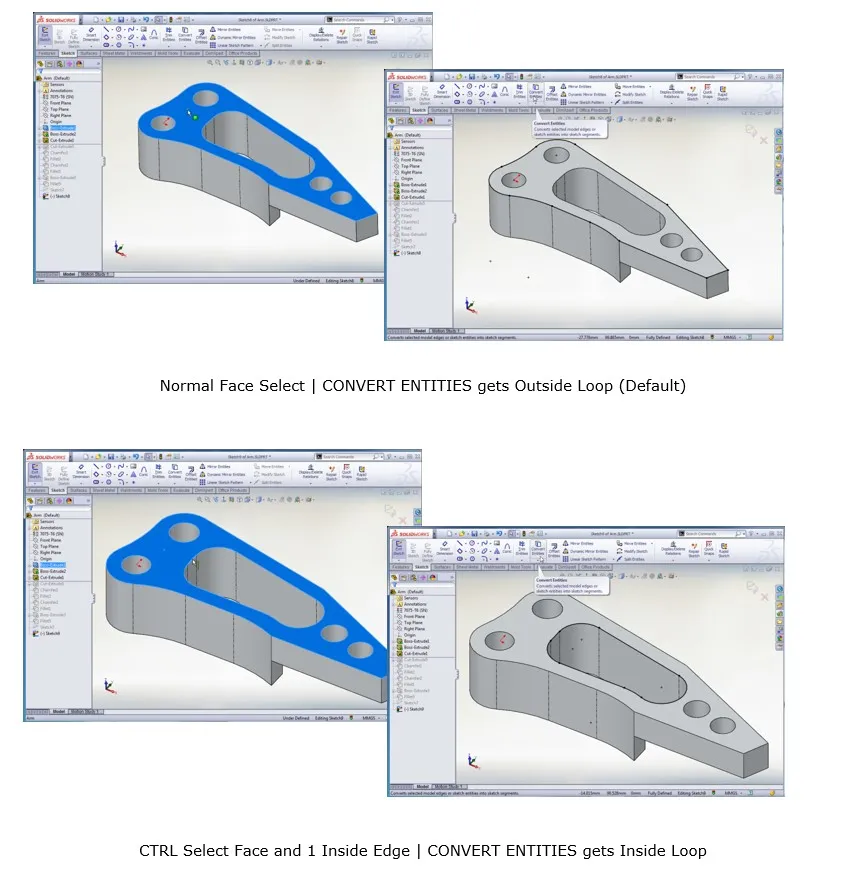
After you’ve started a new Sketch, just select the same old face you would normally use to Convert Entities, but use the CTRL key to add one more selection to that set………..1 Inside Edge!
This is called a LOOP Select and will take the ‘focus’ of the selected Face from the Outside Loop (default) to the Inside Loop.
**Loop Select BONUS**
This tip also works for Loop Selection of the Inside Loop if you want to add a Fillet or Chamfer to the Inside Loop but not the Outside Loop.
It has an added bonus that if you were to change the Sketch that affects the inside Cut shown above, your Fillet or Chamfer would NOT error out with the addition or removal of edges to the Cut profile.
You WOULD, however, get a Fillet or Chamfer error if you had discretely selected all the Inside Edges and there was a change that affected the edge count of the Cut profile. It would take an Edit of the applied feature to resolve the Missing or Added edge.
#3 SOLIDWORKS TIPS: Explode Direction Control
Like SEVERAL other functions in SOLIDWORKS you can modify Control of the Triad orientation using the ALT key along with a Drag and Drop of the Triad.
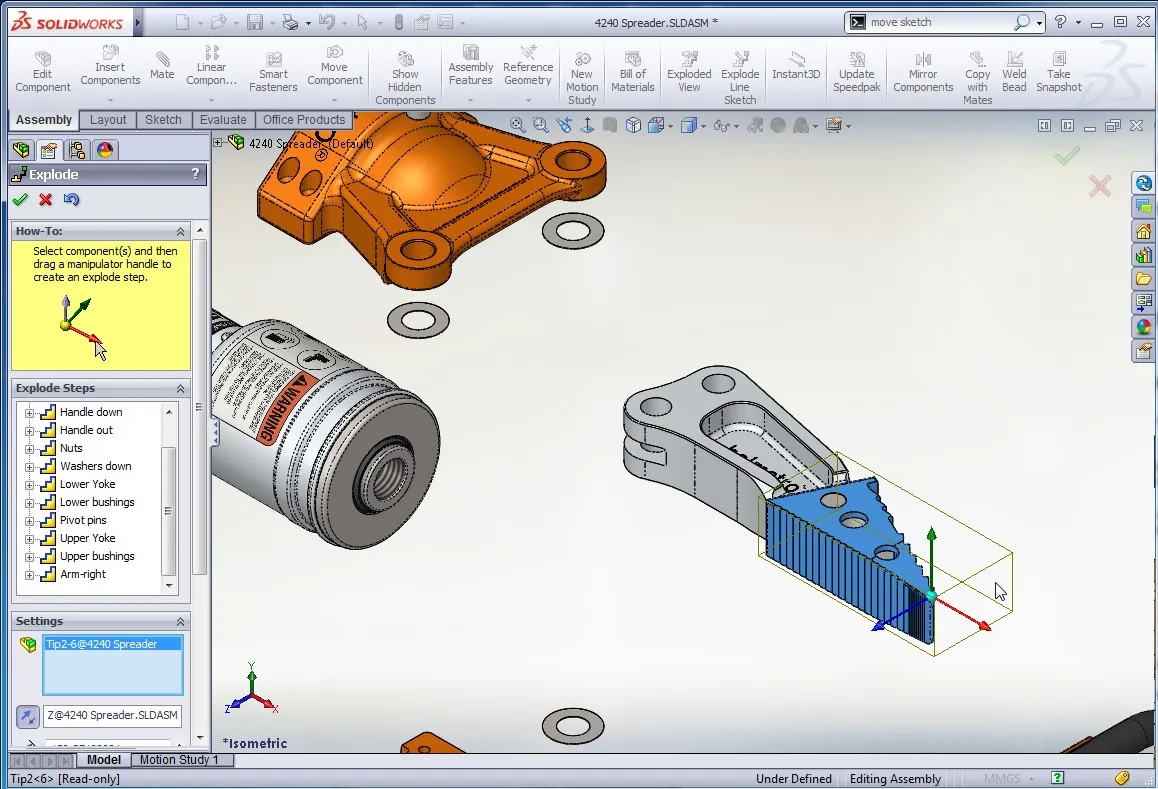
Simply Start the Explode Command, or Edit an existing Exploded View and begin a new Explode Step.
The Triad always mimics the Triad orientation of the Part or Assembly.
To move and reorient the Triad, simply hold ALT and Pick and Drag the Triad using the blue sphere where the X,Y and Z axis meet…….then drag it over other geometry.
It will snap to Linear edges, Plainer faces and will align to the Axis of Holes or Cylindrical features.
Then just Drag the Triad along the new direction and position your part.
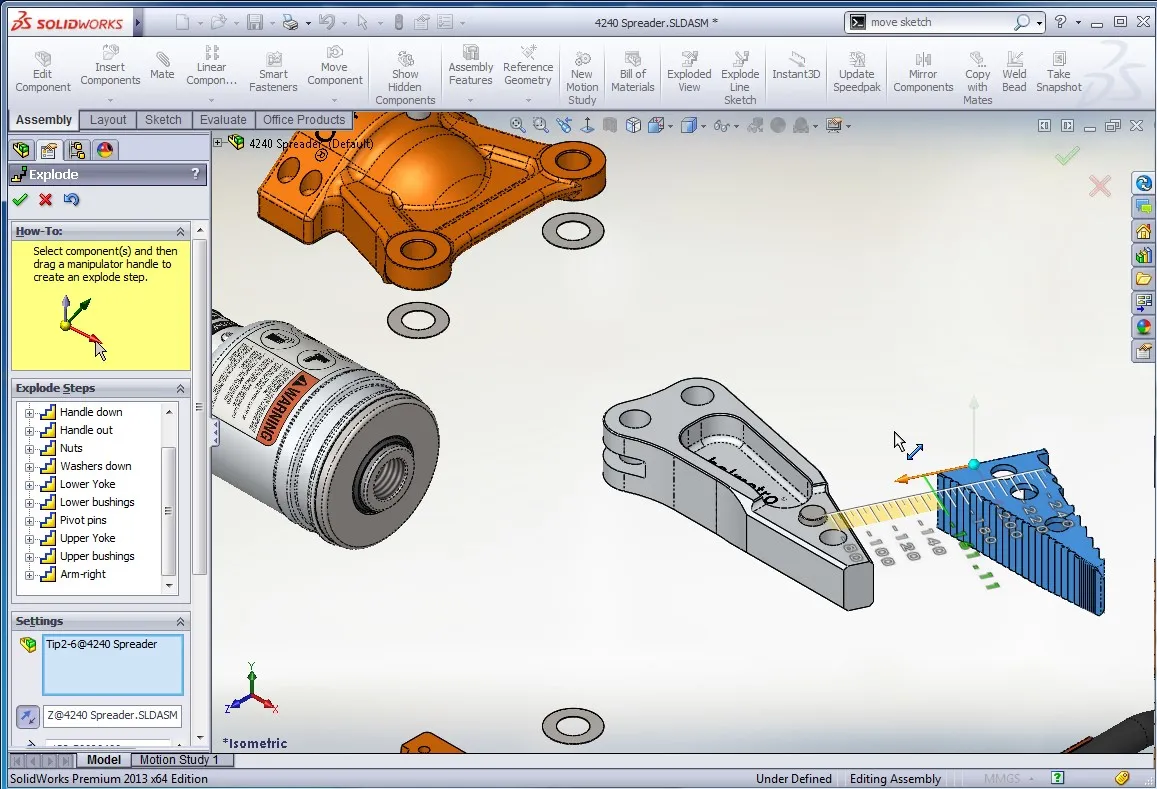
ANYWHERE there is a Triad in SOLIDWORKS, consider this tip valid……..Move/Copy Bodies…..Move with Triad….etc.
#2 SOLIDWORKS TIPS: Copy Surfaces
Copying a Surface from one Part to another is a very useful tool when you want to build In Context relationships between parts, especially when you get an unruly Imported file with thousands of Surfaces……..but you only need to ‘touch’ just a few.
I also use it for operations where I may want to simulate a Coating or Tape application on a part……Just Copy the Surface and Thicken it as a new Body.
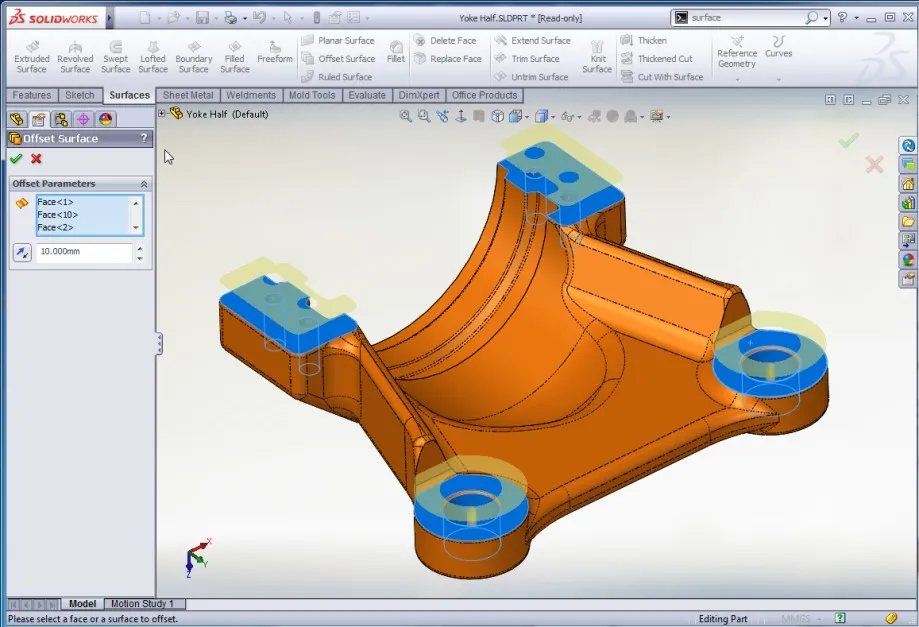
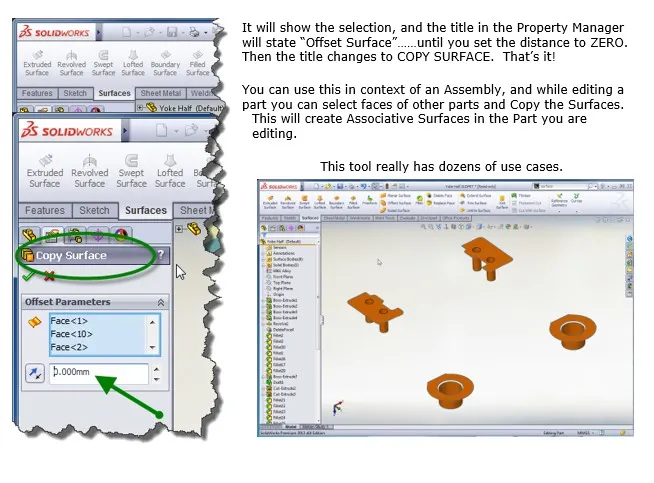
What you may be asking yourself is……..”That sounds great, Darin……but there is NO ‘Copy Surface’ Command”………….and you’d be absolutely CORRECT!
Many users try to use the KNIT SURFACE command, but this doesn’t work unless the Faces you select are adjacent to each other and can form a single, ‘knitted’ surface.
However, there is a simple ‘Trick’ to this one, and it lies in the OFFSET SURFACE COMMAND.
Pick a Face or Faces, adjacent or disjointed, and select OFFSET SURFACES from the Surfaces Tab.
#1 SOLIDWORKS TIPS: Move Sketches…….EASILY
I’ve listed these features in no particular order, but I do consider this one of the most hidden yet easy to use tools when you are unsatisfied with the location of your sketches relative to the Origin or anything else.
Moving Sketches while in Edit Sketch mode is not always the easiest task, ESPECIALLY when they are Under Defined Sketches or those that are Copy/Pasted from DraftSight or other 2D Applications.
Where most users run into trouble is that they feel, and I don’t disagree, that you should just be able to window select all the sketch entities and then just grab a point and drag the whole group. While this sounds logical, it has simply never been the case.
Then you could try the Move Entities command, but it doesn’t always snap to the final location as you might expect.
The following technique is completely effective and very easy to do, you just have to know the sequencing of the clicks.
First, Window select the sketch entities you wish to move.
Second, Hold the CTRL key on your keyboard then Pick and Drag the selected entities from one of the Points in the Sketch.
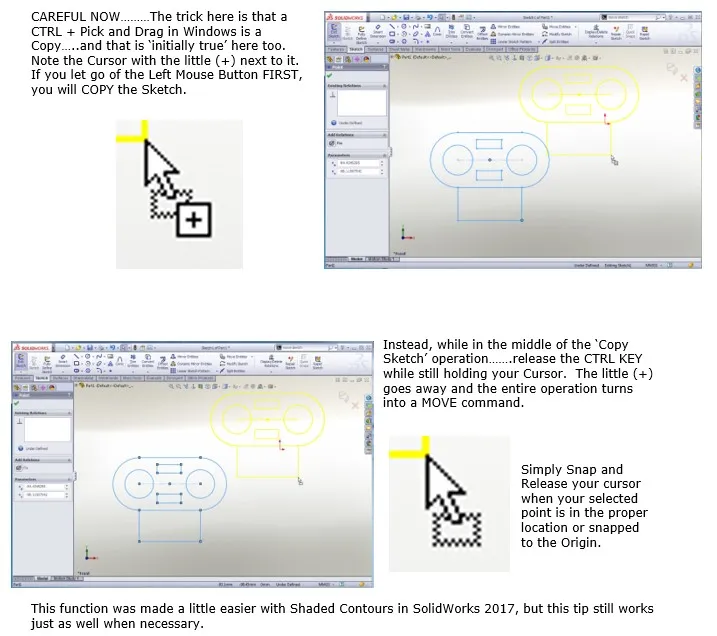
In summary, of the thousands of functions in the millions of lines of SOLIDWORKS Code, these are some of the more useful yet somewhat hidden functions I use frequently. I hope that you found something you didn’t know about that helps you improve your quality of designs, but most importantly saves you time and effort during your creative process.

About Darin Grosser
Darin, an Elite AE, has been an Applications Engineer in the SOLIDWORKS Reseller community since graduating Western Michigan University in 1996. He has a wife of 22 years and 2 beautiful daughters. Darin is an aspiring YouTuber and big into DIY and loves nothing more than to combine his love for creation and engineering with family and projects at home.
Get our wide array of technical resources delivered right to your inbox.
Unsubscribe at any time.
